-

Win a Free Custom Engraved Brass Coin!!!
As a way to introduce our brass coins to the community, we will raffle off a free coin during the month of August. Follow link ABOVE for instructions for entering.
-

PRE-ORDER SHIPS IN SCALE TODAY!
The beloved Ships in Scale Magazine is back and charting a new course for 2026!
Discover new skills, new techniques, and new inspirations in every issue.
NOTE THAT OUR FIRST ISSUE WILL BE JAN/FEB 2026
You are using an out of date browser. It may not display this or other websites correctly.
You should upgrade or use an alternative browser.
You should upgrade or use an alternative browser.
Hasegawa 1/450 Yamato + Pontos
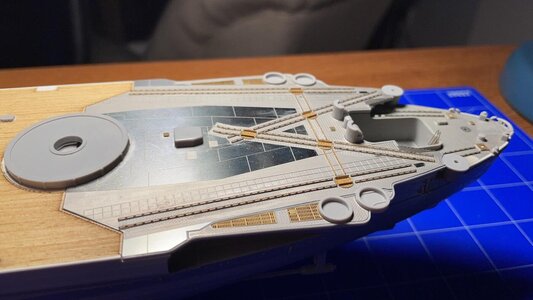
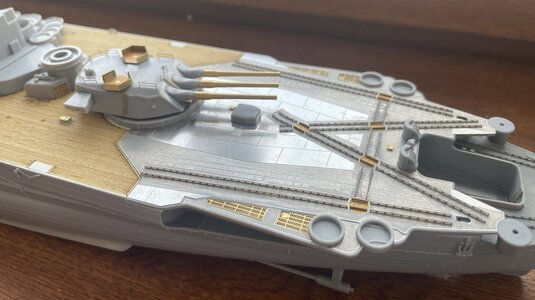
The flight deck is complete! I was able to attach all the railings without damage and they should be quite straight and in the correct position.
Modelling tip: I used superglue, first a small amount just to fix one edge of the rail and after with a very (really very) fine stick microscopic drops of glue... the secret is not to hurry and first to position with a fine tweezers the rail in the correct position and to glue gradually from one extremity to the other. If the rail is straight at the beginning it will gradually "find its way" in the deck engraving. Also it is important to use as less as possible glue at the bigining: to detach and reposition if necessary.
Flight deck is now glued to the hull and alignment with the hull and the wooden one is fine for me

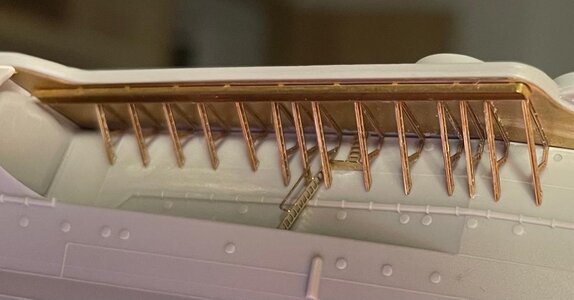
I started working on the supports of the aircraft deck. Pontos PE is very nice, the parts are nicely engraved and there is a lot of detail. Once the parts are bent they fit perfectly.
Modelling tip: my first try was not very good because I put some glue and after I bent the part (difficult to foresee if the holes will fit) So, I changed the approach: first I bent the part and aligned the holes, after with a really very fine stick I put microscopic drops of superglue along the edge thus sealing the part. When I attached the support to the hull I put the glue only on the edge that fits in the groove of the PE plate. I avoided to put the glue on the downwards edge that is on contact with the hull since it was very difficult to clean the area...
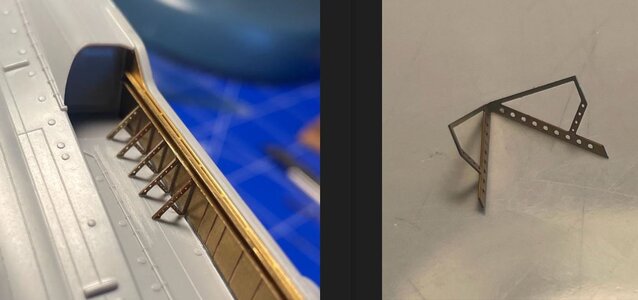
Modelling tip: my first try was not very good because I put some glue and after I bent the part (difficult to foresee if the holes will fit) So, I changed the approach: first I bent the part and aligned the holes, after with a really very fine stick I put microscopic drops of superglue along the edge thus sealing the part. When I attached the support to the hull I put the glue only on the edge that fits in the groove of the PE plate. I avoided to put the glue on the downwards edge that is on contact with the hull since it was very difficult to clean the area...

Very accurate work - especially in this scale 

Fantastic work! I am a big fan of your work...
I emphatically agree! I hate waterline models. This Hasegawa kit is one of the best Yamato kits on the market; the only one better is theTamiya super-kit costing hundreds! I will follow your progress with great interest.Collection of material started long ago in 2016 and meanwhile I started with no success the same subject from Tamiya (1/350) and from Fujimi (1/700). I also was tempted and purchased Tamiya and Pit-road 1/700 offerings and several aftermarket sets. At the end I choose the 1/450 scale since the 1/350 was leading to a quite big model for the particular subject while the 1/700 in my opinion does not give a proper feeling of the majesty of the ship. Another aspect I was quite convinced from the very start was the decision to build her as a full-hull model avoiding any kind of diorama. Dry fit of the model is OK with no major issues.
Last thing that I need to point out is that this project actually started few months ago but I waited to complete the hull and some of the main armament before starting this WIP, just to be sure that at least construction will go until the full completion of the kit.
I was really satisfied by the mould quality of the hull. In particular the degaussing cable turned out to be (in my opinion) very realistic and close to the real thing. Here IMHO the kit is superior to the usual 1/350 and 1/700 offerings. The only problem were the fore davits that are really unrealistically moulded to the hull. I was not able to find an aftermarket product in 1/450 and also a custom 3D print was too much time consuming at this stage, so I decided for a very delicate removal of the unwanted plastic. I was able indeed to detach the davits and to create a more realistic appearance without damaging the fine detail in the underlaying area. Final thickness probably can be further reduced, but I decided to stop and not to spoil that delicate area.
In the pictures you can see the nice detail of the hull. No other major modifications were made before gluing the two halves. Also it was nice not to deal with the waterline since this is a typical Hasegawa concept with two main halves that with some inner ribs make the whole hull without any particular effeort.
View attachment 281135View attachment 281136
Bill
Dear Uwek, thank you very much!Very accurate work - especially in this scale
Dear Jim, thank you very much, I will keep on posting and trying to make a proper description. What makes it easier is the fact that I am quite ahead with the project and I am just going back to the steps already done!Fantastic work! I am a big fan of your work...
Thank you Bill, indeed I tried also the 1/350 from Tamiya, it was the old-mould, and turned out to be really too big for my taste. Recently I discovered also the 1/500 Fujimi kit, very nice and for some aspects (in my opinion) even better than this one I am building. Unfortunately such kit is not very common in Europe or USA, just some hard to find pages in Japan. If you are interesed I can send you the link.I emphatically agree! I hate waterline models. This Hasegawa kit is one of the best Yamato kits on the market; the only one better is theTamiya super-kit costing hundreds! I will follow your progress with great interest.
Bill
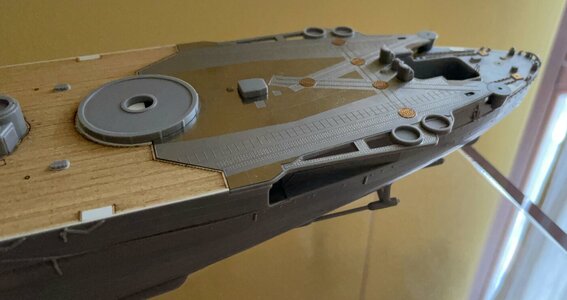
Several details on the deck have been installed, some of them are scratch build like the pipes which are real tubes 0.4 whit inner hole 0.2 and appear much better than the flat PE element. The small PE details of the hatch covers are from Eduard. Have to say that even if Pontos set is outstanding, there are some elements from Eduard that complete the whole. Of course, it is also possible to use only Eduard that is anyway quite extensive. After this step I can consider the hull complete: I will avoid installing the fine railings since I am afraid to bend them and will postpone such operation only as a final stage of the construction.
In the pictures you can see how I handled the additional thickness of the wooden deck and how now it is completely flush with all adjacent structures!
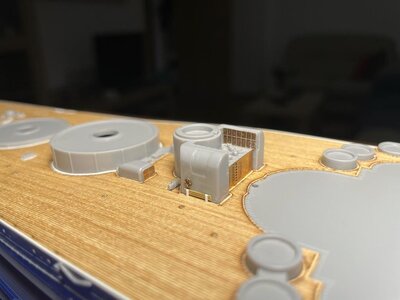
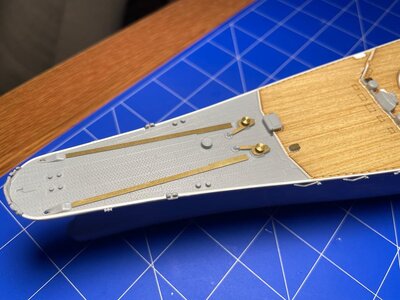
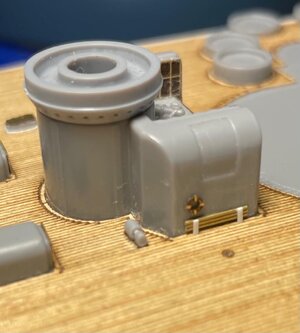
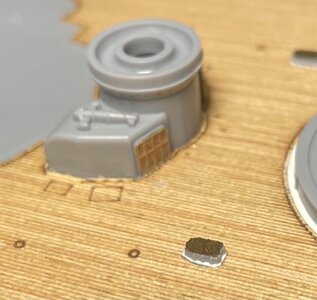
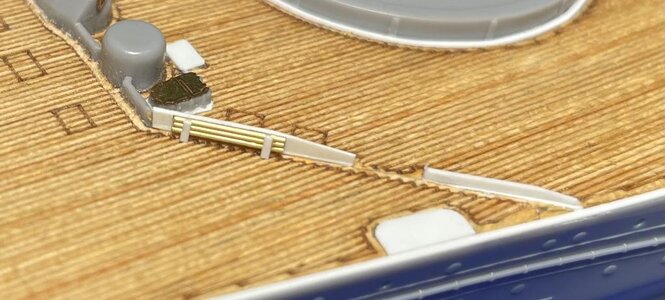
In the pictures you can see how I handled the additional thickness of the wooden deck and how now it is completely flush with all adjacent structures!


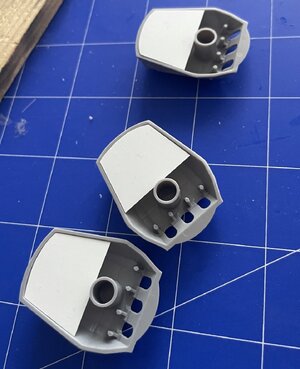
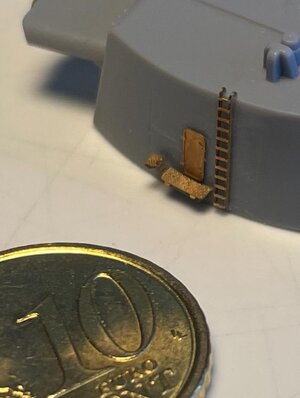
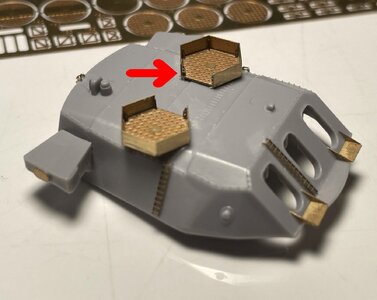
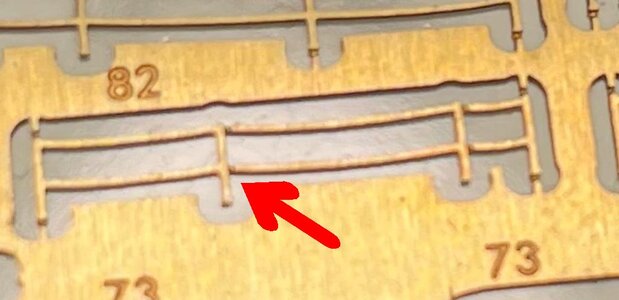
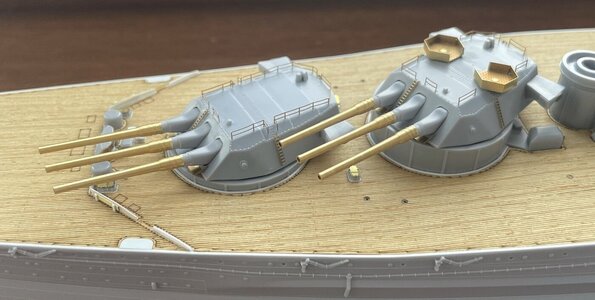
| I started working on the main turrets. About plastic parts except removing of the mould-in ladders the main work was to close from below the turrets and the lateral wings. The Pontos PE goes up quite easily but for the first time I had to face some more complex bending. Very interesting to notice that all railings have a marked grooves for the correct section to be bent. In the past I had some troubles with this aspect because it is VERY difficult to bend a railing at a sharp angle close to a vertical column and it is also VERY difficult to bend the railings the same since it is difficult to perform the bending exactly close to the vertical support As far as the top platforms for the AA guns I have added some very small but good executed inner supports available from Eduard set |
I appreciate the offer! But I have these models in my stash! Thanks!Thank you Bill, indeed I tried also the 1/350 from Tamiya, it was the old-mould, and turned out to be really too big for my taste. Recently I discovered also the 1/500 Fujimi kit, very nice and for some aspects (in my opinion) even better than this one I am building. Unfortunately such kit is not very common in Europe or USA, just some hard to find pages in Japan. If you are interesed I can send you the link.
Bill
I appreciate the offer! But I have these models in my stash! Thanks!
Bill
Dear Bill, sorry there was a misunderstanding… I do not have such kits. The old 1/350 one from Tamiya was sold long ago, while the 1/500 from Fujimi I never had, only the photo etched. I was referring to some links on the web where you can see the 1/500 kit built by other modelers with a nice outcome. Maybe in the future I will try the 1/500 even if I am not sure of the cast quality of the smaller parts.
So, do you have such kit. Some pictures of the sprues can be interesting for my personal evaluation
The main turrets are now 100% complete and I tried also to install them just to have an idea of the final appearance. About railings I tried to use the smallest quantity of superglue and, as usual, I removed all excess. The idea is to have no trace at all of residual glue (or at least visible by naked eye)


Very good work - why these photo etched parts were not available 40 years ago, now they are standard ...... it is really great development in the market
I like your accurate work, I know how those PE parts could be relatively small, and your assembly looks great.
Sure! a great improvement, it is difficult to figure out a battleship without proper photo etched parts. My only doubt is the scale because the 1/700 is really too small for me and I failed to start serveral projects. On the other hand the 1/350 is more accessible but kits become easily big with really a lot of detail to work on. Such "intermediate" scale seems really good, but there are not many other offerings...Very good work - why these photo etched parts were not available 40 years ago, now they are standard ...... it is really great development in the market
Thank you... going forward I had to face some really small details... as I told before seems quite hard to figure out this work in a smaller scaleI like your accurate work, I know how those PE parts could be relatively small, and your assembly looks great.
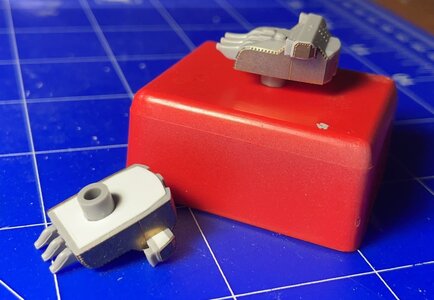
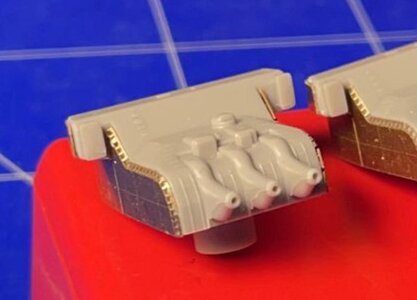
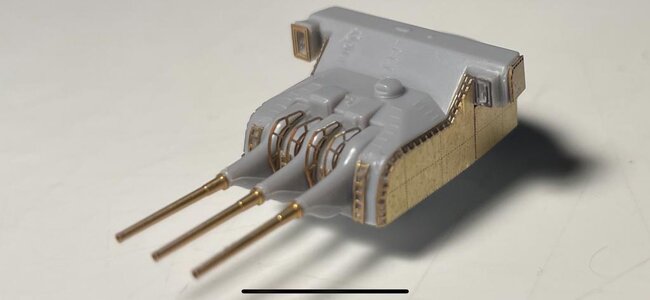
I started to work on the 15.5cm turrets NENDO SHIKI. After removing some mould-in ladders the main task was to close from below the turrets since they are quite high respect the main deck level. After I applied the basic PE elements and made a test of the nice brass turned guns from Pontos. About the rangefinders it is nice to point out that the kit part correctly depicts them different in size. Unfortunately, this is not true for the PE frame. So, it was necessary to use a generic PE set for the smaller frame. I had also to retouch the rangefinder itself with a micro burr to remove the material inside the frame, so to give a more realistic look
