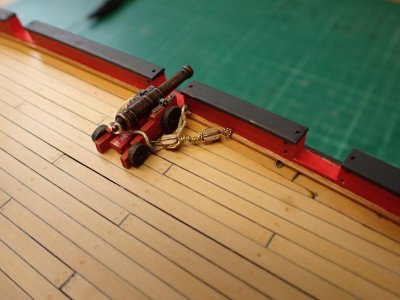
HM Armed Cutter Alert (1777) - Vanguard Models - 1/64

Cannon Query

I read everywhere that everyone hates everything about cannon rigging. Having never done it, I don’t know why that should be except for the obvious repetitive nature of the job on a big ship. I have only 12 to deal with and the first two or three will at least have the novelty factor to keep me cheerful.

I plan to do the first gun from start to finish and then reconsider my method, sequence of operations, materials etc. If I’m happy with all that, I’ll do the rest production line fashion, one step at a time on all of them, then the next and so on.

I have thought of a number of different sequences to try with the intention of not getting in my own way too much.

First possible sequence.

Tie breeching to cascabel.
Glue gun down. (Open deck with good access so no need for a jig?)
Rig breeching to bulwark and arrange neatly around the gun.
Rig tackles on the gun from carriage to bulwark.

Second possible sequence ‘dreamed up’ overnight.

Tie breeching to bulwarks.
Glue gun down. (Open deck with good access so no need for a jig?)
Rig breeching to cascabel and arrange neatly around the gun.
Rig tackles on the gun from carriage to bulwark.

The third possible variation that I want to try is to make the side tackles off the gun on a simple jig and clip them on at the end. (I’ll strop the blocks with hooks.) The jig would be adjustable in length to account for variation in gun / bulwark distance.

Any thoughts? Cautions? Suggestions?
And I haven't decided yet whether I'm going to make the rigging for the guns. The recoil ropes are definitely yes, but the other ropes with blocks, in my scale... most likely not. On the lower deck there won't be much to see, there are 18 of them. But on the upper deck there are 10 of them, I'll think about it. Thick recoil ropes are one thing, but thin ones with 2mm blocks are, personally, too small.
 
I'm no expert here Smithy but here are my thoughts...

I try to do as much off the ship as I possibly can. This means securing the breeching around the cascabel - running it through the ring on the carriage - fixing the breeching to rings and eyebolts (carefully measured for functional length) - and then take that to the ship gluing the carriage in place and then inserting the eyebolts into the bulwark (into the previously drilled holes). I then do the run-out tackles off the ship with a hook on each end - and then bring that completed bit to the ship hooking each hook to their respective eyebolts (one on the bulwark and the other on the carriage). I find it is nearly impossible to do any of this on the ship with the gun in place.

I did use hooks on my 1:64 Vasa but this is no small challenge. If you forgo the hooks, you then need to do the run-out tackle on the gun before bringing the completed everything to the ship (IMHO).
 
And I haven't decided yet whether I'm going to make the rigging for the guns. The recoil ropes are definitely yes, but the other ropes with blocks, in my scale... most likely not. On the lower deck there won't be much to see, there are 18 of them. But on the upper deck there are 10 of them, I'll think about it. Thick recoil ropes are one thing, but thin ones with 2mm blocks are, personally, too small.

Your scale is 1/79. I would not do guntackles in that small scale. I'm not sure that my scale of 1/64 is suitable either but I am going to cheat and simplify things a little. I want to add the appearance of complexity without making life too complicated for myself. ;)

If you forgo the hooks

And tie the blocks directly to the eyebolts. That might help.

Everything is so small!!!!!!
 
Gun Rigging

I read everywhere that everyone hates everything about cannon rigging. Having never done it, I don’t know why that should be
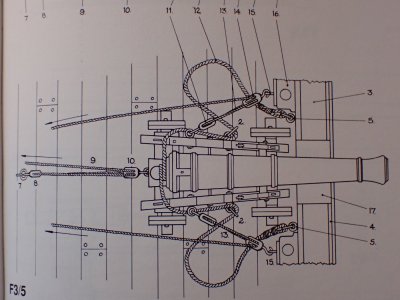
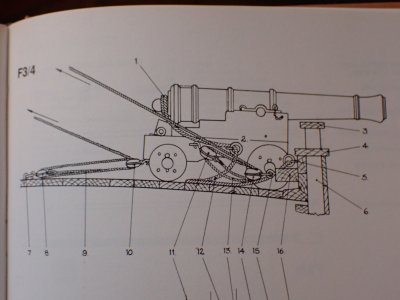
I do now! It's as tight as a mouse's earhole down around a 6 pounder in 1/64. I was forced into several compromises but let me tell you the whole story of my day on the bench. Ive done two sessions, each of about an hour and three quarters (I still habitually take a smoke break after 110 minutes, though I haven't actually smokes for 35 years.)

PA280065.JPG

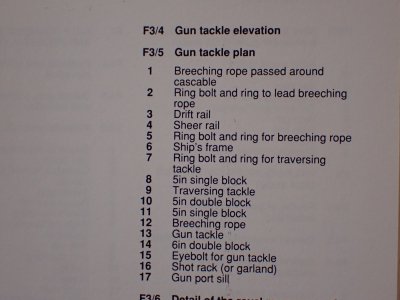
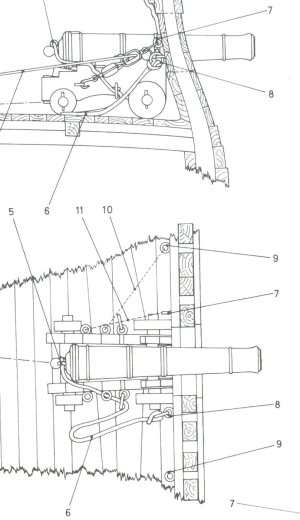
This is what I'm trying to represent. The drawing is from AotS. It shows the gun run out for use. The two 'block and tackle' arrangements at the sides are for running the gun out of the space in the bulwark. Why? Because the explosion at the muzzle when the gun is fired MUST be outside the hull of the ship or the over-pressure it would cause would 'blow the bloody doors off' and deafen the men.

If only one of those tackles is pulled, it would tend to move the back of the gun to one side. Combined with someone levering it over with a handspike (crowbar) from the other side, this is how the guns were trained (aimed side to side). Elevation of the gun was done by moving the quoin, the wedge shaped thing under the back end of the gun, in to lower the muzzle or out to raise it. This was usually done with a big mallet.

The big fat rope that is attached to the gun's back end (the cascabel) is the breeching rope. It was tied to the ringbolt in the bulwark with a big knot and then seized to make sure it didn't come undone. It had a degree of stretchiness and operated like a recoil spring, bringing the gun to a halt 'gently' anter its mad leap backward when fired.

The gun tackles would be unhooked before firing. That's why they have hooks on the end of at least one of their blocks. The gun accelerated from zero to sixty MPH and then back to zero in a second in time and three feet in length. If the gun tackles were still connected the free end of the rope would have to go four (?) times as far and four times as fast and that would be a sight to see - preferably from a safe distance. They probably would simply explode into oakum and sawdust.

PA280066.JPG

The tackle at the rear is for drawing the gun back inside the vessel without firing it. I'm not going to bother with those. My layout of ropes will represent the guns run out and then tidied up for Captain's Rounds, an inspection.

PA280067.JPG


pb guns.jpg

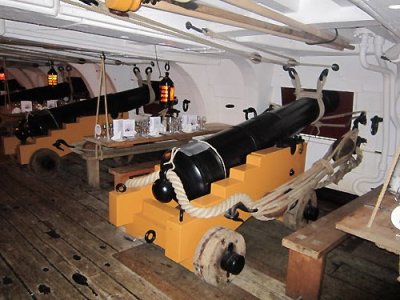
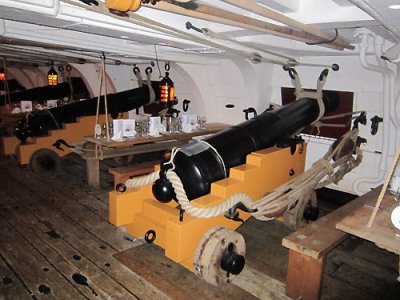
This gun on HMS Victory is secured to the bulwarks in case of rough seas, not quite the same thing I'm doing but note the lead vent apron that keeps the powder dry, the breeching rope going through a ring on the carriage and then tied to the bolt on the bulwark. Note too the relative size of the blocks compared to the gun tube.

To be continued when I have some neck oil to hand in a few mins.
 
A Note on Painting

Yesterday I mentioned my mistake in not using a wet palette. You may not have heard of those so...

PA280068.JPG

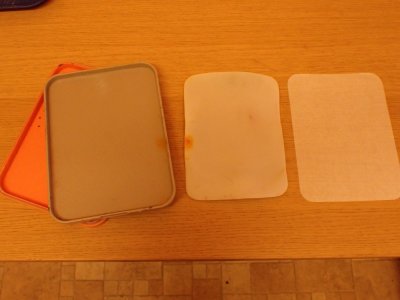
It's an airtight(ish) flat box containing a thin sponge as a water reservoir which is topped with baking parchment (NOT greaseproof or waxed paper).

PA280069.JPG

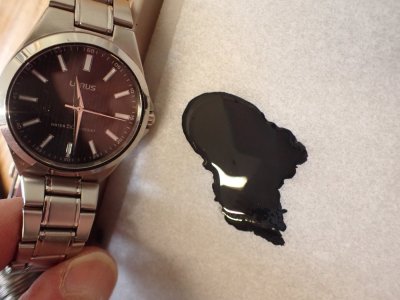
There it is in the background with water keeping everything moist, not wet, just 100% humid to slow the drying of acrylic paint, which as we all know, dries like mustard on the side of your plate, making us buy ten times more paint than actually finds its way onto a model.

With practice at keeping the water level right, you can keep paint useable in the wet palette for days, and use every drop. I discovered this when I was painting figures when I needed to keep maybe ten or twenty colours available for painting and mixing/blending. It's not essential for most boat jobs but painting my rails without it made me use drying, thick paint that refused to flow from my brush. This is particularly pigment rich paint and was like tar yesterday.

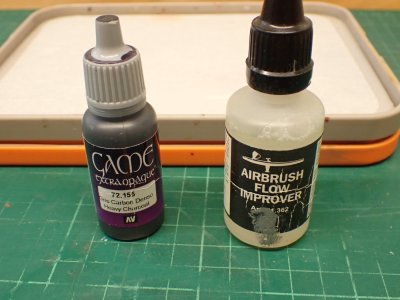
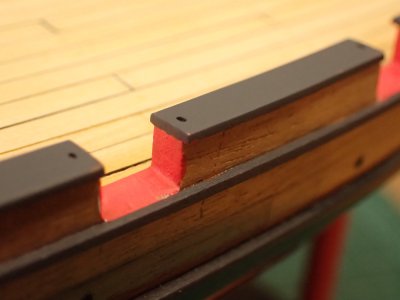
Today I used the flow improver, just a drop. It's a wetting agent, a non-foaming detergent and boy, did it make a difference. Painting the other side of Alert this morning was a pleasure, a brief one because it took no time at all, and the results were much better.


PA280070.JPG

I squeezed out the paint at 09:20 this morning.

PA280071.JPG

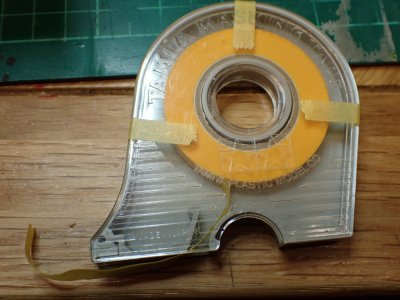
The best masking tape for models is, I an sure, Tamiya. It's not the cheapest but it's Goldilocks - just right. Just the right amount of stickiness, bendiness, toughness and it won't ever leave residue even if you leave it on a model for years.

PA280072.JPG

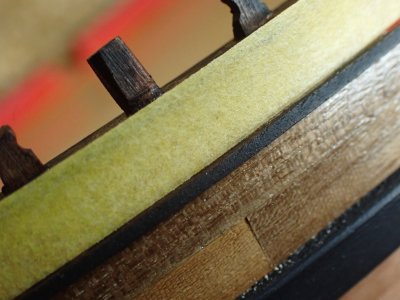
It's pale yellow when you gently apply it but when you burnish the edges to seal it, the colour darkens so you know you have made a seal.

PA280075.JPG

That's how I like my paint to look.

PA280073.JPG

09:50 and my masking and painting was done. The paint is still wet and useable. I put the lid on in case I later spot something that needs a touch up. Which actually happened, believe it or not!
 
Gun Rigging Part 2

It's fortunate that I enjoy writing, isn't it? :D

PA280076.JPG

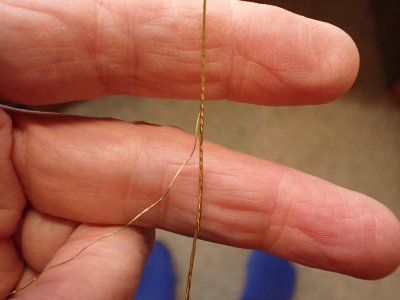
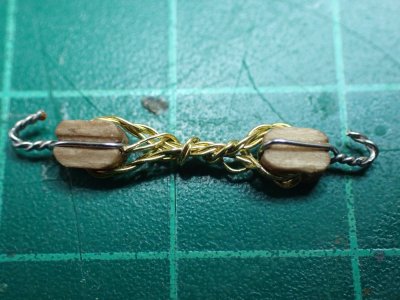
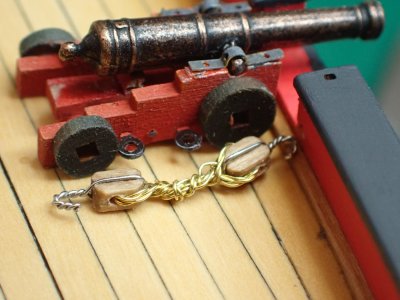
Considering the tiny size of the tackle ropes I thought I'd try something different. I separated a single strand from some brass picture hanging wire.

PA280077.JPG

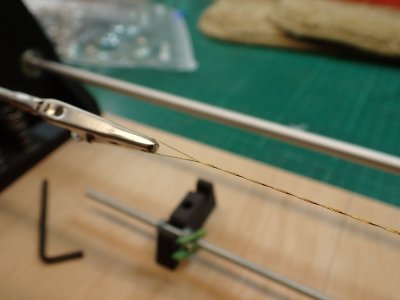
I doubled it and wound it up in my seizing machine so that it looked a bit like rope but without the hairiness of real fibres.

PA280078.JPG

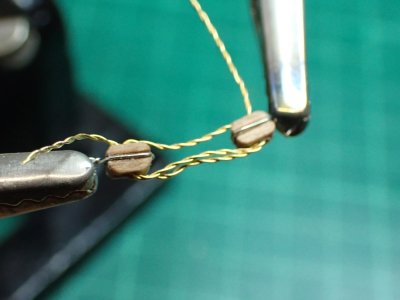
These are the smallest blocks I have and they are just about the smallest ones I can handle. They are single holes but I was intending to wrap the loose ends over as in the Victory photo and hoped that would conceal the cheat.

PA280079.JPG

That was the best I could do and it wasn't good enough.
PA280080.JPG

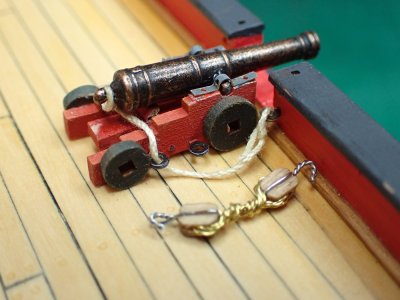
The blocks are so big that even overhauled (so tight that they touch each other), the thing was too long. It needed to be 12.5 mm from hook end to hook end. Impossible with these blocks and my fat fingers.

PA280081.JPG

Even wound up to breaking point (as was I by this time), they were a fail.

PA280083.JPG

But at 11:30 the paint was still useable.

We went for a walk and a ponder.

PA280084.JPG

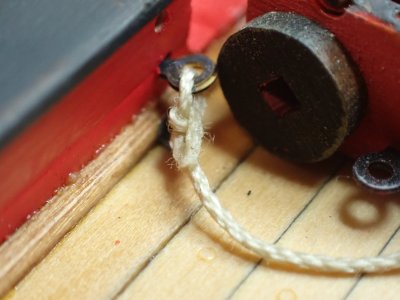
I glued the spare gun down and tied on the breeching rope.

PA280086.JPG

THis one was too short but I'd proved that I could do it, and with the right, loose knot too. That knot adds to the spring of the breeching. I threw the brass tackle in the bin and experimented with illusions.

PA280085.JPG

What if I faked the blocks. I used polyester thread and a blob of paint (still wet) to simulate blocks. What do you think of it so far? RUBBISH!

PA280091.JPG

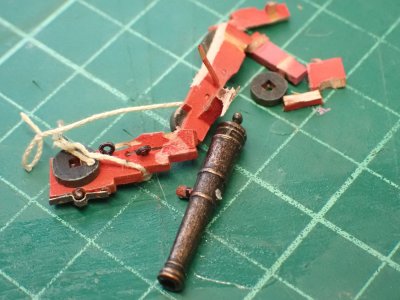
I took the practice gun off the deck (to which some IDIOT had stuck it with SUPERGLUE!) and did a real one.

PA280087.JPG

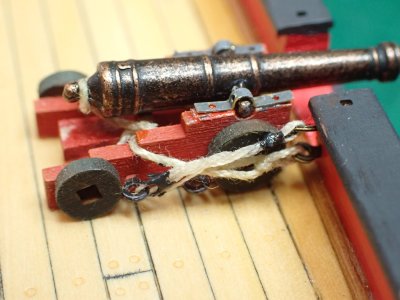
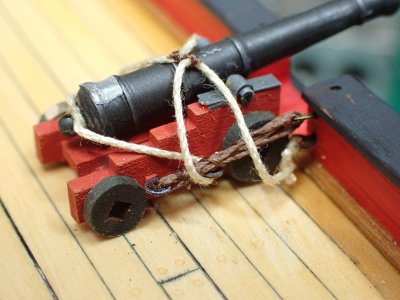
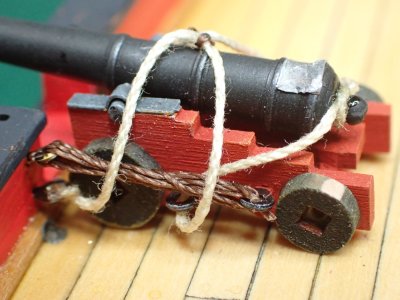
I switched to nylon thread, no hairs and lots of slipperiness, in a contrasting colour so it would be less of a birds nest. Then I seized the breeching rope on top of the gun, just how my captain likes it for inspection. (I've seen this done down at Portsmouth on some ship or other.)

pb guns.jpg

And returning to that gun on Victory, notice how you hardly notice the blocks? No-one that sees this boat, apart from you lot, will even notice what's missing.

PA280088.JPG

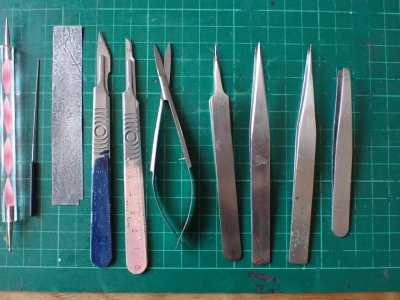
I added the lead vent apron from lead foil which I discovered I could make even thinner by burnishing with the butt end of my tweezers. Uses of tweezers #1,000,005

There's a touch up needed on that rear truck (wheel) and guess what?

PA280089.JPG

Almost five hours after leaving the bottle, my paint is still in perfect condition.

PA280092.JPG

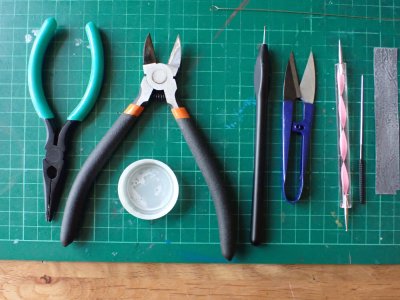
Tools used today included pliers, side cutters, superglue, my patent CA applicator (see above somewhere), shears in two sizes (you can use these in awkward places with either hand), a dotter (a ball ended implement used by nail artists for making dots on women's nails and brilliant for tying very small knots and general rope handling), a reamer (for opening up the holes in eyebolts and especially blocks), and my lead foil (originally for use as cloth on my figures).

PA280093.JPG

AND, gasp nearly done!

Scalpels (various, two out of five shown) more shears, and four tweezers (one blunt, two sharp and one powerful nose-hair puller which is like micro pliers).

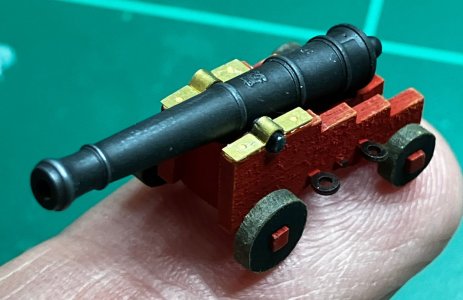
One gun done! Eleven left to do, but not today folks, not today!

~~~~~~~~~~~~~~~~~~

IMG_1043.JPG

For a clearer understanding of the size of the guns and why my head hurts so much, my deck planks are 3.25mm wide.
 
Last edited:
And if you do it right, you need not only a stopper rope (6) and not only drive cables with blocks (11), but cables with blocks that are responsible for horizontal positioning of the gun (10). But this will just be a web. I think in your scale, recoil ropes (6) will be enough.Screenshot_20241028_185658_Gallery.jpg
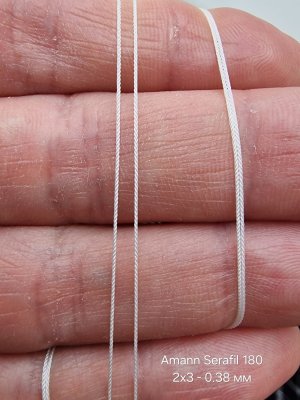
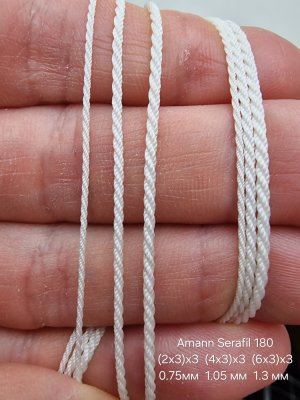
I recommend you a thread from the company Guttermann or Amann. I took Amann 120/2. They have no pile at all, these are continuous threads. They are very good.
20240522_113344.jpg
20240522_112829.jpg
180 = 120/2
 
Last edited:
Back
Top