HM Armed Cutter Alert (1777) - Vanguard Models - 1/64 - Completed Build

Speechless Smithy.
Love your posts mate, I still get drawn in and study every photo and description, eagerly looking on the pics from the details you describe in your writing
Brilliant mate, just love it.
Book, book, book. ;) Thumbsup

I’ll be fitting the first two double sheaved blocks today. Proper rigging with sweating included! First time I’ve rigged anything for two years I believe.
 
Love your posts mate, I still get drawn in and study every photo and description, eagerly looking on the pics from the details you describe in your writing

If anyone's interested in my writing technique, it's dead easy really. I keep my camera next to me on the bench and take pictures of anything that look interesting to me. I might think at the time how I'd describe it but generally it's just a photo.

When I'm ready to write, I upload the pictures via the laptop (always keep a copy) to SoS and post them all onto the editing window in one go. That puts them in time order.

I reduce them all to 660 pixels wide because otherwise they are too big for comfort on my screen and possibly yours - the readers can always enlarge them with a click but they can't shrink them.

Then I write a title if the post seems to be the start of a particular phase. It's a way of breaking up the thread and making it easier to follow for anyone reading through from the beginning. I'm also careful to use lots of white space. My paragraphs are seldom more than a few lines long on laptop (more on a phone). I do this because it's hard to read solid text on screen at my age, I miss lines because the screen is so wide, and I know I'm not the only one.

I look at each photo and try to work out why I took it. I think I delete about a third of the photos because they don't contribute to the narrative. I write a caption. This is essential. When I see posts that expect the reader to instantly understand which of the thousand things in the photo are relevant without any assistance, I click away. Readers need a story! Sometimes all you have to do is add a link - "And then..." for example.

I work through the photos until I reach the end. Now I know what I've said, I'll go back to the start and write an introduction before the first picture, then read through the post making sure that any digressions are signposted or deleted. It's best to only have two or three things in one post, attention spans being what they are nowadays.

Where was I? What did I say? ROTF

I insert silly humour from time to time. I know that very few of my 'jokes' will get a laugh but just trying the make the reader smile keeps most of them on my side. There have been occasions when I've spat my coffee reading unexpected jokes on forums and maybe I have that effect once in a while. It's worth a try. We are mostly men of a certain age and like 'Dad humour'.

At the end, I try to sign off with some sort of conclusion. This is the hardest part for me actually. Finishing with a little smile is a good thing, I think. I'm not very good at ending a conversation in real life either. I've found that "I'm bored now so I'm going" ends not only that conversation, but all subsequent ones too. :)

Finally, I post it up in public, glance over it and immediately see ten spelling mistakes which I go back in and edit.

I hope that's all of interest to someone, anyone...

I have to go now. The dog needs a pooh.

~~~~~~~~~~

EDIT: I don't always follow these rules, sometimes for a bit of variety, sometimes because I'm too rushed or tired. Nobody's perfect. ;)

~~~~~~~~~~

EDIT 2: Emoticons? I hate them. :mad: I'm 67 and should be able to make it clear when I'm joking, or amused, or angry. BUT people with English as a second language and people in a rush (and Millenials) find them a useful signpost so I use them whenever I remember.
 
Last edited:
Good evening Smithy. Firstly wonderful log- very informative. Much appreciated.
Secondly your build of the Alert is marvellous- some skills displayed.
Finally I am an emoji fan - in reference to your Edit 2. English is my first language and I'm never in a rush so no excuse ROTFROTF. I Couldn’t resist.;)
Cheers Grant

ROTF ROTF ROTF ROTF ROTF ;) = roll over five times on the floor laughing in an ironic fashion. :D
 
Rigging - First Block and Serious Revision


I said it was my first time for about two years and I could tell. I have a separate tool set for rigging and when I opened the box today my first thoughts were, "What's that? What's that for? Is that mine?" I creaked into action like a slug heading for a saucer of beer and gradually memories began to surface. I took many photographs and composed this 'dissertation' as a way to revise and relearn not only what to do but why. I remembered some of the many mistakes I made last time and swore (like a sailor) not to repeat them.

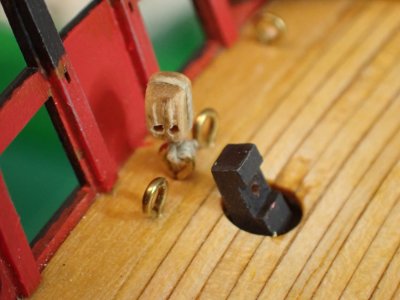
The kit instructions begin the blocks and string part of the build with the fitting some blocks to the extreme ends of the deck. This will probably be because when they are needed, the locations will be blocked by other stuff, so I'm tamely following instructions.

PB060001.JPG

I also wanted to know what these particular blocks and their tackles were for and what they are called. I referred to Peret Goodwin's Anatomy of the Ship - Alert.

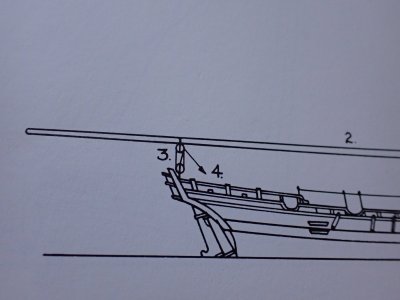
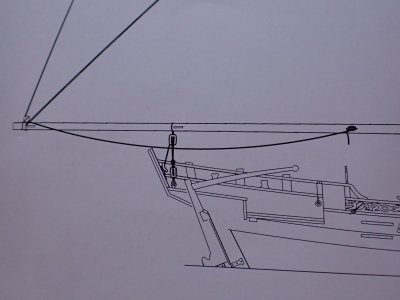
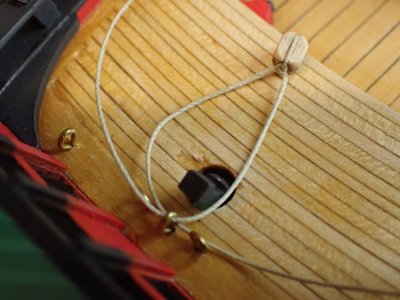
This one at the stern is the boom sheet tackle which controls the outswing of the boom that runs along the bottom of the sail. It's going to be a heck of a job hauling that in against the wind.

PB060003.JPG

The kit instruction manual doesnt give it a name but specifies a single block at the bottom. It occurred to me that this wouldn't give much mechanical advantage so...

PB060018.JPG

Let's have a look in this excellent reference book based on the authors study of contemporary models in the museums of Eu-rope. (Eu ROPE! ROTF )

PB060017.JPG

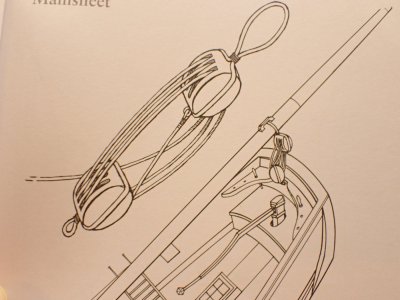
We are now calling it the mainsheet and it uses TRIPLE blocks. I'm not particularly clewed up (ROTF) on block and tackle physics but I think that gives a seven to one mechanical advantage to the people on the free end. I have some triple blocks but not many and in 1/64 scale I think it's possible to overcomplicate rigging to the point of absurdity. Most of the rest of the boat is simplified in some way so I'm going to split the difference between a single and a triple block and use a double instead. (I'm also aware that in these hands of mine a triple tackle can instantly come to resemble the can of worms found in an angler's tackle box!)
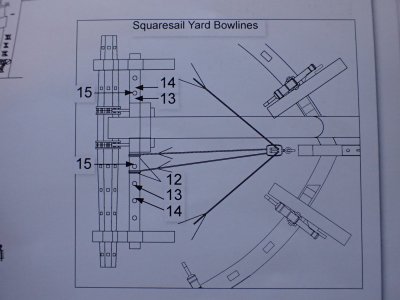
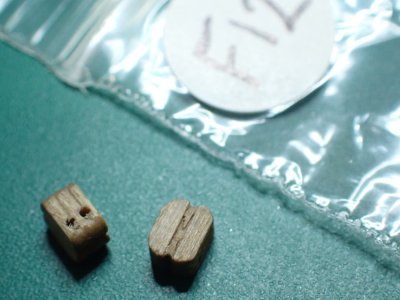
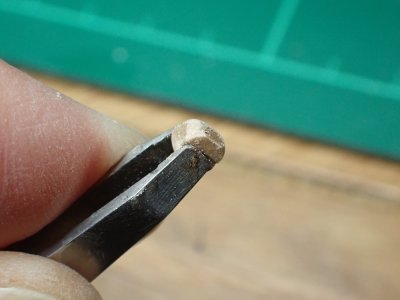
PB060004.JPG

The instruction book tells me that the block in the bows is a double but curiously, it's not used for any mechanical advantage at all but simply takes the bowlines around a corner to make them easier to haul on. As the song, or rather the shout has it, "Haul on the bowline, the bowline haul!"

So I need to prepare two double blocks. Simples?

PB060006.JPG

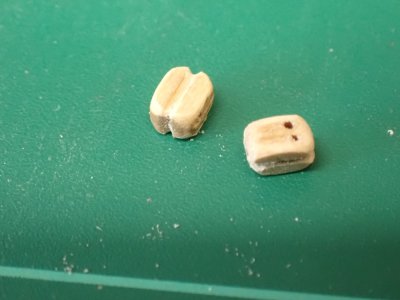
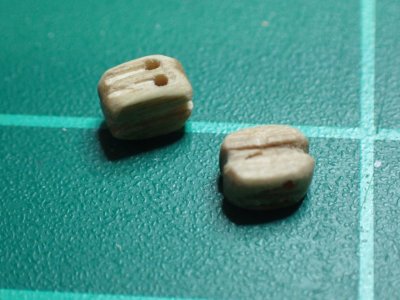
Here they are. The long dimension is 4.36mm. A mistake I made on Le Renard by Artesiana Latina, the first and only model boat with rigging that I ever finished, was to imagine that the blocks were ready for use straight out of the packet. That assumption made the work difficult and the result look awful. Last winter I toured the RN museum at Portsmouth for three days and learned that blocks, like every other wooden thing, were rounded off. In fact most of them look like well used cakes of soap.

PB060007.JPG

"Sand down the blocks, boys. The blocks sand down!" For this operation I recommend a pair of nose hair tweezers. You can get a really good grip with those and unlike pliers, they won't crush or mark the wood - or your nose, for that matter.

PB060008.JPG

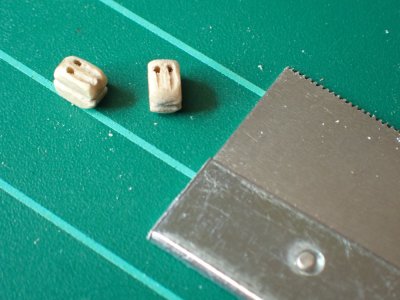
There's that cake of soap look I was after. I have almost lost the grooves that the running ropes slide against as well as the bigger groove that circles the block for the strop to rest in.

PB060010.JPG

The strop groove was recut with a triangular file and the others, which stop at the holes, were restored with a razor saw. By now the holes, which were quite ragged to begin with, were full of dust and 'peened over' with ragged edges. Passing line through there would be awkward especially as they are going to be in inaccessible locations.

PB060012.JPG

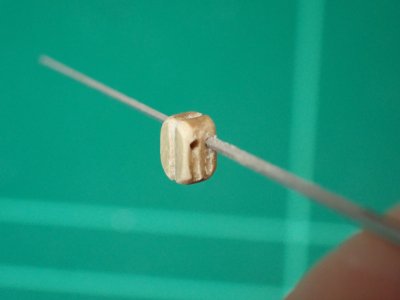
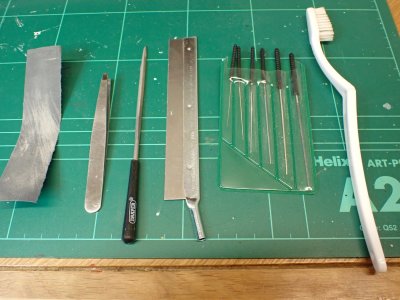
This tool is called a broach or a reamer. It's a long long square pyramid with an extremely sharp end which fits right inside your thumb with the minimum of pressure. The edges are 90 degree corners and remove wood in a scraping fashion when you rotate the broach while gently pushing it through the hole (or your thumb). The result os a smooth and slightly wider, straighter hole.

PB060013.JPG

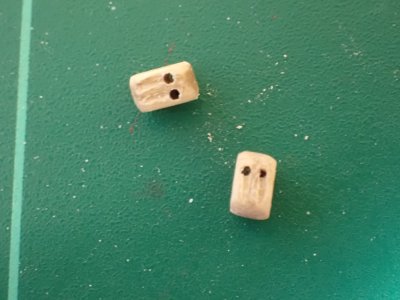
The one at the bottom is before broaching and the other is after the operation. (And the stitching to the thumb.)

PB060014.JPG

The final part of Smithy's block prep routine is to give the thing a good polish with a medium toothbrush. That gets rid of the last of the splinters.

PB060015.JPG

That's the full tool set used so far. Broaches come in sets - I used the third from the left.

In a bigger scale I'd probably be shellacking the block or oiling it but I'm going to leave it bare at the moment. When the rigging is all done, it will be easy enough to poke some varnish at the blocks if I change my mind but as far as I can remember none of the blocks I saw at Portsmouth had any finish applied.

Right, that's the blocks ready. I'm going to have some apple pie now and tell you about stropping the little chaps when I'm refueled. (My goodness, I don't half go on!)
 
Last edited:
Getting a Strop On

PB060016.JPG

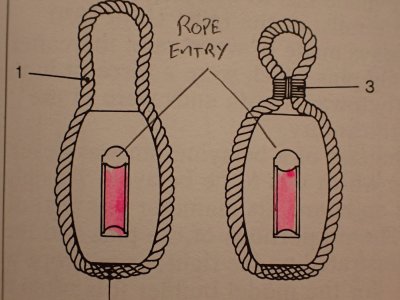
A block needs a strop like a modeller needs a knife, The strop (number 1) attaches the block to the thing which is to be pulled. The strop is seized at the ends to form eyes which may go around quick release hooks or be otherwise lashed into place. Some blocks have an eye at each end, some only at one. Some blocks are stropped with iron bands, though that may be a little later than 1777. The strop in the picture is spliced at the bottom because a knot weakens the rope and would be likely to catch on things and to become loose. In 1/64 or any other scale, I won't be splicing but I will fake the occasional seizing to hide the fact that I'll be depending on knots.

The pink things are the sheaves which are like wheels with the tyres removed. The ropes run over them, turning through 180 degrees with as little strain and friction as possible. The rope enters (and leaves) the block at the places I have indicated. Look carefully and you will see that these are closer to the eye end than they are to the end where the ropes will head off to the other block on the far end of the tackle. It is very easy to install a block upside down in its strop. I did lots like this on Le Renard despite knowing I shouldn't. D'oh!

PB060022.JPG

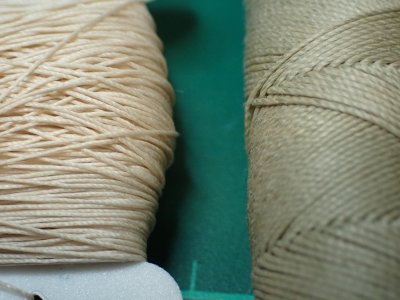
I have two ropes handy. These are going to be running rigging, they will be constantly changing position when the boat of in use and so they won't be sealed against the weather and the sea with Stockholm tar. They will be one of a million shades of beige/grey. The standing rigging are the lines set up in port and not normally altered at sea. They are tarred and will be darker but not black. I don't believe that all the standing rigging was ever one single shade on a ship. It would vary with age, supplier and batch. Same for the standing rigging with the additional variation due to the tar which might be darker or lighter according to the barrel. I'll use these two reels and probably other's too. More colours more interest AND it will make it easier for the viewers (and me) to follow a particular line as they try to figure out what it does.

PB060030.JPG

It's a reel embarrassment when your ropes get tangled before you use them so always make some way to lodge the free end safely.

PB060023.JPG

I like to wax my thread with beeswax. It makes it infinitely easier to use, by stiffening it and adding a little weight and a little stickiness. It also flattens the loose hairs. Not everyone likes to use it. Theres a worry that the wax will attract dust because of the stickiness but actually it dries and hardens quite quickly - think of a polished table - is that sticky once the polish has dried? Of course, you can't buff a thread so what do I know?

I pull my threads through the surface of the wax and then pull them several times through my fingers' gripping hard to heat the wax and press it into the fibres.

PB060032.JPG

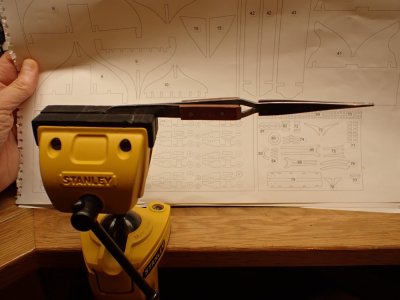
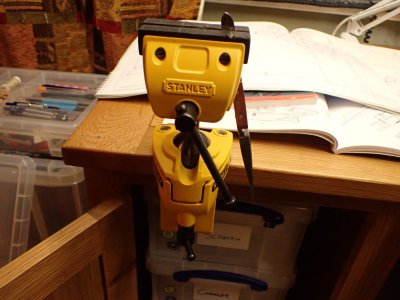
Until I acquire a fly fishing vice, this is how I hold blocks for stropping. Self locking tweezers in a vice.

PB060024.JPG

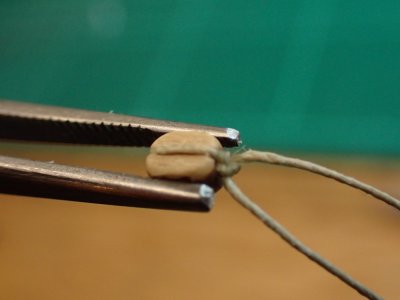
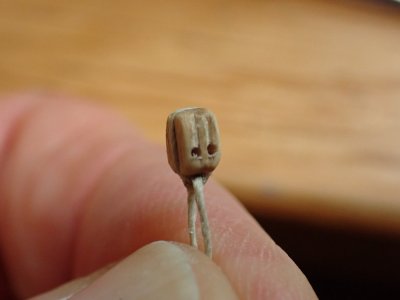
With the block either held securely (or pinging away into the waiting mouth of the carpet monster) it's very easy to tie the strop on. That's simply a reef knot secured with the tiniest spot of CA. It's also easy to tie the strop on upside down so watch out!

PB060031.JPG

In order to watch out you will need both eyes so I advise that you get into the habit of parking your self-lockers safely as soon as you pull the block out of them.

PB060025.JPG

And that's the right way up. (Is there an emoji for 'smiles smugly, little realizing that he will make the mistake over and over again'?)

PB060026.JPG

Making an eye and then tying the eye to the eye bolt seemed a bit pointless to me so I just tied the whole thing as symmetrically as possible to the eyebolt.

PB060027.JPG

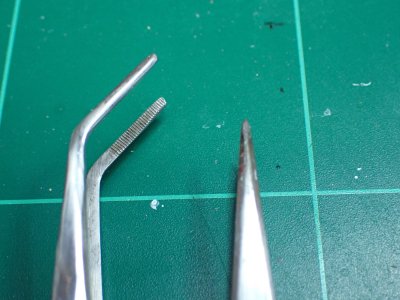
I was practicing my knot tying with tweezers. I put the sharp ones away now and use blunt and if possible grippy, serrated ones for pulling thread without damaging it.

PB060029.JPG

All done. It looks a bit rough at the scale of the photo but it's only 4.5mm long including the strop so on the deck it's good enough. (I love those words.)

And that epic two volume update is enough computer time for me today. G'night all!
 
Rigging - Now With Added Masting!

I was about to attach the chains and deadeyes when I remembered a mistake I have made before. On Le Renard the chains didn't follow the lines of the shrouds.

I need to stretch a line from the point on the mastwhere the shrouds will attach, across the channels and to the hull underneath to ensure that the chains and shrouds align. Time to shape the mast then. (I could measure from the drawings but there's every chance that the actual position and possibly height, of my mast will be different so this is the best way for me.

PB080035.JPG

Unfortunately, I enjoyed this little bit of woodwork so much that I forgot about taking photos for most of it.

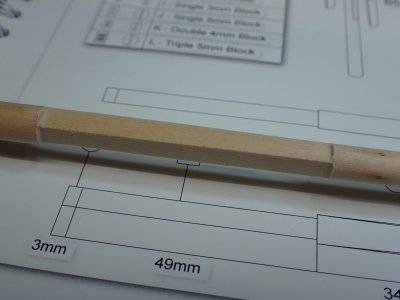
Prior to filing the top part square, I tapered the section from about 6 feet above the deck up to the height of the crosstrees. I chucked the dowel in a houshold electric drill and had at it with a piece of 120 grit, a vacuum cleaner and repeatedly, a set of digital calipers. I reduced it from eight to seven millimetres over a length of 250mm which doesn't sound like much but it's very obvious to the eye.

The square part is 5mm across the faces and was manually filed. As the dowel lay in the vice horizontally, I filed a flat, rotated it 180 and filed the other side, and continues doing that until I was at 5.25mm and more or less parallel and centred. Then I die the two remaining sides in the same way. It's satisfyingly square though I never needed to use a carpenter's square on the angles. Instead I drew a cross on the end of the dowel and each time it went into the vice, I used that to set it level. Then it was just a matter of keeping the file level as I cut. The result isn't up to a certain dentist's standard (you know who you are ROTF) but it's good enough for me and gives me some confidence about the forthcoming PoF builds.
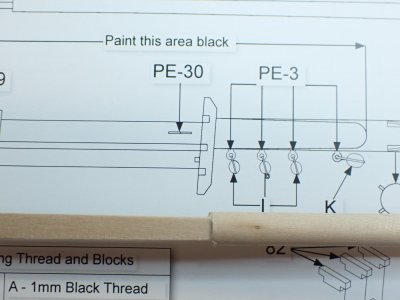
PB080036.JPG

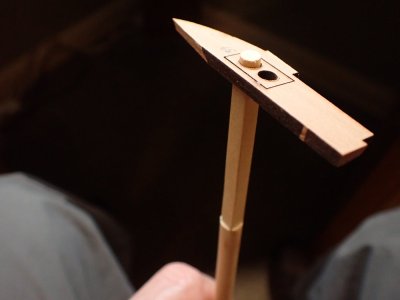
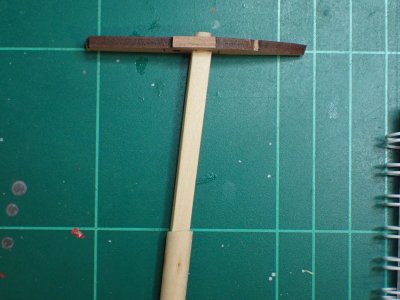
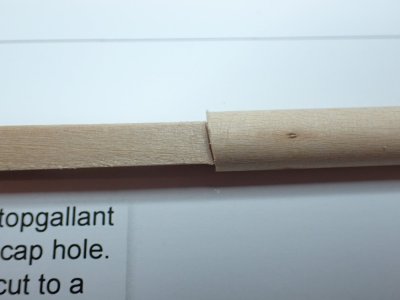
The mast is raked backwards but the crosstrees are parallel with the deck so once the majority of the waste was removed with files and scrapers, I whittled the bearing surface with a scalpel. It would have been easier if I'd glued on the cheeks first but I only just realised that. :confused:

PB080037.JPG

Oh well it's done now.

PB080038.JPG

The very top of the mast will fit into the cap so that had to be made round again which I did with some 120 grit glued to a piece of wood - a DIY sanding stick which is rigid. I was using the lasered cap ad a gauge and almost messed up because I hadn't adjusted the hole in the cap to the mast's rake. I realised before I'd gone too far and while the fit isn't as tight as I'd like, it's going to look ok under the black paint this area will be getting.

PB080039.JPG

Good enough? I'm chuffed to little monkeys with it! :D
 
I have already seen a screenshot from your book. I studied the anatomy of this ship. I liked that there are 2 options for rear sail armament. One with a large one and the second with a small one and an additional mizzen mast.
20241109_003533.jpg
 
Last edited:
the second with a small one and an additional mizzen mast.

You are ahead of me @serikoff. I have not seen that drawing. There’s no provision for a mizzen mast in the kit except for the two steps on the edge of the rudder platform. I guess they used one or the other depending on the tack?

It’s a funny looking rig with the mizzen raised. Very tempting.
 
You are ahead of me @serikoff. I have not seen that drawing. There’s no provision for a mizzen mast in the kit except for the two steps on the edge of the rudder platform. I guess they used one or the other depending on the tack?

It’s a funny looking rig with the mizzen raised. Very tempting.
As I already wrote somewhere, I would like to make 2 versions for the photo, and then leave one, the one with the dream mizzen, and hang the second version, where the big sail is, next to the ship. That's the idea)
 
As I already wrote somewhere

Yes. I remember now. I don’t think I understood properly at the time.

I will keep it simple this time and make the rig as supplied in the kit. I’m not fitting sails and dislike the idea of the storm mizzen without them.

I know it’s not useful to be in a hurry to finish this build and begin another. But I am! ROTF
 
Looks perfect to me!

You are very kind.

My feeling is that your skills as developed on Kingfisher are on a different and somewhat higher mountain from mine right now. However, I am climbing through the clouds onto the peak of my own mountain and I find that I can at last and at least see yours from here. :D

Where am I going? I don’t know. When will I be there? I ain’t certain. All I know is I am on my way.
 
My feeling is that your skills as developed on Kingfisher are on a different and somewhat higher mountain from mine right now. However, I am climbing through the clouds onto the peak of my own mountain and I find that I can at last and at least see yours from here. :D
Good afternoon Smithy.I share your feeling. Some guys,like Paul (@dockattner ), are climbing the Mount Everest of model ships while I’m still struggling to get up Table Mountain :D. Paul got it spot on with regard to your mast. Brilliant. Cheers Grant
 
Good afternoon Smithy.I share your feeling. Some guys,like Paul (@dockattner ), are climbing the Mount Everest of model ships while I’m still struggling to get up Table Mountain :D. Paul got it spot on with regard to your mast. Brilliant. Cheers Grant
I'm sure the view from Table Mountain is lovely. Bunch of dead bodies on Everest...:(. Overrated as a destination...
 
Back
Top