HM Armed Cutter Alert (1777) - Vanguard Models - 1/64

I have always admired you string and stick folks. It requires repetition and I hate that. The thought of tying hundreds of knots and running those lines all over the place seems impossible. My hat is off to anyone who can accomplish this feat. I enjoy making a fitting or part for my models but I am annoyed that a boat has a port and starboard side. That means I gotta make two fittings. Making the first one is fun doing it a second time is boring.

You have done some amazing work on your model. Congrats.
Thank you. :)

Repetition. Yes it can be a bore at times. One thing that seems to help me is to consider the repeated things as one thing. For example, my twelve guns became ‘the battery’ and several hundred knots will become ‘the ratlines’.

Conversely, there aren’t many things that can be made without repetition. How many coats of varnish on your Hacker? How many times back and forward with saw or sandpaper?

I gave up on model aircraft because I was bored by doing the same things over again - even though they were different kits. That was repetition of something I defined as ‘plastic kit’. So perhaps whether we are repeating something is a matter of definition? I don’t know.

~~~~~~~~~~

My dog is on my knee at the moment. I enjoy stroking him. It calms me and lowers my blood pressure I think. I don’t think it would work if I only stroked him once. Maybe doing those hundreds of knots in the shrouds works in the same way? Just enough mental stimulation to prevent me thinking of anything else? Is it a kind of meditation?
 
PB140075.JPG

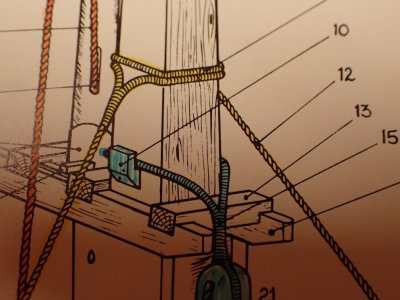
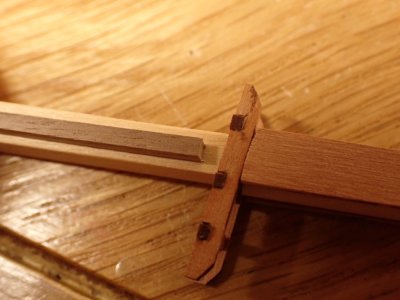
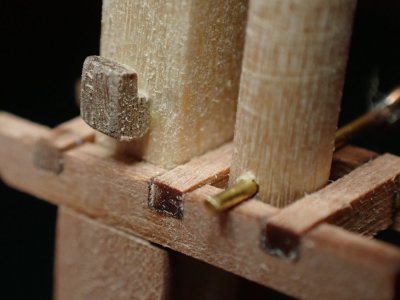
Time for some manual labour. See that cleat numbered 10? There's a PE arrowhead shaped thing provided but I like the chunky wooden one so I'd better get a couple built.

PB140077.JPG

I have some walnut of approximately the right size. The cleats are tiny and difficult to hold firmly.

PB140078.JPG

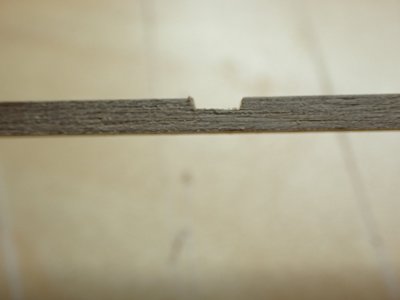
I filed the recess in both cleats before removing them from the strip.

PB140079.JPG

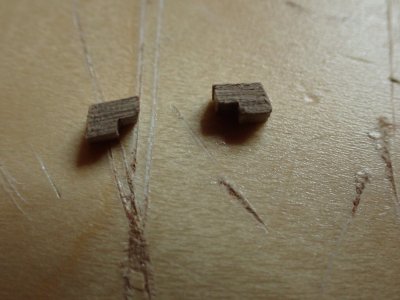
The rest of the shaping was done once they were separated and was done with 240 grit sandpaper, holding the cleats by the top edge with a pair of tweezers.

PB140093.JPG

How will I ever get rid of this dust? The cleat pleases me. It was worth the effort.

PB140081.JPG

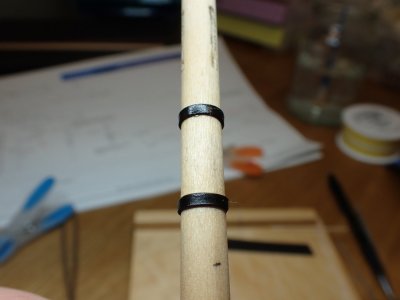
Next job was the rigging stop, an iron band which stops the top ends of the shrouds and stays etc from sliding down the mast like worn out socks. I thought about using brass strip but not for long. Black paper seemed to have possibilities. The upper band on this test piece was applied with thick Titebond buttered on both sides and the lower band used diluted glue. It was slightly easier with the watery glue as the paper softened and wrapped obediently. Once the glue dried, I shellacked both bands.

PB140082.JPG

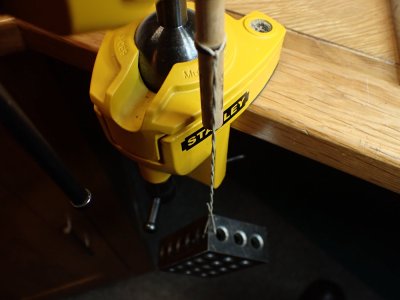
Time for the battle of the bands. This weight made no impression on either one. The resin soaked fibrous paper is a composite material a little like fibreglass and is very tough.

PB140084.JPG

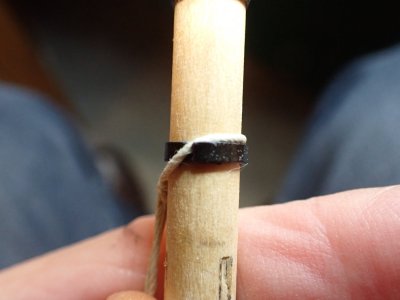
Pulling the thread with all my strength produced this failure but it only happened because the thread fell on the end of the paper tape. To achieve a full test to destruction I had to use pliers. I'm happy to adopt this system for all mast bands in future. And there's no need to paint it either!

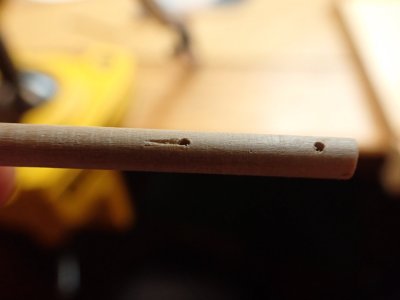
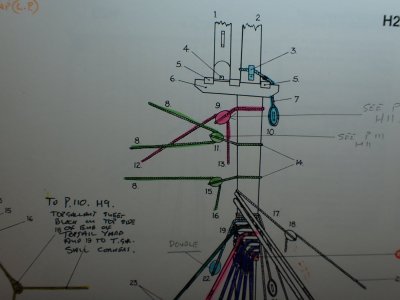
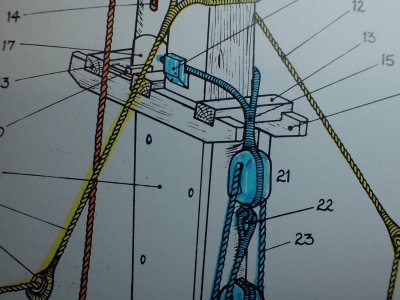
Referring to the diagram at the top of this post you'll see the top rope (bull rope in American usage I believe) in orange entering a sheave in the topgallant mast. Further up the topgallant mast there's another sheave for the topgallant yard tie and I drilled holes for each of these.

The top rope is used to lift the topgallant mast up and out of the crosstrees/trestletrees so that it can be struck down on deck in a severe blow. The topgallant yard tie is attached to the centre of the topgallant yard and used to adjust its height. Both are belayed at the foot of the mast. See, the homework is paying off! ('Paying off' originally meant the sailor receiving his wages at the end of a voyage. Fascinating.)

PB140086.JPG

If I simply drill a hole straight through the mast, the thread will come out of the supposed sheave like this. Not so good really. It looks like someone just drilled a hole straight through. I want people to believe that there might be a pulley wheel in there.

PB140087.JPG

I want the rope emerging like this. No, I haven't simply pulled harder. ROTF

PB140090.JPG

I carved a little ramp into the mast and rounded the side of the hole too. Please forgive the raggedy donkey appearance at full magnification. In life, and especially when all is varnished, it looks OK.

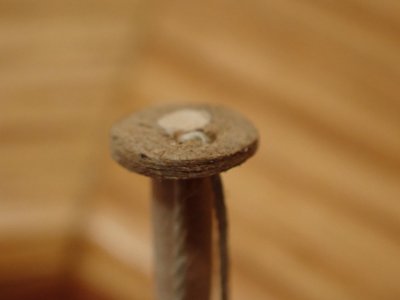
PB140091.JPG

The final sheave was for the pendant haliard and is a tiny one set into the truck. The sloppy focus of the photo hides the fact that I made a bit of a sloppy mess of this one but once again, it's too tiny for anyone to notice. Except a certain critical and pedantic relative of mine who will spot it in an instant. :mad:

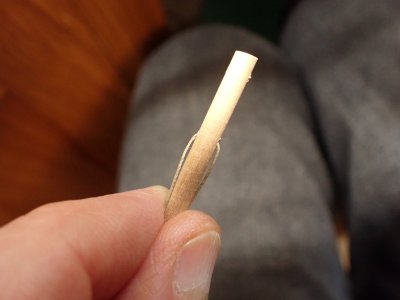
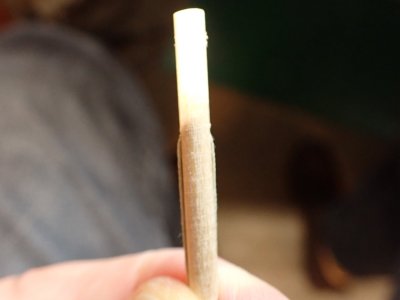
PB140094.JPG

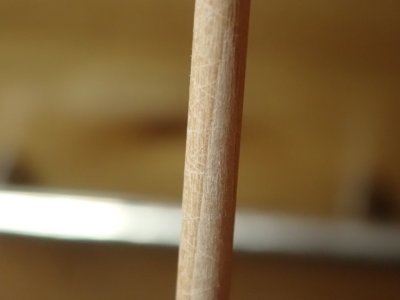
That wraps up the carpentry on the topgallant mast and so it was time for me to notice that the dowel I used encompasses a join between two pieces of beechwood. Why shouldn't there be joins in dowell, it's not intended to be visible, is it? :mad:

My fingers are crossed in the hope that varnish won't make this super obvious.
 
Last edited:
G'Day Smithy mate :)Thumbsup
Took a while to catch up but your Alert is absolutely a work of art mate, I love it.
The rigging terminology is still way over my head but that doesn't stop it from impressing the .... out of me.
I ordered that book of the ships "anatomy" way back for cross reference but hasn't arrived yet. ROTF
Awesome reading as always my friend,

Cat
 
Do you prefer the small ones or the IMAX versions?
I think the IMAX is great to get the assembly story across, "this is how - this is why" etc.
But if you look at the Mona Lisa from 2 inches she doesn't look flash until you admire her from a distance.
I'm sure I went out with a girl at school like that - so the small ones are better for overall presentation.
Not sure if that helps mate

Not a lot. ROTF ROTF ROTF ROTF

I prefer the small ones myself. Sometimes I can't see all of people's big ones unless I zoom out and then I can't read their words! Back to 666 then.
 
The rigging terminology is still way over my head but that doesn't stop it from impressing the .... out of me.

It was over my head until I started seriously studying. Now it’s come down a bit, I’d say it has me by the throat! ROTF

Yesterday was a good combination of book study and practical - like we all did at school! I’ll try to stick to that plan today and get the mast a bit closer to installation.

There are a few bits and pieces which are easier to add to it while I have it comfortably held in my vice. Once it’s glued down into the hull, everything is at arm’s length and makes my shoulders hurt.

I use lots of different positions to keep limber when I’m rigging a boat. Sometimes I’ll put her on the coffee table so I can stand over the top of her, sometimes it’s easier to gain access if she’s on top of the bookcase. So far they have all been small enough to spin them round for getting at the other side but when I do a really big one I guess I’ll have to build a stand in the middle of the room so I can walk around her?

I wonder how many of us have ambitions to do that one massive ship, Victory, Titanic, Yamato, in an impractically large scale?
 
Practical masting ruled my day, but only if 'ruling' means driving me so far round the bend that I met myself coming back the other way. Honestly, some days I'm quite clever but other times...
PB150096.JPGPB150097.JPG

I planned the rigging of the various hanging blocks, starting with the one coloured blue. I filled my tiny desk with the equipment and tools for rigging. Then I realised that I would have to paint that section of the mast first.

It's supposed to be black from the cap down to the rigging stop that I put on last night. My brush painting has not been a great success and I was resolved to paint the mast with my airbrush. I dragged out my airbrushing toolbox but without putting the rigging stuff away. Did I mention that I have a tiny desk? The desk was now as crowded and chaotic as the inside of my tiny mind.

I masked off the area that was not going to be painted and reached for the sanding sealer. Then, realising that I needed to seal the entire mast, whether or not it was to be painted, I took the masking off again.

I applied two coats of sanding sealer each followed by a bit of a rub down with OOOO steel wool. Smooooth!

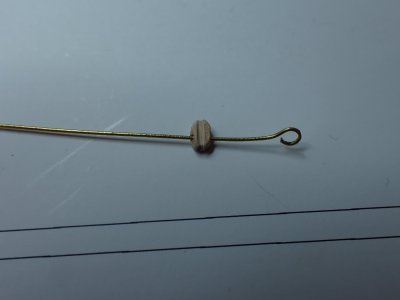
While the sealer coats were drying I returned to the rigging of the topsail yard standing tie block. (A rope running through that non-moving block will support the yard that holds the topsail.) The block is quite small at 3mm end to end before sanding to shape.
PB150099.JPG

Here's an idea, thinks I. I'll make it easier to find on my hopelessly cluttered workspace by threading a piece of brass wire through it. (A better idea would have been to tidy up but the brass did help a little.)
PB150100.JPG

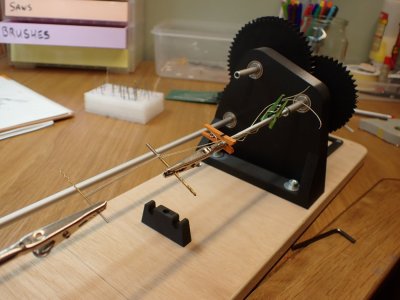
At last, a year after receiving this seizing-serving machine custom designed and made by one of my sons mostly with his 3D printer, I got to use it for real. You'll probably have noticed that I'm not a great fan of complicated machinery but this WAS a gift. And I was using it in manual mode (it's only electrified for serving purposes).

Could I have done the job without it. Not quickly and certainly not today, when I've dropped everything that I've touched then dropped it again while trying to pick it up and then fallen over!

Could I have done it at all? No, to be honest, I couldn't. It's very handy but also very unfamiliar so this was another drag on my allotted time today.
PB150101.JPG

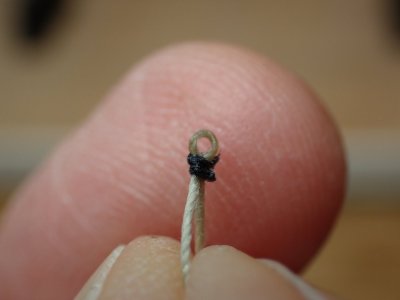
The idea of a seizing machine is that I don't have to use knots. Real sailors didn't because a knot reduces the strength of a rope by about half. They would join two ends by splicing, weaving the strands around each other so the rope became a loop with no loss of strength if done correctly.

Then seizing would be wrapped around the loop at appropriate points to hold it all together by friction rather than the knotting process - which also uses friction but lots of bending too. Am I making sense here? Well I can't splice sewing thread and never will so my 'splicing consists of gluing the ends together with CA which lasts long enough for me to seize over the top of the join.

The picture above shows the first stage and the photo of the machine shows how it was done.
IMG_1537.jpeg

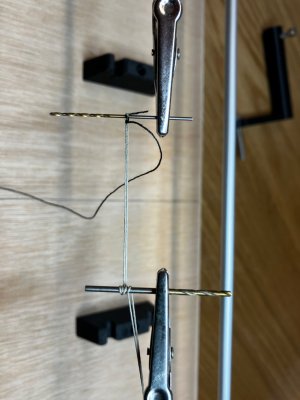
Here’s a close up.

I drew the thread around a 0.9mm drill bit and wrapped a black thread (so you can see it) around the two lines as close to the drill bit as possible. The machine rotated both of the croc clips in the same direction so that I could feed the seizing line into place.

A seizing is tied off by pulling its small lines back underneath the spirally wound part. I can't do that on a 1mm seizing so it was CA to the rescue once again.
IMG_1538.jpeg

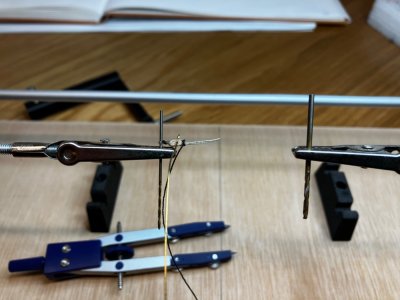
I inserted the block into the crotch of the two ends and glued them to the grooves with a dab of CA. I measured the size of the loop that would be required to go over the cap. I constructed a loop on the block to be the same size, joining the ends ('splicing') at a point that would be under the next seizing.

Unfortunately somewhere along the line I lost a millimetre or two. When I tried the finished item for size the block resisted going over the mast cap on the way to its final resting place. This annoyed me slightly :mad: and I gave it a bit of a push thinking that I was going to have to start again if it broke and I was gonna have to start again if it wouldn’t pass so it didn’t matter which.

The application of brute force and ignorance stretched the thread and it DID go over the cap, unfortunately there was no way it was going to go back. Back over that mast cap. That as-yet-unpainted mast cap. :mad:

I applied the seizing above the block to tighten it up and make it lie right and shellacked the whole thing so that it would appear to be bearing a heavy weight. As I did that I reflected that all of this work will be obscured by the black paint that was soon to go over the top of it. Add it to the list of 'unseen when finished' items we slave over.

I’d been neglecting to take decent photos all day but I was taking some on the phone to send to my son the machinist so they will have to do.
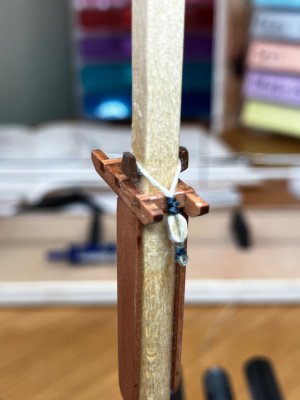
IMG_1542.jpeg

Like a dog playing a violin, the wonder isn't that it's done well, but that it's done at all!
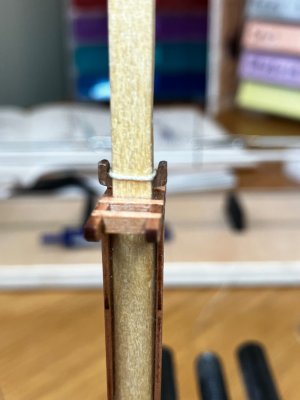
IMG_1541.jpeg

It's far from perfect but all things considered, especially that this is the first time on that machine, it's a reasonable beginning.
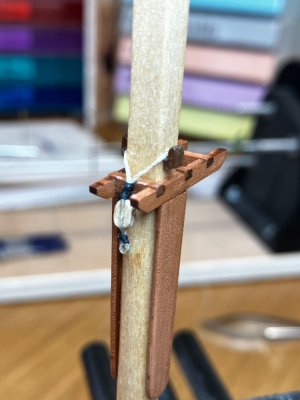
IMG_1540.jpeg

It's all painted black now so It doesn't really matter anyway. ROTF

Despite all the tiny annoyances if the day, I'm damned pleased with this block and its strop. It's a pity that it took about three hours to do but remember half of that was due to my miniscule desk and the problems it caused.

I masked off the mast again and assembled airbrush, compressor and extractor booth and prepared to spray paint.

I had hoped when I took up wooden modelling that I'd be able to avoid the faff of airbrushing with the irritating half hour of masking and half hour of cleaning up sandwiching the twenty seconds of spraying, not to mention getting all the gear out of the cupboard and putting it all away again. Did I mention that my desk is very small?
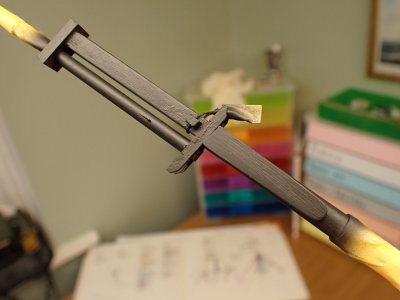
PB150102.JPG

However, it turned out that spraying on wood is as much of a game-changer as spraying on plastic was. I laid down a coat of paint so thin and even that it looks like, well paint. Paint at 1/64 scale. It's painted but it's clearly still wood underneath.
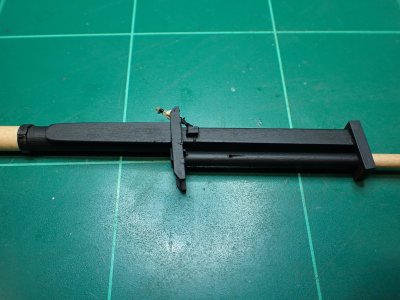
PB150103.JPG

A second shot because I was so pleased with the result.

That sheave entry looks perfect now, doesn't it? And the cleat looks like it grew there.

This is actually the Stynylrez primer. I was going to spray Tamiya acrylic over the top but really, why bother when this dark grey is a perfect match with the wales and it's tougher than Tamiya anyway. I will be edge highlighting as I did on the rails etc and with a bit of luck I'll take a photo of that and show you tomorrow.
 
Last edited:
That's it, I'm getting my kit out again !

Use sunscreen.

That looks absolutely awesome mate !! Thumbsup Thumbsup ;)

Ta!

What's sanding sealer ?

Colourless shellac with some filler, talc I believe, mixed in. Being alcohol based it sinks into the grain of the wood and sets hard there fast as the alcohol evaporates quickly. It blocks all the holes so paint stays on the surface.

What's CA ?

Cyanoacrylate glue. Superglue.

And Shellac ?

An organic thermoplastic secreted by a little bug that lives on trees in India. They make tiny tubes with it all over the trees as they move around. This is then harvested and when it’s dissolved in alcohol it makes a varnish. It’s one of the oldest wood treatments. It comes in different shades from white (which is actually colourless) through yellows reds and dark brown. It’s used in French polishing.

It’s a good material for us as it seals the wood but doesn’t stop anything else sticking. (Enamel type varnish makes it difficult to use water based pain over it for example).

There’s a saying, shellac sticks to everything and everything sticks to shellac.

Who am I ?

You are the Curious Cat

What am I doing here ?

Yes what are you doing here when you should be writing in your own thread which is getting rather thin?

Why is the Universe so big ?

Compared to what?
 
There are a few bits and pieces which are easier to add to it while I have it comfortably held in my vice. Once it’s glued down into the hull, everything is at arm’s length and makes my shoulders hurt.
The model ship group mentor who taught me most of my ship related skills said that we should not glue masts into the hull, in case there is damage to be repaired or shipment that would be done easier with the mast removed from the hull. Just a thought. Don't know how other master builders deal with it.
 
The model ship group mentor who taught me most of my ship related skills said that we should not glue masts into the hull, in case there is damage to be repaired or shipment that would be done easier with the mast removed from the hull. Just a thought. Don't know how other master builders deal with it.

Yes that's wise. Or glue them in with a gentle glue like a dab of PVA.

I'll still be glueing it in properly though. I won't ever be shipping this model and if it was broken badly enough to need the mast removing, I'd throw it away. :)
 
Back
Top