HM Armed Cutter Alert (1777) - Vanguard Models - 1/64

Late to the show... but pulling a chair in front row. Love the fact that you are showing how you tackle the "clinkering" planks. Same goes for the joints at the front deck. This help tremendously with the learning experience. Thank, I'm sure that many are picking up on your experience. Enjoying the logs! Please more! Seriously enjoy the build that the reason we are doing it.
 
Late to the show... but pulling a chair in front row. Love the fact that you are showing how you tackle the "clinkering" planks. Same goes for the joints at the front deck. This help tremendously with the learning experience.

Welcome aboard! I find that I can learn easiest from people who are just a little bit better than me at things. Experts go too fast for me a lot of the time. With that in mind I’m aiming my writing at ‘me-one-year-ago’, and hoping that experts chip in from time to time with better ideas (as has already happened - see above)

Apart from that, I’m really enjoying the building right now. The frustrations of recent years nearly made me give up but something seems to have clicked in my head lately and I know I can do it! Not perfectly and sometimes not even well, but I CAN DO IT! (I’m shouting, lol.)

Enjoying the logs!

For me writing is as much fun as modelling and writing about modelling is brill. Encouragement, like your post will soon have me posting daily updates!

Please more!

Check back later to hear the tale of The Transom Vs The Power Sander!

(You would have had it by now but for the dog. He had a hard life before I got him so when he asks for some love, he gets priority over more or less anything short of a house fire.)
 
Last edited:
I had no idea what I was getting myself into! It was an eBay buy from the Heart Charity people. Good price, good cause, looked like an interesting one. So on impulse I bought the ZHL Le Requin! Oh my!
Good morning. OH my indeed. I personally think that the ZHL Le Requin is the most Beautiful model ship around. That impulse buy is a good one. Cheers Grant
 
Good morning. OH my indeed. I personally think that the ZHL Le Requin is the most Beautiful model ship around. That impulse buy is a good one. Cheers Grant

I agree with everything you said there. I already had an Amati French Xebec and a Corel polacre-xebec Francese-Mistque when I bought the big one. They are beautiful craft (and no bluff bows to plank).

There’s a build here on SoS by @Crypton which will guide me and which takes my breath away. (Link HERE)
 
Last edited:
The Transom Vs The Power Sander

I couldn't put it off any longer.

IQSVRJOuvRnbRYvJl8wK683JAXzIN1d1R7HabWM7

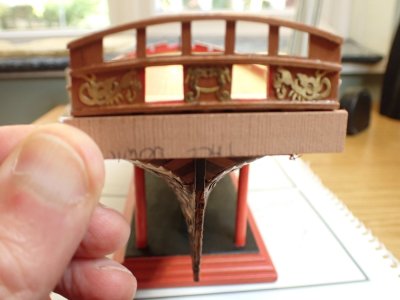
It was time to cap this raggedy end, where the bulwarks had been trimmed neither to length nor correct angle.

IQTexo8x3pZUSLCF14k-CPZKAbqXnSuO81KW2CyH

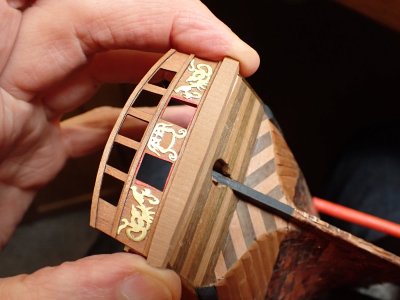
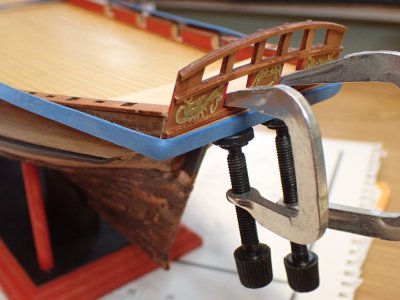
It was to be capped with this delicate transom.

I'd been dreading it because the sensible way to bring the raggedy donkey of a stern into a straight plane, precisely angled in two directions was to use my electric disc sander. And the quickest way to turn the raggedy donkey of a stern into firewood and splinters thrown all over my living room was to use my electric sander. I hate power tools. They are the most effective way for me to make great big mistakes in the blink of an eye. Especially when the sander's table must be removed and the workpiece presented to the disc by eye and fingers. Especially, especially when the disc will be on full speed for a neat finish and possibly to minimise the risk of snatching.

IQSs1UaQ0civTJvordNarFNCAckfGsQRmhRn09mo

I went slowly and checked the fit often, and of course, it's never the things that we worry about that get us. The sanding was actually dead easy to get right. There was no chipping out, due to the high speed and slow feed, just the tiniest of burrs where shellac held onto the sawdust.

IQRXcYWmU_MdS52n94xbZtbUAVbjbv6epaYgA_RR

The clamping was the simplest ever. I remember my father teaching me to use elastic bands to hold my plastic Spitfires together sixty years ago. They are the original and still often the best clamps.

IQR7VfpnCx4BS4UPtMJB7V-CAaN8GjzPHROE6N6O

I ended up with a big fat gap on the outside. It was the result of planking the counter, rather than simply painting it as instructed. I do get carried away sometimes.
 
PA110053.JPG

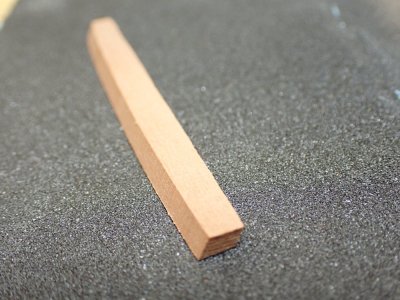
I have many pieces of wood on hand. This pear was a leftover from my first attempt to cut my own planks using that terrifying table saw. I am not fond of power tools at all as you already know but for shaping this piece, I must say that my disc sander was invaluable. At least if I messed up it would only be the single piece that was thrown through the window, not the entire boat.

PA110057.JPG

First I made the angles top and bottom making it into a trapezium section, then with the sander's table at the same angle, I rounded the top to fit the curve of the transom.

PA110058.JPG

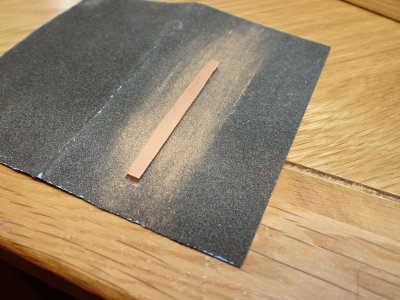
Back to good ole sandpaper for smoothing the sawn sides. I use high quality wet and dry sandpaper for several reasons. It cuts really fast - silicon carbide is sharp stuff. It lasts for ages - silicon carbide is hard and keeps its edge for a long time when used on wood. If it clogs, its tough waterproof glue means that it can be cleaned with an eraser or one of those power sander cleaning blocks, or even scrubbed in water. I think the long life more than compensates for the higher cost compared to glasspaper. Lastly, I have a large stock left over from my plastic model days and it seemed a shame to waste it. Most of that was too fine for woodworking but I had some coarse sheets for rough working on resin.

PA110059.JPG

I can't tell you how pleased I was with this single piece of wood. As a beginner, I couldn't have done it so well and so quickly and at the first attempt. As an expert I'll probably find it completely unremarkable. As a novice, I'm amazed and delighted to see how my skills are developing.

PA110060.JPG

Good old elastic band clamping, this time with a little anti-slide assistance from two c-clamps that I bought three years ago. I was really disappointed with them when they were delivered. They are feeble and poorly made so I threw then into a drawer and almost forgot about them. Three years later they are the only things I own that could have done this little job. "Thank you li'l clamps, I'm sorry I doubted you."
 
IQQSfIFCjCM4TJA2WkOb3Ql0AfBXIkwbZmQW5sPU

I thought the transom was 'just another little piece' now I realise that it was a key moment in the build. Completing the circuit of the walls around the deck is a big milestone in the build. The basic hull is now complete. * The next phase will be what I call 'deck furniture' or 'fitting out'. That includes the deckhouses bitts, rails, rudder, cleats and eyebolts and so on right up to the point where I begin the long processes of masting and rigging. Deck furniture is a lot of fiddly bits, each done in only a day or two, and will make a pleasant change of pace after those marathon sessions of planking and coppering.

I am going to celebrate reaching this milestone by taking Buddy, whom I forgot to introduce properly when he was sleeping on my legs yesterday, out to the pub to share a steak sandwich and a pint of bitter for lunch. (I'll have the beer and bread, guess who will end up with the steak! :p )


* I'm seriously tempted to begin my next build so that I'll have the option each day of hull work or furnishings. Hmmmm. No, not yet. I'll reconsider this option when I begin the rigging which will compel such close attention that hacking at a few bulkheads will be a welcome relief.
 
I too though that having two builds at the same time would allow to shift the type of task for more varieties. In one end, I had the rigging of the REVENGE going on. On the other I started a small ship - the Amati bireme - planned as a Christmas gift. Was an easy one, right! just planking mostly. Well, the bireme turns out to be the longest and complicate planking I have ever done.... it just ends up taking all the time.... and the rigging still stand in the same state than when I started.

Thanks for the logs, great work. Indeed, a very stylish ship... I'm having this hitch again to buy another kit.
 
Coppering

I was happy with the results of my plankings but keen to get the copper in place to hide the worst of it. There's no provision for coppering provided in the Alert kit but it's known that it was done and I wanted to experiment. I'd coppered a model once before, with self-adhesive foil, so I knew the layout, but this time I chose to use some copper sheets made for the purpose by Amati. They were 0.1mm thick and very hard and springy. They were also shiny. Patrick O'Brian, C S Forrester and suchlike authors often mention the beautiful shining streaks of copper showing at the waterline of a ship heeling to the breeze. Clearly they were off school on the day they should have been taught chemistry. Copper in seawater doesn't keep its shine for long, and I suspect that 18th century copper straight from the foundry wasn't particularly lustrous. It was likely to be contaminated with many different compounds which would all react quickly with salty water to produce some marvellous colours - and a lot of brown.

To kill the shine, start the reactions that I wasted to simulate and soften the plates, I annealed the large sheets of copper before breaking them into individual sheets. That's a simple matter pf heating the metal to red hot with a soldering torch and letting it cool slowly.

View attachment 476007

By heating the sheets irregularly, I found that I could vary the colours. Painting on various solutions of household chemicals like bleach, vinegar, saline before the heating was even more spectacular.

View attachment 475992

The sheets came with an engraved pattern of circles, meant to represent the nails which held the copper to the hull. I thought the circles were too large, too few and far too regular so I used a variety of sharp tools to impress patterns and random marks into the surface.


A coarse round file was the most useful for general nailmarks. I rolled it over the sheets before separating then into the individual plates, trying to avoid any regularity creeping in. I also coarsely sanded both sides of the sheets for texture and to key the surface for the CA glue.

View attachment 475995

Each of the 700+ plates were overlapped and worked into place with a ball ended tool. Toolmarks just improved the chaotic, organic appearance of the copper.

View attachment 476003

Once applied, I gently sanded the high spots. This made the overlapping structure far more apparent and also exposed some fresh copper for the last stage in my chemistry process. I was having such fun - think of a mad scientist, drunk with rum and inspiration. Actually it might have been the CA fumes...

The last stage was to hard boil ten eggs, chop them up and place them in a bowl inside a large plastic storage box with the model. The sulphur compounds that give the eggs their marvellous aroma gave turned some of my copper into copper sulphate and other 'stuff'. (I didn't listen to the chemistry teacher much either.)

View attachment 475999

This was one of my favourites. There are greens, reds, yellows, black, oranges... Isn't that gorgeous?

View attachment 476008

After a few weeks the chaos was muted by the general tarnishing of the copper by the ambient atmosphere in a small flat occupied by a single man and his dog. ROTF

This was the best of times and the worst of times. I hugely enjoyed the creative experience of playing with chemicals, fire and sharp things. On the other hand, the exposure to a large amount of CA glue over about three weeks of working was bad news. I was already sensitized to CA so I took precautions.

I had all the windows open, giving a strong cross breeze across the flat. I directed a small fan across my desk with another very big fan blowing the fumes out of the downwind window. I wore nitrile gloves and worked with tweezers. I wore a mask.

I'm glad I was so careful because it must have reduced the damage. However, I still contracted dermatitis with sores on my hands, particularly the right one which was closest to the CA in its little dish (with a cover!) and on my face around my mouth and nose where I'd breathed the fumes in. I looked like a chronic glue-sniffer, which indeed I was, thankfully temporarily. I developed chest pains and a cough too. The sore in my left nostril took a month to heal and bled daily. This is the last time I'll be using CA in any quantity for any reason. It's as nasty as novichok as far as I am concerned.

View attachment 476027

It was all worth it though. ;)
Awsome work. I bought a large copper spun bird bath a number of years ago and it was as shiny as a new penny. I washed it in metholated spirits to remove any production oils. I spread rock salt randomly over the surface then placed coverd cotten rags soaked in cleaning vinegar over the top. I'd shift the rags around from time to time over a period of about 2 hours. Then rinsed it thouroughly on water. The results looked very similar to your finished work. The only differance I would note is you would get more of the copper oxide greens with the above method. Think St Pauls Cathedral dome. Also don't have to deal with festering eggs. Perhaps give it a try on a small scrap of copper plate.
Cheers Rick.
 
Interesting work with the copper plating. In the future, I will also touch on this topic in detail. I will be aging the copper. I don’t like the clean color, and I also don’t want to wait many years. So, patination is the solution for me.
 
I too though that having two builds at the same time would allow to shift the type of task for more varieties. In one end, I had the rigging of the REVENGE going on. On the other I started a small ship - the Amati bireme - planned as a Christmas gift. Was an easy one, right! just planking mostly. Well, the bireme turns out to be the longest and complicate planking I have ever done.... it just ends up taking all the time.... and the rigging still stand in the same state than when I started.

I understand. I think I would get immersed in one or the other for a few weeks but then swap over when I became bored or the task became difficult.

The great danger would be stopping rigging when it became difficult, then stopping planking when it became difficult and then starting a third ship!

Thanks for the logs, great work. Indeed, a very stylish ship... I'm having this hitch again to buy another kit.

You are very welcome. The responses to this log have been inspiring me to work almost every day. I'm also spending hours on the site just enjoying the chat. It's a marvellous, friendly place. I suppose that's thanks to all of us but especially to the mods and admins.
 
Awsome work.

Thanks Rick

you would get more of the copper oxide greens with the above method. Think St Pauls Cathedral dome. Also don't have to deal with festering eggs. Perhaps give it a try on a small scrap of copper plate.
Cheers Rick.

I was a shade disappointed [ ROTF ] not to have more green and blue but the photos I've seen of the copper on Constitution and Victory all seem to show toffee brown as the dominant colour.

The festering eggs? I ate them all. I love hard boiled eggs. Here's a strange thing. Eating lots of boiled eggs usually make me pass a lot of foul smelling gas. After a night in a copper rich box, the eggs had lost all their power. Not a peep!
 
Interesting work with the copper plating. In the future, I will also touch on this topic in detail. I will be aging the copper. I don’t like the clean color, and I also don’t want to wait many years. So, patination is the solution for me.

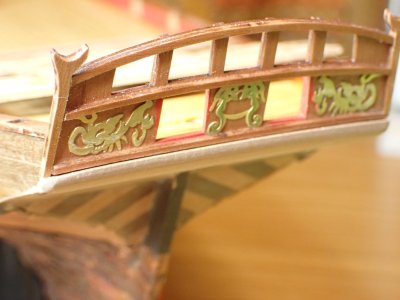
I can't wait to see how you patinate your copper. It's a fascinating art. I wish I had paid more attention to chemistry at school.
 
PA120081.JPG

My lump of wood has turned into a beam which supports the two crutches (why two?) for the boom. It's no more accurate than the flat transom but it hides the gap. ;)

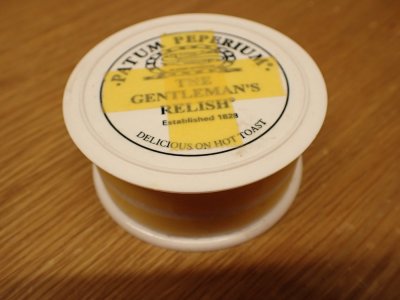
I'd like to share the way I manage my glue when I'm building. It's very efficient and economical.

PA120068.JPGst

First you need a small pot with a lid that you can remove and replace with only one hand.

PA120070.JPG

It needs to be heavy enough to stay on the bench when you lift the lid off and poke a brush inside.

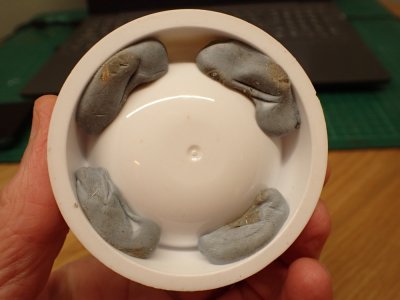
PA120069.JPG

Inside is a milk bottle top, secured with BluTac putty.

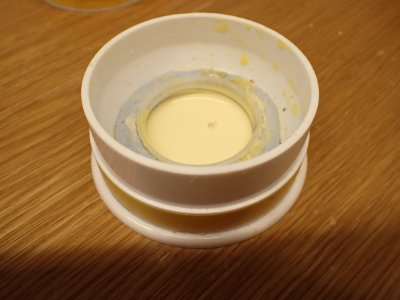
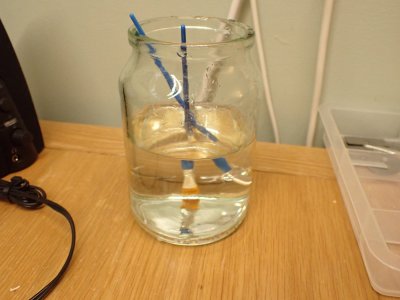
I half fill the bottle top and immediately put the lid on the pot. When I need to use it, I pick up one of my many cheap glueing paint brushes. I but them a hundred at a time and they cost pennies that way. Off with the lid and into the glue. I apply the glue and before putting the parts together I throw the brush into a jar of water and close the lid of the pot.

PA120071.JPG

The brushes clean themselves and at the end of the session I swish them out and replace them in the ready-use tool tray..

The glue in the pot stays useable for up to a week, depending on how often I open the lid. It gradually thickens which is great because when it's thick it grabs like an aligator and sets quickly. When it gets too thick I simply add more glue to thin it down.

If I take a week off and the weather is warm it might set hard. I throw the milk bottle lid away and use another one. Actually, one time I ran out of bottle tops and found that when the resin wood glue has set hard, it can be levered out of the pot leaving it clean.

Sometimes I forget to dunk my brush but it's ok because even after it's set hard, a couple of days in the water cleans it as fresh as new.

PA120072.JPG

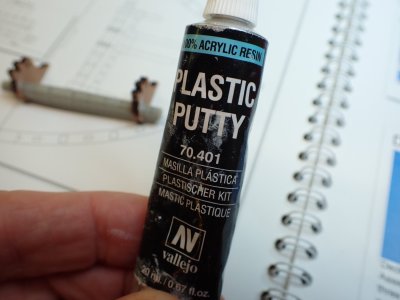
Sometimes we need a tiny amount of filler. This type is designed for plastic models but it's only acrylic resin glue with some crushed marble or something like that mixed in. It sticks to wood, can be smoothed when it's wet with a damp q-tip, sands ok and takes paint well, but will show up under varnish. Best of all, the pointed end to the tube dispenses a tiny amount just where you need it. The lid on mine, although simply a push fit, has kept it fresh for well over five years. I used some on the deck furniture that I worked on today which I'll show you tomorrow because it's getting time to clean up the flat before bedtime.

PA120067.JPG

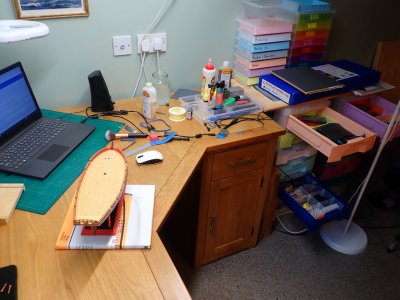
I hate it when my desk gets this untidy. It's not big enough for this hobby but I have plans for expansion as soon as Alert is finished.
 
You always manage to captivate me with your progress Smithy, both in pictures and prose, loving it mate, the detail you are
maintaining on that beautiful ship of yours is stunningly impressive.
Or soul destroying..............can't decide which........but whichever effect it's having it certainly inspires me greatly Thumbsup;)
 
progress Smithy, both in pictures and prose

It’s been like a New Year’s Eve party here today. I’ve been struggling to keep up with replies here and some great posts on other threads, including yours. (Did I reply to you??? Oops! Ill get there now).

I composed my answer first thing this morning in my head and then forgot to post it. Sorry mate.
 
Last edited:
Back
Top