• Ships of Scale has incorportated an extra level of security when you log In. Please follow on-screen prompts to acknowledge that you are not a robot via a "Check Box" or a "Pictorial Check Box Puzzle". This is needed due to higher level of AI Activity Security.
  • SUBSCRIBE TO SHIPS IN SCALE TODAY!

    The beloved Ships in Scale Magazine is back and charting a new course for 2026!
    Discover new skills, new techniques, and new inspirations in every issue.

    NOTE THAT OUR NEXT ISSUE WILL BE July/August 2026
  • Win a Free Custom Engraved Brass Coin!!!
    As a way to introduce our brass coins to the community, we will raffle off a free coin during the month of August. Follow link ABOVE for instructions for entering.

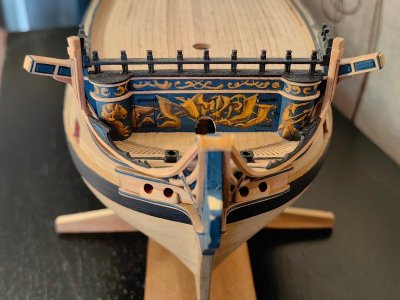
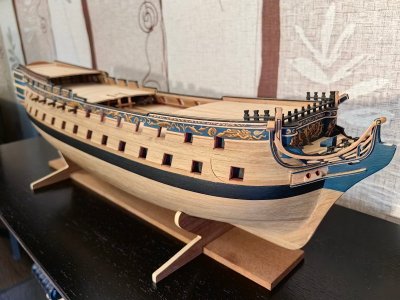
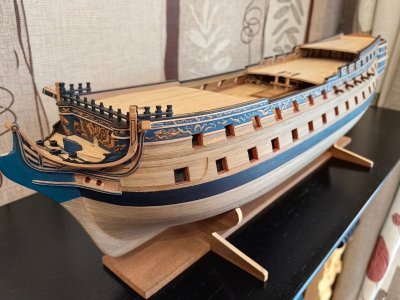
HMS Bellona Corel 1:100

Hi Fri Cap, I’m absolutely thrilled with your beautiful build—the dinghies are outstanding. In fact, your entire research is very impressive. I’ve only just discovered your build log and plan to study it carefully at my leisure in the coming days. I wish you continued success and enjoyment with your project.
Best regards, Holger
Hi, Holger! Thanks for the kind words and wishes! Wishing all of us luck and patience!:)
 
I’m giving you what you’ve worked for and earned: appreciation and recognition for a ship model that’s come a long way. It’s anything but easy to build a historical sailing ship model of this quality.
It’s good that you wrote that, Fri Cup. I, too, wish that for all of us in every respect.
 
Holger, thank you, this means a lot to me! The construction is still far from complete. The process is going slowly because I’ve long gone beyond the Corel kit and am making many things myself. And you’re right — positive feedback gives a great boost, so thank you again!
 
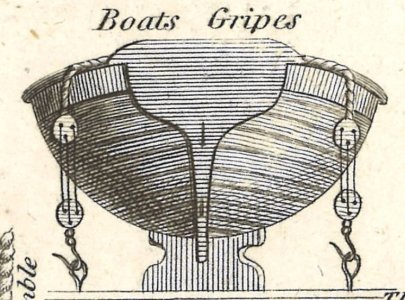
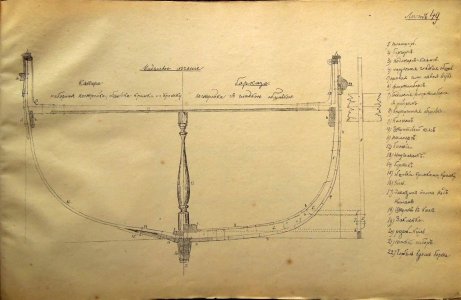
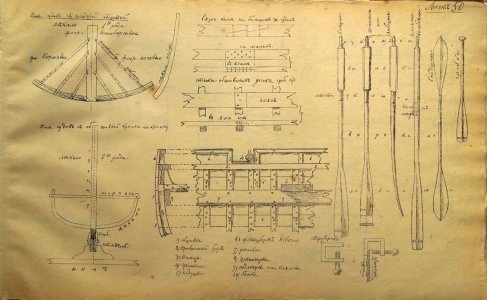
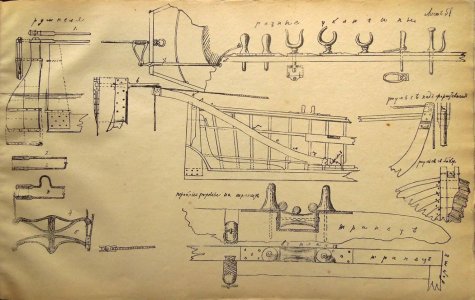
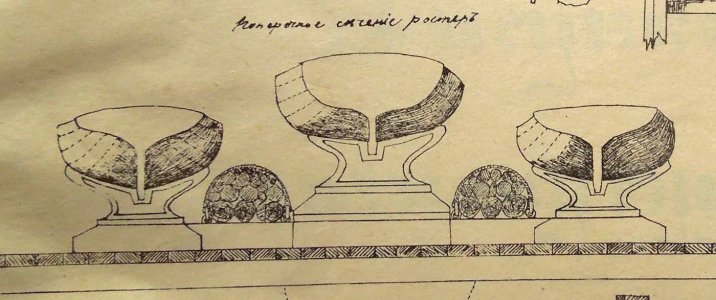
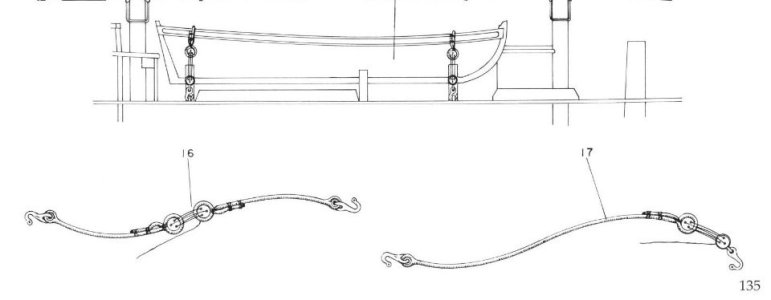
Алексей, вот ещё, в помощь. Это русские шлюпки. Но их конструкция была схожа с английскими и совершенно не схожа с французскими. Будешь делать баркас, обрати внимание, что кат-балка для поднятия якоря за томбуй снималась и убиралась под пассажирские сидения. Рули на шлюпках, когда те стоят на кильблоках, тоже снимались. Когда будешь ставить найтовы, обрати внимание, что они никогда не перекрещивались. Обычно было два найтова. Один удерживал переднюю часть шлюпки, ставился и обтягивался на линии носового кильблока. Второй найтов ставили напротив кормового кильблока. Ты можешь привязать найтовы к скид-бимсам корабля. Когда одна шлюпка ставится на другую (способ "матрешка", английский вариант названия - "ложки"), то на банки гребцов нижней шлюпки ставили съёмные кильблоки для верхней шлюпки. Обычно "матрешкой" укладывали баркас и ял. Найтов яла при этом шёл на скид-бимс, а не на банку баркаса, где стоял его кильблок.
Alexey, here is some more information to help you out. These are Russian boats. Their design was similar to the British style but completely different from the French. If you are building a longboat, note that the cat-davit used for hoisting the anchor by its buoy rope was detachable and stowed beneath the passenger benches. The rudders were also removed when the boats were resting in their chocks. When rigging the lashings, keep in mind that they never crossed over one another. There were usually two lashings: one secured the forward part of the boat and was tightened in line with the forward chock, while the second was positioned opposite the aft chock. You can secure the lashings to the ship's skid beams. When one boat is stowed inside another (the "Matryoshka" or "nested" method), removable keel blocks for the upper boat were placed on the thwarts of the lower boat. Typically, a longboat and a yawl/skiff were stowed in this nested fashion. In this arrangement, the yawl's lashing was secured to the skid beams rather than to the longboat's thwart where its keel block rested.

0cGvV_po-9g.jpg

49 6784 — копия.jpg

50 6792 — копия.jpg

51 6810 — копия.jpg

53 6834 — копия — копия.JPG

3fe07ae3efae.jpg
 
Игорь, благодарю! Очень классные - полезные детали и иллюстрации. Я обязательно использую эту информацию!
Igor, thank you! These are really great — very useful details and illustrations. I’ll definitely use this information!
 
Hi everyone!
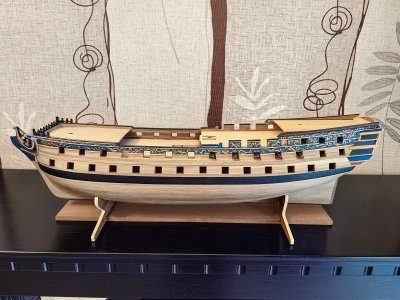
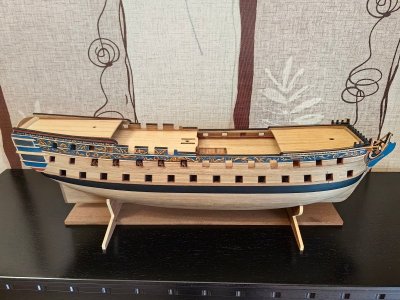
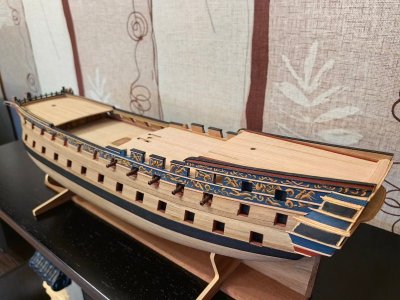
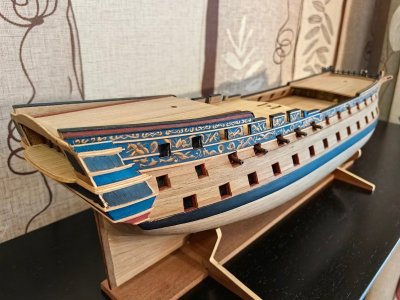
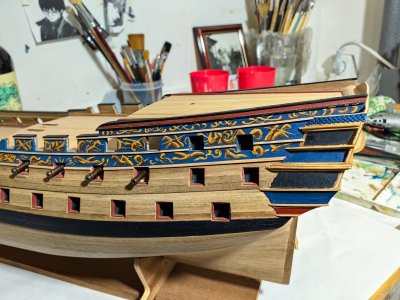
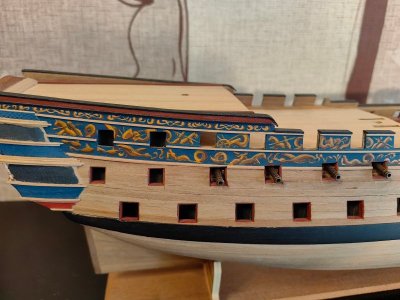
Since I don’t have any artistic talents, but I really wanted to paint the sides of the model, I asked a friend who’s an artist to help. Here’s what we ended up with.

0001.jpg
0002.jpg
0003.jpg
0004.jpg
0005.jpg
0006.jpg
0007.jpg
0008.jpg
0009.jpg
0010.jpg
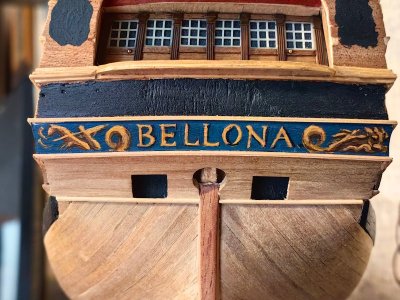
To be honest, I was hoping for something a bit more impressive. Maybe the painting doesn’t follow the traditional conventions used for the prototypes, but that’s not the main issue. In my opinion, the details aren’t worked out enough — the image looks rather rough. Especially in the bow and the stern. I’ll definitely redo the stern; I don’t like the lettering. I’ll also try to improve the bow. But I’ll leave the sides as they are.
The girl did her best. But it seems this kind of work requires a special skill…
 
Алексей, когда будешь переделывать надпись на корме, учти простое правило: буквы имели вертикальный наклон согласно наклону контр-тимберсов. В конце слова нужно будет поставить точку, точка тоже должна иметь тень.
Alexey, when you redo the lettering on the stern, keep a simple rule in mind: the letters were slanted vertically to match the rake of the counter timbers. You will need to place a period at the end of the word, and the period must have a shadow as well.
 
Да, Игорь, благодарю! Я думаю, найти подходящие буквы, или напечатать на 3D принтере и наклеить. Хотя я читал, что надпись всегда была именно нарисована. Но ровно нарисовать такие мелкие буквы я точно не смогу. А точка там есть кстати) Просто темного цвета там сильно больше, чем основного и она сливается с фоном...

Yes, Igor, thank you! I think we can either find suitable letters or print them on a 3D printer and stick them on. Although I’ve read that the inscription was always painted. But I definitely won’t be able to paint such small letters evenly. By the way, there is a dot there. It’s just that there’s much more dark colour than the main one, so it blends into the background…

 
This is acrylic paint. I mixed blue, black, and white to get this colour.
Hi Alex

Great choice. Did you use bottled paints or tubed artist paints? I tried the paint in bottles at first but found that tubed artist acrylics are by FAR better than the low pigment bottled paint. Costs a tad more, but so much better, and several tubes of various colors lasts for years.

What type of brushes do you use for acrylics? I learned the hard way that natural hair brushes are a not the best choice for good quality acrylic paint. Synthetic bristle brushes like those from Princeton Aspen are the way to go.

Allan
 
Hi, Allan!
I only applied the blue background. I used model paints in jars, and the brushes were just the basic ones. When I was painting the sides, I didn’t overthink it — I just bought thin flat brushes, 3–4 mm wide. The ornament was painted by an artist. She used paints in tubes. I bought her thin brushes — those ones.
7633061187.jpg
They’re made of wolf hair, according to the seller. I don’t really know much about brushes, but she said they’re good.Since I want to tweak some details in the decor, I bought the same paint she used — I’m going to experiment with it.
 
Thanks for the advice about the synthetic‑bristle brushes. I guess the difference is obvious to a real artist. Like I said before, I’m not much of an artist — that’s why I asked for help. But when I’m experimenting, I’ll try to compare them if I get the chance.
 
или напечатать на 3D принтере и наклеить.
Заказать декаль, в ВК есть человечек, который специализируется именно на декалях для моделистов. Или сделать декаль самому. Буквы, всё верно, рисовались.
You could order a decal—there’s someone on VK who specializes specifically in decals for modelers—or make one yourself. As for the letters, you're right: they were hand-drawn.
 
Век живи-век учись! Слово Декаль впервые услышал. Я вспоминал переводные картинки из детства и думал, вот бы было что-то подобное сейчас для моделизма... А есть оказывается! Благодарю за совет, Игорь!) А не дадите ссылку на того человека?
Live and learn! I’d never heard the word “decal” before. I was remembering the transfer pictures from my childhood and thinking, it’d be great to have something like that for model building nowadays… And turns out there is! Thanks for the tip, Igor! Could you give me a link to that person?
 
Hi everyone!
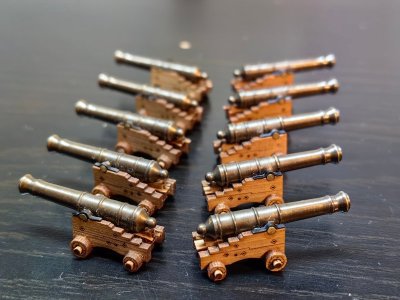
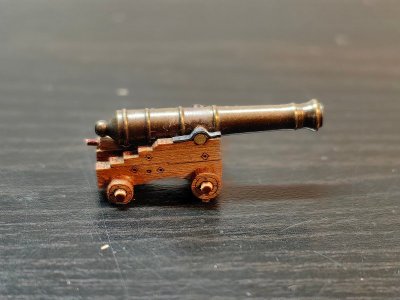
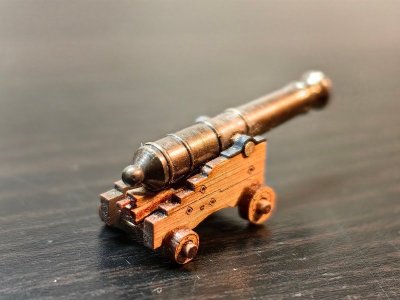
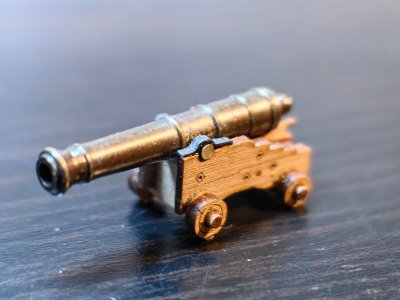
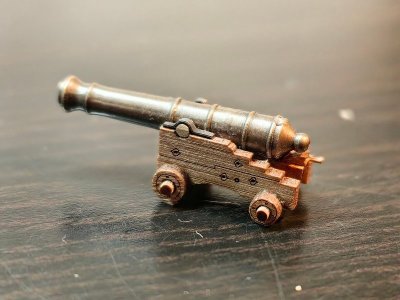
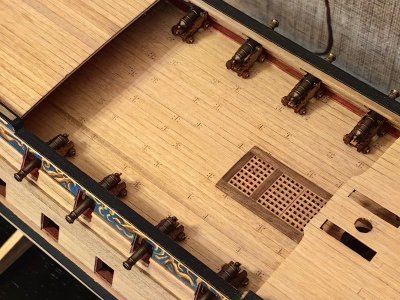
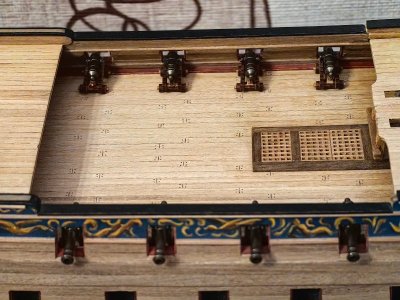
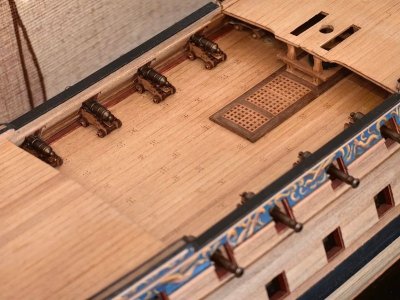
I’ve replaced the carriages on the upper deck guns. I used commercial ones (16.5 mm) from Wooden Ship, but only for the guns on the open part of the deck.

IMG_20260918_001954.jpg

IMG_20260918_002120.jpg

IMG_20260918_002247.jpg

IMG_20260918_002311.jpg

IMG_20260918_002527.jpg
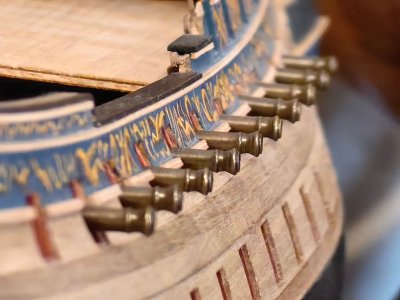
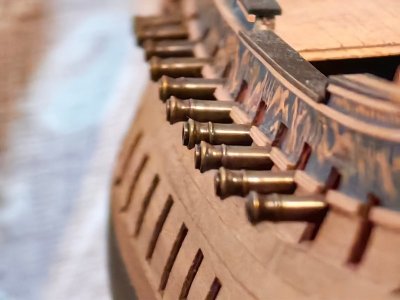
Unfortunately, there’s no access to the guns under the quarterdeck, so I left them as they are. Since the new carriages are smaller than the original ones, they created an uneven break in the line of barrels when viewed from outside. To fix this, I had to flip the barrels and, in some places, add small pieces of planking under the wheels. The alignment isn’t perfect, but I think it looks acceptable.

IMG_20260918_063953.jpg

IMG_20260918_064115.jpg

IMG_20260918_064243.jpg

IMG_20260918_064259.jpg

IMG_20260918_064317.jpg

Next up, I’ll be installing the breeches and tackles.
 
Back
Top