• LUCZORAMA SHIPWRECK SCAVENGER HUNT GIVEAWAY. 4 Weeks of Fun • 1 Legendary Prize ((OcCre’s Fram Ship)) • Global Crew Welcome!
    **VIEW THREAD HERE**

HMS Bounty Jolly Boat 1/24 Artesania Latina

Joined
Sep 17, 2024
Messages
30
Points
48

Here is my first build log on my first wooden ship kit. I chose this particular kit as there is a lot of information on the web relating to it and most reviews/builds I have seen say it really is suitable for beginners like me. I am not expecting miracles from this kit given my ability level but I do intend making the dest of it that I can.
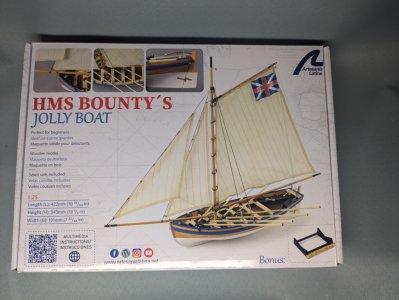
PXL_20240922_201027597_Original.jpeg

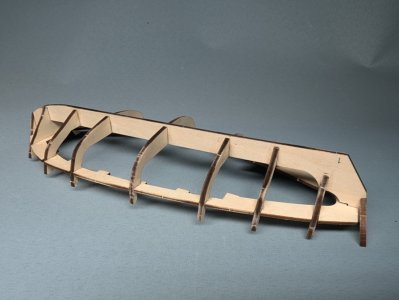
Off to a flying start with the easy bits done and ready to start fairing the frames ready for planking.
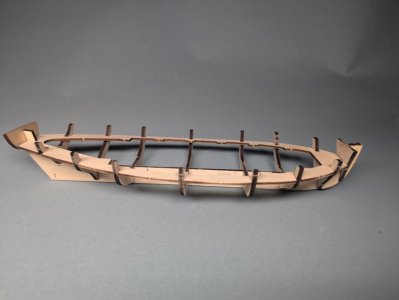
PXL_20240922_201136440_Original.jpeg

PXL_20240922_201144817_Original.jpeg

Also worked on the oars. They are a single piece blade and shaft so I have rounded off the shafts and thinned the blades a bit, looks a lot better than they did, just need finishing off
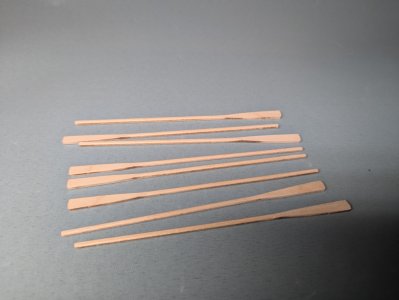
PXL_20240922_201303877_Original.jpeg


Also made the stand ready for painting
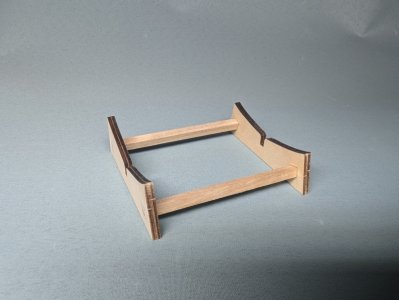
PXL_20240922_201159138_Original.jpeg

So now the real work starts on the planking. However, I do have a question. The instructions show that the false keel parts are attached after planking which seems counter intuitive to me. I would think it would be neater to plank up with them attached rather than try to trim the plank ends to match parts attached later. Is there a reason for attaching the false keel parts after or am I overthinking it and seeing problems that are not there.
 
Hello Graham,

I am not sure of their decision on when to add the false keel, but there are some nice build videos of the Jolly Boat on YouTube that may help.

Bill
 
I would think it would be neater to plank up with them attached rather than try to trim the plank ends to match parts attached later.
I am not sure why the kit explains it this way, perhaps the parts they supply require this order of assembly. On the real launch (the jolly boat on Bounty was rotted through and the cutter leaked and was too small so neither was used :) ) and ships in general it was the keel, stem and sternpost, then the framing, then the planking as you describe. Regardless I suspect you can wind up with a very nice boat regardless of how you proceed. For a first go you may be best off following their instructions. If you have more questions like this as you proceed you have a lot of help here in the wings of your stage.
Allan
 
Last edited:
Hello Graham,

I am not sure of their decision on when to add the false keel, but there are some nice build videos of the Jolly Boat on YouTube that may help.

Bill
Hi, Bill. If you happen to know those links, please provide links here, it should be beneficial to all of us.
 
I agree with Allan, unless you are an experienced scale modeler, I would follow the instructions in the manual for now. Every kit manufacturer has their preferred method of assembly. It is most likely not the method actual boats are built, but it is adapted for the kit design and easy assembly.
 
Hi Jim,

I hate to say it, but I have no idea how to post a link. If you copy the title of this thread and paste it in the search bar in YouTube it will bring up several build videos.

Bill
 
Thanks for all your replies folks. I have watched that video before but on watching it again, I am surprised how much the kit has changed. The colour scheme on the box artwork is totally different now and there is no mahogany wood at all now in the kit. The oars in the video are dowel and flat blades but in my kit they are one piece laser cut flat wood so I am pleased that I rounded them off as I did. The kit now does not include a full scale plan like the one in the video and the instruction book is only available as a download. Interesting that, in the video, he cut most of his planks from sheet wood rather than use the kit planking. A bit beyond me to attempt :) He does say that he will have to re cut the bow plank ends to fit the false keel parts as per my instructions, would hate to get that wrong after all the planking is done…..

Thanks again for your support
 
A good start with your topic with building log
And we will try to assist you as much as possible.....
 
Back
Top