• Ships of Scale has incorportated an extra level of security when you log In. Please follow on-screen prompts to acknowledge that you are not a robot via a "Check Box" or a "Pictorial Check Box Puzzle". This is needed due to higher level of AI Activity Security.
  • SUBSCRIBE TO SHIPS IN SCALE TODAY!

    The beloved Ships in Scale Magazine is back and charting a new course for 2026!
    Discover new skills, new techniques, and new inspirations in every issue.

    NOTE THAT OUR NEXT ISSUE WILL BE July/August 2026
  • Win a Free Custom Engraved Brass Coin!!!
    As a way to introduce our brass coins to the community, we will raffle off a free coin during the month of August. Follow link ABOVE for instructions for entering.

HMS Sovereign of the Seas - Bashing DeAgostini Beyond Believable Boundaries

@DARIVS ARCHITECTVS
Kurt, your work really makes me want to get back into Blender and start playing around.

Do you have any favorite tutorials or YouTube channels?
There are SO many tutorials for Blender on YouTube. Just type a phrase including the function you want to learn and the word "Blender" in the YouTube search line and you'll find many helpful tutorials. Teach yourself the functions one at a time, starting with how to create and edit an object with simple shapes, then use the sculpt mode to make more advanced shapes later on. You won't learn Blender if you don't start teaching yourself now. I've been using it for two years now and I'm still a rank beginner. You learn this complex software one small step at a time.
 
Hi Kurt
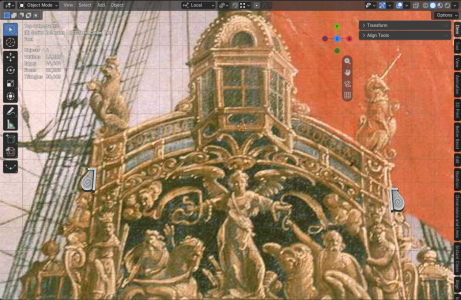
The lion and the unicorn on the top, hat’s going to be a challenge. Also the central stern lantern!!!
Keep up the excellent work. I’m wondering if a CNC machine for wood carving could achieve the subtle 3D effects found in your figures; I’d much rather make them out of wood than plastic.
Cheer my friend
 
Hi Kurt
The lion and the unicorn on the top, hat’s going to be a challenge. Also the central stern lantern!!!
Keep up the excellent work. I’m wondering if a CNC machine for wood carving could achieve the subtle 3D effects found in your figures; I’d much rather make them out of wood than plastic.
Cheer my friend
I was thinking of building the lantern using the etched brass SotS lantern kit from Amati as a basis, adding thin strips of wood to create the wooden members of the structure, and perhaps using 3-D printed resin parts for the tiny details and embellishments. It all depends on if the Amati lantern kit is the proper scale for my model, which has yet to be measured. In my estimation, CNC wood carvings could achieve about 60% if the details of those in the printed 3-D resin parts, mostly due to the wood grain limiting the delicasy of the detail lines and partially because of the how small you can get the cutter on a typical CNC machine. Having too much plastic where wood could be used would detract from the texture of any ship model. The saving grace of using resin to make the decoration is that they will be painted in solid gold, and the grain of wood cannot allow the finest details in the sculptures. The resin will allow most of the details to be visible at the small scale of the parts which I am going to print. Wood grain would dull those details significantly.

When all is said and done, you would have to use a magnifying glass to appreciate the details on my model when it is complete. Hopefully the decorations willl distract the eye from flaws in the model such as my amateur attempts at wood staining and finishing, gaps between planks, and slight misalignments in railings and other symmetrical parts. I know my shortcomings (precision wood cutting/shaping and finishing) and strengths (patience in packing as much small details as possible). One should try their best to hide shortcomings by adding more effort into utilizing one's strengths, all the while improving on the shortcomings.

Adding fully details interior spaces such as the gun decks and soon the stern castle spaces will raise the quality of this model from intermediate to excellent, despite the fact that my skills are at an intermediate level. This model will be the finest model in my life, better than models I will build afterward. Later models will not approach the level of detail devoted to the Sovereign because of builder's fatigue and the desire to build models faster than 10-15 years. :D
 
I was thinking of building the lantern using the etched brass SotS lantern kit from Amati as a basis, adding thin strips of wood to create the wooden members of the structure, and perhaps using 3-D printed resin parts for the tiny details and embellishments. It all depends on if the Amati lantern kit is the proper scale for my model, which has yet to be measured. In my estimation, CNC wood carvings could achieve about 60% if the details of those in the printed 3-D resin parts, mostly due to the wood grain limiting the delicasy of the detail lines and partially because of the how small you can get the cutter on a typical CNC machine. Having too much plastic where wood could be used would detract from the texture of any ship model. The saving grace of using resin to make the decoration is that they will be painted in solid gold, and the grain of wood cannot allow the finest details in the sculptures. The resin will allow most of the details to be visible at the small scale of the parts which I am going to print. Wood grain would dull those details significantly.
That makes sense Kurt totally agree; I imagine that at that scale, nothing will look quite as crisp as the figures do in the software on your PC.
Speaking of patience and making seemingly impossible adjustments, if I recall correctly, did you use blocks to make the 2.5mm or 3mm cannons rigging? That question came up when I tried to thread a line through one of the 2.5mm blocks I bought yesterday; I believe you had to enlarge the holes in every single one of the 100,000 million blocks you usedROTFROTFROTFROTFROTFROTF, right?, Yesterday I just gave up; there was absolutely no way to get that blasted thread through, not by burning and stretching it, not with CA glue, nothing!! nichts!!! nada!!
 
That makes sense Kurt totally agree; I imagine that at that scale, nothing will look quite as crisp as the figures do in the software on your PC.
Speaking of patience and making seemingly impossible adjustments, if I recall correctly, did you use blocks to make the 2.5mm or 3mm cannons rigging? That question came up when I tried to thread a line through one of the 2.5mm blocks I bought yesterday; I believe you had to enlarge the holes in every single one of the 100,000 million blocks you usedROTFROTFROTFROTFROTFROTF, right?, Yesterday I just gave up; there was absolutely no way to get that blasted thread through, not by burning and stretching it, not with CA glue, nothing!! nichts!!! nada!!
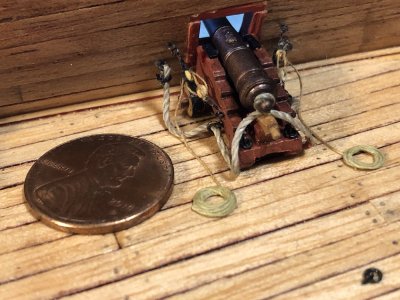
The cannon carriage gun tackles used 1.5mm Blocks from @zoly99sask at Dry-Dock Models and Parts. Those are the smallest blocks I could find. I used thin sewing thread to rig those tackles. ALL the guns are rigged so, inside and out... because I'm crazy. ROTF
1397 Glue Coils Over End of Fall.jpg
 
The cannon carriage gun tackles used 1.5mm Blocks from @zoly99sask at Dry-Dock Models and Parts. Those are the smallest blocks I could find. I used thin sewing thread to rig those tackles. ALL the guns are rigged so, inside and out... because I'm crazy. ROTF
Man, you're really crazy!!! 1,5 mm:oops: I ordered the 2.5 blocks, and I'm going to have to start a thread just to figure out how to rig them, otherwise, I'll have to drill through every single one of them, hahaha. As you know, I don't like dummy cannons either, so I'm going to put all the cannons on carriages to;)
 
Man, you're really crazy!!! 1,5 mm:oops: I ordered the 2.5 blocks, and I'm going to have to start a thread just to figure out how to rig them, otherwise, I'll have to drill through every single one of them, hahaha. As you know, I don't like dummy cannons either, so I'm going to put all the cannons on carriages to;)
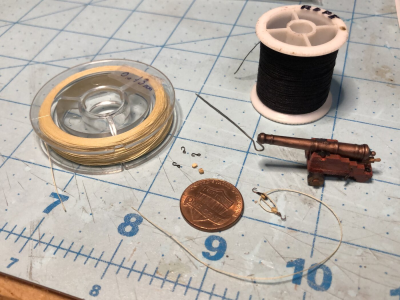
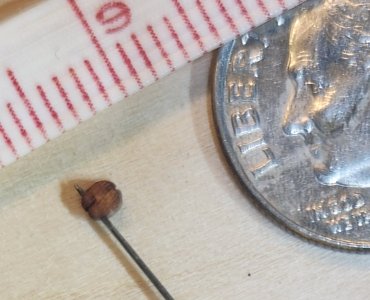
You have to use an Archimedes drill and a VERY small drill bit to open up the holes in the 1.5mm blocks, without applying enough force to split them. Stiffen the end of the 0.13mm thread to rove the line through, and make left and right hand gun tackle sets. Black thread was used for the block strops and the hooks are the very smallest copper etched hooks from HiS Model. The hooks are very delicate. All the work is performed using tweezer and a magnifying headset.
1789792142634.png
 
You might try these: ( The smallest one )
Broach set.

You can find cheaper sets, but these have 5 edges. The cheaper ones only have 3.
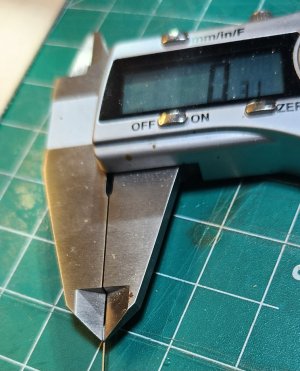
We’re talking about holes of 0.2 mm or smaller, my friend; those blocks are on the millimeter scale, 1.5 to 2 mm. The finest Swiss-made broach I’ve seen is 0.4 mm. It’s microscopic work that requires a great deal of patience.
 
You might try these: ( The smallest one )
Broach set.

You can find cheaper sets, but these have 5 edges. The cheaper ones only have 3.
Those are far too large, and pushing a tool into the block will instantly split it. The cutting edges on the tip of a very small drill bit will chew their way through with minimal force pushing the bit into the material. If you push too hard without the cutting action, the brittle boxwood block simply splits in half. You should meet resistance as you twist the drill. That's how you tell it is cutting. I've done HUNDREDS of these. You get get the feel of it after breaking a few blocks.

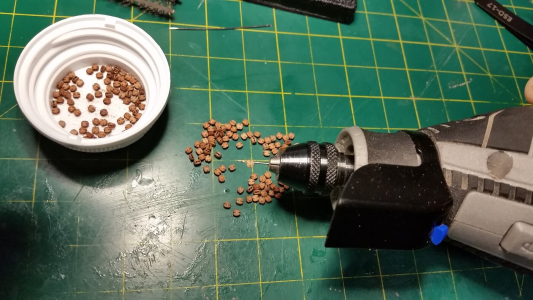
You may also use a dremel and slowly drive the rotating bit into the hole with the block pinched between your thumb and forefinger (just don't drill your thumb!), and shown below on 2mm blocks which are used for the largest guns on the lower gun deck. This method is faster. You don't have to press the bit in hard, just let the bit do the cutting. Practice makes you really good at this, and it's actually easier than you think. Beautiful Blocks from Model Expo have well defined holes in their blocks, so locating where to insert the spinning drill bit is easy.
1789836193276.png
 
Last edited:
Those are nice looking blocks.
broach 1.jpg


You don't push the broach through. You just spin it with your fingers and it works it's way through.
I have never broken one, but I've only done a few. I have broke a lot of carbide bits trying to do it with a mill..


broach 2.jpg

It has 5 edges and the smallest tip is less than .31mm.
 
Those are nice looking blocks.
View attachment 637761


You don't push the broach through. You just spin it with your fingers and it works it's way through.
I have never broken one, but I've only done a few. I have broke a lot of carbide bits trying to do it with a mill..


View attachment 637762

It has 5 edges and the smallest tip is less than .31mm.
So, the broach is basically the same as a small round needle file...
 
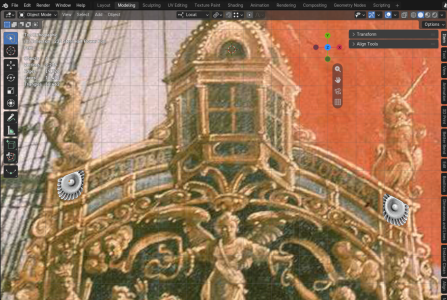
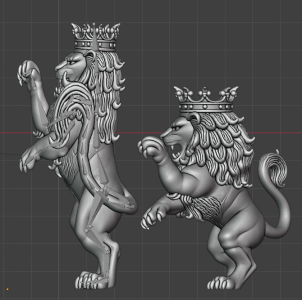
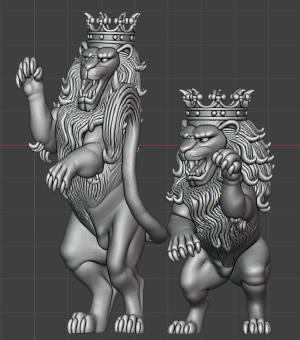
Work has begun on the taffrail English lion sculpture. The rampant lion on the right is the 3-D object I downloaded as a basis. Making this 3-D figure completely from scratch, starting from a meta-cube primitive shape, would be a living hell for me at my skill level. The one on the left is modified to reshape it using an internal skeleton I inserted to proportion it to the decoration on the ship, and it needs a few more sculpting tweaks and addition of a kite shield to be complete. I am wondering how the coat of arms on the Norman kit shield should appear and wonder if they should be in color or gold like the rest of the decorations. Finding a suitable 3-D model to form the basis for the Scottish unicorn on the starboard side of the taffrail is proving to be a challenge.

1789961185790.png

1789961239367.png
 
Last edited:
Back
Top