• Ships of Scale has incorportated an extra level of security when you log In. Please follow on-screen prompts to acknowledge that you are not a robot via a "Check Box" or a "Pictorial Check Box Puzzle". This is needed due to higher level of AI Activity Security.
  • SUBSCRIBE TO SHIPS IN SCALE TODAY!

    The beloved Ships in Scale Magazine is back and charting a new course for 2026!
    Discover new skills, new techniques, and new inspirations in every issue.

    NOTE THAT OUR NEXT ISSUE WILL BE July/August 2026
  • Win a Free Custom Engraved Brass Coin!!!
    As a way to introduce our brass coins to the community, we will raffle off a free coin during the month of August. Follow link ABOVE for instructions for entering.

HMS Surprise - Vanguard 1:64

Joined
Jun 16, 2026
Messages
17
Points
48

I started this a bit earlier than I planned since I didn't expect delivery of the kit before October. I originally got interested in building the Surprise from watching videos on Artensania Lantina's 1:48 kit. But after studying it for a while I decided to that building the model at that scale would require me to first buy a bigger house. That made Vanguard's 1:64 scale kit look more reasonable in spite of its higher price. However, I do lose a few features I would like to include, lighting and sails. I will try to add these but there are some problems to overcome to do that. One of the main drawbacks of taking on this kit is the lack of anyone else posting build information on this model. While I am not new to building wood models, I am not expert either. While "Modelkit Stuff" has started a build series on the kit, he isn't moving fast enough to be of much help.

The Vanguard Kit comes in two versions. One for the historical HMS Surprise which was armed with cannonades. The other is the fictional version from Patrick O'Brian's novels which was armed with nine-pound long guns. I went with the fictional version because I like the look of long guns :) Both versions are based of the historic ship except for the change of guns and a few additions based on the movie, Master and Commander: The Far Side of the World.

This is what the box cover looks like:
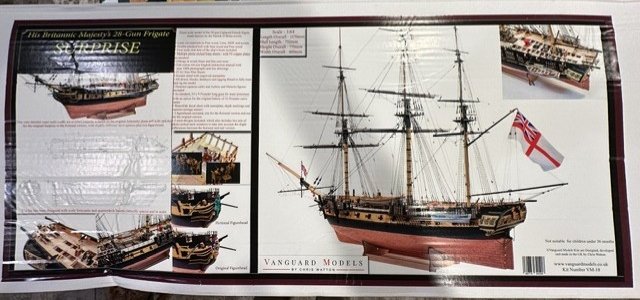
Box.jpg
 
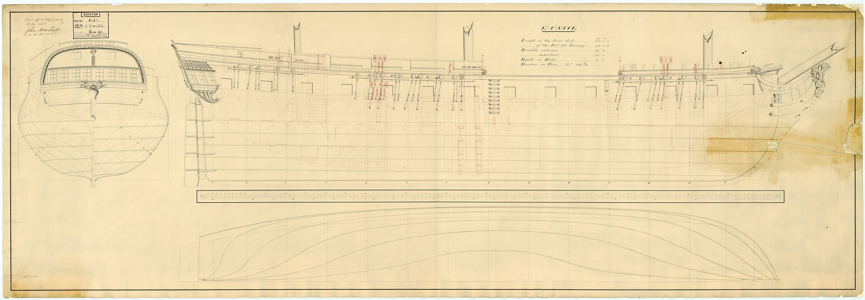
You are lucky in that there are a number of high resolution contemporary drawings of Unité (Surprise) available to compare with the kit. Vanguard does have a very good reputation for much higher quality compared to the other brand so win-win with the smaller scale and brand!
Allan

Low resolution version of one of the drawings on the Wiki site.
1788980802861.png
 
Watching some Youtube videos of the Artisania Latina HMS Surprise is what actually got me into the hobby (all two weeks of it now!), so I will be following this build log with interest! (While trying to build my tiny beginner model...)
 
There's quite a few build logs for this kit, just not on this forum.
Building logs like this one are nice but they don't address the kind of problems I expect to run into. Detail building videos like the one Modeltek is doing are very helpful for spotting problems before you run into them. But I am searching through all I can find. I will probably watch and follow some on other manufacturer's HMS Surprise kits as well.
 
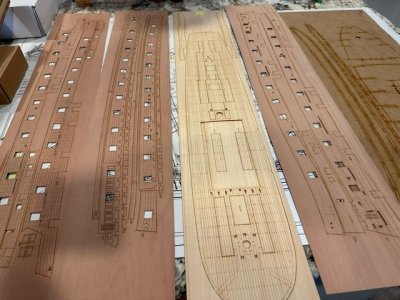
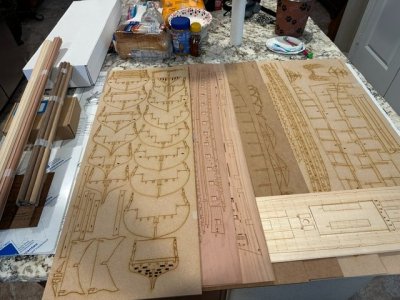
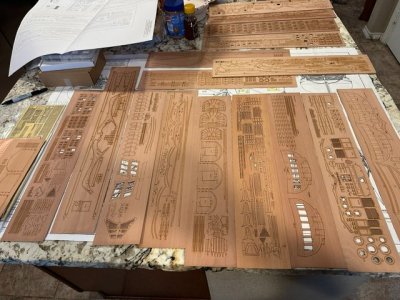
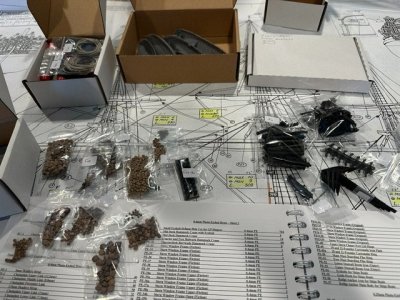
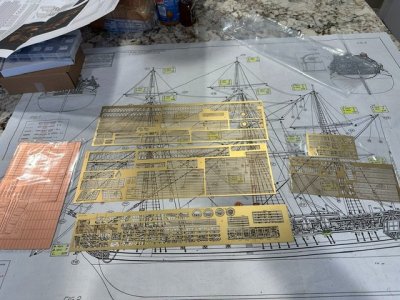
I consider the Vanguard Surprise kit as a "hybrid wood" model kit. A term I made up to highlight the difference in what is included in this kit versus others I have made. Wood kits have been following the pattern of the plastic models for some time. Plastic models have been including not plastic parts, mostly photoetch, for some time. Wood kits have for the most part kept their addons to resin cast decorations and metal parts. Vanguard takes this to a new level with laser engraved parts, photoetch, metal and 3D printed (resin) parts.

So here is a look at what comes in the box:

Unboxing 1.jpeg

Unboxing 2.jpeg

Unboxing 3.jpeg

Unboxing 4.jpeg

Unboxing 5.jpeg
 
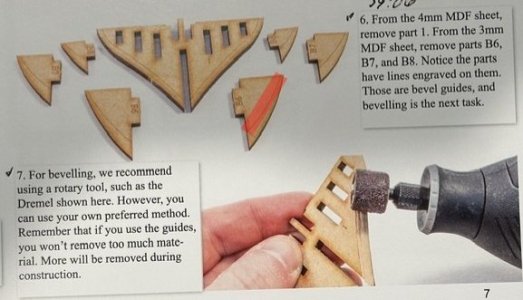
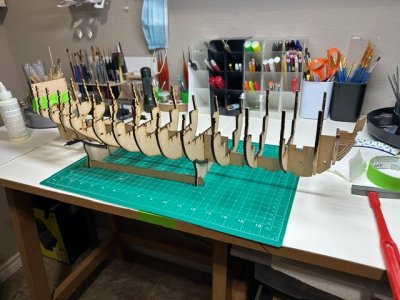
The first few steps of the build are making the construction stand (there is a separate stand for display) and assembling the false keel and bulkheads which gets you up to Step 26 in the build. What is unique about Vanguard's method of building is almost none of the parts are glued. Only the small pieces for shaping the bow and stern are glued on. Which also brings us to another feature of how Vanguard does things. On the edges of the bulkheads and spacers they "burned" a laser line showing where you should bevel the piece too. This lets your rough in the shape of the hull before assembly. Later it will have to be finished but this allows you to do the bulk of the wood removal with the rotary tool. The instructions for the bow piece is shown below as well as the model at end of Step 26.

Beveling.jpg

Step 24.jpeg
 
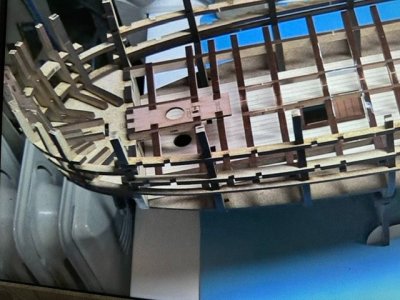
Things from here on move pretty fast because most of the work is just snapping pieces into place without gluing. The structure of the hull is more like a lego build. There are a few steps where the limewood decking is glued on so that the viewer will see wood flooring when looking down through open hatches. I did run into a few typos like pieces named "OHD1' in the instructions but "ODH1" on the wood sheets. At step 68 I ran into a piece that didn't match the pictures. The side pieces for GDL2 were shorter than the piece pictured in the manual. But it was obvious that it was the right piece. The area around the foremast supports is pictured which contain the piece. The only parts glued in this picture are the bow structures, the foremast guide and the lower deck. All the bulkheads and framing to align them are still just snapped together.

Step 68.jpeg
 
This takes me up to Step 124 with still most of the work just snapping pieces into place. For the most part the laser cutting is so accurate that nothing else is needed to hold them in place. At this point the instructions have me glue things down by "brush slightly diluted wood glue into all joints and pegs to finalize this part of the construction." I did use super glue to tack down a few pieces that wouldn't stay in place without being held. Because there was so little glue required up to this point, I finished these first 124 steps in less than a week.

Step 124.jpg
 
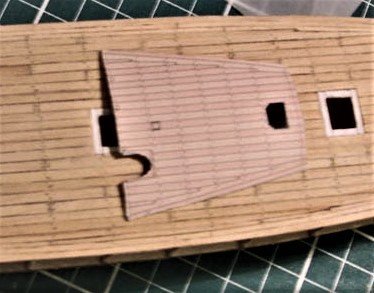
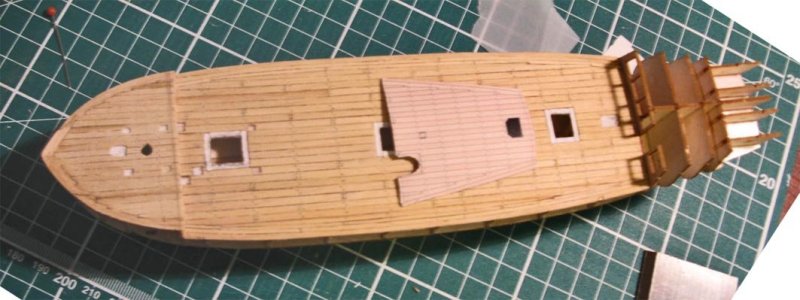
One of the small criticisms I have of the Vanguard models is that the kit offers a one piece deck. That always shows because the grain of the wood gives it away. I suggest you use a very thin light coloured veneer and lay your planks individually down on the surface of the one piece deck. I attach an illustration to show the difference beteen a printed deck and a properly laid one. The printed quater deck is lying on the individually planked main deck. One thing to remember is that no plank is exactly like its neighbours.

Wolf  08 decked - Copy.jpg

Wolf  08 decked.jpg
 
I see what you are talking about although I don't think the color is that far off. Modeler's tend to try for a too much wood look and forget they sanded these decks with sandstone, salt water and sand almost daily. This supposedly creates a dried look of bone-white or very light gray. The Vanguard deck is probably pretty close to the right color. It just suffers from too much consistency. I have already glued down the gun deck so may not be able to do much to it. But I think using a stain like a wash might create enough variation in color. I just need to find a way to test that. Here is what Google AI gave as an example:
1789228575475.png
 
My Society runs a monthly Zoom meeting at which we present our work, cover research projects and discuss tools, materials and techniques. Althought based in the UK, we have several members in the USA and Canada including two directors of the Nautical Research Guild. The meetings are at 1830 London time on the fourth Sunday of each month. Would you be prepared to join us as a guest and give us a talk on the build of this model? If you would please make contact through our website at <modelshipwrights.org>. I visited the owner of Vanguard Models last year and correspond with him regularly. He is working flat out at the moment trying to meet the demand for kits of HMS Surprise, but he should not be surprised by the demand for the Surprise.
 
HMS Speedy by Vanguard models. The full gun tackes and breeching lines help.
Are the blocks and gun rigging instructions for the guns in the photo from Vanguard? The reason I ask is that they appear to be over rigged using double blocks on small caliber guns.

Allan

.
From Adrian Caruana, The History of English Sea Ordnance, Volume II, page 386.

TACKLES
The Running out tackles.
....................The running out tackle consisted of a rope (the fall) and two blocks (both single except for 32-pdrs which had one single and one double) each equipped with a hook. The single block was fitted to an eye-bolt on the side of the carriage, and the second to a ring bolt by the side of the port......

The Train tackle
Ther train tackle (or relieving tackle) was also composed of a single and a double block for 32-pdrs, and two single blocks for lesser calibers.........


Yes, the blocks on my model came out of a spare parts box and were not supplied with the kit. As it would have delayed the build I pressed on with what was available, They are oversize and double which is unfortunate.
 
Are the blocks and gun rigging instructions for the guns in the photo from Vanguard? The reason I ask is that they appear to be over rigged using double blocks on small caliber guns.

Allan

.
From Adrian Caruana, The History of English Sea Ordnance, Volume II, page 386.

TACKLES
The Running out tackles.
....................The running out tackle consisted of a rope (the fall) and two blocks (both single except for 32-pdrs which had one single and one double) each equipped with a hook. The single block was fitted to an eye-bolt on the side of the carriage, and the second to a ring bolt by the side of the port......

The Train tackle
Ther train tackle (or relieving tackle) was also composed of a single and a double block for 32-pdrs, and two single blocks for lesser calibers.........
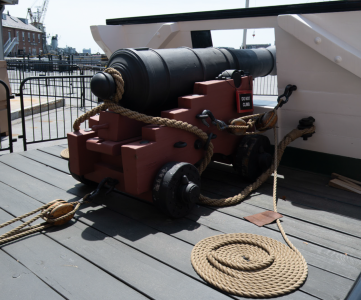
I have seen them done both ways so not certain what the standard should be. May also be dependent on the weight of gun. In this picture from the USS Constitution exhibit shows single on the front but double on the back one.
1789320572776.png
 
I have seen them done both ways so not certain what the standard should be. May also be dependent on the weight of gun. In this picture from the USS Constitution exhibit shows single on the front but double on the back one.
Sorry for any confusion Kennon. The American ships may have been rigged differently including USS Constitution which carried 24 pounders like the Armstrong Frederick pattern in the photo you posted as well as carronades. I was referring to English ships as the book is The History of English Sea Ordnance. Can you share any information you found based on the contemporary sources showing double blocks for cannons smaller than 32 pounders on English ships? There seems to be more exceptions than we can count on English ships of the 18th century, and it would be interesting to see this one as well. Thanks in advance.
Allan
 
Since most of what I have seen (on YouTube), I can't verify since they seldom say where they got their information from. But I do have a copy of "Ship Modeler's Shop Notes" published by Nautical Research Guild in 1979 which is a wealth of trivial information. To quote it "Port tackles are used to run the gun out the port; this consists of a single block hooked to eyebolts on either side of the carriage and goes to either single or double blocks hooked to ring bolts on both sides of the port. Train tackles are used to run the gun in; to assemble this tackle, hook a double block to the hind axtree of the carriage and then reeve it through a single block secured to an eyebolt in the deck." This was in regard to tackle of 2" circumference which based on their table would be for a 9 pound gun. Lighter guns would use 1-1/2" rope and heavier (32 pounder" would use 3" rope.

But later they use another reference (Atkinson and Clarke) and gave the following for block sizes:
First Rate: 5 to 10" double and single block.
The same for Second though Fifth.
Sixth Rate: 6-1/2" rope with double and single block. 5" rope with single, common.

Based on this the single connected to a double was the standard regardless of gun size. As the gun got heavier only the size of the rope (which of course would mean larger blocks) changed. The sources used were from London in 1812 and 1814.
 
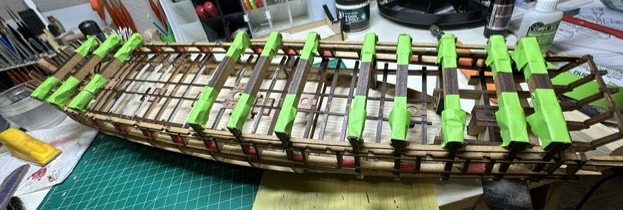
Now the sanding starts. But even this prep of the hull for boarding is done different by Vanguard. To support the very thin tops of the bulkheads, Vanguard included parts to make "jigs" to provide support. These were assembled from three strips of wood begged together. These would brace the tips of the bulkheads and be pinned in place by more pegs so they could be later removed (they will be used again later in the build). The instructions indicate that the pegs could be glued with a "spot of glue" but would have to be separated later.

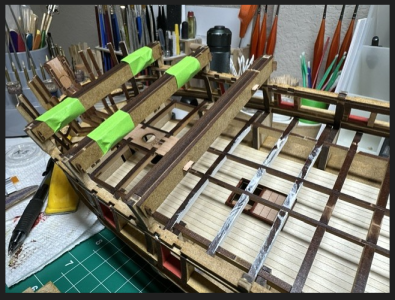
I suspect that the three boards could be glued together using the pegs to hold their alignment and only the end pegs needed to be removable. But just in case I just wrapped them in masking tape. I also used masking tape on the end pegs (just the edge so it wouldn't block sanding) to hold them in place. The kit includes extras in case you lose them, but I didn't want to fool with that happening.

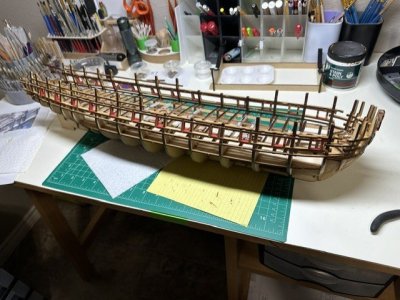
The first image shows the first two jigs with just tape on the three-piece structure. The second picture shows them all in place so that I can cand the outer hull bulkheads into shape. This will complete steps 127 through 131. It only required some minor sanding to give the right slope to the edges of the bulkheads since most were roughed into shape based on the bevel lines etched into the pieces.

1789331821108.png

1789331871308.png
 
Back
Top