Earlier this year a friend provided me with a box containing all 100 weekly installments of the Del Prado "Build the HMS Victory". I hope here to detail the build. Will initially attempt to complete each weekly issue a day until it proves impracticable to achieve as I allow around two to three hours per day to my hobby and as we progress some installments will take a little longer than a days time allotment. I'm still wrestling with how to post photos so once I've resolved that issue will make a start. Hopefully a post for each installment.
-

Win a Free Custom Engraved Brass Coin!!!
As a way to introduce our brass coins to the community, we will raffle off a free coin during the month of August. Follow link ABOVE for instructions for entering.
-

PRE-ORDER SHIPS IN SCALE TODAY!
The beloved Ships in Scale Magazine is back and charting a new course for 2026!
Discover new skills, new techniques, and new inspirations in every issue.
NOTE THAT OUR FIRST ISSUE WILL BE JAN/FEB 2026
You are using an out of date browser. It may not display this or other websites correctly.
You should upgrade or use an alternative browser.
You should upgrade or use an alternative browser.
Look forward to your build.
- Joined
- Mar 22, 2024
- Messages
- 396
- Points
- 168

Interesting. I have been given a 1:100 Heller Victory in a sack(yes) which I am still contemplating - started (just a tiny tiny bit) by a previous owner, but not seriously damaged and it is mostly there. I will follow your progress with interest.
This will be interesting to followEarlier this year a friend provided me with a box containing all 100 weekly installments of the Del Prado "Build the HMS Victory". I hope here to detail the build. Will initially attempt to complete each weekly issue a day until it proves impracticable to achieve as I allow around two to three hours per day to my hobby and as we progress some installments will take a little longer than a days time allotment. I'm still wrestling with how to post photos so once I've resolved that issue will make a start. Hopefully a post for each installment.
Attaching photos is very easy.......
Click on at the bottom "Attach files"
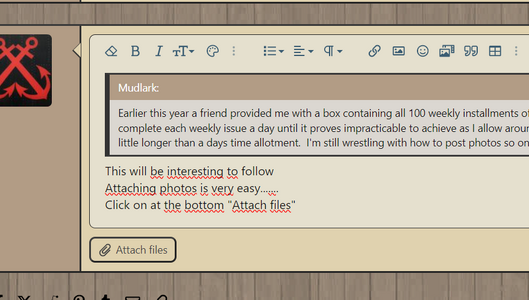
search for the photo you want to post
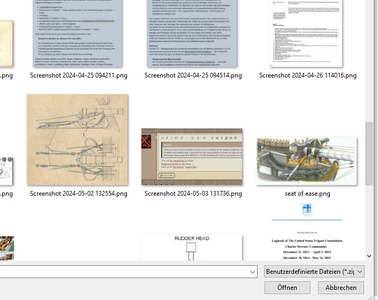
Mark th ephoto and click on (I think in english it is ) "open"
now the photos are at the bottom of your post, but still not in your text
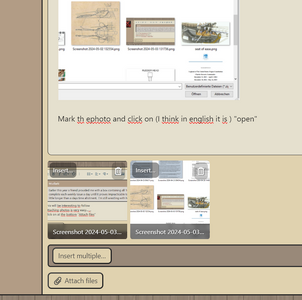
click on insert and you will see "thumbnail" or "Full image" - decide and after a click there the photo is included in the text, where your cursor was before -> now it is inserted into your text / post
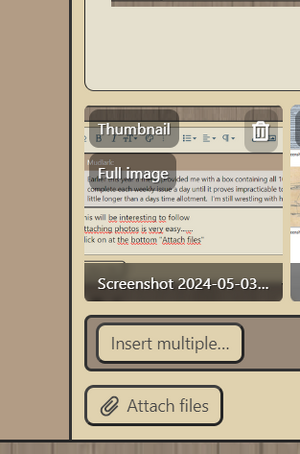
Do not forget to click on "Post Reply" - finished
Very fast and easy to make - you will see
if you like you can make also a test post here
Practice Testing your post here
Here is where you can make a test of your post before going live with it.
shipsofscale.com
Thank you all for your encouragement, my estimate is around 1500-2000 hours for the build especially as I'm a total novice on the subject of rigging and the application of coppering for the lower hull.
So a start was made and I immediately diverted away from my concept of doing each installment sequentially. The keel for this kit comes in three parts and is suppled in issues one, seven and 18. There was a risk here that assembling the keel in stages after having already fixed bulkheads in place could lead to a twisted keel. The keel parts had a fair bit of play so used the work mat to line them up. Also took the work stands from isse three and assembled them. By the end day one arrived at this.
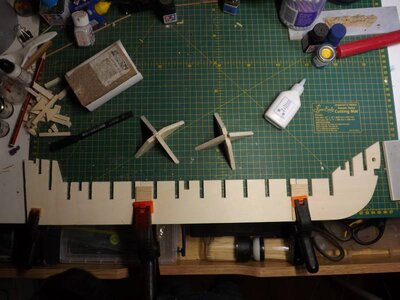
Reverting back to the plan, installment 2 is the first bulkhead and some reinforcement for the bow. The plywood used is not exactly first grade.
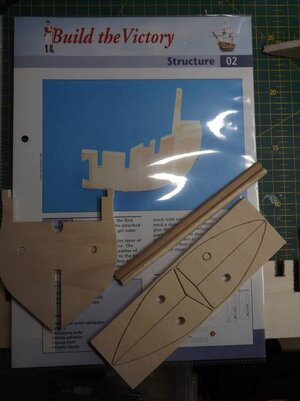
The dowel supplied is to assist in aligning the parts. I did use it but struck an issue with getting the bow reinforcement to fit flush against the bulkhead. If doing this again would give consideration to dispensing with the dowel.
So end of day two.
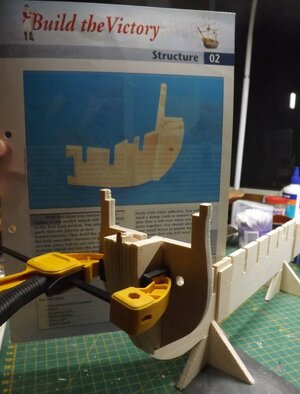
So a start was made and I immediately diverted away from my concept of doing each installment sequentially. The keel for this kit comes in three parts and is suppled in issues one, seven and 18. There was a risk here that assembling the keel in stages after having already fixed bulkheads in place could lead to a twisted keel. The keel parts had a fair bit of play so used the work mat to line them up. Also took the work stands from isse three and assembled them. By the end day one arrived at this.

Reverting back to the plan, installment 2 is the first bulkhead and some reinforcement for the bow. The plywood used is not exactly first grade.

The dowel supplied is to assist in aligning the parts. I did use it but struck an issue with getting the bow reinforcement to fit flush against the bulkhead. If doing this again would give consideration to dispensing with the dowel.
So end of day two.

Mudlark, I'm pulling up my shop stool and looking forward to your build. Should be a fun project! Magic Mike
Thankyou all for looking in and the kind comments.
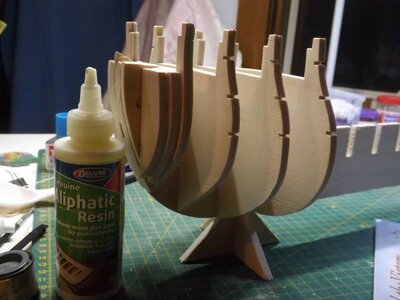
Were at that stage where the activity is is focused on fitting bulkheads. There is one in most of the early installments. Installment three was the fixing of the remaining bow reinforcements. I did opt not to use the dowel rod through the reinforcements as it did prevent the pieces fitting flush against the keel.
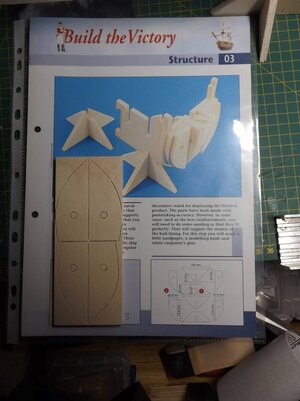
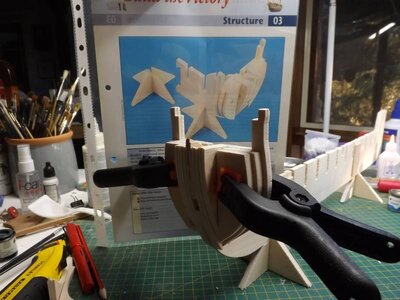
Installments four to six were the next three bulkheads.
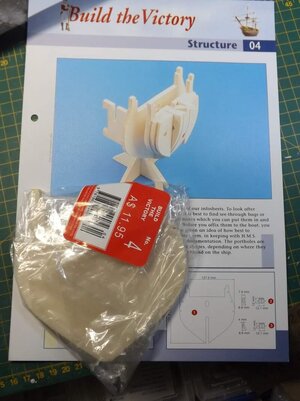
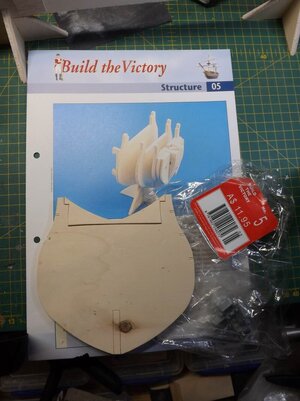
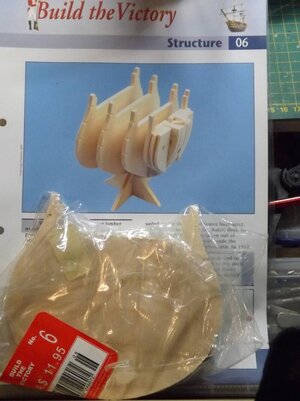
Installment seven is the extension of the keel assembled in the very beginning.
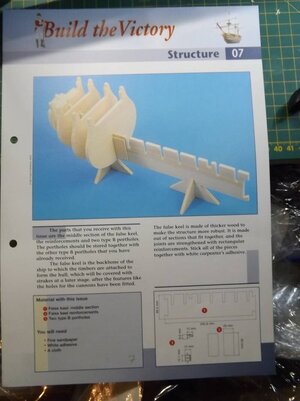
So at the end of day three we have reached this stage.
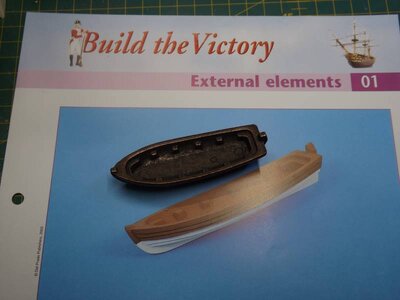
The construction sheets are divided into three categories, Structure, Rigging and External elements. The first installment included a ships boat in metal. Whilst acceptable opted to visit my LNMS (Local Nautical Modelling Shop) and obtain a couple of replacements,
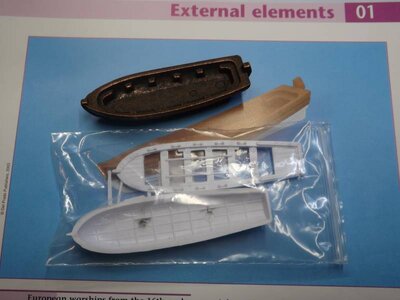
The other components being provided in each installment are a number gunports, or as they are referred to in the instructions "portholes'.
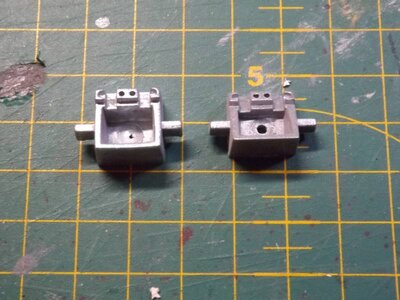
That is all for this update. I know I have accelerated the build in not sticking to my plan of one installment a day. I suspect that I will eventually fall behind schedule.
Were at that stage where the activity is is focused on fitting bulkheads. There is one in most of the early installments. Installment three was the fixing of the remaining bow reinforcements. I did opt not to use the dowel rod through the reinforcements as it did prevent the pieces fitting flush against the keel.


Installments four to six were the next three bulkheads.


Installment seven is the extension of the keel assembled in the very beginning.

So at the end of day three we have reached this stage.

The construction sheets are divided into three categories, Structure, Rigging and External elements. The first installment included a ships boat in metal. Whilst acceptable opted to visit my LNMS (Local Nautical Modelling Shop) and obtain a couple of replacements,


The other components being provided in each installment are a number gunports, or as they are referred to in the instructions "portholes'.

That is all for this update. I know I have accelerated the build in not sticking to my plan of one installment a day. I suspect that I will eventually fall behind schedule.
Now up to bulkhead number 6 or installment 10.
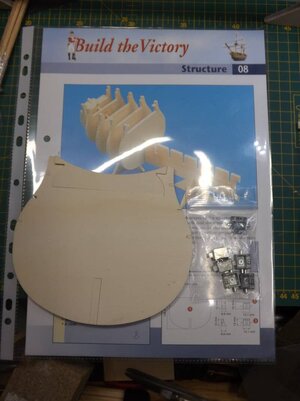
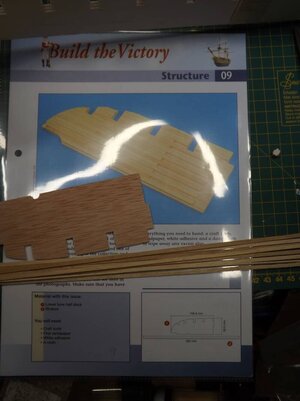
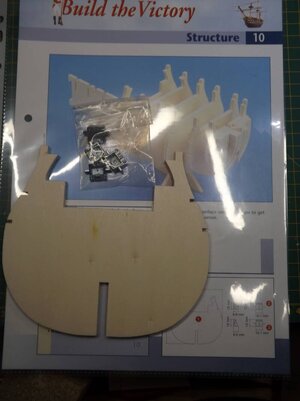
I have skipped over installment 9, the task here is to plank a onehalf segment of the lower bow deck. I found that bulkhead number 5 when fitted to the keel had a fair amount of play so dry fitted both bow deck segments and used them to brace and true up the bukhead.
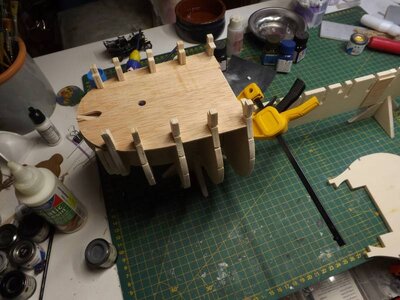
My reasons for skipping the task in installment 9 is that the suggested technique was mark a line 1.5 mm in from the inside edge of the half bow segment and then plank out to the outside. I wanted the deck planking to fit snuggly up against the bulkheads. A more pressing issue is of the 10 pieces of planking material provided only 4 were fit for purpose, the planking should be 3mm x 1.5 mm. I'll give delPrado the fact all the planking was 3 mm wide, the depth was another question. Some planks were 1.5 on one side to just over 2 on another or tapered from 1.5 mm at one end to less than 0.5 mm at the other. A trip to Float-A-Boat will yield some better material.
Bulkhead number six was also a loose fit so used a square a clamp and a block to true it up. I can see that with a few more projects in the plan a building slip may be a worthwhile investment.
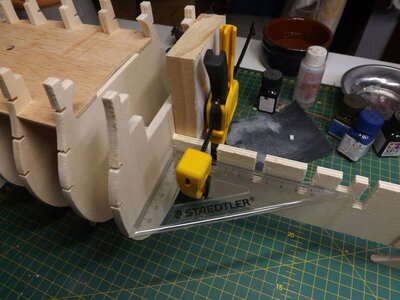
Installment 11 provides bulkhead seven and more gunports. In the instructions it is at this point we begin to attach the gunports to the bulkheads. As previously mentioned there are two types of gunports provided, the first is designed to fit the upper hull and has small locating tabs the second designed for the second tier are larger with along with their locating tabs. The first gunports fit neatly into the slots in the bulkhead and are almost flush with the edge of the bulkhead.
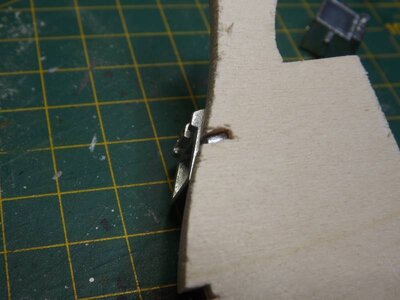
The second type sit proud of the bulkhead about 1.5 mm which is the same as the thickness of the hull planking material provided.
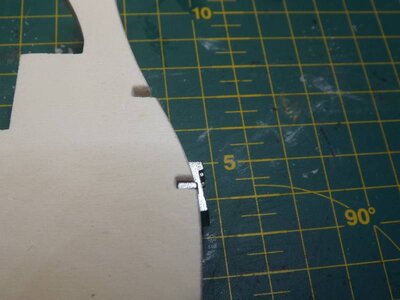
The instructions suggest to sand down the locating slot to fit the gunports in place.so they follow the line of the bulkhead. I have an issue here in that the outer edge of the gunports should sit flush with the planking (not the bulkhead) in which case the the second larger ones are correct as long as we don't deepen the locating slots. But using this premise it means the the first smaller type will end up recessed in the planking. My solution is to defer placing any of the gunports until I'm ready to start planking to see how it fits. The impact of this decision is my main efforts for the upcoming week will be to continue with more bulkheads.


I have skipped over installment 9, the task here is to plank a onehalf segment of the lower bow deck. I found that bulkhead number 5 when fitted to the keel had a fair amount of play so dry fitted both bow deck segments and used them to brace and true up the bukhead.

My reasons for skipping the task in installment 9 is that the suggested technique was mark a line 1.5 mm in from the inside edge of the half bow segment and then plank out to the outside. I wanted the deck planking to fit snuggly up against the bulkheads. A more pressing issue is of the 10 pieces of planking material provided only 4 were fit for purpose, the planking should be 3mm x 1.5 mm. I'll give delPrado the fact all the planking was 3 mm wide, the depth was another question. Some planks were 1.5 on one side to just over 2 on another or tapered from 1.5 mm at one end to less than 0.5 mm at the other. A trip to Float-A-Boat will yield some better material.
Bulkhead number six was also a loose fit so used a square a clamp and a block to true it up. I can see that with a few more projects in the plan a building slip may be a worthwhile investment.

Installment 11 provides bulkhead seven and more gunports. In the instructions it is at this point we begin to attach the gunports to the bulkheads. As previously mentioned there are two types of gunports provided, the first is designed to fit the upper hull and has small locating tabs the second designed for the second tier are larger with along with their locating tabs. The first gunports fit neatly into the slots in the bulkhead and are almost flush with the edge of the bulkhead.

The second type sit proud of the bulkhead about 1.5 mm which is the same as the thickness of the hull planking material provided.

The instructions suggest to sand down the locating slot to fit the gunports in place.so they follow the line of the bulkhead. I have an issue here in that the outer edge of the gunports should sit flush with the planking (not the bulkhead) in which case the the second larger ones are correct as long as we don't deepen the locating slots. But using this premise it means the the first smaller type will end up recessed in the planking. My solution is to defer placing any of the gunports until I'm ready to start planking to see how it fits. The impact of this decision is my main efforts for the upcoming week will be to continue with more bulkheads.
Last edited:
Studied the gunport question some more. searching through the other installments came across the gunport cover (I'm sure it has a proper name) this suggests that the gunports slots need to be deepened so the gunport is flush with the bulkhead.
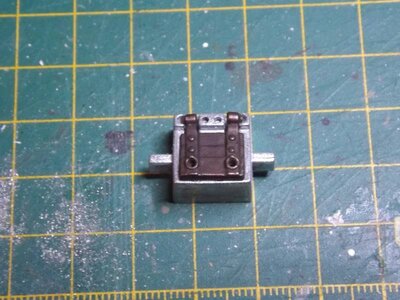
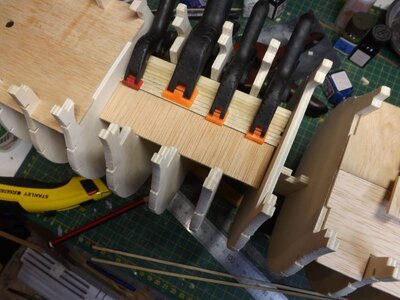
I need to own up, I've failed. Despite my best intention to go installment by installment I skipped a few and concentrated on the bulkheads. Also forgot to take photos along the way. By the end of last night, 10 days into the build, was up to the second last bulkhead (installment 25). The deck pieces in the photo below are just dry fitted. In theory you are supposed to partially plank each of the six deck sections individually then glue them down at some stage and fill in the spaces. I suspect that anyone following this may have found themselves with a fair amount of fettling to get the deck planking neat. The bow and middle deck sections are some of the skipped installments.
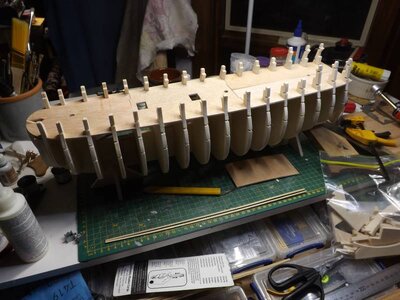
Before doing the gundeck the hold deck section needs to be installed and planked. (Installment 15). The instructions call for the hold timber to be planked and then glued in place. My timber was a few mm to short so have opted to glue the deck plate in first and then plank.
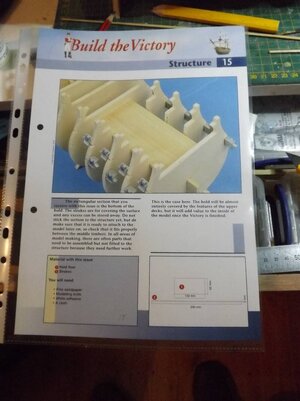
On the subject of representing caulking of the deck at 1:100 scale have copied from other members on the forum and opted to mark each side of the deck plank with a HB pencil.
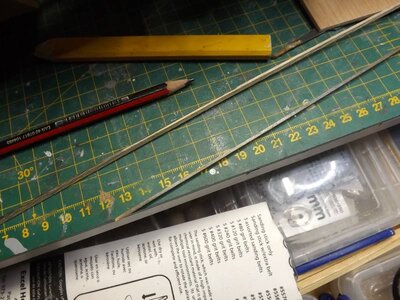
Progress to date.
I'm still finding that the quality of the material provided for the deck planking leaves a lot to be desired. Planks should be 3 mm x 1.5 mm. So far I have about a 60% acceptance rate. The the other 40% of the planks are under sized ie less than 3mm wide or both thinner or greater than 1.5 mm (sometimes both depending on where you look along the plank). For the main deck have opted to replace the material with some lime wood from my Local Nautical Model Shop. Life is too short to spend time resizing planks.
More to come.

I need to own up, I've failed. Despite my best intention to go installment by installment I skipped a few and concentrated on the bulkheads. Also forgot to take photos along the way. By the end of last night, 10 days into the build, was up to the second last bulkhead (installment 25). The deck pieces in the photo below are just dry fitted. In theory you are supposed to partially plank each of the six deck sections individually then glue them down at some stage and fill in the spaces. I suspect that anyone following this may have found themselves with a fair amount of fettling to get the deck planking neat. The bow and middle deck sections are some of the skipped installments.

Before doing the gundeck the hold deck section needs to be installed and planked. (Installment 15). The instructions call for the hold timber to be planked and then glued in place. My timber was a few mm to short so have opted to glue the deck plate in first and then plank.

On the subject of representing caulking of the deck at 1:100 scale have copied from other members on the forum and opted to mark each side of the deck plank with a HB pencil.

Progress to date.

I'm still finding that the quality of the material provided for the deck planking leaves a lot to be desired. Planks should be 3 mm x 1.5 mm. So far I have about a 60% acceptance rate. The the other 40% of the planks are under sized ie less than 3mm wide or both thinner or greater than 1.5 mm (sometimes both depending on where you look along the plank). For the main deck have opted to replace the material with some lime wood from my Local Nautical Model Shop. Life is too short to spend time resizing planks.
More to come.
My build diary says it is 26 days since the keel was laid. Reviewing my objective to do one installment a day realised an error in my plan. Each weekly installment may actually have several worksheets. The instructions are divided into Structure (76 sheets), External Details (30 sheets) and Rigging (31 sheets). So my plan should be one worksheet per day however so far after 32 hours effort spread over 26 days have completed 18 worksheets (all structure). Sorry about the stats it's something which I always seem to have done.The main thing is I'm really enjoying the build.
Have been spending time fitting gunports and planking the lower deck. Glued the six sections in place and with a little clamping achieved a reasonable alignment. Started the planking from the centre moving outwards.
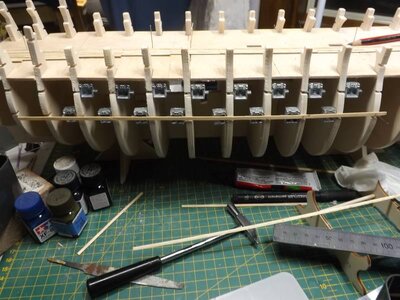
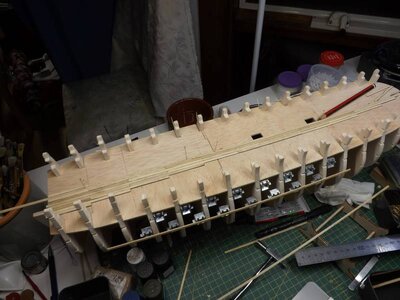
As each run of decking required two lengths of planking devoted some time to matching the provided material for width. Then marked the side of each section with a hb pencil and cut to 100mm lengths.
So we have reached this stage.
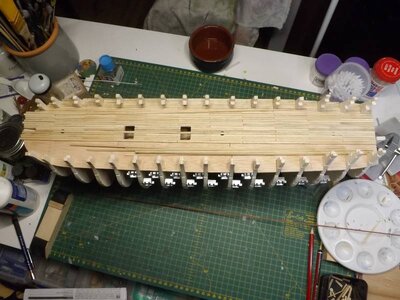
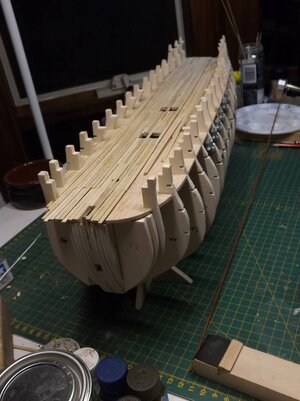
Once finished the decking will give it a sand and then decide on what stain to use. The instructions suggest a very orange colour. Looking at the website for HMS Victory a more grey colour would seem appropriate, my local hardware has a good candidate but it only comes in a 4 litre can. Other option is after a sand to use straight satin varnish. Any suggestions?
Before fitting any further gunports will trim the deck to fit the ribs and also shape the hull at the bow and stern.
Have been spending time fitting gunports and planking the lower deck. Glued the six sections in place and with a little clamping achieved a reasonable alignment. Started the planking from the centre moving outwards.


As each run of decking required two lengths of planking devoted some time to matching the provided material for width. Then marked the side of each section with a hb pencil and cut to 100mm lengths.
So we have reached this stage.


Once finished the decking will give it a sand and then decide on what stain to use. The instructions suggest a very orange colour. Looking at the website for HMS Victory a more grey colour would seem appropriate, my local hardware has a good candidate but it only comes in a 4 litre can. Other option is after a sand to use straight satin varnish. Any suggestions?
Before fitting any further gunports will trim the deck to fit the ribs and also shape the hull at the bow and stern.
Seems I've been distracted. Having finished the planking of the lower deck marked the deck nails using a needle and then a twist of a 0.5mm Mars Micro clutch pencil with 2B lead. Regarding the stain for the deck opted for Feast Watson English Oak.
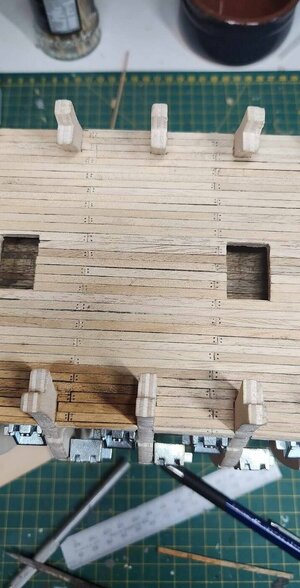
After staining the rest of the deck. Applied a couple of coats of clear satin varnish.
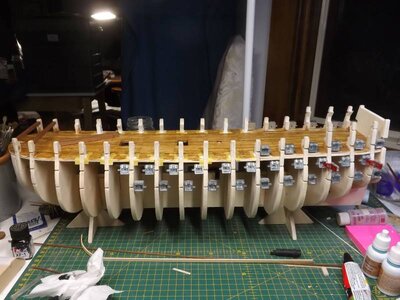
Next it was support beams for the upper deck and the coaming (not sure of the right term) around the hatch ways. and the faux grating.
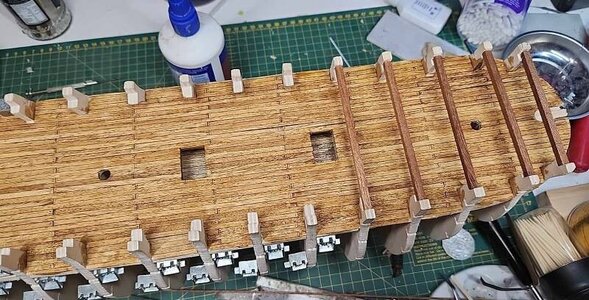
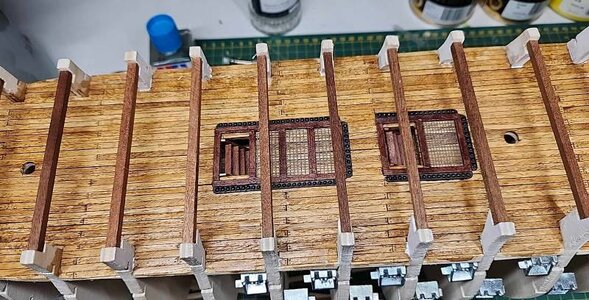
Installments 31 to 34 focused on the upperdeck. As per the lower deck it was suggested that each of the six sections be partially planked and then the sections added to the hull. Having the advantage possing all the installements opted to glue the deck plates to the hull and then plank.
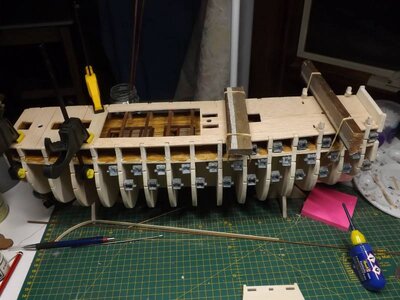
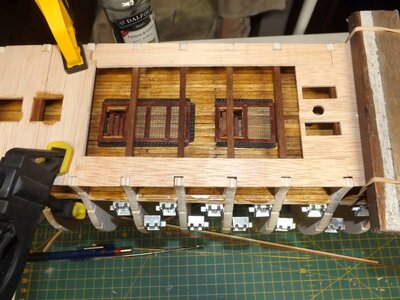
Starting with the bow commenced planking with 3mm an 1.5 strips, the strips were rubbed on the side with a 2B pencil as per the lower deck planks.
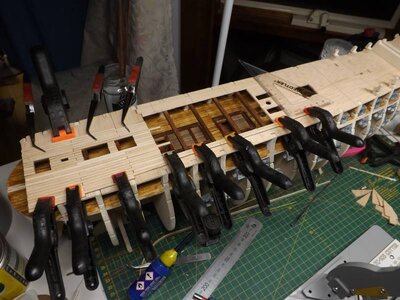
The completion of the planking brings the work up to installment 34.

After staining the rest of the deck. Applied a couple of coats of clear satin varnish.

Next it was support beams for the upper deck and the coaming (not sure of the right term) around the hatch ways. and the faux grating.


Installments 31 to 34 focused on the upperdeck. As per the lower deck it was suggested that each of the six sections be partially planked and then the sections added to the hull. Having the advantage possing all the installements opted to glue the deck plates to the hull and then plank.


Starting with the bow commenced planking with 3mm an 1.5 strips, the strips were rubbed on the side with a 2B pencil as per the lower deck planks.

The completion of the planking brings the work up to installment 34.
Last edited:
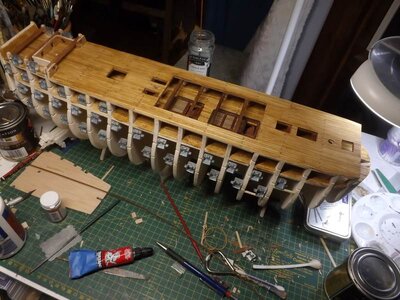
Work continues with staining the upper deck 'European Oak'
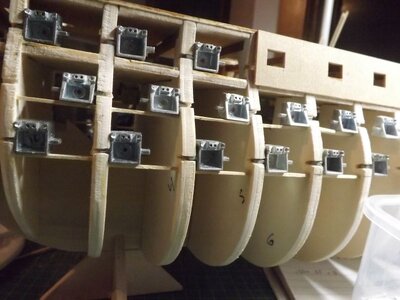
Have needed to revisit some of the gun ports to fix their alignment. Adding a support strip underneath and in some cases one behind.
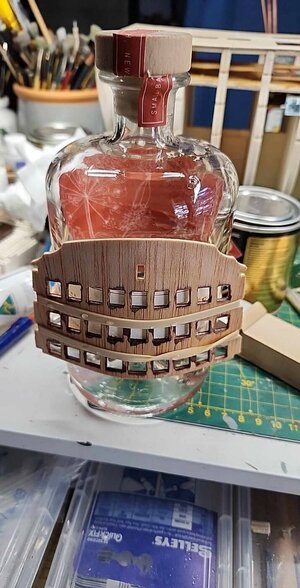
With the stern cabin needed to bend the piece solved this with a squat bottle of a local libation , a couple of rubber bands and a gentle application of the contents of a kettle of hot water.
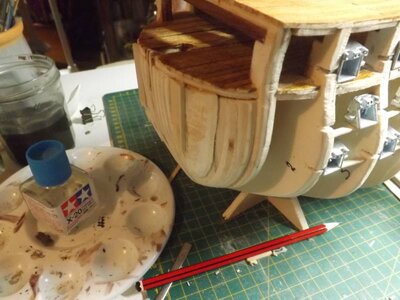
With the bow with the addition of some scrap pine filled in the space, will need now to shape and sand back to the correct profile but believe the effort will be worthwhile to support the planking on such a bluff bow shape.
Reminding myself that this is my first big ship in timber will be boxing in the mast support slots in the keel.
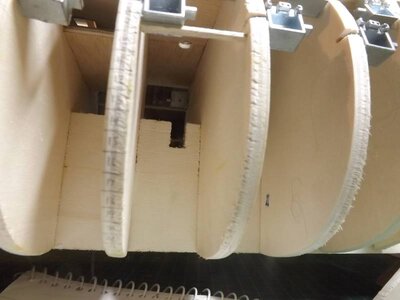
Slow but steady progress.

Have needed to revisit some of the gun ports to fix their alignment. Adding a support strip underneath and in some cases one behind.

With the stern cabin needed to bend the piece solved this with a squat bottle of a local libation , a couple of rubber bands and a gentle application of the contents of a kettle of hot water.

With the bow with the addition of some scrap pine filled in the space, will need now to shape and sand back to the correct profile but believe the effort will be worthwhile to support the planking on such a bluff bow shape.

Reminding myself that this is my first big ship in timber will be boxing in the mast support slots in the keel.

Slow but steady progress.
Finished off sanding the bow adjusting a few more gunports and decided to make a start on the planking and then adjust the gunports to fit tight against the planks.. Have managed a couple of rows and not entirely happy with my efforts as the results seem a little crude. However have been learning as I go. First lesson learnt was if I need to notch a plank for a gun port pick a plank where the timber has a straight grain parallel to the plank, otherwise when notching the plank will split. The second lesson was letting the plank follow its own lie and use a stealer. The third lesson from KristerL is to take it one plank at a time.
I will return to the nails and centre punch them before sanding and filling the hull in preparation for the second layer of planks.
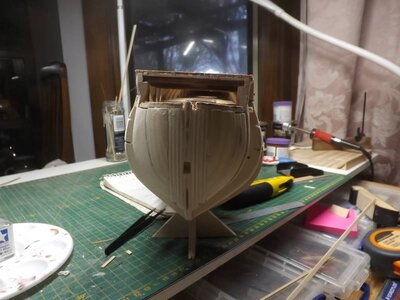
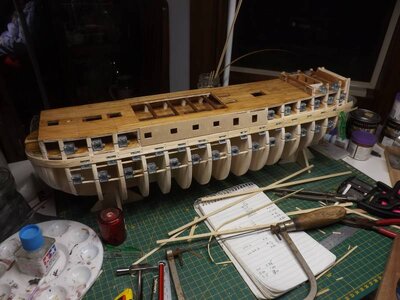
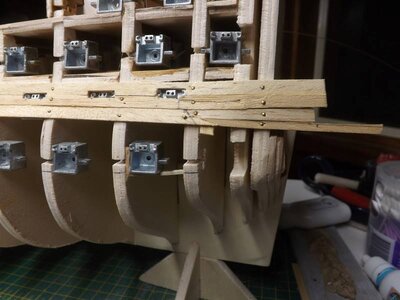
I will return to the nails and centre punch them before sanding and filling the hull in preparation for the second layer of planks.


Mudlark
Have you studied any planking tutorials or have any books on planking? One that is probably best suited to using strip wood in kits is the four part You Tube video
I use a hot air gun rather than an iron now, but both work. Just be sure to mark off the width of the planks at each bulkhead then taper them in width as in the video and the result is that each plank will end at the rabbet as they should. Another great source of help for Victory is Nepean Longridge's book The Anatomy of Nelson's Ships which is how to build a POB of Victory. It is a huge help.
Allan
PS: Do you do mudlarking? Would love to see pics of any nice finds you have come up with. My own SMALL experiences have only come up with sea glass
Have you studied any planking tutorials or have any books on planking? One that is probably best suited to using strip wood in kits is the four part You Tube video
Allan
PS: Do you do mudlarking? Would love to see pics of any nice finds you have come up with. My own SMALL experiences have only come up with sea glass
Thank you Allan for the hints. I have several books on Model ship building plus some articles on planking 'how to'. I have built a couple of small PoB models so not an entire novice but this is my first 'big ship'. The delPrado worksheets which come with each installments offer some information as to how progress should look. So far my planks want to seem to go off in a different direction.  I do own an Amati plank bender and have also used the soak in hot water and then use a board with nails in the curve required. My main challenge is DelPrado have their planks going to a sharp point where convention if I have read the books correctly dictate using a stealer. The video you suggested was very informative and introduces to me another concept on plank bending. I can see I'll be spending the rest of the week marking off the bulkheads.
My moniker comes from a bird native to Australia that often visits the pond in the yard ,it's more correct name would be the Magpie-lark . Ours is quite friendly and being quite territorial keeps the Kookaburras from decimating the fish population in the pond.
My moniker comes from a bird native to Australia that often visits the pond in the yard ,it's more correct name would be the Magpie-lark . Ours is quite friendly and being quite territorial keeps the Kookaburras from decimating the fish population in the pond.


