-

Win a Free Custom Engraved Brass Coin!!!
As a way to introduce our brass coins to the community, we will raffle off a free coin during the month of August. Follow link ABOVE for instructions for entering.
-

PRE-ORDER SHIPS IN SCALE TODAY!
The beloved Ships in Scale Magazine is back and charting a new course for 2026!
Discover new skills, new techniques, and new inspirations in every issue.
NOTE THAT OUR FIRST ISSUE WILL BE JAN/FEB 2026
You are using an out of date browser. It may not display this or other websites correctly.
You should upgrade or use an alternative browser.
You should upgrade or use an alternative browser.
Home made thickness sander
- Thread starter modelshipwright
- Start date
- Watchers 10
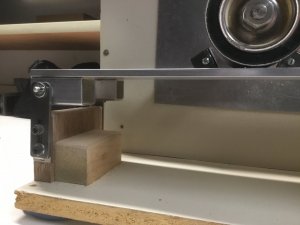
The next two photos show the base mounting for the sled table. You can see that both sides are adjustable to ensure the table is inline with the sanding sleeve to get a perfectly flat surface on your work.
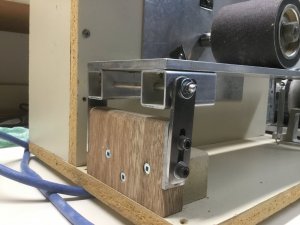
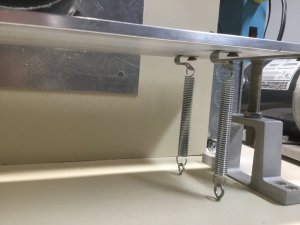
Next is the spring arrangement at the opposite end of the table which holds the adjusting nut down on the bracket under the table. The adjusting nut is threaded on a rod with fine threads to ensure micro adjustments in height.
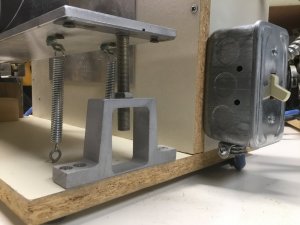
This photo shows the end view of this arrangement where the threaded rod is allowed to move up and down in a hole in the bracket. To adjust the table you lift the end of the table and screw the nut either up or down as required.
More to follow..............


Next is the spring arrangement at the opposite end of the table which holds the adjusting nut down on the bracket under the table. The adjusting nut is threaded on a rod with fine threads to ensure micro adjustments in height.

This photo shows the end view of this arrangement where the threaded rod is allowed to move up and down in a hole in the bracket. To adjust the table you lift the end of the table and screw the nut either up or down as required.

More to follow..............
Last edited:
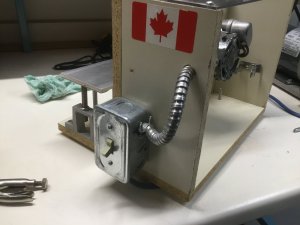
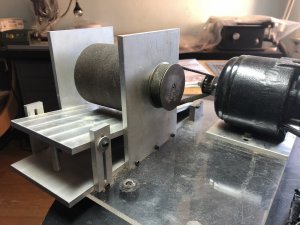
The next photo shows the shaft mounted on the motor shaft with set screws. This secondary shaft brings the arbor up to the size required for mounting the sanding sleeve.
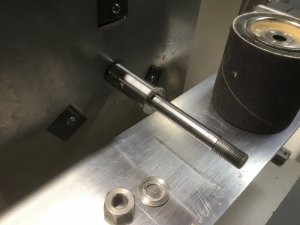
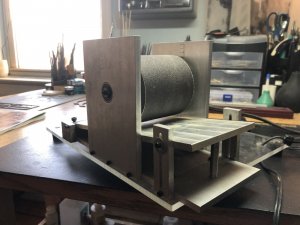
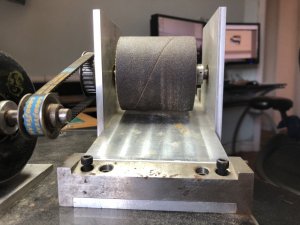
This photo shows a front view of this arrangement with the sanding sleeve sitting on the table.
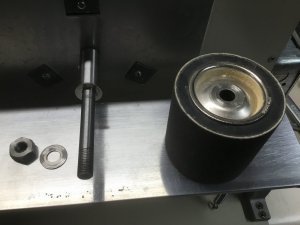
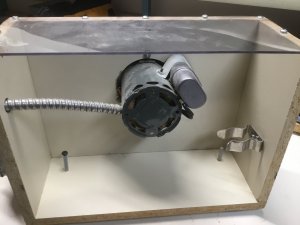
The next photo shows the sanding sleeve mounted on the shaft. The thread on the shaft is ‘left handed’ to prevent the nut from loosening when in operation. It also shows the dust collection cover sitting on the table. This arrangement virtually eliminates all airborn dust when in operation allowing me to use this indoors.
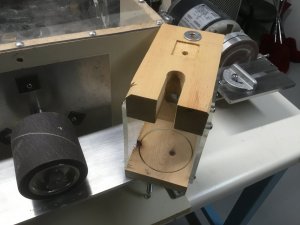
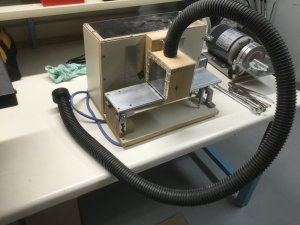
This photo shows the dust cover mounted in position with the vacuum hose in the hole in the top ready to plug into my Shop-Vac vacuum.
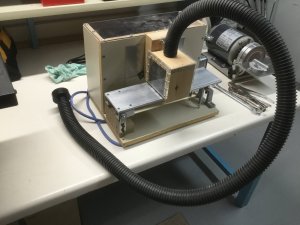
If you have any questions regarding the sander, please ask.
Regards,
Bill

This photo shows a front view of this arrangement with the sanding sleeve sitting on the table.

The next photo shows the sanding sleeve mounted on the shaft. The thread on the shaft is ‘left handed’ to prevent the nut from loosening when in operation. It also shows the dust collection cover sitting on the table. This arrangement virtually eliminates all airborn dust when in operation allowing me to use this indoors.

This photo shows the dust cover mounted in position with the vacuum hose in the hole in the top ready to plug into my Shop-Vac vacuum.

If you have any questions regarding the sander, please ask.
Regards,
Bill
Last edited:
Great idea
Nice!
Thank you for the very detailed description Bill, much appreciated!

The motor is 115V , 3450 rpm, AC 85 A thermally protected electric motor. It was given to me by a friend some years ago.What horsepower rating is the motor you used?
EJ
Bill
Very good. I love the idea.
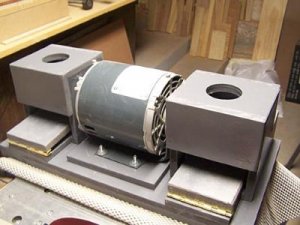
Great idea! You can use coarse grit on one side and fine on another. It definitely saves some time. Do you have motor specs by chance? Does anyone know what speed is required? I have built one long time ago, but never have success using it. I think I would need a faster motor...
View attachment 87186 View attachment 87187 View attachment 87188
The motor speed on my sander is 3450 RPM. I find it makes a very smooth cut when taking off very fine increments of wood.
Regards,
Bill
From chatting with various professional wood workers I've come up with two basic considerations for motor selection to keep in mind. I'm sure there are many others but these two seem to stand out the most.
1. The heavier the motor you can use the better (i.e. a 1hp motor would be better than a 1/2hp motor.) The concept here is that you want to make sure that your sander has the power to complete the task at hand so that you are not facing premature motor burnout.
2. Multiple speed control. Different sanding grits sand better at different RPMs. I never really gave a lot of thought to this, until I started looking at high end sanders. I noticed that almost all of them have some form or speed control.
Hi Winston!
Although the variable speed feature is nice, it’ not critical if you pay attention to the depth of cut. The Byrnes thickness sander is single speed and works well.
Although the variable speed feature is nice, it’ not critical if you pay attention to the depth of cut. The Byrnes thickness sander is single speed and works well.
Happy Birthday. Enjoy your special day! 


