• SUBSCRIBE TO SHIPS IN SCALE TODAY!

    The beloved Ships in Scale Magazine is back and charting a new course for 2026!
    Discover new skills, new techniques, and new inspirations in every issue.

    NOTE THAT OUR NEXT ISSUE WILL BE MARCH/APRIL 2026
  • Win a Free Custom Engraved Brass Coin!!!
    As a way to introduce our brass coins to the community, we will raffle off a free coin during the month of August. Follow link ABOVE for instructions for entering.

How to build yours jig/stand

Joined
Oct 19, 2024
Messages
46
Points
78

Location
Ashkelon, Israel
I'm looking for a jig /stand design for a 60-70 cm model, preferably with rotation around a horizontal axis. I'd be grateful if you could tell me about yours, and most importantly, show me your design. Perhaps you know where I can buy one?

 
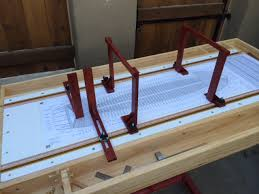
There are rotating vises many folks use, but I am not so sure they would be big enough for the size model you have. Hopefully some member can give you more information. You can also construct a building board with rails to move a gantry which is extremely useful in making sure everything is square. Once the framing is done you can always remove the model temporarily and lay it on a cushion or sand bag while you add planking and such. Once planked back on the building board and deck work commences, Have you done a search here at SoS. There are posts on this, including the following: https://shipsofscale.com/sosforums/threads/constructing-the-building-board.17396/ Author Ed Tosti showed me how he built his and I have been using this type of board for over 15 years.

1780080997401.png
 
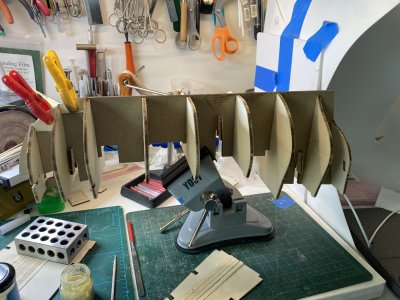
The build jig, build board, etc. depends on what sort model that you are building and the ship that you are modeling. I suppose if your interests are limited to rigged sailing vessels built from commercial POB kits, rotating clamp type building jig seems to be a popular choice. More versatile might be one of the vises featuring a clamp on each end of a bar. There both require a stout keel for clamping. Allan’s gantry works where erecting frames is required and can be made as long as you need. The European scratch builders prefer a two layer build board, the second layer being elevated and notched to register the frames.

As your modeling choices move further afield. Building techniques will require creativity.

Roger
 
Two foot range is not pushing limits.
The key is having a baseboard that is absolutely flat and substantial enough to remain absolutely flat.

The jigs that ride on it can be experimented with.
my rec:
If you go T-track (mini- or router-) do a surface mount - add a built up surface if that is needed.
If you adhesive bond as well as bolt - use something reasonably reversible.

If you find a unicorn - a dead flat, thick, building board in the 4 foot range - it can be repurposed for future - larger models if you are careful with jig mounts.

Look at the jobs that you want the building board to do. Look - with a broad field of focus at what is available for all woodworkers in the way of clamps.

You may get by with screwing strips of wood to the base to make a push fit slot for the central spine (it ain't really a "keel").
A couple of carpenters squares just sliding on the base may be enough for POB.

If you have money to burn, if you do not mind getting "took", you can try a dedicated POB "keel" clamp.

Learning to make your own jigs is a way out of the trap of being just an assembler of kits. There nothing magic or particularly special about BUILDING ship models. The LEARNING about ships and ship building is special and is life long. There is no diploma and license to practice.
 
to go real simple you can use a lazy susan type base (can probably find one someone is getting rid of!), place a flat board longer than your ship. Secure a strip of wood with some screws to the length of board and then have some angle irons with slots cut into the bases on the other side of the keel that you can tighten onto it.

if the ship is not too big you can use a vise with rubber jaws that can be rotated.

IMG_2085.jpeg


Rob
 
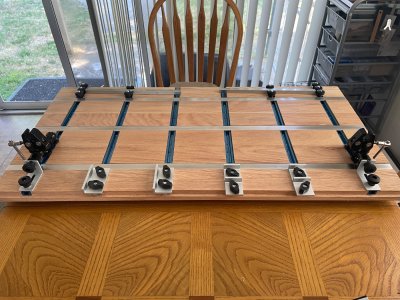
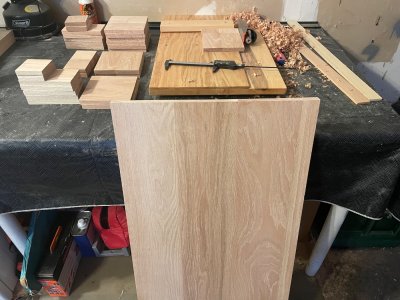
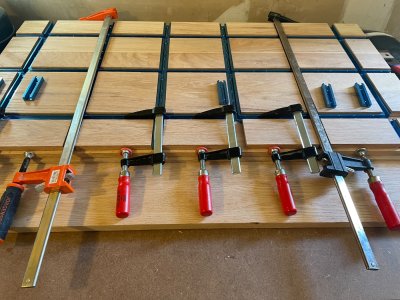
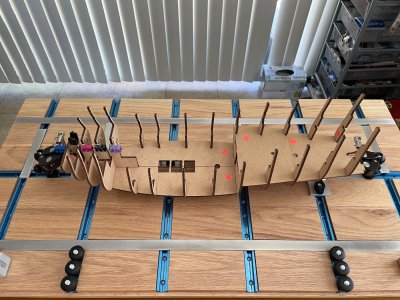
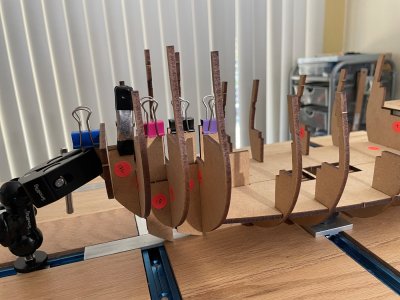
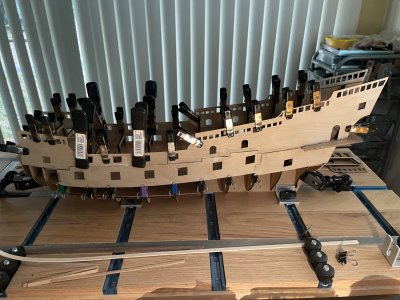
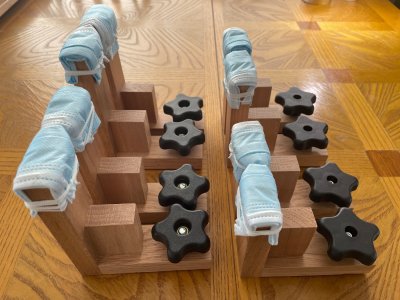
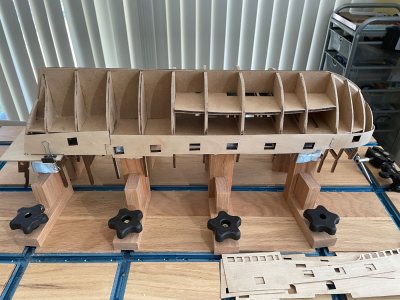
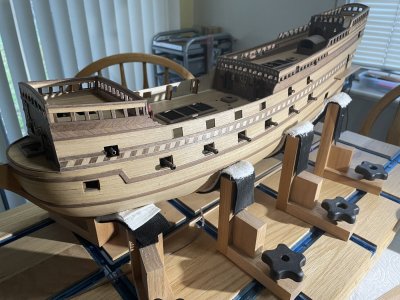
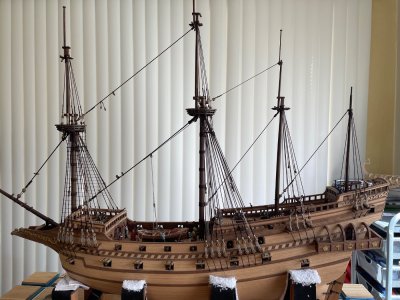
Greeting, I used a custom made t-track table, which I like a lot. A little expensive due to the size but it is hard wood and will last forever. If you have a router, building the table should be more straightforward. I did not so I used simple tools. It just took more time.

With the lost of build logs at MSW, I cannot refers you to my revenge build anymore. So let me post here a series of pictures that illustrate how I build and use it.

IMG_1282.jpeg

IMG_1255.jpeg

IMG_1266.jpeg

IMG_1404.jpeg

IMG_1395.jpeg

IMG_1479.jpeg

IMG_1489.jpeg

IMG_1499.jpegIMG_1941.jpeg

IMG_2484.jpeg
 
I can't remember who... maybe the admiral gave me the idea of using straps as "hammock" for the ship to avoid damaging it.
 
Thank you all for your helpful tips. Loracs, your desk is simply exceptional; it combines comfort and organization.
I don't think I'll build anything similar, but I'll definitely use some of the elements.
Maybe you remember where you bought those clamps (I mean the front and back ones).
 
In your image 1395 I noticed two strange looking deices holding the model by the bow/stern. Never seen such before: what are they, where did you get them and how much did they cost?
 
One size never fits all. For setting up frames, a perfectly flat, rigid "build board" is required. It's flat surface serves as a reference point for everything else in the build. On the other hand, when it comes to rigging especially, a holding mechanism that accommodates the greatest flexibility in movement, rather than rigidity, is preferred. To that end, I've found the Zyliss Vise System to be an excellent option. In order to maximize movement of the entire model mounted on a clamped keel (which must be sufficiently engineered to easily support the model,) the 360 degree rotation accessory is required.
The Zyliss Vise, originally designed for use in the field by the Swiss military, is an extremely flexible cast aluminum, magnesium, and stainless steel (I think) portable vise that can be configured in a great number of ways to hold just about anything. (It even can be set up as a drill motor-powered wood lathe!) The sad catch is that I don't believe they are still in production, although there are usually a number of them listed for sale used on eBay. One caveat is that there are Asian-made "clones" out there which are not as well made as the real Swiss-made ones. Accept no substitutes. Get the real "Swiss Army Vise!"


Back
Top