How to carve a simple groove?

Joined
May 3, 2016
Messages
143
Points
113

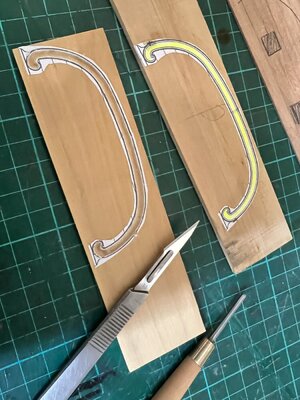
I’ve got a stern piece that requires a groove as indicated by the yellow marker. What’s the best way of going about carving/cutting a smooth even groove, (semicircular?) between the lines as shown by the yellow highlighter?
I have tried once and used a carving chisel but got a very uneven surface, irregular outline and sanding did not seem to help?
Possibly using a scalpel first along the outline?, using a drill bit with a rounded end? Suggestions would be grateful.
I am a complete novice when it comes to carving.
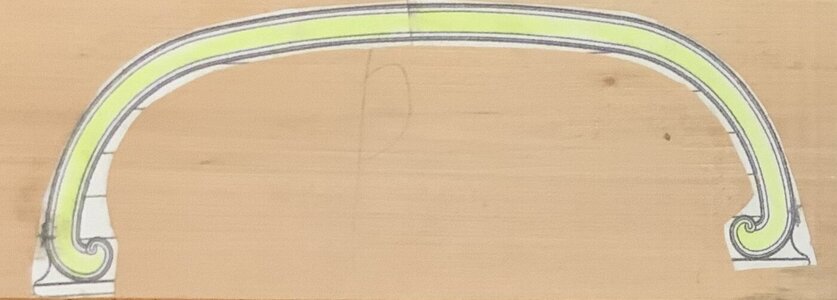
295B9366-7AD7-4551-8BBC-CE3C2FFFE039.jpeg
 
I think this is a task for a milling bit with sphere shape with a micromotor or Proxxon- or Dremel-type tool. As the first step I would use a T-shape milling bit, with this the centre line of the groove can be cut then depending the width of the groove I would follow this cut with a milling bit, half the size of the width of the groove. The last step is to follow the cut with the full size milling bit. The curving ends need a bit more of manual carving because of the shape the T-shape milling bit can't be used here. After the 'machine' work the groove can be smoothened with a bit of sandpaper.
The 2- (or rather 3) step carving is necessary to avoid breaking pieces of the outside edges of the groove. Be cautious with the material - ie. walnut would provide these broken out edges anyhow because it has lose grains.
János
 
I would humbley recommend practice practice and more practice. You state you tried once and the result was not acceptable. I have learned that with myself when learning ANY new skill I have to approach it with realistic expectations. Achieving perfection the very first time for me has been nothing more than sheer luck proven by botched second and subsequent attempts.

Through practice with your chisel you should learn better control of the depth and smoothness of cut. Practicing with the various chisels you have will also give you a better understanding of what each chisel is not only good for, but also what it may not be good for.

Tool sharpness is CRITICAL. This is a skill in itself.

The same principle would apply to power carving, learn control through practice. I haven't done much power carving so will leave it at that.

Glenn
 
SO true, GAStan. SHARPNESS IS CRITICAL. The rest is practice. Learn how chisel angle changes depth of cut, and practice on a few scrap pieces of wood, both parallel with the grain, and cross grain. Then try angled relative to the grain. Try chip carving flowers first. Why flowers, you ask? The round petals force you to carve curves so you can learn how the grain affects your technique.
 
I think this is a task for a milling bit with sphere shape with a micromotor or Proxxon- or Dremel-type tool. As the first step I would use a T-shape milling bit, with this the centre line of the groove can be cut then depending the width of the groove I would follow this cut with a milling bit, half the size of the width of the groove. The last step is to follow the cut with the full size milling bit. The curving ends need a bit more of manual carving because of the shape the T-shape milling bit can't be used here. After the 'machine' work the groove can be smoothened with a bit of sandpaper.
The 2- (or rather 3) step carving is necessary to avoid breaking pieces of the outside edges of the groove. Be cautious with the material - ie. walnut would provide these broken out edges anyhow because it has lose grains.
János
Thanks Janos
Can you show me pictures of the drill bits, and where they might be available. I have a proxxon milling machine and would like to give it a try.
I will also,give carving more practice. It just means preparing more stern pieces as pictured at the top.
 
Post #448, here, shows a basic demonstration of such a scraper:


I forgot to mention that razor blades are also excellent for this task.
 
One approach would be to make a profiled moulding scraper from an old hacksaw or bandsaw blade, which will get you 95% of the way there with perfectly uniform results. The last 5% around the tight radiuses of the end scrolls will have to be carved by hand, as described above.
That's what I was going to say, also. I've shocked myself at how well it works. Another is the edge of a piece of glass cut to the angle or width you need to use as a scraper.
 
I’ve got a stern piece that requires a groove as indicated by the yellow marker. What’s the best way of going about carving/cutting a smooth even groove, (semicircular?) between the lines as shown by the yellow highlighter?
I have tried once and used a carving chisel but got a very uneven surface, irregular outline and sanding did not seem to help?
Possibly using a scalpel first along the outline?, using a drill bit with a rounded end? Suggestions would be grateful.
I am a complete novice when it comes to carving.
View attachment 314282
Prior to attepmting to carve any shape or figure, it is essential to selsct the right species of wood to be carved. Mention has been made elswhere in this thread of walnut. Beware walnut has a distinct and open grain as do many of the hardwood types, they are difficult to carve and obtain a smooth edde or surfaceg. For carving you need to selsct a wood that has little in the way of defined grain, and in model ship sizes the best wood to use for any carving will be Lime. It give an even edge when using very sharp tools, which is vital for any carving work. Sharp tools give easier cutting and smoother edges, blunt tools make scrap! To make a curved piece such as the stern pice, take a rectangular sheet of Lime larger than the finished part. Mark out the outline of the stern piece and the outline of the groove that is to be carved. Clamp the piece of Lime to a flat surface of thicker wood and clam this in a vice or to a bench top. Then carve the groove starting at the centre in on direction, then from the centre in the opposite direction. When the groove is carved use fine glasspaper wrapped in a tube to sand the grooved surface smooth. Finally, whislt supporting the piece of Lime, cut ariund the otside edger of the finished piece using a fine piercing saw and then finish trim the outside edge using needle files for tight internal curves and finish smooth using sandpaper, Be very careful at this stage to clamp and support the carved itme very close to when the filing or sanding is being done, and gradually work around the edge, in short sections, and reclamp the part in little steps as you work around the the perimeter of the complete part.
Throughout all of this work in small steps, always support the part near to where you are working, do not rush, be gentle and work slowly and take frequent breaks to remain calm. Good Luck please be patient.
 
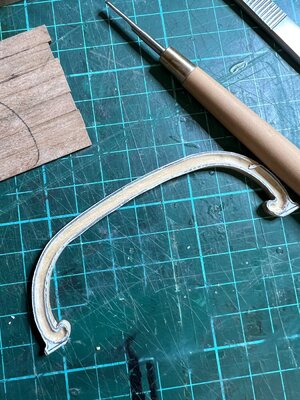
Thanks for the replies everyone. The wood I’m using is Castello boxwood. I’ve in fact went the way of carving a groove with a chisel after first outlining the edges with a sharp scalpel. And finished with a light sanding. I think the result is acceptable.
I must say the idea of customising a profile edge from an old bandsaw blade sounds like an idea I would try as well.
I’ll post some pictures later.
 
Hi clogger,

Actually the shape you carved above looks great but you could have done it with a mill and a ball shaped mill bit.

First you create the frieze you need.
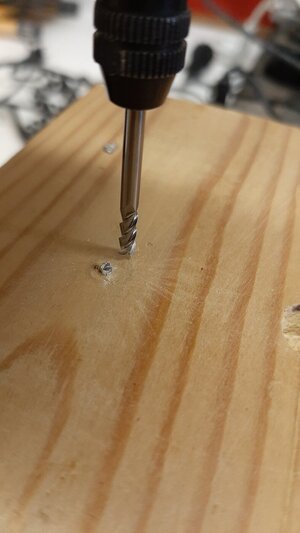
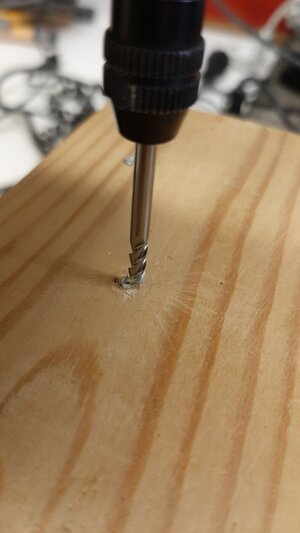
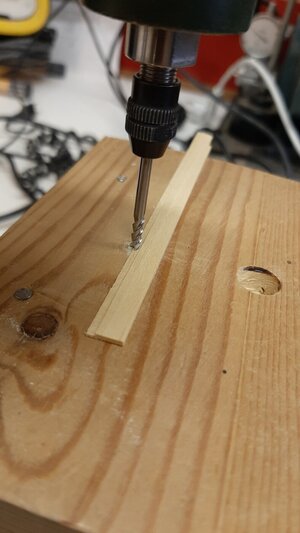
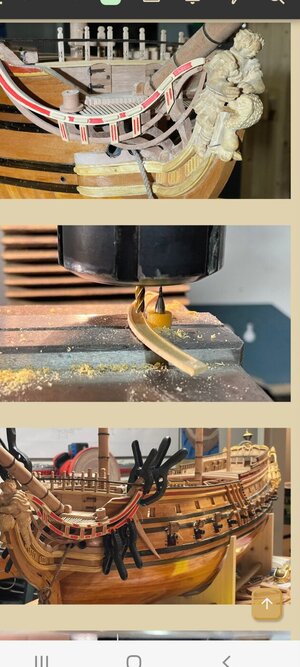
On your mill table you fit a small piece of wood with a nail in it. Set the ball shaped mill at the correct distance from the side and pull your frieze along it. You will perfectly mill out the inner surface.

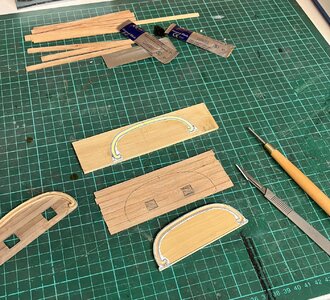
See below the same technique I used for milling planks.
20210124_153956.jpg20210124_154014.jpg20210124_153908.jpg

With this technique you can mill very straight lines along any type of edge.
 
For very light cuts, you can use a drill press if you don’t have a mill. Go easy on the side force though because a drill press spindle does not have thrust bearings for side forces, only axial force. Use the shortest mill bit you can to go eat on the drill. I once milled the buttstock for an MP-44 sturmgewehr rifle using just a drill press from walnut.
 
Hi clogger,

Actually the shape you carved above looks great but you could have done it with a mill and a ball shaped mill bit.

First you create the frieze you need.
On your mill table you fit a small piece of wood with a nail in it. Set the ball shaped mill at the correct distance from the side and pull your frieze along it. You will perfectly mill out the inner surface.

See below the same technique I used for milling planks.
View attachment 315482View attachment 315495View attachment 315496

With this technique you can mill very straight lines along any type of edge.
I assume this would work even with a Dremel tool with a ball-end mill bit if you secure the drill on some sort of drill press so it won't move except up or down.
 
Hi clogger,

Actually the shape you carved above looks great but you could have done it with a mill and a ball shaped mill bit.

First you create the frieze you need.
On your mill table you fit a small piece of wood with a nail in it. Set the ball shaped mill at the correct distance from the side and pull your frieze along it. You will perfectly mill out the inner surface.

See below the same technique I used for milling planks.
View attachment 315482View attachment 315495View attachment 315496

With this technique you can mill very straight lines along any type of edge.
Hi Maarten, it’s hard to understand what you’re doing? Any chance of a video?
 
Back
Top