• LUCZORAMA SHIPWRECK SCAVENGER HUNT GIVEAWAY. 4 Weeks of Fun • 1 Legendary Prize ((OcCre’s Fram Ship)) • Global Crew Welcome!
    **VIEW THREAD HERE**

How to finish hull and cut gun ports

Joined
Jan 21, 2024
Messages
24
Points
48

Hi,
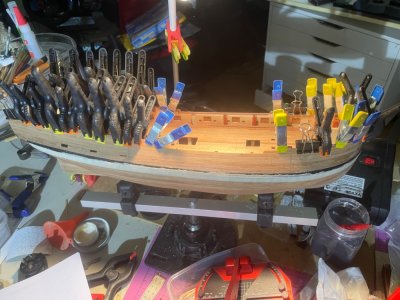
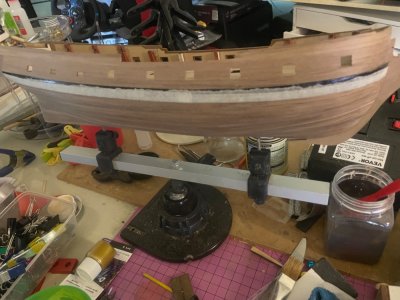
I’m currently building my first wooden ship the HMS Fly. So far so go. I’m just finishing the 2nd planking and looking for advice on the best ways to finish the walnut planks.
I’ve done a reasonable amount of sanding 240 now 600 grit.
I have some minor gaps fo fill.
What are the recommended steps to get a lovely deep walnut finish with Matt clear finish?

Also any recommendations on how to cut the gun ports to get a nice sharp edge. My first attempt ended with rounded edges. I cut back then filed to final size.

Many thanks
Rob
IMG_6752.jpeg

IMG_6703.jpeg
 
Last edited:
Also any recommendations on how to cut the gum ports to get a nice sharp edge
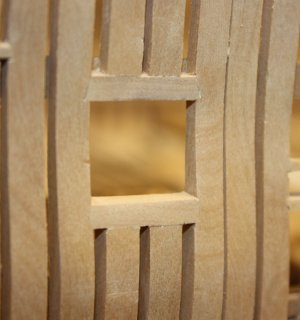
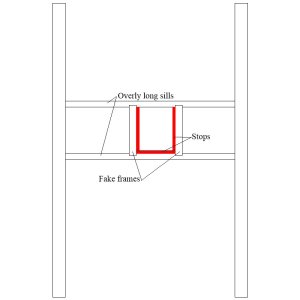
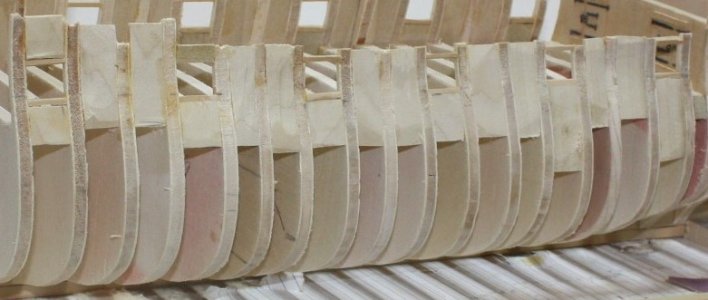
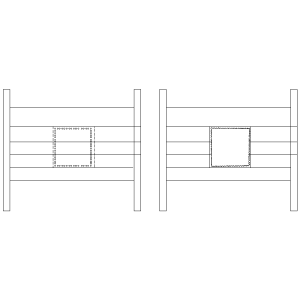
I suspect everyone has their own way that works for them. I prefer to frame the gun ports before planking. Once the planking is done then draw the gun port openings on the planking but a bit inside the port frames that have already been installed before the planking. Once marked I drill tiny holes so they are just inside port frames. A scalpel or similar hobby knife is then used to connect the drilled dots and remove the piece. I use the scalpel to finish the trimming match the edge of the port frame pieces. I small sanding stick will also work but if this leaves a radius on any corner it can be squared up with a scalpel. First photo below is on a framed model. The next is a drawing for the same thing for a POB hull. The third pic shows the framing of the ports between bulkheads. In this case I made the bulkheads so they were spaced the same width as the gun port openings. alleviating the need for the overly long sills as shown in the sketch. If this verbage is confusing, my apologies. The last sketch may be more clear than words. It shows the holes drilled then the opening before final trimming.
Allan
1726828379376.jpeg1726828462113.jpeg 1726828808433.jpeg
1726830059731.png
 
Last edited:
I suspect everyone has their own way that works for them. I prefer to frame the gun ports before planking. Once the planking is done then draw the gun port openings on the planking but a bit inside the port frames that have already been installed before the planking. Once marked I drill tiny holes so they are just inside port frames. A scalpel or similar hobby knife is then used to connect the drilled dots and remove the piece. I use the scalpel to finish the trimming match the edge of the port frame pieces. I small sanding stick will also work but if this leaves a radius on any corner it can be squared up with a scalpel. First photo below is on a framed model. The next is a drawing for the same thing for a POB hull. The last photo shows the framing of the ports between bulkheads. In this case I made the bulkheads so they were spaced the same width as the gun port openings. alleviating the need for the overly long sills as shown in the sketch. If this verbage is confusing, my apologies. The last sketch may be more clear than words. It shows the holes drilled then the opening before final trimming.
Allan
View attachment 472000View attachment 472001 View attachment 472002
View attachment 472004
Thank you for the detailed response. Very informative.
 
I suspect everyone has their own way that works for them. I prefer to frame the gun ports before planking. Once the planking is done then draw the gun port openings on the planking but a bit inside the port frames that have already been installed before the planking. Once marked I drill tiny holes so they are just inside port frames. A scalpel or similar hobby knife is then used to connect the drilled dots and remove the piece. I use the scalpel to finish the trimming match the edge of the port frame pieces. I small sanding stick will also work but if this leaves a radius on any corner it can be squared up with a scalpel. First photo below is on a framed model. The next is a drawing for the same thing for a POB hull. The last photo shows the framing of the ports between bulkheads. In this case I made the bulkheads so they were spaced the same width as the gun port openings. alleviating the need for the overly long sills as shown in the sketch. If this verbage is confusing, my apologies. The last sketch may be more clear than words. It shows the holes drilled then the opening before final trimming.
Allan
View attachment 472000View attachment 472001 View attachment 472002
View attachment 472004
Very nice work.
 
"What are the recommended steps to get a lovely deep walnut finish with Matt clear finish?"

If you use too fine a grit you may burnish the wood making it so finish doesn't penetrate very well. Maybe experiment on some left over scraps. Sand to 400 on some and 600 on others and see if there is a visible difference.
 
Back
Top