How to Rig Cannons

Kurt Konrath

Kurt Konrath
Joined
Feb 11, 2020
Messages
4,020
Points
588

Location
Oklahoma City OK
Ok I am looking for general guidelines on how to rig cannons. I know of main rope to hold cannon when fired and of block and tackle to pull cannon to firing position. I have seen others with block at back of carriage also. Not sure what it’s for.

These will be for my TS cross section kit

Kurt
 
Hi Kurt,
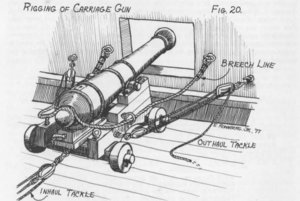
The tackle at the back of the cannon is to pull the gun back into the ship for loading, cleaning or maintenance before firing. It's not required when firing as the recoil does the job.
Hope that helps
Steve
 
Ok I am looking for general guidelines on how to rig cannons. I know of main rope to hold cannon when fired and of block and tackle to pull cannon to firing position. I have seen others with block at back of carriage also. Not sure what it’s for.

These will be for my TS cross section kit

Kurt
I guess you mean the Santissimo Trinidad "ST" - in scale 1:90 - this small scale is making the tackling / rigging of the carriages not so easy.
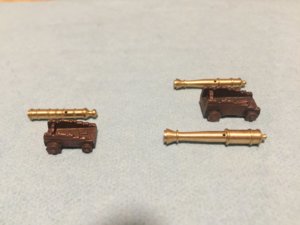
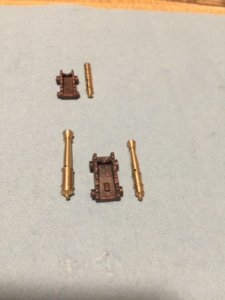
Maybe it would be helpful to show us the different carriages and muzzles of the kit, so we can show you afterwards how these would / and could be rigged?
 
The ring bolt behind the cannon should be far enough back so that when the withdraw tackle is used the barrel is within the ship with just enough space for the gun crew to load ... it was a tight squeeze for them so not far. Each ring bolt would be in a smart line down the deck.
have fun
Steve
 
My cannon barrels are the same as yours. I just made the carriages but I suspect there are a lot on your ship!!
003.JPG001 (3).JPG
008 (4).JPG
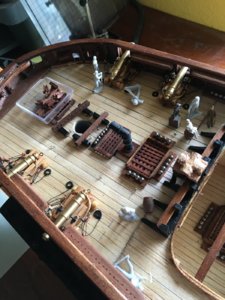
I am working on a very tight budget of not a lot of £ so all my main and lower deck gun ports are closed. I've effectively reduced the need for about 60 guns. (Don't look too closely at the foredeck, nothing has been fixed in place yet.)
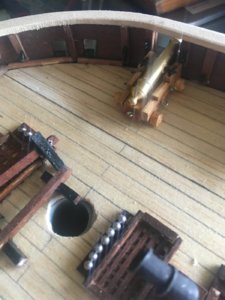
I made the carriages out of an old wooden garden ornament wind chime sort of thing. It is a nice teak colour and just the right size and hardness to do the job.
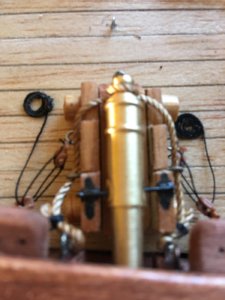
This gun isn't set up with the withdraw tackle yet but you can see the other main tackles. At each side is a simple tackle used for pulling the gun to the port after loading. The rope over the pommel at the back and sides is the breeching that stops the backwards recoil of the gun after firing.
I hope that helps a bit
Have fun
Steve
 
Just FYI, the gun tackle would be tan rope. Black rope typically is used for standing rigging.
But personal preference...
To help understand this...black rope reflects being tarred to withstand water rot. This tar does not lend to running rope through blocks thus it is used only on standing rigging to protect it from weather. Running rigging, or any rope used in block and tackle is not tarred thus the more natural color for the rope. This is why most models use black for standing rigging and tan for running rigging.
 
When rigging cannon think about what each tackle rig is used for. A large rope anchored to the bulkhead and around the cannon's end restrains the kick back when fired. The running tackle on each side also anchored to the bulkhead helps run the cannon up to fire. If the cannon is runup to firing position and needs to be pulled back for access then the tackle on the rear comes into play. Having a picture in your head for the purpose of each tackle rig helps visualize how the cannon is then rigged.
 
Just to add to the confusion...….sometimes there were also tackles on each side that were used to train the guns. The eyebolts were in the waterway. In my MS "Niagara" I made 5 tackles for each of the 20 guns (carronades). A total of 100 sets.
 
Last edited:
Thanks Donnie that helps confirm what I have seen in photos

Now to decide if for this kit do I want to use better carriages and rig or just go with kit supplied.

Having assembled all the decks it would be hard to rig lower guns now.

I may just do rigging of cannons on top deck

Thanks again
 
Hi J,
I open my browser and pointed it to Google - "Cannon Rigging" then click on "Image search" and there it was about midway into my scrolling down. I don't mean to make light of the method, but basically, this is what I did. I did not even look to see where the original came from (probably should), but for all practical purposes, the 'gathering' of info is strictly for educational purposes and I think that deems it ok.
As a side note, I can't help but mention that many years ago, the internet was a free exchange of info and ideas. As a matter of fact, that is exactly how webmasters learned from each other was looking at the web HTML source code. Now instead of searching and learning, it has become searching and being threatened about who is stealing info. - stealing has replaced searching and learning. Now, just about all the source code is invisible or is shrouded in mystery with very complicated programming. (I am sure that you really needed to know all this) :)
 
Hi J,
I did not even look to see where the original came from (probably should), but for all practical purposes, the 'gathering' of info is strictly for educational purposes and I think that deems it ok.
Donnie,
Don't go there... :cool:
The artist/author is very well known master in modelling circles, still alive, and the image is dated '77.
However I agree with you that this use would be unlikely to be considered a breach of copyright as it is for general information of non-paying members of SOS and was already available for download from another forum.
 
Back
Top