Hi YT
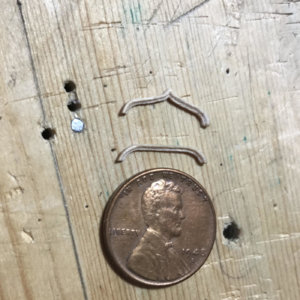
I accomplished it with great success making some decorations with no prior experience,it is pretty easy,the hardest bit is making the pattern.Looking at the Rigols,I would cut the "seagull" shape from sheet styrene then glue the lip to the top surface carefully bending it to the profile.Gluing with Tamiya extra thin cement as you go.Using a little of this makes it easy,it sets really quick enabling you to hold it wile it sets.
Once you have your patterns made,I would take all four types and set up one mould to produce one of each type in one hit.Glue the 4 patterns to a large pice of the styrene sheet with the lips pointing upward.Then cut some of the sheet and cut 4 walls.These want to be the same height and only need to be about 6mm for what you need.Glue these to form a frame around the patterns leaving and inch or so gap around the outside.You should end up with what looks like a baking tray with you 4 patterns glued to the bottom.Make sure you keep an inch or so between each pattern as well.The whole thing may end up being 4 or 5 inches square.
I bought a Polyurethane Resin moulding kit from a company called Easy Composites in the UK.In the kit you get a tub of liquid silicon rubber with it's own little bottle of Catyliser and the two part casting resin.
I appreciate this may work out expensive for you and don't know if the couriers will ship to another country but I illustrate it so you can source something local.
The next job is to mix the silicon and then pour into the tray,you can get away without a release agent in this instance using plastic as your patterns.The silicon will not stick.Allow to cure fully.Next break off the plastic "walls".You should then be able to flex the backing sheet enabling you to peel the Silicon mould off.You will now have a rectangle of Silicon with four impressions to cast you Ringols.
Lay the mould on a flat surface.Mix the two part resin as directed and carefully pour into the four recesses.Take a piece of scrap styrene and scrape the top of the mould to remove a excess resin on the top.Allow the resin to cure.The silicon can then be flexed and the four Ringols removed.
This sounds a long job but it isn't,once you have the mould,it takes 5 minutes to mix and pour the resin leaving you to do other things whilst it sets.
Kind Regards
Nigel


