I would use an acrylic paint base nature color such as burnt seinna. This color will look more natural which is what you are looking for in the stain yet cover completely. If you thin the acrylic you can maintain the wood grain pattern if desired. Thin the acrylic even more and it will coat the wood like a solid color stain. Experiment a bit…
-

Win a Free Custom Engraved Brass Coin!!!
As a way to introduce our brass coins to the community, we will raffle off a free coin during the month of August. Follow link ABOVE for instructions for entering.
You are using an out of date browser. It may not display this or other websites correctly.
You should upgrade or use an alternative browser.
You should upgrade or use an alternative browser.
I have used "Conditioner MS4973 , water based, from Model Shipways with excellent results. Always minimum of two coats and fine sanding after applications. Efficient for small parts and large areas. Good luck !I have started the Occre HMS Bounty. The bulkheads and keel (and other parts) require staining. The appearance is important because the side of the ship is open for viewing. The bulkheads appear to be birch, which stains poorly. My efforts and have been blotchy and amateurish. I have tried regular stain, gel stain, wood conditioner, and combinations of these. I've also tried wood dye. The grain of this wood still comes out splotchy and I believe even if I got it perfect, the grain would look terribly out-of-scale and unacceptable. Any thoughts?
I used an artist acrylic (burnt umbe) paint with good resultsI have started the Occre HMS Bounty. The bulkheads and keel (and other parts) require staining. The appearance is important because the side of the ship is open for viewing. The bulkheads appear to be birch, which stains poorly. My efforts and have been blotchy and amateurish. I have tried regular stain, gel stain, wood conditioner, and combinations of these. I've also tried wood dye. The grain of this wood still comes out splotchy and I believe even if I got it perfect, the grain would look terribly out-of-scale and unacceptable. Any thoughts?
From all the problems it sounds like the best solution now is to paint the visible parts and apply a faux finish like they do on plastic models using several different colors to replicate wood grain.
When I have stained plywood or timbers in kits I have mixed the stain with turps and applied a few coats. The turps seems to get it in quite easily and leaves a nice base for the varnish. When finishing a timber boat I use a few coats of 50% turps and satin polyurethane varnish usually a cabots or similar. Then rub down with a fine scourer and sok the are a with danish oil and leave in the sun to dry. This gives a nice clean finish and is quite water proof as well.
- Joined
- Jun 17, 2021
- Messages
- 3,132
- Points
- 588

I'm assuming you are talking about model maker's Birch ply. the wood conditioners mentioned are a good idea and where I would start. then seal the wood with a thinned acrylic varnish and sand lightly. coat and/or recoat sufficiently to close the pores, but not entirely, leave surface still porous enough to accept filler . Use a thinned water base wood filler, Elmer's interior wood filler is good, has a nice neutral color akin to boxwood. Thin with water and wipe on, filling the the grain. wipe off excess with a damp rag. Do not be too aggressive. A couple of passes. allow to dry in between. The Elmer's is water soluble and can be reworked ad infinitum. Allow to dry thoroughly and sand lightly until surface is smooth. a patient gentle approach with fine sandpaper, 150-250 grit or so. Use patience until a pleasingly soft tactile surface is achieved, still porous enough to hold glue and colorants. Seal again with thin satin or flat acrylic varnish. sand lightly in between a couple of very thin coats.( Or as many as are required to achieve the surface you want.)
Most old Admiralty models with exposed wood are boxwood which is a creamy, smooth pale yellowish (emphasis on the "ish") color. You may already be there at the end of this process. The ply edges will probably require an opaque coating to approximate the flat surfaces after having been treated in the same way described above.
For further coloring I recommend glazing with artists oil colors ( of which there are an infinite variety of colors) thinned with the appropriate artists oil solvents. This is slow, but has the virtue of being malleable, with a long working time.
and is reworkable if desired. Japan drier can be used to speed the process, but remember ,speed is not the objective here, patience with yourself to acquire the required technique is. I like to use old soft cloth as an applicator, sometimes in combination with brushes.
Also prior to this , a few very thin coats of amber shellac (50-50 denatured alchohol to shellac) lightly brushed on, will impart a warm glow ,either as a final look , or a golden glow beneath glazing which adds depth to the final finish. Once thoroughly dry, an artist's (thinned) varnish will seal the colored surface.( fat over lean , never lean over fat.)
Purchase a sheet of modeler's ply wood, cut into 4 to 6 inch squares to experiment on. keep a recipe log of each, so that you can reproduce any desired result.
I bet there is a U-tube video on glazing, which is ,in short, the process of laying one translucent coat of color over another, using either a brush or a rag.
Remember, the final surface must still be porous enough to hold glue, not shiny.
I am, as you may have surmised by now ,Old School. also, feel free to contact me at petergutterman@yahoo.com (if this is considered kosher at SOS). let us know what your results are if you stick your toes in this water. Lots of experimenting before you commit.
Good luck.
Pete
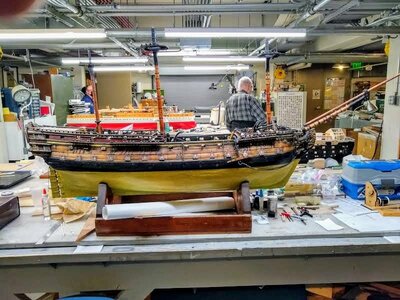
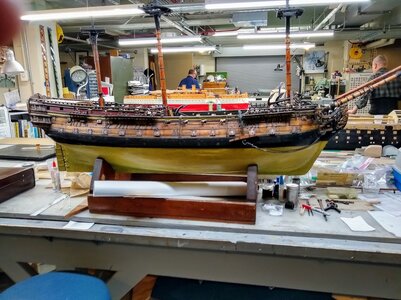
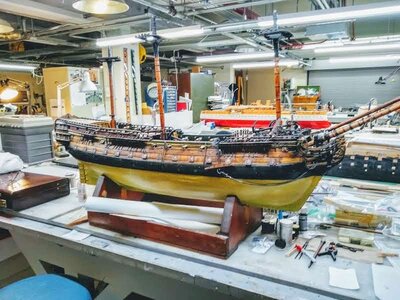
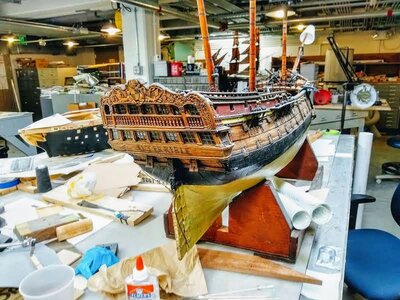
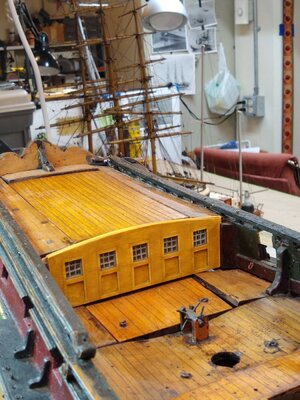
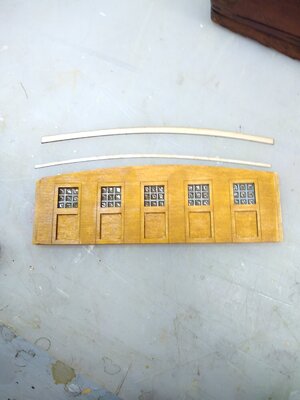
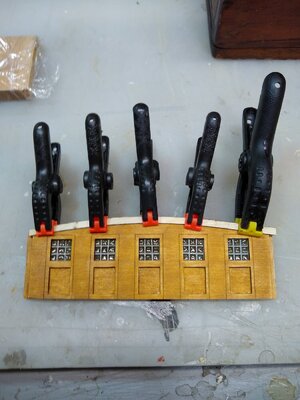
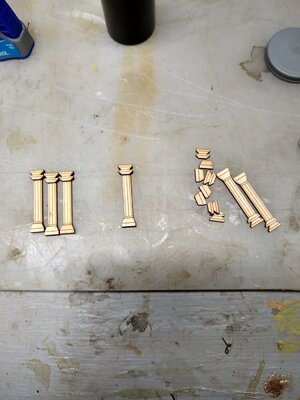
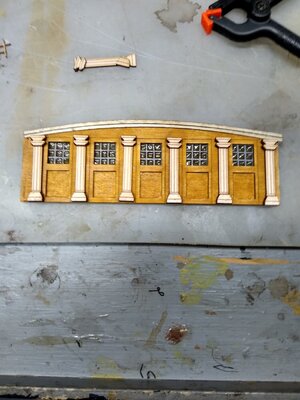
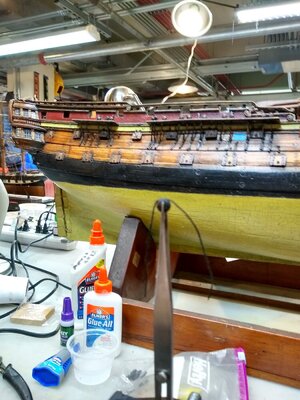
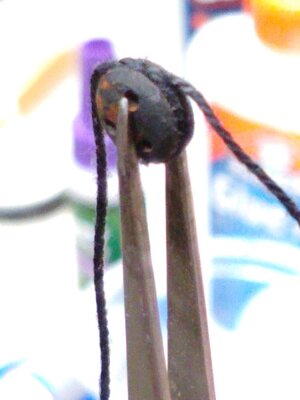
These are some images that I meant to share, just now uploading.
the model is an 18thc. Spanish ship of the line, "El Terrible" that I have been restoring for Roger's collection at The U.S.N.A. museum. The bulkhead was recreated from birch plywood cut out with a laser. The birch ply was used for its ability to hold up accurately cutting a multitude of tiny parts. It was finished to match the late !8th c. original wood using the method I described in my earlier post. Also, I employed glazing in matching repairs to the original finish, in particular the hull bottom. I used a pencil to recreate the crackle in the finish of the bottom where necessary.


Last edited by a moderator:
Tung oil also tends to have an aversion to glue as well.We were talking about the protection of the timbers on the actual ship, and the color that the model would be as a result. However, Danish oil seems to create the most attractive wood finished on a model, provided all course scratches in the wood are properly sanded out. All the grain shows. Danish oil does not seal the wood like tung oil, but lets moisture in and out similar to linseed oil. Tung oil will seal the pores of the wood, given a few coats. It tends to be gummy unless you apply thin coats and let dry in between. It is used as wood preservative in real marine environments on boats even today. I prefer Danish oil as a stain on a model. Given enough coats, tung oil will make the wood glossy. Some people varnish their model until it is very glossy, as if it were dipped in glass. To me, that looks ugly and certainly unrealistic. A satin finish is the most glossiness that wood should have if your aim is for realism.
Basically, "birch is a bitch"! Birch is not used for furniture (at least on surfaces that show) for all the reasons you enumerated and then some. There really is nothing you can do to make birch look like box (or any other wood used in fine models). That is why no-one uses it except kit makers (it is also relatively cheap). The only semi-passable technique is to paint it. Even with paint you have to use a good grain filler to hide all the irregularities, cover that with several layers of well sanded primer and finally cover that with several layers of air-brushed paint. I have just listed all the reasons why I have never painted anything or used birch for anything. Life is just too short!I have started the Occre HMS Bounty. The bulkheads and keel (and other parts) require staining. The appearance is important because the side of the ship is open for viewing. The bulkheads appear to be birch, which stains poorly. My efforts and have been blotchy and amateurish. I have tried regular stain, gel stain, wood conditioner, and combinations of these. I've also tried wood dye. The grain of this wood still comes out splotchy and I believe even if I got it perfect, the grain would look terribly out-of-scale and unacceptable. Any thoughts?
Hi Boat guy 7
I got friendly with my local wood merchant and they gave me a big swag of different veneers . Get them to label or identify the different species of each one so you can at least settle on one type and give it a semi gloss finish so you dont need to stain which is where your problem lies. If possible bring (or should I say take) your model to them and see what they have so they can match your sample. The mob I use is called Bruynzeel and they supply all sorts of plywoods and veneers. The species here in Australia will differ to yours in the USA. No more blotchy results ! And much better looking than paint !
All the best
Mal
- Joined
- Jun 17, 2021
- Messages
- 3,132
- Points
- 588

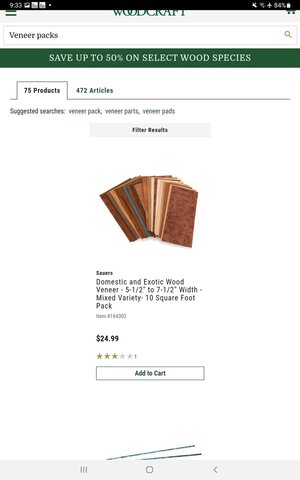
I do, Indeed have this pack .great variety. Absolutely worth the price. I have used bits of it to good effect for lots of projects for several years .Just one pack with lots left over!
Pete
Pete
As mentioned earlier, uneven stains can occur in a variety of woods, but it can be controlled. I discovered a book I didn’t realize I had called The Woodworker’s Problem Solver. It also recommends gel stains because they barely penetrate the wood. Stain controllers fill the pores to prevent liquid stains from penetrating unevenly. The woods mentioned were for, pine, poplar, aspen, birch, and cherry. I hope this helps. I know it’s a bit repetitive considering earlier posts.


