Kingfisher 1770 1:48 POF

One of the hanging knees has disappeared off my workbench so I'll just redo these at the same time. Where do pieces go when they disappear? I looked EVERYWHERE :mad:.

Oh, man. I think you have a really big problem in your house.

This very dangerous animal, called carpet monster (in German Teppichmonster), has found his way to the US and to your home. He swallows an un known number small pieces and you will need a lot of extre time to rebuild them. I haven't yet found a way to get the monster out of my flat.

My thoughts are with you.:p
 
Thank you again, dear friends, for the likes and nice posts.

As I continue to think through how much of the lower deck I will be building, I turned my attention to the hanging and lodging knees. For sure I will include these on the finished side. The jury is still out on the unfinished side.

As the lower deck is omitted from the kit, these knees needed to be fabricated from my very limited supply of boxwood. I created the necessary patterns and traced those to the sheet stock. I paid little attention to grain in the crafting of these rather small pieces.

View attachment 438570

View attachment 438571

It took me a while to figure out how to approach this aspect of the build. I ended up fitting the hanging knees first (these do not appear at every beam on the lower deck - no heavy guns here) and then the lodging knees. Only halfway done at this point (the previously fitted hanging knees are not shown here)...

View attachment 438577

Please don't concern yourself with the precision of the fit to the hull - I will be installing a waterway on this side and that will cover some sins...

About the midship region there is a special situation where the lodging knees change direction relative to the beams. This means that there is a knee that sits to the aft of one beam, and a knee that fits forward of the neighboring beam. It took me a while to figure out how to make the necessary multilevel knee:

View attachment 438573

View attachment 438574

View attachment 438576

View attachment 438578

Some parts are easier than others!

Finally, here is a photo essay showing my solution to making 8-sided pump tubes:

View attachment 438579

View attachment 438580

View attachment 438581

View attachment 438582

The cool kids use a mill - but this only took me about an hour...

Thanks for the visit!
Paul! AWESOME!!!! I imagine that you're not forming these parts by focusing your mind and clenching your stomach muscles. Virtuosity!! I'm really going to have to stop using edged stones and flint to cut my parts from the wood and maybe get some better quality wood? ROTF
 
Second that...
Thanks Johan!

Wow, what and update!
I think it's really that the cool kids find a way around the mill. Beautiful fabrication. And that's a lot of knees to cut out in a single update. Inspiring work, as always
Well, I've never been a 'cool kid' so I may not be well-versed on how that works ROTF. Thank you for the nice post!

That where only tiny bits, but WOW what a great sight it is. Magnificent work Paul
Yup. Not just tiny bits but fiddly tiny bits!
 
Paul! AWESOME!!!! I imagine that you're not forming these parts by focusing your mind and clenching your stomach muscles. Virtuosity!! I'm really going to have to stop using edged stones and flint to cut my parts from the wood and maybe get some better quality wood? ROTF
Hey Chuck, thanks for the nice comments. You're too self-effacing by half. I love your work!

And yes, the boxwood can be shaped far better than a soft wood. Of course that means I can't blame the material :rolleyes:.

Dear Paul
I'm admire your beautiful and accurate working, it's great pleasure to see the results Okay :) Thumbsup
How nice of you to say Shota!

Everything is looking great
Thank you, my friend! I don't think we've seen an update from you recently. Are you holding back?
 
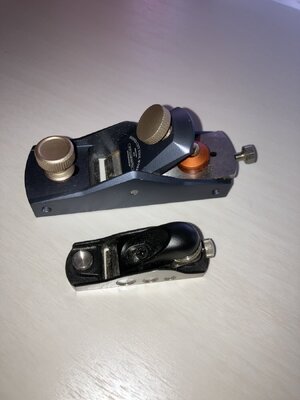
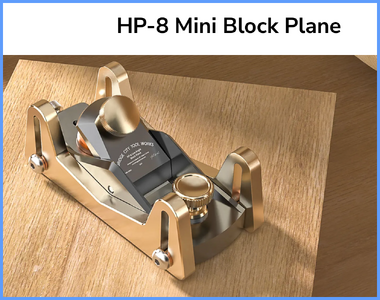
Paul, I concur with your assessment of Veritas Tools however, if you want a top of the line small block plane look at the Bridge City Tool Works HP-8 mini plane.
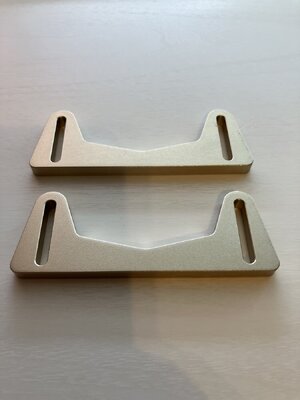
The blade angle is adjustable, has a pair of shoes you can attach to use as a thickness plane and the blade has a very fine grind on their Rockwell 60 blade. I've used this extensively without the need to sharpen.
Yes, it is somewhat larger than the Veritas as you can see in the picture however not too large to be cumbersome on small pieces. Did I say it was sharp.


IMG_0019.jpegIMG_0020.jpeg2024-03-31_15-15-48.png
 
Sometimes I have the feeling, that my "monster" ate already 10% of all my parts - so after some year, there is already a complete ship laying around
I hate it when these small brass parts falling down, right after you cut them off from the photo etched sheet - these parts are hard to make new..... so you can often see me on my knees and searching with a flashlight - sometimes I find them sometimes not, sometimes I find them weeks later

BTW: very good work with the knees and the pumps
 
Dear Paul,
I built the Kingfisher kit some years ago. I maked the hawsetimbers twice without having them to fit. Then I noticed in David Antscherls book on page 22, that the halfbreadth line and the toptimber line where crossing each other in the framingplan by frame seven. After that I made a new attempt and everything fitted perfect. Perhaps the lines are not drawn on your plan either?
Best regards Magnus
Hallo @Heimdahl
we wish you all the BEST and a HAPPY BIRTHDAY
Birthday-Cake
Would be great to see your KIngfisher ....... Paul, sorry for highjacking your log
 
Greetings, friends, from the middle of the Pacific.

Dragging my bride on a goat trail through Waimea Canyon:

IMG_1570.jpeg

Near Wailua after a long paddle and hike:

IMG_9344.jpeg

Two days later when she was speaking to me again…

IMG_1601.jpeg

On the north shore:

IMG_1612.jpeg

And from our cottage on the south shore:

IMG_9402.jpeg

Catamaran cruise scheduled for tomorrow but the weather may be turning on us. Modeling will have to wait.
 
Back
Top