Hello Cap'n Jack. If you choose to try to use files in this way, keep in mind that they work on the 'push' stroke. In other words, you need to orient them properly (into the rotation of the lathe).interesting use of a needle file. I never thought of using it that way. Seems to work well.
-

Win a Free Custom Engraved Brass Coin!!!
As a way to introduce our brass coins to the community, we will raffle off a free coin during the month of August. Follow link ABOVE for instructions for entering.
-

PRE-ORDER SHIPS IN SCALE TODAY!
The beloved Ships in Scale Magazine is back and charting a new course for 2026!
Discover new skills, new techniques, and new inspirations in every issue.
NOTE THAT OUR FIRST ISSUE WILL BE JAN/FEB 2026
You are using an out of date browser. It may not display this or other websites correctly.
You should upgrade or use an alternative browser.
You should upgrade or use an alternative browser.
Kingfisher 1770 1:48 POF [COMPLETED BUILD]
- Thread starter dockattner
- Start date
- Watchers 146
- Joined
- Aug 14, 2018
- Messages
- 820
- Points
- 403

Hi Paul, if you don't mind, could you tell me the gap spacing of your gratings? They look 'just right' and are very pleasing to the eye.
Cheers JJ..
Cheers JJ..
- Joined
- Oct 23, 2018
- Messages
- 874
- Points
- 403

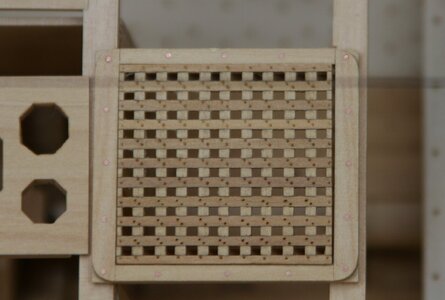
@dockattner Really nice progress, Paul. But I do not understand the copper nails on top of the frames for the gratings. As far as I know, was every side of the frames one piece of wood. It is easier to built it from two pieces, but than glue between the pieces is enough. 
For all other pieces you use treenails, Why have you now changed your method.
For all other pieces you use treenails, Why have you now changed your method.
Absolutely fantastic work, as always I am thrilled with your absolutely fine and precise work, very well done. Your video is great and a good guide.
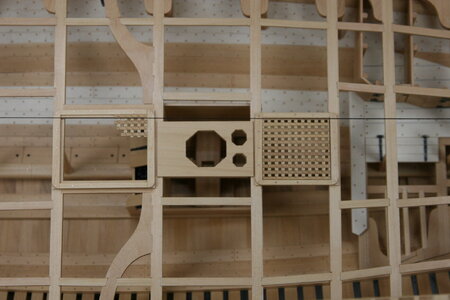
The holes (and the lathe strips) are about 1.2 mm (the conversion at 1:48 creates a hole about 2 1/4 inches).Hi Paul, if you don't mind, could you tell me the gap spacing of your gratings? They look 'just right' and are very pleasing to the eye.
Cheers JJ..
Thank you kindly, Tobias!Absolutely fantastic work, as always I am thrilled with your absolutely fine and precise work, very well done. Your video is great and a good guide.
Dang it! You're right Christian. I read Antscherl wrong. Volume 1 p 272 calls for 3/4 inch metal bolts only on the head-ledges. There should be treenails on the coamings.@dockattner Really nice progress, Paul. But I do not understand the copper nails on top of the frames for the gratings. As far as I know, was every side of the frames one piece of wood. It is easier to built it from two pieces, but than glue between the pieces is enough.
For all other pieces you use treenails, Why have you now changed your method.
Bother us?? We look forward to seeing your incredible work and progress every time you post!!!
Love the gratings and the smooth finish on the lathe turned balusters...all so precise and true.
The hanging cut away grating is truly a delicate work of art.
Love the gratings and the smooth finish on the lathe turned balusters...all so precise and true.
The hanging cut away grating is truly a delicate work of art.
Wow, just catching up on your log. I'm blown away by your detail work. Absolutely incredible.
Jan
Jan
Thanks, my friend!Bother us?? We look forward to seeing your incredible work and progress every time you post!!!
Love the gratings and the smooth finish on the lathe turned balusters...all so precise and true.
The hanging cut away grating is truly a delicate work of art.
Thank you Jan! I'm really enjoying this part of the build.Wow, just catching up on your log. I'm blown away by your detail work. Absolutely incredible.
Jan
Fantastic !!!!Thanks, once again, for all the likes on my previous posting!
On the Kingfisher there are posts that support the centerline of the beams of the lower deck as well as the beams of the upper deck. The posts for the lower deck are a simple affair which would have been quite suitable for the hold:
View attachment 451934
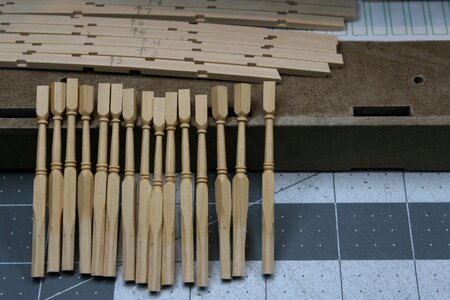
But I wanted to make something more 'elegant' for the upper deck beams. A few years ago I had purchased a mini-lathe which I never used. Would it work to turn posts from square stock? Let's find out...
First, some blanks with layout lines:
View attachment 451926
A back-cut to prevent any tear-out:
View attachment 451927
And a preliminary beveling of the sacrificial end that would go in the chuck as well as the center turned portion:
View attachment 451928
I purchased this mini-lathe for around $30 USD:
View attachment 451929
View attachment 451930
Here we go!
View attachment 451931
Just for fun I recorded the turning of one of the posts. As you will see I just used needle files. I guess someone who knows how to properly use a lathe would use a carbide cutting tip and a pattern jig but that's above my pay grade. The video is about 10 minutes long and will show the steps I went through to make a single post. I suggest you 'fast-forward' as it's not exactly a big budget action-adventure film:
Here is a photo of the finished product:
View attachment 451932
And now the total run.
View attachment 451933
Of course, no two are exactly the same, but I believe these will work! Add another 'skill' to my model-building repertoire.
Great job!!! Paul, it looks like it’s time for me to enroll as your student. Will you take it?A few lingering details before the construction of the upper deck commences:
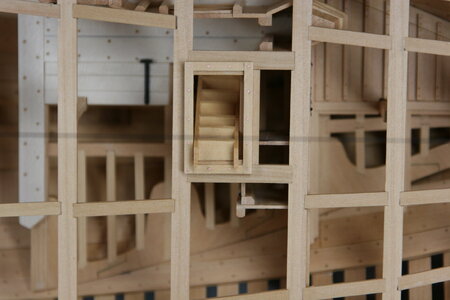
A ladder into the hold:
View attachment 452247
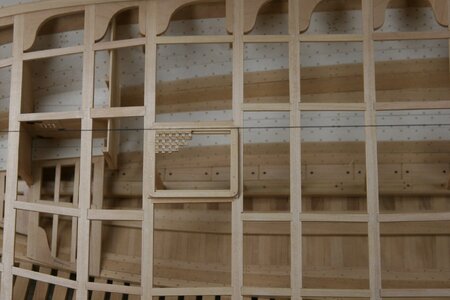
The grates:
View attachment 452244
View attachment 452245
View attachment 452246
The 'finish' on the upper deck posts:
View attachment 452243
Everything is now in place for the fabrication of the upper deck. I kind of doubt I will bother you again for a bit. We'll see...
Those balusters are a great piece of work Paul, if that was your first attempt on the lathe, then i wonder what you wil show us in a couple of months
Paul, I have always strugle with ladder builts. Looks very simple, but you need the correct angle and technique to cut the slot (is this the correct word?) for the steps. Knowing how detail oriented are you and your skills, can you please tell me (us) how you did your ladder.
Thank you !!
Daniel
Thank you !!
Daniel
A few lingering details before the construction of the upper deck commences:
A ladder into the hold:
View attachment 452247
The grates:
View attachment 452244
View attachment 452245
View attachment 452246
The 'finish' on the upper deck posts:
View attachment 452243
Everything is now in place for the fabrication of the upper deck. I kind of doubt I will bother you again for a bit. We'll see...
Actually, I would love to share a workshop with you Sasha! I'm pretty sure you will need to take the role of lead teacher, but I'm a fast learner!Great job!!! Paul, it looks like it’s time for me to enroll as your student. Will you take it?
Thanks, Peter. I'm pretty happy with the result, though if you look at them side by side they are all a bit different. But I think (hope) that will disappear once they get installed...Those balusters are a great piece of work Paul, if that was your first attempt on the lathe, then i wonder what you wil show us in a couple of months
Thanks Allan! Every once in a while even a blind squirrel will find an acorn...Your gratings, coamings and head ledges look super. Rounded corners above the deck surface and no open holes against the coamings and head ledges is so nice to see for a change. Beautifully executed!
Allan


