-

Win a Free Custom Engraved Brass Coin!!!
As a way to introduce our brass coins to the community, we will raffle off a free coin during the month of August. Follow link ABOVE for instructions for entering.
-

PRE-ORDER SHIPS IN SCALE TODAY!
The beloved Ships in Scale Magazine is back and charting a new course for 2026!
Discover new skills, new techniques, and new inspirations in every issue.
NOTE THAT OUR FIRST ISSUE WILL BE JAN/FEB 2026
You are using an out of date browser. It may not display this or other websites correctly.
You should upgrade or use an alternative browser.
You should upgrade or use an alternative browser.
Kingfisher 1770 1:48 POF [COMPLETED BUILD]
- Thread starter dockattner
- Start date
- Watchers 146
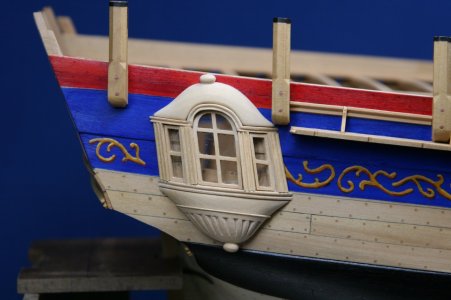
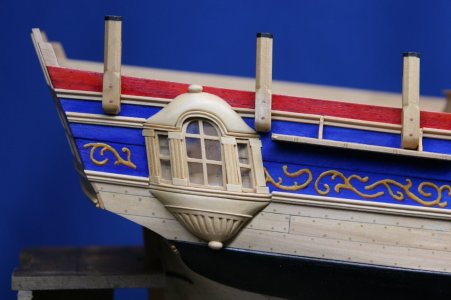
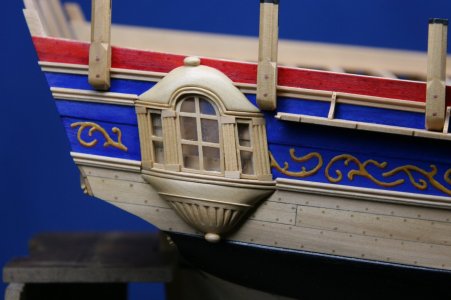
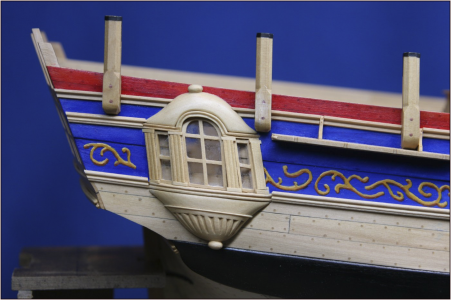
Very nice quarter badge. I'm sure that the next project will suit you perfectly, very neatly done.
I can only agree with this without reservation. Perfect.Very nice quarter badge. I'm sure that the next project will suit you perfectly, very neatly done.
Everything about the badge is striking but my big question like Chestcutter's, how did you do that?Also is the proud ridge of the lower decoration a separate piece of wood or part of the whole?
Thanks for all the likes! And to Ron, Grant, Christian, Michael, Mirek, Shota, Tobias, Adi, and Daniel - additional thanks for the encouraging posts.
But really, how did you create the recesses in the lower decoration and how did you get that knob so perfectly smooth, levelled and formed?
Also is the proud ridge of the lower decoration a separate piece of wood or part of the whole?
Everything about the badge is striking but my big question like Chestcutter's, how did you do that?
Recesses: are just cut in with a V-shaped chisel. The hardest part was building up the courage to potentially ruin a part that had been worked on for several hours.
Knob: sandpaper
Ridge: that one is modeling magic
 ... I very carefully cut the lower part in half (horizontally) - inserted a wafer thin piece of veneer - did some preliminary shaping of the wafer - glued everything back together - completed the final shaping - and breathed a sigh of relief...
Last edited:
Brilliant! Absolutely Brilliant!Ridge: that one is modeling magic...
I really like this Paul, great work! I had imaged you might have used an insert to achieve the ridge on the lower piece. It could have also been carved, but most likely not to that precision. So you made a wise choice on how to achieve that. Even in carvings, some pieces are made separately and added to the main piece. There are no rules, whatever it takes to get the best desired end result! 
The photo documentation of your beautiful quarter badges is a superb as the work and techniques you came up with. Thanks for being willing to share this work and your techniques!! Invaluable to all.
You know that thing that happens when you add something to your ship and think you're happy with it - but then every time you walk past the ship your eyes are drawn to what you just installed because there is just something wrong there...
Here is the latest iteration of the munnion covers. Before and after:


I'm not sure this is quite there yet...
Here is the latest iteration of the munnion covers. Before and after:


I'm not sure this is quite there yet...
Well you know how many times I changed the panels on the walls of my NL ship!You know that thing that happens when you add something to your ship and think you're happy with it - but then every time you walk past the ship your eyes are drawn to what you just installed because there is just something wrong there...
Here is the latest iteration of the munnion covers. Before and after:
View attachment 489756 View attachment 489757
I'm not sure this is quite there yet...
 There were people who thought I would never move past that.
I think you’re moving in the right direction. I would probably add a feature to the upper and lower pieces you added, maybe a fine groove with a v file towards the upper edge on the lower ones and bottom edge on the uppers. I also feel like the roof needs something extra. Maybe shingles or decorative lines? But I like ornate stuff and it’s all subjective. You’ll know when you’re happy, and then you’re done!
- Joined
- Jun 17, 2021
- Messages
- 3,196
- Points
- 588

I know you've been following my Flying Cloud build. So, I know you understand how well I can relate.You know that thing that happens when you add something to your ship and think you're happy with it - but then every time you walk past the ship your eyes are drawn to what you just installed because there is just something wrong there...
Here is the latest iteration of the munnion covers. Before and after:
View attachment 489756 View attachment 489757
I'm not sure this is quite there yet...
Beautiful work. I'm envious.
 Pete
Pete- Joined
- Oct 23, 2018
- Messages
- 883
- Points
- 403

I know, what you mean and I know the feeling. To be honest, I like the first version of your batch more. The new installed parts on the top and bottom of the stanchions are looking like simple pieces of wood and not like parts of the installation.
I think I understand your doubts, Paul. But now the attention is drawn to the individual part even more. That was also the case with the windows on Dean's @Dean62 model. But now that they are provided with all the 'in's and out's' you first look at the whole and those earlier attention-grabbing details are less noticeable.You know that thing that happens when you add something to your ship and think you're happy with it - but then every time you walk past the ship your eyes are drawn to what you just installed because there is just something wrong there...
Here is the latest iteration of the munnion covers. Before and after:
View attachment 489756 View attachment 489757
I'm not sure this is quite there yet...
I think you have the best view of what still needs to be applied and that it might not be so bad later.
So from one side it is quite difficult
Only a dilemma to wait with re-dos’ when the whole thing is ready.
Regards, Peter
- Joined
- Aug 8, 2019
- Messages
- 5,554
- Points
- 738

I understand your feelings to Paul and I agree with Christian. And it looks that there is something wrong with the geometry that drawn my eyes in. The knob on the roof is not in line with the rest.
And the longer I look the more I see something in the roof top and the opposite part under the window. To much flesh, to rounded or to bold? Difficult to judge on a picture.
And the longer I look the more I see something in the roof top and the opposite part under the window. To much flesh, to rounded or to bold? Difficult to judge on a picture.
- Joined
- Dec 3, 2022
- Messages
- 1,547
- Points
- 488

You know that thing that happens when you add something to your ship and think you're happy with it - but then every time you walk past the ship your eyes are drawn to what you just installed because there is just something wrong there...
Here is the latest iteration of the munnion covers. Before and after:
View attachment 489756 View attachment 489757
I'm not sure this is quite there yet...
I agree. The pilasters aren’t right. The tops and bottoms don’t harmonise with the columns, making them appear to be three ‘architectural elements’ instead of one. I think it’s the angles of the bases that’s off.
Thanks for the engagement, guys. The visuals are quite tricky. I had another version where the blocks at the top and bottom of the column (I'll call them plinths even though they aren't) were beveled but that looked even worse:

I am constrained by the very narrow lip above and below the columns (I did have another version that featured a molded upper and lower plinth but that extended outside/beyond the lip and drew too much attention to itself). I have not tried Dean's suggestion to do the shaping subtractively. Maybe the sides and the tops and the bottoms of the plinth ALL need to be angled?
I have seen only two models (swan class builds) that get this right. At this point I am struggling seeing and producing the geometry at scale...
Semicircular, fluted columns come to my mind's eye with an upper and lower base also semicircular.
- Joined
- Dec 3, 2022
- Messages
- 1,547
- Points
- 488

Maybe the sides and the tops and the bottoms of the plinth ALL need to be angled?
I think the Georgians would have done that to the entire stern gallery with their love of geometry. Maybe even the curves of the roof and 'basement' of the things. Certainly that's what I was thinking about the pilasters.
Hi Paul. IMHO: if you make the blocks on top and bottom of the columns as high as the profiles of the windows, then they are more in balance.Thanks for the engagement, guys. The visuals are quite tricky. I had another version where the blocks at the top and bottom of the column (I'll call them plinths even though they aren't) were beveled but that looked even worse:
View attachment 489793
I am constrained by the very narrow lip above and below the columns (I did have another version that featured a molded upper and lower plinth but that extended outside/beyond the lip and drew too much attention to itself). I have not tried Dean's suggestion to do the shaping subtractively. Maybe the sides and the tops and the bottoms of the plinth ALL need to be angled?
I have seen only two models (swan class builds) that get this right. At this point I am struggling seeing and producing the geometry at scale...

Just a quick Photoshop adjustment ........
Regards, Peter


