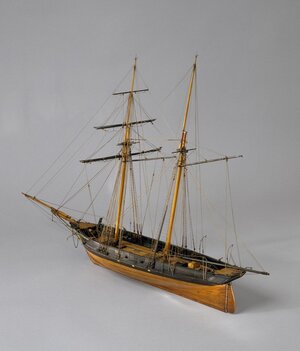
La Toulonnaise 1823 - French schooner - Billing Boats 1:50

Joined
Aug 30, 2020
Messages
639
Points
308

I will log a few notes on my build here.

This kit was given to me after passing through a few hands, the original owner requested it be built as it had to be shelved after he barley started it.

I think the scale is 1:50 but nothing is obvious on the box except it's made in Denmark.

It would be quite big once finished as the dimensions are approx 980mm from bowsprit to stern and 700mm high.
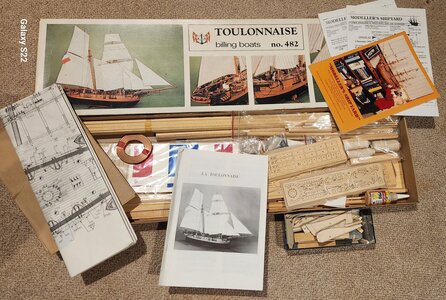
Box Kit.jpg

I suspect this particular kit is at least 25 years old as there is a Modeller's Shipyard magazine and flyers from the late 90's, this design may have been around for quite a while since.

A quick check in the box and it seems like all or at least most parts are there except accessories.
Billing Boats decided that if you wanted the canons, blocks, extra life boats, etc then you need to purchase another kit No. 483 so I don't have these.

This image is from the internet as an example.
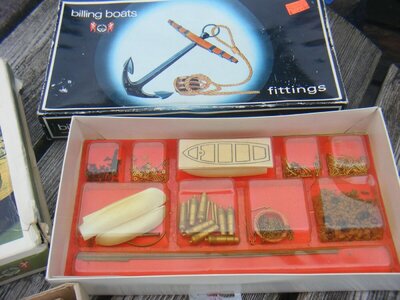
483.jpg

There are no laser cut parts and the wood is well dried out.

The kit is a plank on bulkhead type although there is no central spine for the bulkheads as it is built up from individual wood parts.
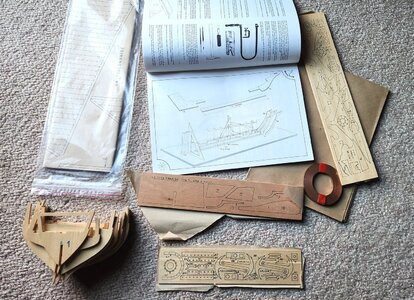
Pics.jpg

There is a roll of flat copper included so not sure what its for, perhaps lining the hull.

Looking through the instructions there is not a lot of technique details so if it's your first build it may have been a challenge to complete it.
Not sure how the materials will hold up and to complete the model some scratch built or purchased parts will be required, but I think I am up for the challenge.

A few other kit manufactures have a similar kit so was wondering if anyone has built this particular version, let me know how it went.
 
This kit was my 2nd model I ever built. It was bought for me by my late wife in the early 80s as a Christmas present.

Nice lines to it when built but as mentioned previously the fittings kit was separate but I also noticed way back then that most parts were generic for Billings with the identical fittings used on other models. Very easy to source what you need elsewhere and with better quality too to be fair.

Good luck with the build :)
Thank you for the feedback.
I suspected the kit might be from the eighties.
The additional fittings shouldn't be an issue as I will make or source them at the time as required.
 
And so it begins, I plan to make a few notes as the build progresses.

My idea with this build was to keep it fairly simple and not get to stressed about the finer details or if things go wrong, after all it's a hobby and should be fun to do.

A previous owner did make a start cutting out a few pieces but nothing had been glued yet.
I did an inventory which proved difficult to match everything so it still left a few question marks, a few small parts were missing which I could make and one part that was already cut out and broken, although still not sure what the roll of copper strip is for.

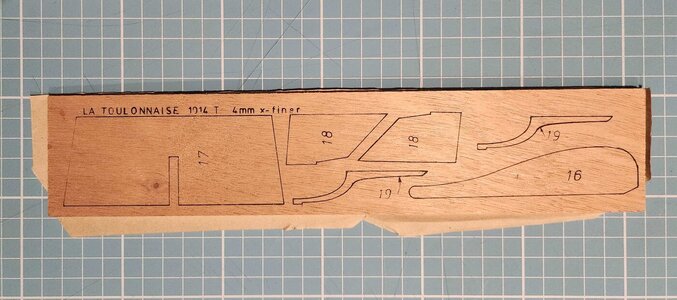
The pre-drawn sheets of wood are very dry and somewhat brittle, there is a technique mentioned in the instructions to glue some thin paper to the back of the wood before cutting the parts out which I did and worked pretty well.
There are no laser cut parts here it's all cut out manually and some of the wood was slightly warped as well.

Parts.jpg


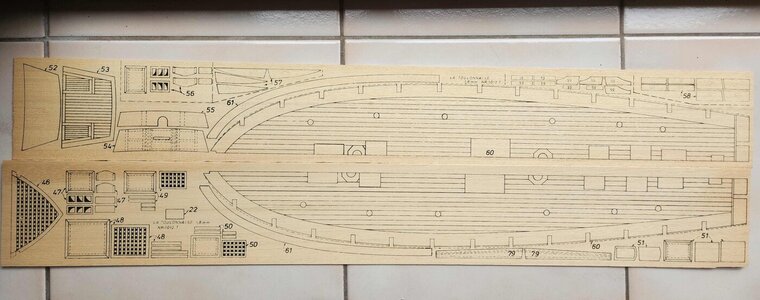
There are no images of the wood sheets in the instructions so before cutting parts out I took photos.

Wood.jpg

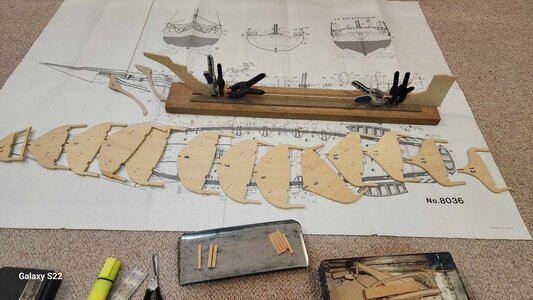
I made a base to mount the initial skeleton and with a bit of shaping to make parts fit I started to assemble it.

Skeleton.jpg

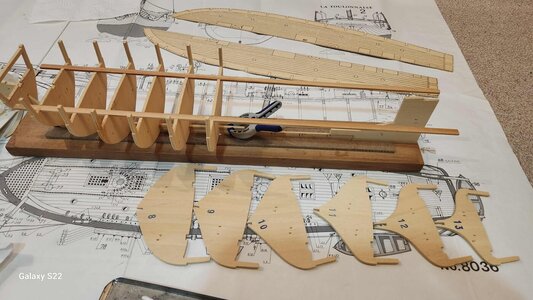
Now I made it this far and realised some things weren't quite lining up.

Skeleton 2.jpg

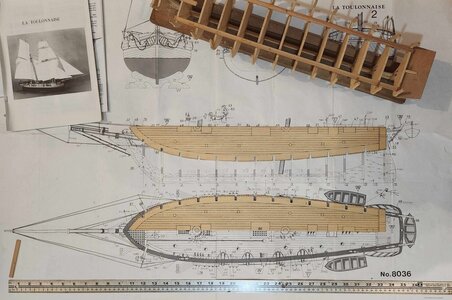
I decided to cut out the decks and laid them on the plans and low and behold they don't match, I assume the plans would be a 1:1 so either something shrunk or something expanded.
I will need to realign things as I go to make everything fit, at least now I am aware of it I can plan ahead.
Note the ruler at the bottom, it's going to be a big ship when completed.

Deck.jpg
 
I built this model in the early '80's when I was living in the UK. The box was the same. This is a 1 layer plank on bulkhead build. This was back when you had to cut the parts out. Ha. More fun now that the parts are cut for you. This is a beautiful model. Good luck on your build.

P.S. Just read your log Richie. Sorry, that was about 40 years ago and i don't recall anything about the build other than soaking the hull planking and bending the heck out of them to force them to fit. We didn't have internet and I was just guessing how to fit the planking. But the hull turned out pretty well. Actually it turned out better that some of the hulls I'm trying to fit now. That's back when I had some skills. ROTF
 
Last edited:
I built this model in the early '80's when I was living in the UK. The box was the same. This is a 1 layer plank on bulkhead build. This was back when you had to cut the parts out. Ha. More fun now that the parts are cut for you. This is a beautiful model. Good luck on your build.

P.S. Just read your log Richie. Sorry, that was about 40 years ago and i don't recall anything about the build other than soaking the hull planking and bending the heck out of them to force them to fit. We didn't have internet and I was just guessing how to fit the planking. But the hull turned out pretty well. Actually it turned out better that some of the hulls I'm trying to fit now. That's back when I had some skills. ROTF
Thank you for the feedback, I wasn't sure if it was double or single plank as there were several lots of bulk strips, I suspect the thin ones will be for the deck then.
Yes not sure how bending this wood will go being so old.

I had a closer look at the reel of copper strip in the box and noticed a price sticker on it so now realise it was not part of the original kit, wonder what they had in mind for it.

Like my first build I stated nearly 30 years ago and messed up the planking after not getting far so it sat unfinished for years, now the internet is a resource it helped educate me to finish the build.
 
I sure hope I got that right about the single planking. I built several ships in the early '80's. This ship, Golden Hind, Wasa, Blue Nose a couple more I can't remember the names of. I seen to recall all of them being single plank.
 
Copper tape for Stained glass projects , re purposed for coppering sailing ship bottoms of the appropriate period. I'm sure there are experts on SOS, and perhaps a U- Tube video on the process.
I had lots of printed parts on basswood sheets for a 1970s-80s Scientific Models Robt. E. Lee steamboat kit. A lot of cutting and sorting. I used the ubiquitous X-acto knife, and a very fine jeweler's saw blade. Always cut out the pieces first to separate them with lots of material left outside the lines. Then cut the pieces "proud"(just outside the lines) and trim them to fit with very fine jeweler's files. The paper backing sounds like a good idea, but water based glues will warp the wood badly. Glue stick best but still iffy. NEVER fully cross or eradicate the outlines! organize the cut out parts in labeled baggies.

Hope this helps, Pete
 
Last edited:
I sure hope I got that right about the single planking. I built several ships in the early '80's. This ship, Golden Hind, Wasa, Blue Nose a couple more I can't remember the names of. I seen to recall all of them being single plank.
No problem thanks I will figure it out when I get to that point, if it is it will be my first single planked model.
 
Copper tape for Stained glass projects , re purposed for coppering sailing ship bottoms of the appropriate period. I'm sure there are experts on SOS, and perhaps a U- Tube video on the process.
I had lots of printed parts on basswood sheets for a 1970s-80s Scientific Models Robt. E. Lee steamboat kit. A lot of cutting and sorting. I used the ubiquitous X-acto knife, and a very fine jeweler's saw blade. Always cut out the pieces first to separate them with lots of material left outside the lines. Then cut the pieces "proud"(just outside the lines) and trim them to fit with very fine jeweler's files. The paper backing sounds like a good idea, but water based glues will warp the wood badly. Glue stick best but still iffy. NEVER fully cross or eradicate the outlines! organize the cut out parts in labeled baggies.

Hope this helps, Pete
Thanks for the tips Peter.
Some of the printed parts in this kit are very close together and I already figured out with the mismatched plans and wood size some adjustments are going to be needed.
 
Hi Richie. It's great to see you start a new project. I am also pretty sure it will be a single-layer planking model which just adds to the excitement. @Dean62 Dean's current build of the Norske Love is also a Billings single-planker so maybe he can give you some good tips on the Billings kit.
 
Hi Richie. It's great to see you start a new project. I am also pretty sure it will be a single-layer planking model which just adds to the excitement. @Dean62 Dean's current build of the Norske Love is also a Billings single-planker so maybe he can give you some good tips on the Billings kit.
Hi Heinrich. Thank you for the tip on the Norske Love from @Dean62, yep both the builds start exactly the same way right donw to the generic diagrams, looking through the first 2 pages of the log highlights how the top level builders do it and well me still second rate, pity I didn't know about this log earlier I could have learnt a few things which as already causing me a few issues and I am tempted to dismantle it and start again instead of trying to correct a few things now.

By the way all the best with your mid year break, hope it all goes well and you have a great time.
 
I will log a few notes on my build here.

This kit was given to me after passing through a few hands, the original owner requested it be built as it had to be shelved after he barley started it.

I think the scale is 1:50 but nothing is obvious on the box except it's made in Denmark.

It would be quite big once finished as the dimensions are approx 980mm from bowsprit to stern and 700mm high.

Box Kit.jpg

I suspect this particular kit is at least 25 years old as there is a Modeller's Shipyard magazine and flyers from the late 90's, this design may have been around for quite a while since.

A quick check in the box and it seems like all or at least most parts are there except accessories.
Billing Boats decided that if you wanted the canons, blocks, extra life boats, etc then you need to purchase another kit No. 483 so I don't have these.

This image is from the internet as an example.

483.jpg

There are no laser cut parts and the wood is well dried out.

The kit is a plank on bulkhead type although there is no central spine for the bulkheads as it is built up from individual wood parts.

Pics.jpg

There is a roll of flat copper included so not sure what its for, perhaps lining the hull.

Looking through the instructions there is not a lot of technique details so if it's your first build it may have been a challenge to complete it.
Not sure how the materials will hold up and to complete the model some scratch built or purchased parts will be required, but I think I am up for the challenge.

A few other kit manufactures have a similar kit so was wondering if anyone has built this particular version, let me know how it went.
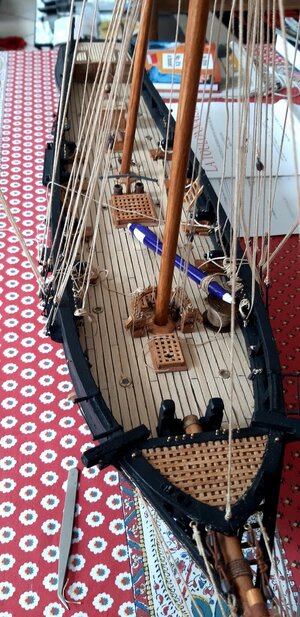
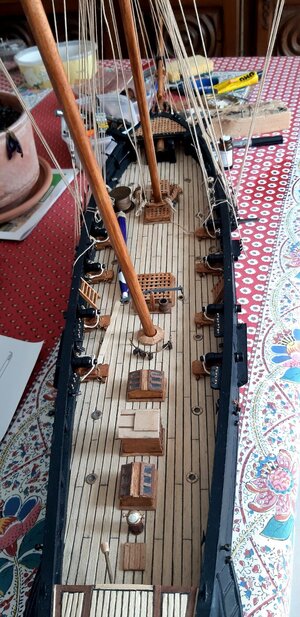
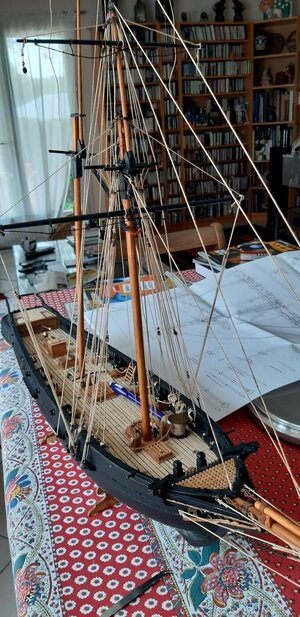
My wife bought me this Billing Boats model (with fittings) in 1979 for my 30th birthday (we were then living in Phoenix, Arizona). Probably because I was born in Toulon… I built the hull but then had to stop because of family, children, work, , etc. Then came the COVID and the lockdown and I started working on it again (40 years later!). After staying for so long in cellars or garages the hull is slightly warped and the rudder has disappeared…

Unfortunately, my wife has been fatally sick for a year (she died last September) and I had to stop again.

Now I am back to it. It is a nice model. I found the original plans not detailed enough and inaccurate, and I recently bought the plans, booklet and pictures of the ship published by the French “Association des Amis du Musée National de la Marine” (Association of the friends of the national maritime museum) https://boutique.aamm.fr/monographies?page=3.

Quite a different view from the Billing Boats model (and from the actual model in the Maritime Museum in Toulon!). So, I must juggle between both plans – I must admit the AAMM rigging seems better to me: no deadeyes but “turnbuckles”.

I had to search the internet to find and buy some extra or missing elements (i.e. double blocks in Britany, eye bolts in Australia!).

If you have time, you can improve it by adding nice details, e.g. I planked the desk instead of using the printed sheet, added some details to the guns, made proper gratings, etc.

Important as the wood is probably very dry: glue the wood sheets to paper before cutting them (then remove glue and paper).

Enjoy!

20230709_154036.jpg

20230709_152815.jpg

20230709_152750.jpg

72m50212.jpg
 
My wife bought me this Billing Boats model (with fittings) in 1979 for my 30th birthday (we were then living in Phoenix, Arizona). Probably because I was born in Toulon… I built the hull but then had to stop because of family, children, work, , etc. Then came the COVID and the lockdown and I started working on it again (40 years later!). After staying for so long in cellars or garages the hull is slightly warped and the rudder has disappeared…

Unfortunately, my wife has been fatally sick for a year (she died last September) and I had to stop again.

Now I am back to it. It is a nice model. I found the original plans not detailed enough and inaccurate, and I recently bought the plans, booklet and pictures of the ship published by the French “Association des Amis du Musée National de la Marine” (Association of the friends of the national maritime museum) https://boutique.aamm.fr/monographies?page=3.

Quite a different view from the Billing Boats model (and from the actual model in the Maritime Museum in Toulon!). So, I must juggle between both plans – I must admit the AAMM rigging seems better to me: no deadeyes but “turnbuckles”.

I had to search the internet to find and buy some extra or missing elements (i.e. double blocks in Britany, eye bolts in Australia!).

If you have time, you can improve it by adding nice details, e.g. I planked the desk instead of using the printed sheet, added some details to the guns, made proper gratings, etc.

Important as the wood is probably very dry: glue the wood sheets to paper before cutting them (then remove glue and paper).

Enjoy!

View attachment 383990

View attachment 383991

View attachment 383992

View attachment 383993
Firstly sorry about the loss of you wife.

Thank you so much for the tips and images which I shall use as reference, I didn't realise the kit was as old as the 70's.

Your story is similar to mine, a long time between starting my first kit and completing it.

Yes the wood is very dry and warped in my kit too, I haven't looked into the ship itself too much yet or worked out the final details I will follow.
 
Back
Top