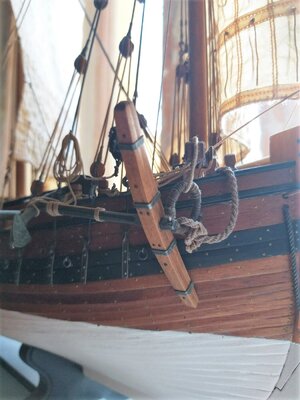
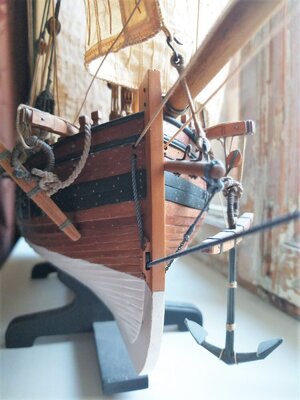
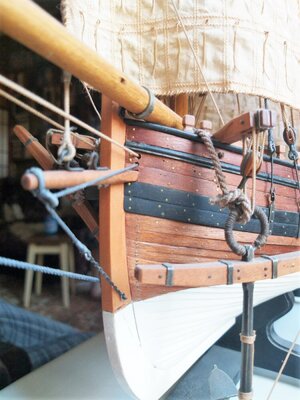
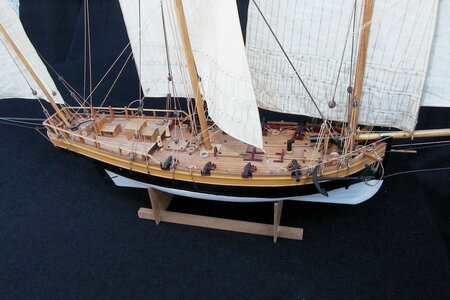
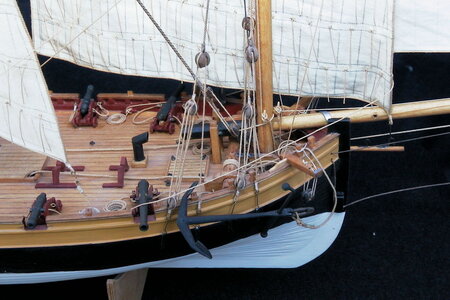
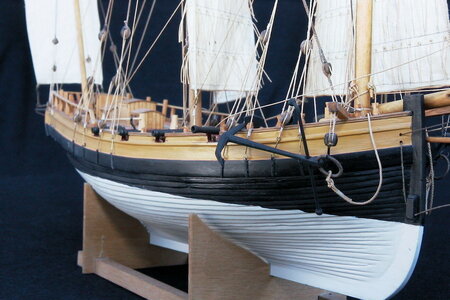
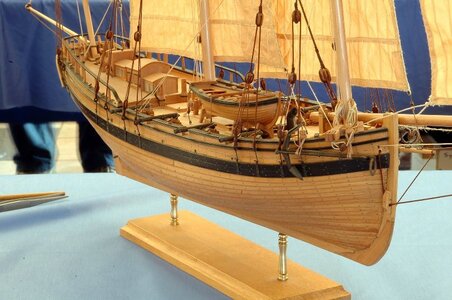
Le Coureur 1776 CAF Model by OT1138

A couple of questions for anyone reading.

1. I am about to purchase some 3mm boxwood rigging blocks for the cannon. I am wondering if the other blocks provided by CAF are suitable for the rigging or if it would be recommended to replace all of them on the model?

2. Can anyone point me to a guide or other resources on how to make different size rope?
I am a big fan of the CAF kits, nevertheless the blocks are not the best, or you have to make a lot of work to make them "working"
I ordered now for my Granado blocks from @Dry-Dock Models & Parts which are in my opinion the best on the market

 
Those actually look very nice! And they have some models I haven't seen before. I will have to keep them in mind for my next build.

I had to get something else from Syren so I ended up ordering from there. Got a selection of single and double sheave in 3mm, 4mm and 5mm sizes.
 
Those actually look very nice! And they have some models I haven't seen before. I will have to keep them in mind for my next build.

I had to get something else from Syren so I ended up ordering from there. Got a selection of single and double sheave in 3mm, 4mm and 5mm sizes.
Later on with building the next model you will see and recognize the difference of the blocks...
 
Also, does anyone know the correct diameter brass tube to use for the rear guns? 2mm looks ok but I'm not sure if it's too large. The manual states to use 1mm diameter but that is definitely too small.
 
The Coureur monograph does not indicate the ammo used in the swivel guns. A search indicates that the swivel guns could typically be used to fire 1-2 lb shot. This would require a bore of approximately 2.5" and a barrel diameter of approximately 4". This converts to ~2mm in 1:48 scale. However, this strikes me as absurdly large as most of the main battery would also fire 2 lb shot.

2mm brass tube seems quite large and to be honest, I find the swivel gun assembly as described in the kit to be quite cheap looking. I could not find any in the appropriate size online so I made my own. My first attempt came out pretty good. My second not so much, but I have plenty of material.

1722799063604.png

1722799116292.png

1722799173710.png

1722799384419.png
 
Took a number of tries but I finally ended up with a reliable method for making the swivel guns (ie: small cannons). Not perfect but they are so small that you would be hard pressed to tell the difference without a close up camera.

1723418430627.png
 
Safety chains and leather attached. The leather was quite a challenge!

Also these little chains don't easily fit into the hoops provided with the kit. I was able to stretch the links by carefully tapping the last link onto the leg of a sharp pair of tweezers.

1724011556196.png
 
I was thinking about tackling the anchors today (heh) but they look a lot more complicated than I expected. There's a nice write up in the 74 Gun Ship Vol 3 but I find it mostly quite hard to follow.

The port side of my ship is the unfinished side, so I was thinking that it is on this side that I would have the anchor hang from the cathead, similar to what is shown in the attached photo. It would seem that the anchor must be puddened and the main cable must be cinched through the protected ring. I presume the cable would run down the deck to the hawsehole. It's unclear to me if an anchor stopper should also be affixed, or if this would only be used in the case where the catblock is unhooked from the anchor (both are shown in the photo). It is not clear to me how this is tied to the deck either.

I do not know if I will display a buoy-rope hitch on the anchor. It would be a nice touch but then a decision must be made as to what would the other end be attached to... a buoy, a barrel, or simply cut and left to the viewer's imagination?

As for the starboard side, I would like to have the anchor stowed but it is not clear how this should be rigged either. I found a blurry photo of Boudriot's Le Coureur which shows the anchor resting on the rail but lacks sufficient detail regarding the rigging. And should this anchor be cinched?


1724513139609.png
1724513158248.png
1724513184635.png
1724513737054.png
1724513824860.png
 
Here's a dry run... nothing permanently tied in place yet. I wanted to see how this would look. Note that my arrangement here is based on the illustrations from 74 Gun Ship vol 3 and differ from the CAF manual. The iron hook connected to the catblock was made from 1mm brass wire, shaped and blackened (I will probably also need a small blackened brass strip to be wrapped around the block to look more authentic). The block itself is from Syren (very nice!).

There are several ropes shown here. I hand made the black puddening rope and seized it in four places with thin tan thread provided with the kit. The lighter colored rope running through the catblock was also made by me, while the cable was provided by CAF. I rubbed this cable with beeswax to get rid of the fuzzies.

The 74 Gun Ship book depicts an iron hoop installed on the side of the cathead which attaches to the rope (as shown here, though not permanently attached). This is not shown on the CAF blueprints.

I do not yet have a place to belay off the other end of the rope. A wooden pin is shown on the CAF blueprints (and also referenced in 74GS) but it does not appear that enough came with the kit, so I will need to fabricate a few more.

I'm also not quite sure yet how to run the cable. It probably shouldn't be routed around the cathead (as I've shown here) as the friction would probably damage it.

1724521835666.png
1724522043774.png

1724522588222.png
 
Coming along nicely now. Have some touchups to do on the anchor paint (I could not blacken it due because the brazing would show). I'm getting reacquainted with rigging as well. Not sure yet how to tie off the rope to the rail or if it needs a hank (I would assume so... no?)

I'm also unsure of how many times to wrap the cable around the windlass or even the proper way to do so. It seems like perhaps it should be reversed (ie: the rope closest to the anchor should be midship instead of starboard as shown), as the way I have it now would probably result in a lot of friction and wear.


1724548958406.png

1724549201500.png
 
Rope decision time. I made some thinner rope which I really like (shown middle below). The #20 rope above comes with the kit. It reminds me of twine, even if beeswax is applied. Below that is some white cotton rope left over from an old kit. Too white!

I soaked a length in espresso for a minute and it took on a slightly more weathered color (second rope from the bottom in the 2nd photo). Not bad. The rope on top in that photo is the same but in it's original color.

1725130899815.png

1725131000965.png
 
Ok, folks. I could use some help here. This is my first time rigging a cannon. It was unclear to me how to do. I made an effort but if this is clearly wrong, I could easily do it over. See photo below - nothing is attached to the hull yet.

For the hooks, I seized each of them separately to the tackles. The look isn't very clean and you can see that the rope has unraveled up to the seizing. While I could easily cut this off, I just saw that others appear to have done this a little differently (it appears that Adi may have attached the hooks and ran everything through the tackles using just a single length of rope. If so, how?)

Anyway, to secure one end of the rope in the tackle, I simply dead knotted it so it was too big to run through. The other end will be coiled up.

For the breech line (the thick one running through the carriage), I seized a loop on the end of the rope and this will sit on the hooks. I see on some other representations that a double seizing is used.

One more question: I have been seizing the blocks using darker colored thread. Is this correct?

1725140987629.png
 
Last edited:
Here's an extreme closeup. I also found an illustration from an old thread here which suggests that the outhaul tackle should be on the side closest to the hull.

1725142725423.png
1725142740914.png
 
Ah, it appears that my gun rigging is all wrong. First, I must use a thinner rope (which I will make from fine Guterman thread). Then we must use a single and a double block. As noted earlier, the single block hook is rigged inline, while the double block hook is attached independently (otherwise, the blocks would be at a fixed distance from each other, which would defeat their purpose).

1725202875901.png
 
I rerigged the first cannon and permanently installed it. Learned a few things. It isn't terrible but the next ones will be better.

IMG20240908174428.jpg
 
Back
Top