• Ships of Scale has incorportated an extra level of security when you log In. Please follow on-screen prompts to acknowledge that you are not a robot via a "Check Box" or a "Pictorial Check Box Puzzle". This is needed due to higher level of AI Activity Security.
  • SUBSCRIBE TO SHIPS IN SCALE TODAY!

    The beloved Ships in Scale Magazine is back and charting a new course for 2026!
    Discover new skills, new techniques, and new inspirations in every issue.

    NOTE THAT OUR NEXT ISSUE WILL BE July/August 2026
  • Win a Free Custom Engraved Brass Coin!!!
    As a way to introduce our brass coins to the community, we will raffle off a free coin during the month of August. Follow link ABOVE for instructions for entering.

Le Renard Cotre Corsaire - Artisania Latina 1:50

Joined
Aug 16, 2026
Messages
39
Points
48

Hi all, and welcome to my build log of the build (okay: the attempt to build) the Renard by Artisania Latina!

So why this model? Basically three reasons: it's French, it has a difficulty of 2 out of 4, and it is half the price of the Vanguard Models Sherbourne. Which I should probably have bought instead as a beginner, but hey ho here we are. This is my first build log and my first build, but I do not have the patience to start with some real beginners models and work my way back up. You have to fail in style.

What's the plan? The plan is to build this model and figure out if this is the (or 'a') hobby for me. I recently got back into plastic model car building, but it didn't really click any more. I love to work with wood because you can shape and assemble it with hand tools. If this *does* click, then the dream is to build one of those massive age-of-sail warships that count their build time in the thousands of hours. Eventually.

Anyway, that's enough talk. We want to see some pictures, so here is the box that arrived a while ago:
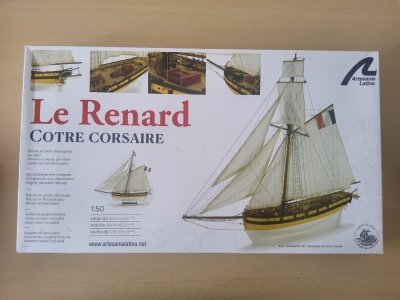
20260819_103132.jpg

When opening, we are greeted with a modest amount of well-packaged components:
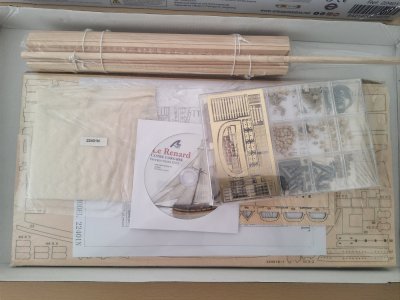
20260818_142546.jpg

And a bloody DVD! AS has given up on providing a paper manual and schematics, so you either have to have a working DVD-ROM drive (which I did, somewhere in a drawer) or download the instructions from the AS website. There are two build instructions PDFs, a parts list, and that 'precision cut' page that's also in the box. That's it! No diagrams for this model whatsoever. My main two gripes with the instructions are that the photos are very low resolution, and that at some point they completely give up on providing written instructions (which were not brilliant in the first place) and just show low resolution pictures.

As far as I can judge, the quality of the materials is good. And no parts are missing: it's all complete. On the contrary, most small part sets had at least one extra piece provided. What I noticed immediately was how small most of the parts are! And this is 1:50! Which in ship modeling is considered quite large...

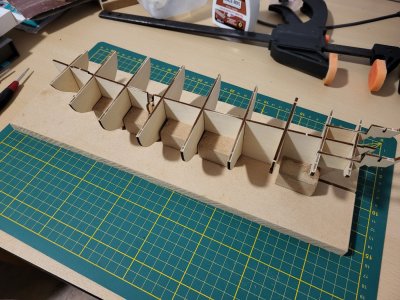
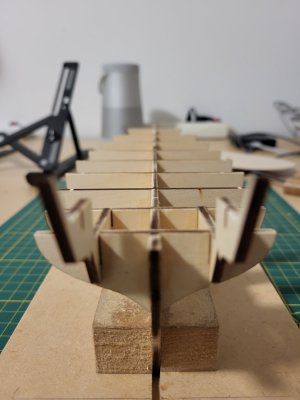
Of course you quickly have to put together the frame, just to see what it looks like. And it looks like a boat:
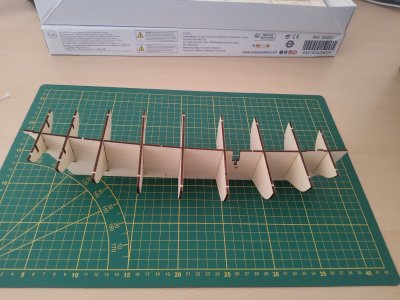
20260818_144915.jpg

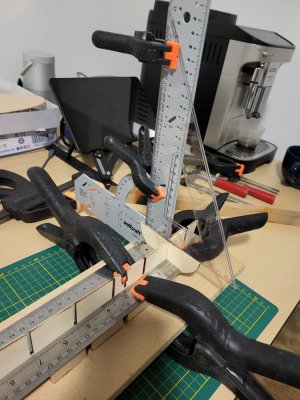
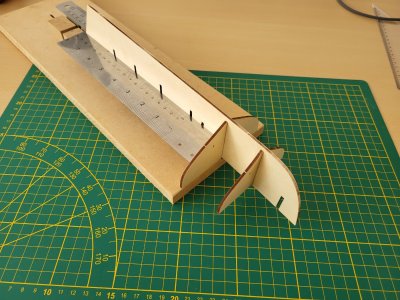
The nice thing about this model is that you do not need a stand while building, because the plywood main structure (the false keel?) is warped enough to make it stand upright by itself. It is as straight as a crooked arrow, so we'll have to do something about that. Enter the jig:
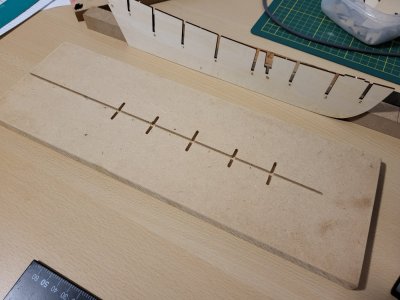
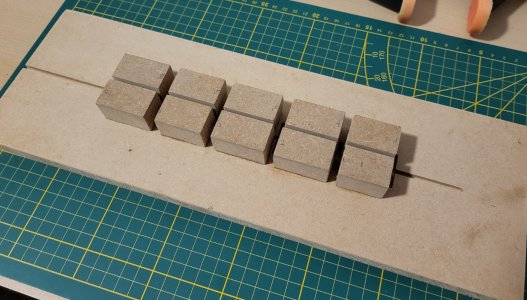
20260829_204058.jpg
20260829_220719.jpg
20260829_224715.jpg

That's better! It's almost straight now. I am a bit paranoid about getting the frame together totally straight to avoid ending up with a wonky boat. AS makes this a fun challenge by providing thin plywood ribs that have wiggle room in 5 of their 6 possible degrees of freedom, and a main structure that is bent quite severely. I see why some companies prefer MDF these days. The Sherbourne uses this, combined with a very smart sandwich construction that guarantees that everything is square without any glueing. But real ships are not built from MDF! So we shall not use it! (Real ships are not built from plywood either, but let's not dwell on that.)

So we have a straight-enough skeleton loosely put together. I guess it's time for some glue?
 
Looking good so far. Getting the keel and bulkheads straight at this stage is one of the most important parts of the build, so the jig is time well spent. Before gluing permanently, I'd check each bulkhead with a small square and sight down the keel from bow and stern to make sure there's no twist. If the structure stays true through planking, you're already ahead of many first-time builders. Keep going!
 
Matti - Great start on Le Renard! And great start on your build log. You are describing your build process very well for a beginner and putting questions for SoS members in your log. I agree with SMT that after you dry fit your bulkheads to the keel frame you should use caliper or ruler to make sure all of your bulkheads are at a 90 degree angle to the keel frame. Those wood blocks between your bulkheads will help get you there. Are they standard with the kit, or is that your addition?
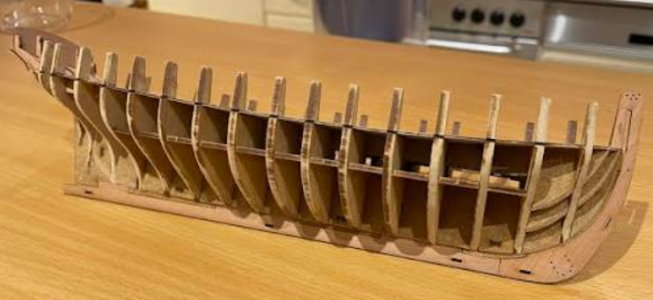
Also, before you glue your planks you may want to lightly sand the edges of each bulkhead to help you get a smooth lay of the planks fore and aft. Assuming your bulkheads are numbered 1 through 9 starting at the bow, you may want to sand bulkheads 1-4 on the stem/fore facing side and then sand bulkheads 6-9 on the stern/aft facing side. For bulkhead 5, you may want to sand both bulkhead sides because that is the dividing line between all 9 planks and the widest part of the hull (called the beam). The sanding of bulkheads should be from the keel to the sheer (top deck line) so you can lay all your planks on a smooth edge.

Just some friendly suggestions...you should definitely chart your own path. Vive la France!
 
Vive la republique! Thank you both for your tips. Anything that can help me or one of the many Le Renard builders that will surely follow is much appreciated!

Now that we are on the subject of straight, this is my first attempt at getting all those loose degrees of freedom in order:

20260829_233702.jpg

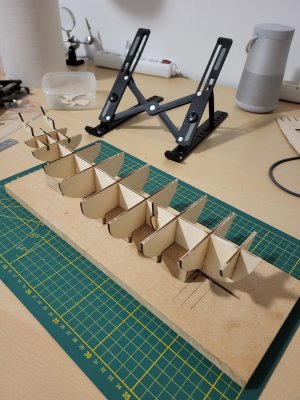
And while this worked okay (while being deliciously over-complicated at the same time), I discovered that, like real small boats, it's much easier to build the thing upside-down:

20260830_093358.jpg

And it is much faster as well. It's hot here, so the PVA glue dries in about 15 minutes. So four bulkheads per hour later, we end up with this:

20260830_210002.jpg

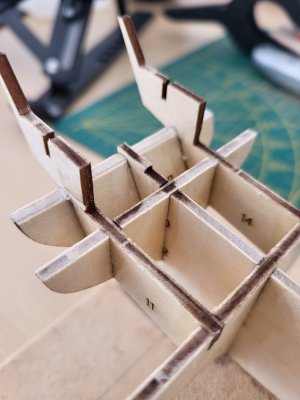
And if I look along the centerline, I can actually see a line instead of a curve:

20260830_210020.jpg

All the bulkheads look pretty straight as well, so we should roughly have a proper 'Renard' shape now. The false deck will lock everything in place further, and when I place it (with a pencil centerline marked on it) on the bulkheads, it's pretty damn straight. I cannot glue it into place yet, because there are some issues...
 
Last edited:
Matti - Great start on Le Renard! And great start on your build log. You are describing your build process very well for a beginner and putting questions for SoS members in your log. I agree with SMT that after you dry fit your bulkheads to the keel frame you should use caliper or ruler to make sure all of your bulkheads are at a 90 degree angle to the keel frame. Those wood blocks between your bulkheads will help get you there. Are they standard with the kit, or is that your addition?
To answer your question: The wood (MDF, actually) blocks are not included with the kit, I used a saw that's even bigger than the one in my picture of 'tools' to create them from a longer piece of MDF I had lying around. MDF is so nice and square: it's great. Maybe you could use it for model ship building even? What a crazy idea.
 
Last edited:
To answer your question: The wood (MDF, actually) blocks are not included with the kit, I used a saw that's even bigger than the one in my picture of 'tools' to create them from a longer piece of MDF I had lying around. MDF is so nice and square: it's great. Maybe you could use it for model ship building even? What a crazy idea.
Matti - Really nice, clean work. I use MDF for backboards and display stands that are painted (instead of stained). I've also used MDF to fabricate bulkheads that get nicked or damaged. Its so easy to use. No problem using MDF on parts that don't show in the final build.
 
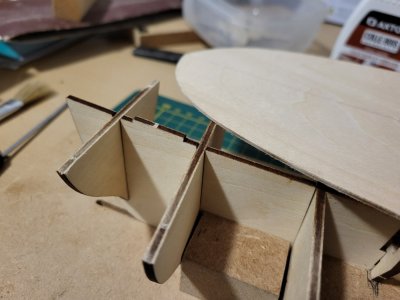
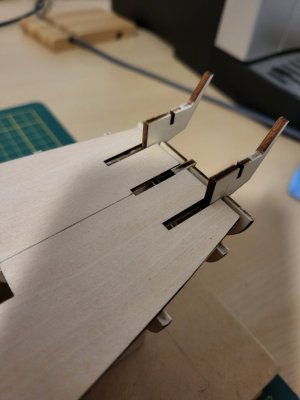
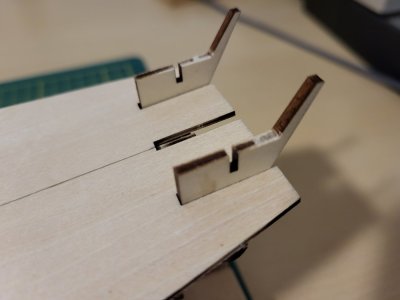
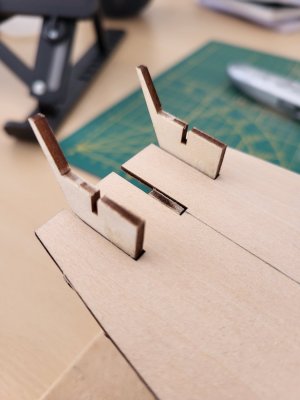
It is time to tackle the false deck. There are two issues that prevent the deck from being glued on directly. The first is that the frame has this tab, but the false deck does not have a corresponding slot:

20260829_224907.jpg

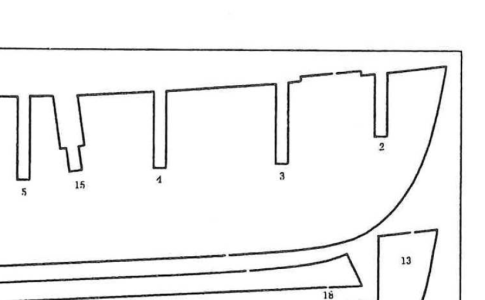
This slot is shown as well on the one-and-only sheet of paper that comes with the kit which shows all the laser-cut pieces, but it is clearly not there in the instructions:

1789207631684.png1789207568745.png

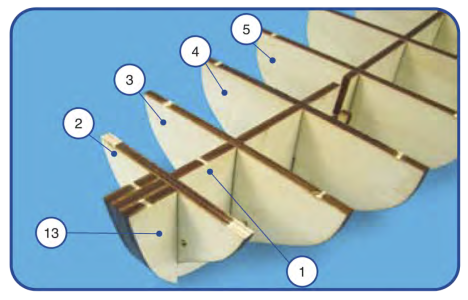
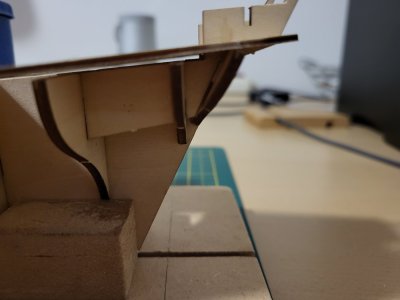
The frame centre-piece in the instructions came without this tab (you can see the laser cut line, it's not sanded before taking the picture). Nothing that a bit of filing and sanding cannot solve of course, but it's an interesting discrepancy nonetheless. There is a different problem at the rear. The frame also has a tab there, and this time there is an actual slot in the false deck, BUT the tab actually does not engage with the slot because the stern piece is in the way:

20260903_235642.jpg

20260903_235732.jpg20260903_235719.jpg

Just a bit more filing to do here, because just bending the false deck and glueing it like that probably is going to cause problems later:

20260904_131318.jpg20260904_131355.jpg

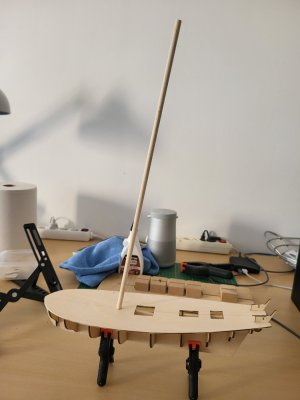
Fits like a glove! Now it can finally be glued in place, and (with the mast in place for an idea of the dimensions), and we got what takes about 15 minutes when building the Vanguard Models Sherbourne (but I'm not salty):

20260904_183640.jpg

The manual shows that the next step is to plank the deck, but (spoiler alert!) I might be deviating a little bit from the instructions here...
 
A question to the dear readers: is this too detailed? Too much waffling and not enough 'getting on with it'? I'd like to strike the right balance, but I find literally every little step of the build extremely interesting, and I like to talk about it. Also, if I am doing something dumb, it can be caught sooner rather than later
 
Mattij - Your build log is very detailed and you have good progress pictures of Le Renard, so keep it going. You're doing fine! One thing you may want to do in your build log is to highlight your questions for the SoS community in bold or in color so readers can see where you are asking for advice. It's a simple task, but worth it for members who scroll through many build logs. You will get better engagement with people who wish to share their advice on your troubled areas.

On your Le Renard build, your framing looks great and your build is coming along nicely. Two things I'd highlight. You may wish to lightly sand the edges of your bulkheads so that your planks will more easily accept the bends of the hull as they are affixed to the bulkheads. Guessing that you have 9 bulkheads numbered 2 through 10 from bow to stern. You may want to lightly sand the sharp edges of the bulkheads from the sheer line to the keel or rabbet. So your bulkheads 2 through 4 would be lightly sanded on the edge facing the bow. Your bulkheads 6 through 10 would be lightly sanded on the edge facing the stern. Assuming that bulkhead 5 is the beam (widest part of the hull from port to starboard) you would want to sand both the fore facing and the aft facing edges. If bulkheads 5 and 6 are equally "beamy" you may wish to sand both edges of 5 and 6.

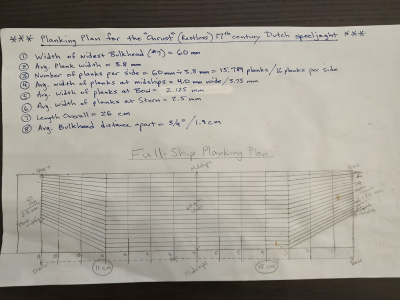
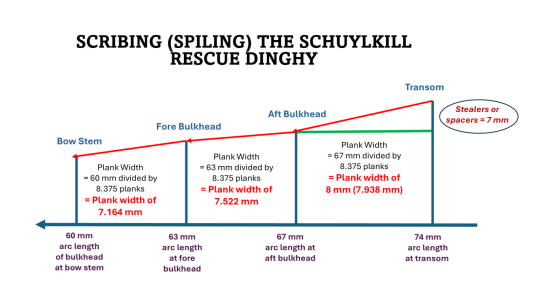
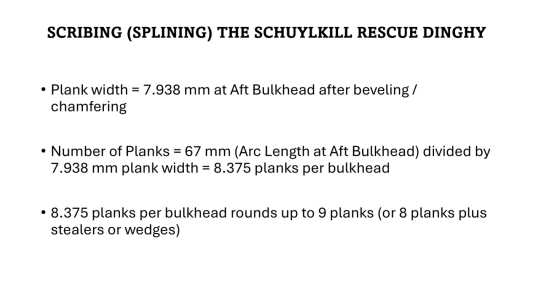
Another suggestion is to consider doing a scribing and spiling plan for your planks. This is one way to visualize how your planks will need to be narrowed as they move fore and aft, because for a ship like Le Renard the bulkheads get smaller before and after the beam. There are many ways to do this, but the idea is to carefully calculate the width of each plank as they narrow from the beam to the stem and to the stern. Another advantage of doing a plan is to determine how many "stealer" or "spacer" planks need to be added, especially at the stern. Stealer/spacer planks are partial planks that help you to get complete plank coverage towards the stern, where there may be spaces between your planks.

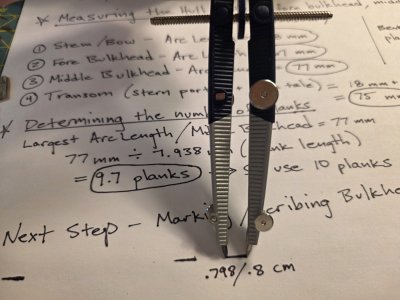
Here are examples of scribing / spiling plans that I've done for two of my (very early) builds. The first is a plan for a ship whose hull narrows at both ends. The second is for a dinghy style boat that has a wider stern than the bow. Other SoS members may do their plans differently, but I learned this approach mainly from SoS member Crisjaca, who is an excellent builder. You will need a compass to help measure the arc angles of your bulkheads and to transfer the data/lines on your scribing plan to your bulkheads. Cheers!

1789216259193.png

Below: The "Onrust (Restless)" Dutch speeljaght from a cheap Internet kit of a generic Dutch jaght.

1789216892691.jpeg

1789216312732.png
1789216412757.png

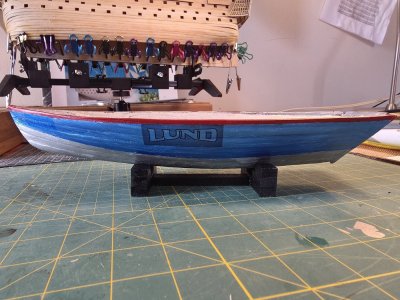
Below: The "Schuylkill Rescue Dinghy," scratch built using the strongback of the "Seabright Dory" lifeguard boat.

1789217222927.jpeg
1789217189771.jpeg
 
Last edited:
Hahaha, you REALLY want me to sand those bulkheads, don't you? It will happen one day, don't worry. Thanks for the extensive information! I have decided to say as far away from hull planking as I can, and in the meantime gather as much information as possible. I have a few books, YouTube, and of course this forum. I am flicking through other build logs to see how to (and how not to) do nice planking. My model will only have a single planking layer, so I cannot practice with a first layer which will be invisible later. This is the nightmare I found on youtube:

1789220121041.png
1789220164107.png

This is not my model, but from a short video of another Renard builder. It's making me a bit dizzy... However, that are lots of great videos on the 'Tube that are very helpful. Chuck Passaro, Tagliamere, Harry Houdini, and many more have videos specifically about hull planking, and I am learning a LOT. And I want to keep learning for as long as possible. Here's a little sneak preview of what I am doing right now (and I will explain the 'why' soon):

1789220777582.png
 
Hahaha, you REALLY want me to sand those bulkheads, don't you? It will happen one day, don't worry. Thanks for the extensive information! I have decided to say as far away from hull planking as I can, and in the meantime gather as much information as possible. I have a few books, YouTube, and of course this forum. I am flicking through other build logs to see how to (and how not to) do nice planking. My model will only have a single planking layer, so I cannot practice with a first layer which will be invisible later. This is the nightmare I found on youtube:

View attachment 635287
View attachment 635288

This is not my model, but from a short video of another Renard builder. It's making me a bit dizzy... However, that are lots of great videos on the 'Tube that are very helpful. Chuck Passaro, Tagliamere, Harry Houdini, and many more have videos specifically about hull planking, and I am learning a LOT. And I want to keep learning for as long as possible. Here's a little sneak preview of what I am doing right now (and I will explain the 'why' soon):
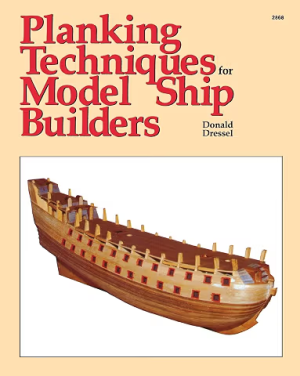
LOL! Your bulkheads are your business! Just making some friendly suggestions. I know you're doing much research on planking techniques. In case you haven't come across it, here is the Dressel book that I've used. I found it very comprehensive, but of course, there are many resources. Also, Chuck Passaro is excellent at planking and all things shippy.

1789223149605.png
 
Last edited:
The Zen of ship model kits is all about troubleshooting the inevitable issues. Process is a large part of the experience. Success in solving the issues is intoxicating. Have FUN!
 
LOL! Your bulkheads are your business! Just making some friendly suggestions. I know you're doing much research on planking techniques. In case you haven't come across it, here is the Dressel book that I've used. I found it very comprehensive, but of course, there are many resources. Also, Chuck Passaro is excellent at planking and all things shippy.

View attachment 635325
Yup, that is one of the books that I have. As you say, very comprehensive. The only thing that is letting it down slightly is the quality of the photographs. They are black-and-white and a bit grainy. Still a great help, this book
 
The Zen of ship model kits is all about troubleshooting the inevitable issues. Process is a large part of the experience. Success in solving the issues is intoxicating. Have FUN!
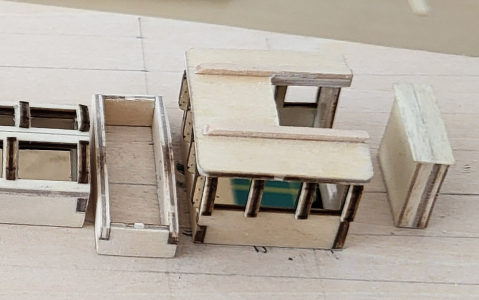
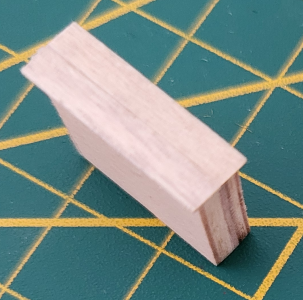
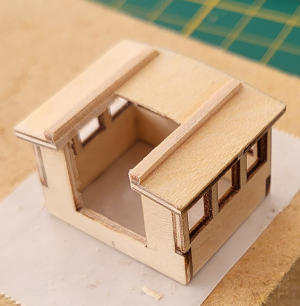
Thanks, and indeed: as long as you have fun, it's okay. Speaking of which: what do I want from this build? How do I get the most fun out of it? And it is only when I started the actual build that I realized the following: one thing that I want is, that I understand what every element is and what it does. The realization actually came when I was building this little thing:

1789319399830.png

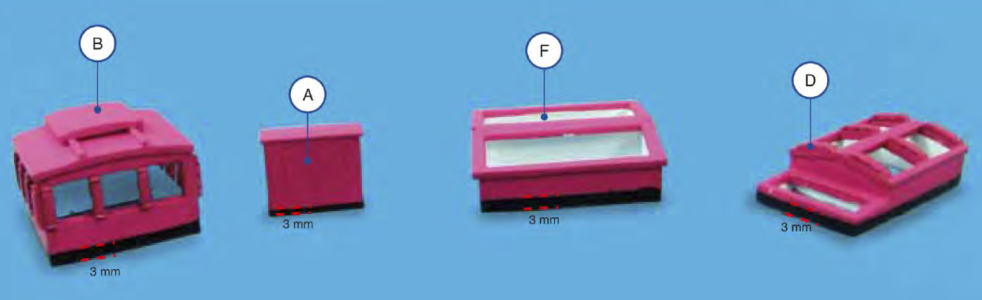
What on earth is this? What is it for? The manual is no help: apparently it is 'booth A', and it goes in some blurry position behind 'booth B' (remember, no plans!):

1789319601462.png

1789319658314.png

I want to know what this is! If the building instructions cannot tell me (no plans, and only blurry photos and telling me that booth A is made by glueing A1 to A2, and covering with 30), then I will have to find out some other way. Which is of course where the *research* starts. And the rabbit hole suddenly becomes a lot deeper...

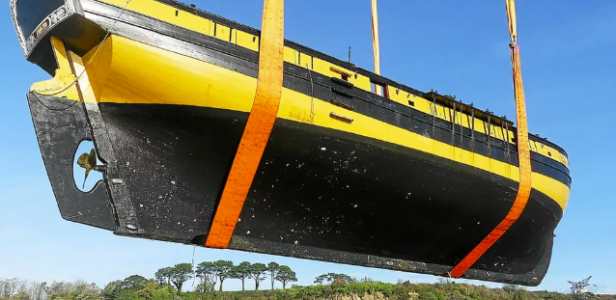
Interestingly, there exists a replica of the Renard:

1789319977876.png

You can hire it for day trips and such. It's located at Saint Malo, a few hours from here. There are plenty of photos and videos of the replica available on the Internet as well. However, not everything is the same as the original. Sometimes for good reasons, such as safety. So you have to be careful with what to copy or be inspired by. For example, this does not look 100% historically accurate:

1789320510716.png

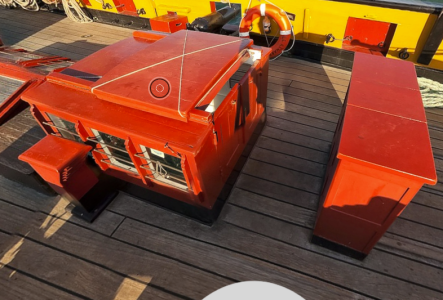
And the replica also has a modern achor and an electrical anchor chain winch thingy (windlass?). And that 'booth A'? Here it is:

1789320817125.png

It is indeed behind 'booth B'. But quite a few models I have seen have placed it very close to the main entrance hatch, which would actually block the little doors from opening and prohibit anyone from entering! And *that*, dear reader, is exactly the kind of thing that makes it fun for me.

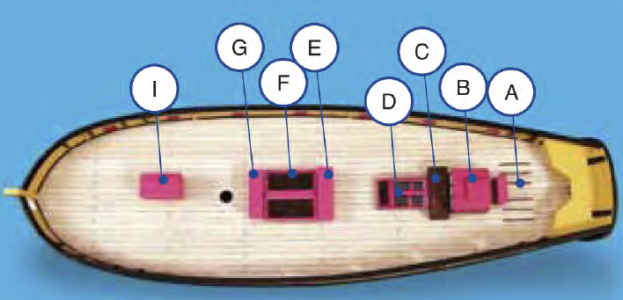
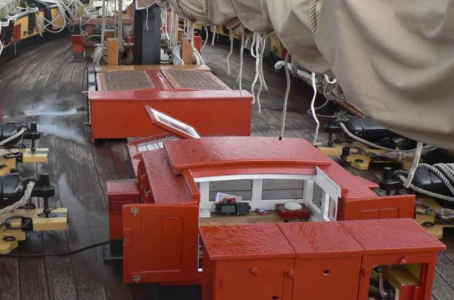
Here's another shot of the deck of the Renard, showing the different booths (is there a better English word for these?):

1789321174669.png

So yes, everything has to make sense. If later (much later actually, with the speed I am progressing) someone starts pointing at bits of the finished model and asking questions about it, I want to be able to answer them.

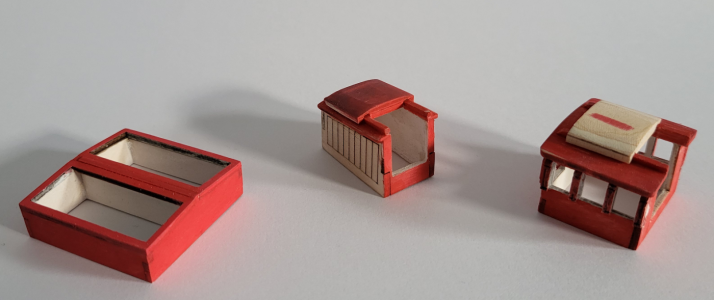
So if everything has to make sense, I have to choose the 'pose' I want to depict. And I want to show the ship eventually under full sail (so those have to be finagled into the right shape, as I have seen someone do with their build of the Renard using glue and a hairdryer), so with people on board. Which means that the hatches will be open, at least the rear one. Which exlains why I have modified 'booth B' like this:

1789321562666.png

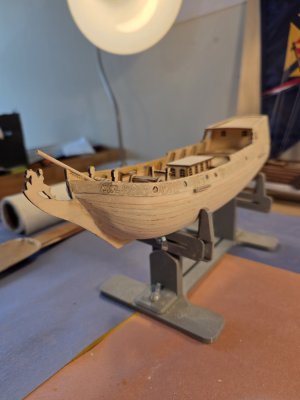
I actually made some progress since, this is where I am now (I am testing paints and filller products, so it looks a bit messy):

1789322029988.png

I still have to add the doors. Of course, the front hatch being open meant that I had to cut a big hole in the deck. And now you can see down the hole. So now I need some steps that go down...
 
That booth A is most probably the binnackle, destined to host the steering compass and and a few other, preferably non-magnetic knicknacks (like the engine control). :)
 
Last edited:
It looks like your model is coming along nicely. Building a ship model is a lesson in 3-D geometry and your time spent getting the model’s backbone straight will pay off.

Ignatius is correct the bulkheads need to be faired; gently sanded so that a wood strip bent around them forms a nice curve while lying flat on each bulkhead. Since they are so thin they are easily damaged. You might consider adding support by gluing blocks of soft wood (Balsa?) between them.

Roger
 
Thanks Roger, the bulkheads are indeed super-thin. And there are not a lot of them either. Look at the amount of thick, juicy MDF bulkheads you get with a certain other similar model:

1789333139723.png
 
Last edited:
Thanks, and indeed: as long as you have fun, it's okay. Speaking of which: what do I want from this build? How do I get the most fun out of it? And it is only when I started the actual build that I realized the following: one thing that I want is, that I understand what every element is and what it does. The realization actually came when I was building this little thing:

View attachment 635681

What on earth is this? What is it for? The manual is no help: apparently it is 'booth A', and it goes in some blurry position behind 'booth B' (remember, no plans!):

View attachment 635682

View attachment 635683

I want to know what this is! If the building instructions cannot tell me (no plans, and only blurry photos and telling me that booth A is made by glueing A1 to A2, and covering with 30), then I will have to find out some other way. Which is of course where the *research* starts. And the rabbit hole suddenly becomes a lot deeper...

Interestingly, there exists a replica of the Renard:

View attachment 635684

You can hire it for day trips and such. It's located at Saint Malo, a few hours from here. There are plenty of photos and videos of the replica available on the Internet as well. However, not everything is the same as the original. Sometimes for good reasons, such as safety. So you have to be careful with what to copy or be inspired by. For example, this does not look 100% historically accurate:

View attachment 635685

And the replica also has a modern achor and an electrical anchor chain winch thingy (windlass?). And that 'booth A'? Here it is:

View attachment 635687

It is indeed behind 'booth B'. But quite a few models I have seen have placed it very close to the main entrance hatch, which would actually block the little doors from opening and prohibit anyone from entering! And *that*, dear reader, is exactly the kind of thing that makes it fun for me.

Here's another shot of the deck of the Renard, showing the different booths (is there a better English word for these?):

View attachment 635688

So yes, everything has to make sense. If later (much later actually, with the speed I am progressing) someone starts pointing at bits of the finished model and asking questions about it, I want to be able to answer them.

So if everything has to make sense, I have to choose the 'pose' I want to depict. And I want to show the ship eventually under full sail (so those have to be finagled into the right shape, as I have seen someone do with their build of the Renard using glue and a hairdryer), so with people on board. Which means that the hatches will be open, at least the rear one. Which exlains why I have modified 'booth B' like this:

View attachment 635689

I actually made some progress since, this is where I am now (I am testing paints and filller products, so it looks a bit messy):

View attachment 635690

I still have to add the doors. Of course, the front hatch being open meant that I had to cut a big hole in the deck. And now you can see down the hole. So now I need some steps that go down...
The "booths" are generally referred to as "deck furnishings," "deck houses," "cabin trunks," or "superstructures." In the yacht or pleasure boat context, they are known as "coach roofs."
 
Wow, there are a lot of active build logs! When you don't update yours frequently, it goes down the list pretty quickly!

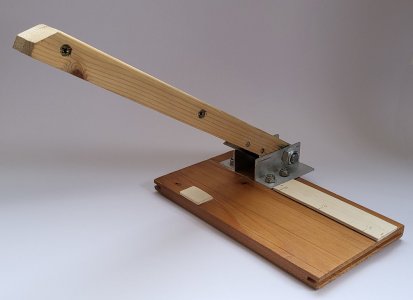
Anyway, I can only work on my model(s) during the weekend, and last weekend I was abroad, so nothing much has happened. However, the next step in the build description is to do the deck planking. And since I like to apply individual planks, I need to cut them to length first. So I made a thing:

20260927_185838.jpg

Of course this took way too long, so that's basically my progress for this weekend. But I have a surprise incoming soon...
 
Back
Top