• Win a Free Custom Engraved Brass Coin!!!
    As a way to introduce our brass coins to the community, we will raffle off a free coin during the month of August. Follow link ABOVE for instructions for entering.

Le Requin Keel Raised from Build Board

  • Thread starter Thread starter CLB
  • Start date Start date
  • Watchers Watchers 9

CLB

Joined
Feb 22, 2018
Messages
96
Points
113

Hey Group,
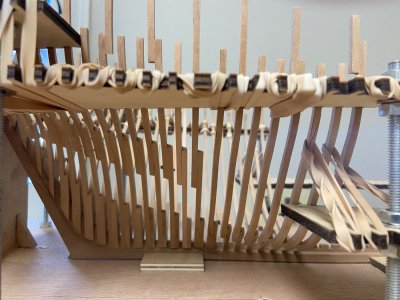
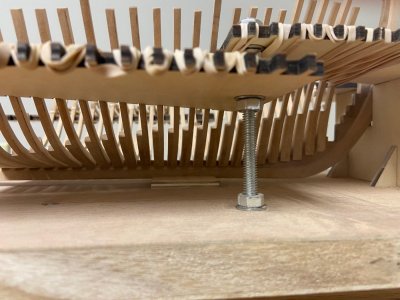
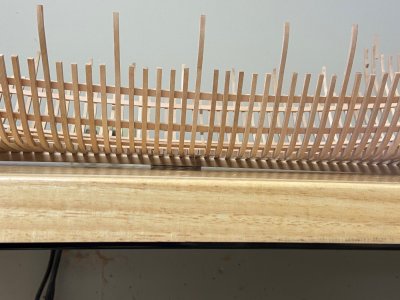
I almost have completed the framing and just noticed the keel has lifted at the bow from the build board by about 2mm and about 1mm at the stern. The keel remains dead straight and the frames are perpendicular/in their slots. It possibly occurred by the tension by the rubber bands to keep the interior of the frames in alignment for the fairing process.

I can not remove the hull from the jig until the internal battens are installed

I really hope the hull is not too tweaked. So far its been a fun build and is a well designed kit. Any advice/tips/encouragement is appreciated.
 
Just a thought - I could lower the bolts slightly on the threads on the front of the jig to lower it to release some of the tension before installing the battens - not sure if this will make the problem worse....
 
Perhaps run some wire between a couple of the forward frames, then screw the ends to your base to hold the keel down. Looks like the hole thing has lifted from the jig so things might still be in good alignment
 
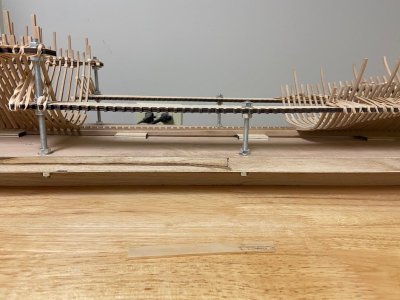
Both the bow and the stern are tight and the keel will not move at all (probably due to the rubber bands on the frames). The only area the keel has some play is midship where I have yet to install the frames. I could tie keel down there but it could tweak it worse - at least the keel still looks straight although not fully lodged into the jig.

I may have to just proceed with the rest of the frames and pray.

Midship.jpg
 
Hi Chris mine did the same i did pull the bow down with a cramp. but did nothing to the stern. Hope this helps Mark
 
Both the bow and the stern are tight and the keel will not move at all (probably due to the rubber bands on the frames). The only area the keel has some play is midship where I have yet to install the frames. I could tie keel down there but it could tweak it worse - at least the keel still looks straight although not fully lodged into the jig.

I may have to just proceed with the rest of the frames and pray.

View attachment 502562
Hi ,my suggestion...check the keel components.Frank
 
Are the frames still resting on the sides of the jig without tension?
 
Last edited:
Sono gli elastici che sollevano la chiglia o metti elastici meno tirati o metti un peso di acciaio in centro altrimenti la chiglia rimarrà
 
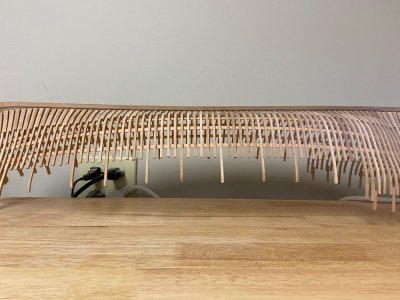
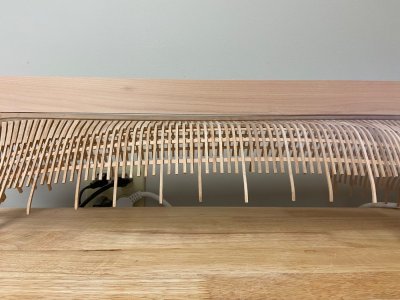
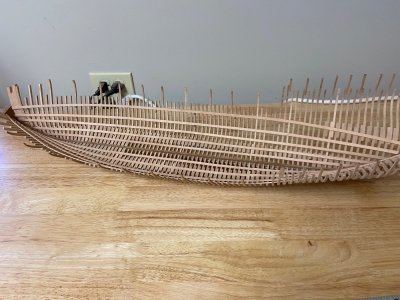
Thanks for all of your advice group - after 2 months of work I was able to remove the hull out of the build jig - as I feared the keel is warped irrevocably. I attribute the warp to the laminated cherry keel and my failure to tie it down to the build board during construction to counteract the force of the rubber bands. Its a shame because there was some nice work here. I was intending on using my supply of French Pear and Boxwood to kit bash after completing the frame. However for me it does not make sense to proceed any further with this build

Warped Keel 1.jpg

Warped Keel 2.jpg

Warped Keel 3.jpg

Requin.jpg
 
Before you continue you should fix the problem with the keel.
Therefore you have to remove the longitudinal planks. Then you drill a small whole through the keel (for example 2mm to 2.5mm) and also through you building board. After this you can screw the keel to the building board. If you are shure that your keel is straight you can glue the planks again in position.
 
Thanks for the advice but I do not think this will work as I used slow CA to install the longitudinal planks. Any attempt to remove them will destroy the frames
 
Thanks for the tip - it didn't work - the planks were glued fast and began to destroy the frames once I tried to remove them.

I don't regret the Requin experiment - I always wanted to attempt one of these Chinese POF kits as they are a time saver over cutting all of the parts out yourself with a scroll saw and these kits provide a decent building jig.

I did find myself scratching my head over trying to match kit materials, the Chinese plans and the Ancre Monograph with my own supply of wood. So in some ways it was more work than just scratching everything myself. I did save all the kit boxwood carvings which are really nicely done for a future scratch build of this ship using the Ancre Monograph. I learned quite a bit to carry forward to the next build.

Which I have already started - a scratch build of an Ancre subject I have always wanted to build in 1/48. Over the years I have accumulated so much Pear (I cleaned out my workshop recently) it's times to put it to use and put the new TAIG mill thru its paces.

Again appreciate the comments here from everyone.
 
Hi Chris,
it's a real shame to listen to this and see what happened. I don't think it was the rubber bands alone; the kit wood is extremely dry. When you glue it together, the wood absorbs moisture at that point and starts to expand. The glue or superglue dries faster than the wood; tension only develops once the wood has dried again, and this is the result. Christian's tip of using acetone is good, but it doesn't seem to work. Maybe you can still save it; it would be a real shame to lose this beauty. I wouldn't leave any stone unturned. First, I'd drill three or four holes in the keel and the board underneath. Fill a long dish (oven tray) or something similar with warm water and let just the keel soak for a few hours. Then screw the whole thing onto the board and let it dry for two days. Since you've connected everything with superglue, nothing should come loose. Once you have started gluing the beams and planks lengthwise, there should be enough stability and the deformation should be gone.
 
Another, admittedly tedious, option would be to use a dremel or other sanding tool to work the longitudinal braces down until they are very thin and then sand them by hand until they are gone. Then you can straighten the keel and install new braces.
 
Back
Top