Making Full Sails

It's amazing this day and age that the so called "men" who used to rule the roost are now over ruled....are you also sequestered to a "small basement" room to do your model work? I used to remember a day when "men" ruled the world and paid the bills...I realize this will probably ban me.. but it had to be said.
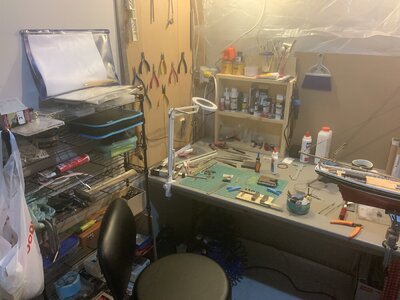
In a small space in the basement Redface image.jpg
 
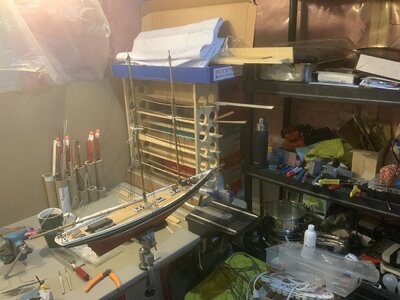
Here’s the rest. Still organizing and setting up. About to try and make some small cardboard drawers to go in between the wooden shelf and the tubes holding my random brass, aluminum & shorter wooden pieces.image.jpg
 
I have found that all the sewing of hand made sails, including a good bunt line, stiffens the sail considerably such that they can be shaped by hand and when bent to yards along with controlling running rigging they keep a shape that looks like a fair wind.
 
I’ve seen several posts with techniques for bending or making sails that look wind filled. They seem to advise draping the sail over a round object then coating them and letting dry to set in place. Has anyone tried installing the sail material on the ship then hitting them with a fan on high then spraying with a clear coating to set them? Seems like a technique that would pull the sail material and corresponding rigging in a natural fashion. Am I completely off base here? Has anyone tried this or reasons that this would not work? Newbies need to know! o_Oo_Oo_O
Yes, I've done that with dil PVA and with spray mount, both work. One problem remains, the headsails fly nicely when the fan is going but the sheets are not strong enough to hold them in that fully filled position, the drop when you turn the fan off. I'll experiment with wire next time.
 
wire does work with the sheets but best on a 1:48 scale as the smaller the scale the thinner the wire and it becomes ineffective. i have used it with varying results. also tried wire folded into the perimeter of the sail . it gives more control over desired shape of sails .
that's a good idea to use some wire music wire made of steel will tend to hold it's shape even thin pieces. A good trick to stiffen small wire like brass is to chuck it up in a drill on one end and hold the other end with pliers spin the drill slowly it twists the wire making it more ridged per its diameter it makes them nice and straight also.
 
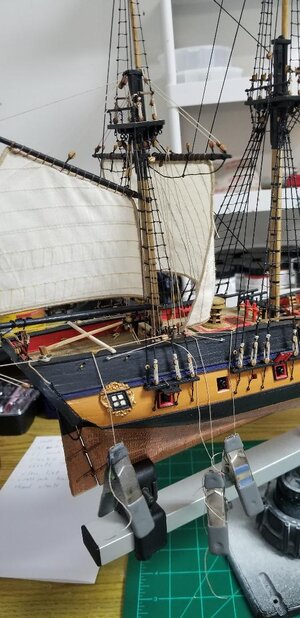
I’m getting decent results just pulling up a bit on the leech lines and bunt lines.View attachment 195858
That approach seems to producing some convincing results. Again, you may want to remember that for most sailing winds were seldom abaft, even with stunsails extended from the yard arms. Most sailing was at an angle to the wind, on a tack, with the yards rotated depending upon tack and the leading edge of the sails depended upon the bolt ropes and sheets' tension. That will also improve the appearance of the gaff rigged mizzen mast. Just some observations for you to consider or pass by. Rich (PT-2)
 
I’m getting decent results just pulling up a bit on the leech lines and bunt lines.View attachment 195858

To keep the sail drawn forward, install your bowlines. Yours, being 19th century, will be simpler, without bridals to attach them to the sail. Research how they should appear on your particular ship. On simpler models, they are frequently omitted.
1224 Fore Course Bowlines.jpg
 
I give her the little wins it pays bigger for me in the back end.
I use the same strategy. I let her decide on all the small things. Things like which kinda car we drive, which kinda house we live in etc. Then I'm in charge of all the really important things, like what to do about the crisis in the Middle East and how to deal with the islamist armed groups in Burkina Faso etc.
 
That approach seems to producing some convincing results. Again, you may want to remember that for most sailing winds were seldom abaft, even with stunsails extended from the yard arms. Most sailing was at an angle to the wind, on a tack, with the yards rotated depending upon tack and the leading edge of the sails depended upon the bolt ropes and sheets' tension. That will also improve the appearance of the gaff rigged mizzen mast. Just some observations for you to consider or pass by. Rich (PT-2)
Agree with @PT-2 also you won't get the tell tails (I think that's what they're called, little string things on the sails to help with positioning for wind) in the right wind directions by just adjusting rigging. Need them to be blowing as well.
 
Agree with @PT-2 also you won't get the tell tails (I think that's what they're called, little string things on the sails to help with positioning for wind) in the right wind directions by just adjusting rigging. Need them to be blowing as well.
In racing small sailboats we did have yarns through the sails at various points to be able to visualize the air flow across the sail camber for best lift/driving force. On gaff rigged and schooners those are on reefing lines to shorten sail but on the square riggers I think that the crew aloft had other lines to wrap around the bundled sail and yard arm to tie it off. I don't remember the name of those lines, but definitely different purpose than for air flow. We had a wind direction arrow on top of the masts for align the wind at that height with the boom/sail set and those indicator yarns. Rich (PT-2)
 
wire does work with the sheets but best on a 1:48 scale as the smaller the scale the thinner the wire and it becomes ineffective. i have used it with varying results. also tried wire folded into the perimeter of the sail . it gives more control over desired shape of sails .
I assume you sewed it into the sail? Sewing machines and I have an understanding, I don't speak to them and they don't speak to me!!:( Scale wise no problem, I usually build fairly large scale small craft.
 
more for smaller scale where on sail templates it usually shows an outer section that is folded over on the aft side of the sail to create the foot, head and leeches of the sail and is secured with pva glue, a steel ruler and an hot iron. the bolt rope with cringles and clews and leeches is again glued to this edge with pva and ca (at stress points, like cringles and leeches) all other parts of the sail- reef bands, bunts ect. are glued on as seperate pieces. for more detailed work before any of the above i cut the already colored sail clothe in 5mm section and glue together with a 1mm overlap to create vertical seams then glue on the foot, head, leeches and all other bands as seperate pieces then attach the bolt rope as above ( credit to master korabal for this ) with a little practice they look quite authentic, again at smaller scales . I am afraid of sewing machines.
 
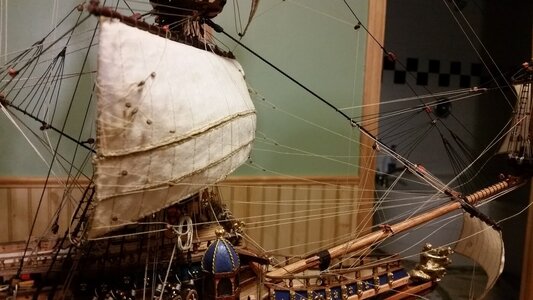
Watch this an you'll see what you need to in order to make billowed sails. Olha Batchvarov's technique was used to me the sails for my La Couronne. Fabric stiffener is cheaper than hair spray and works well. A fan is too weak to stretch sail fabric, only bend it a small bit. It depends on how much you want to deeply deform the sail into a billowed shape. For a 17th century ship, sails were billowed much more than 18th and 19th century sails in general. If I can make billowed sails on my first try, you can too. Prepare to impress yourself.

Click the link below.

Technology of making sails for my models

Also, look at my build log for step-by-step instructions, starting at post #295:
La Couronne Build Log
Thanks will follow
 
It's amazing this day and age that the so called "men" who used to rule the roost are now over ruled....are you also sequestered to a "small basement" room to do your model work? I used to remember a day when "men" ruled the world and paid the bills...I realize this will probably ban me.. but it had to be said.
a friend used to yell "insubordination will not be tolerated " at his wife. then she would tell him shut the f...up
 
Back
Top