Mantua Bruma - Ocean going motor sailor

Joined
May 25, 2021
Messages
77
Points
88

Location
UK Lancashire
Hi,
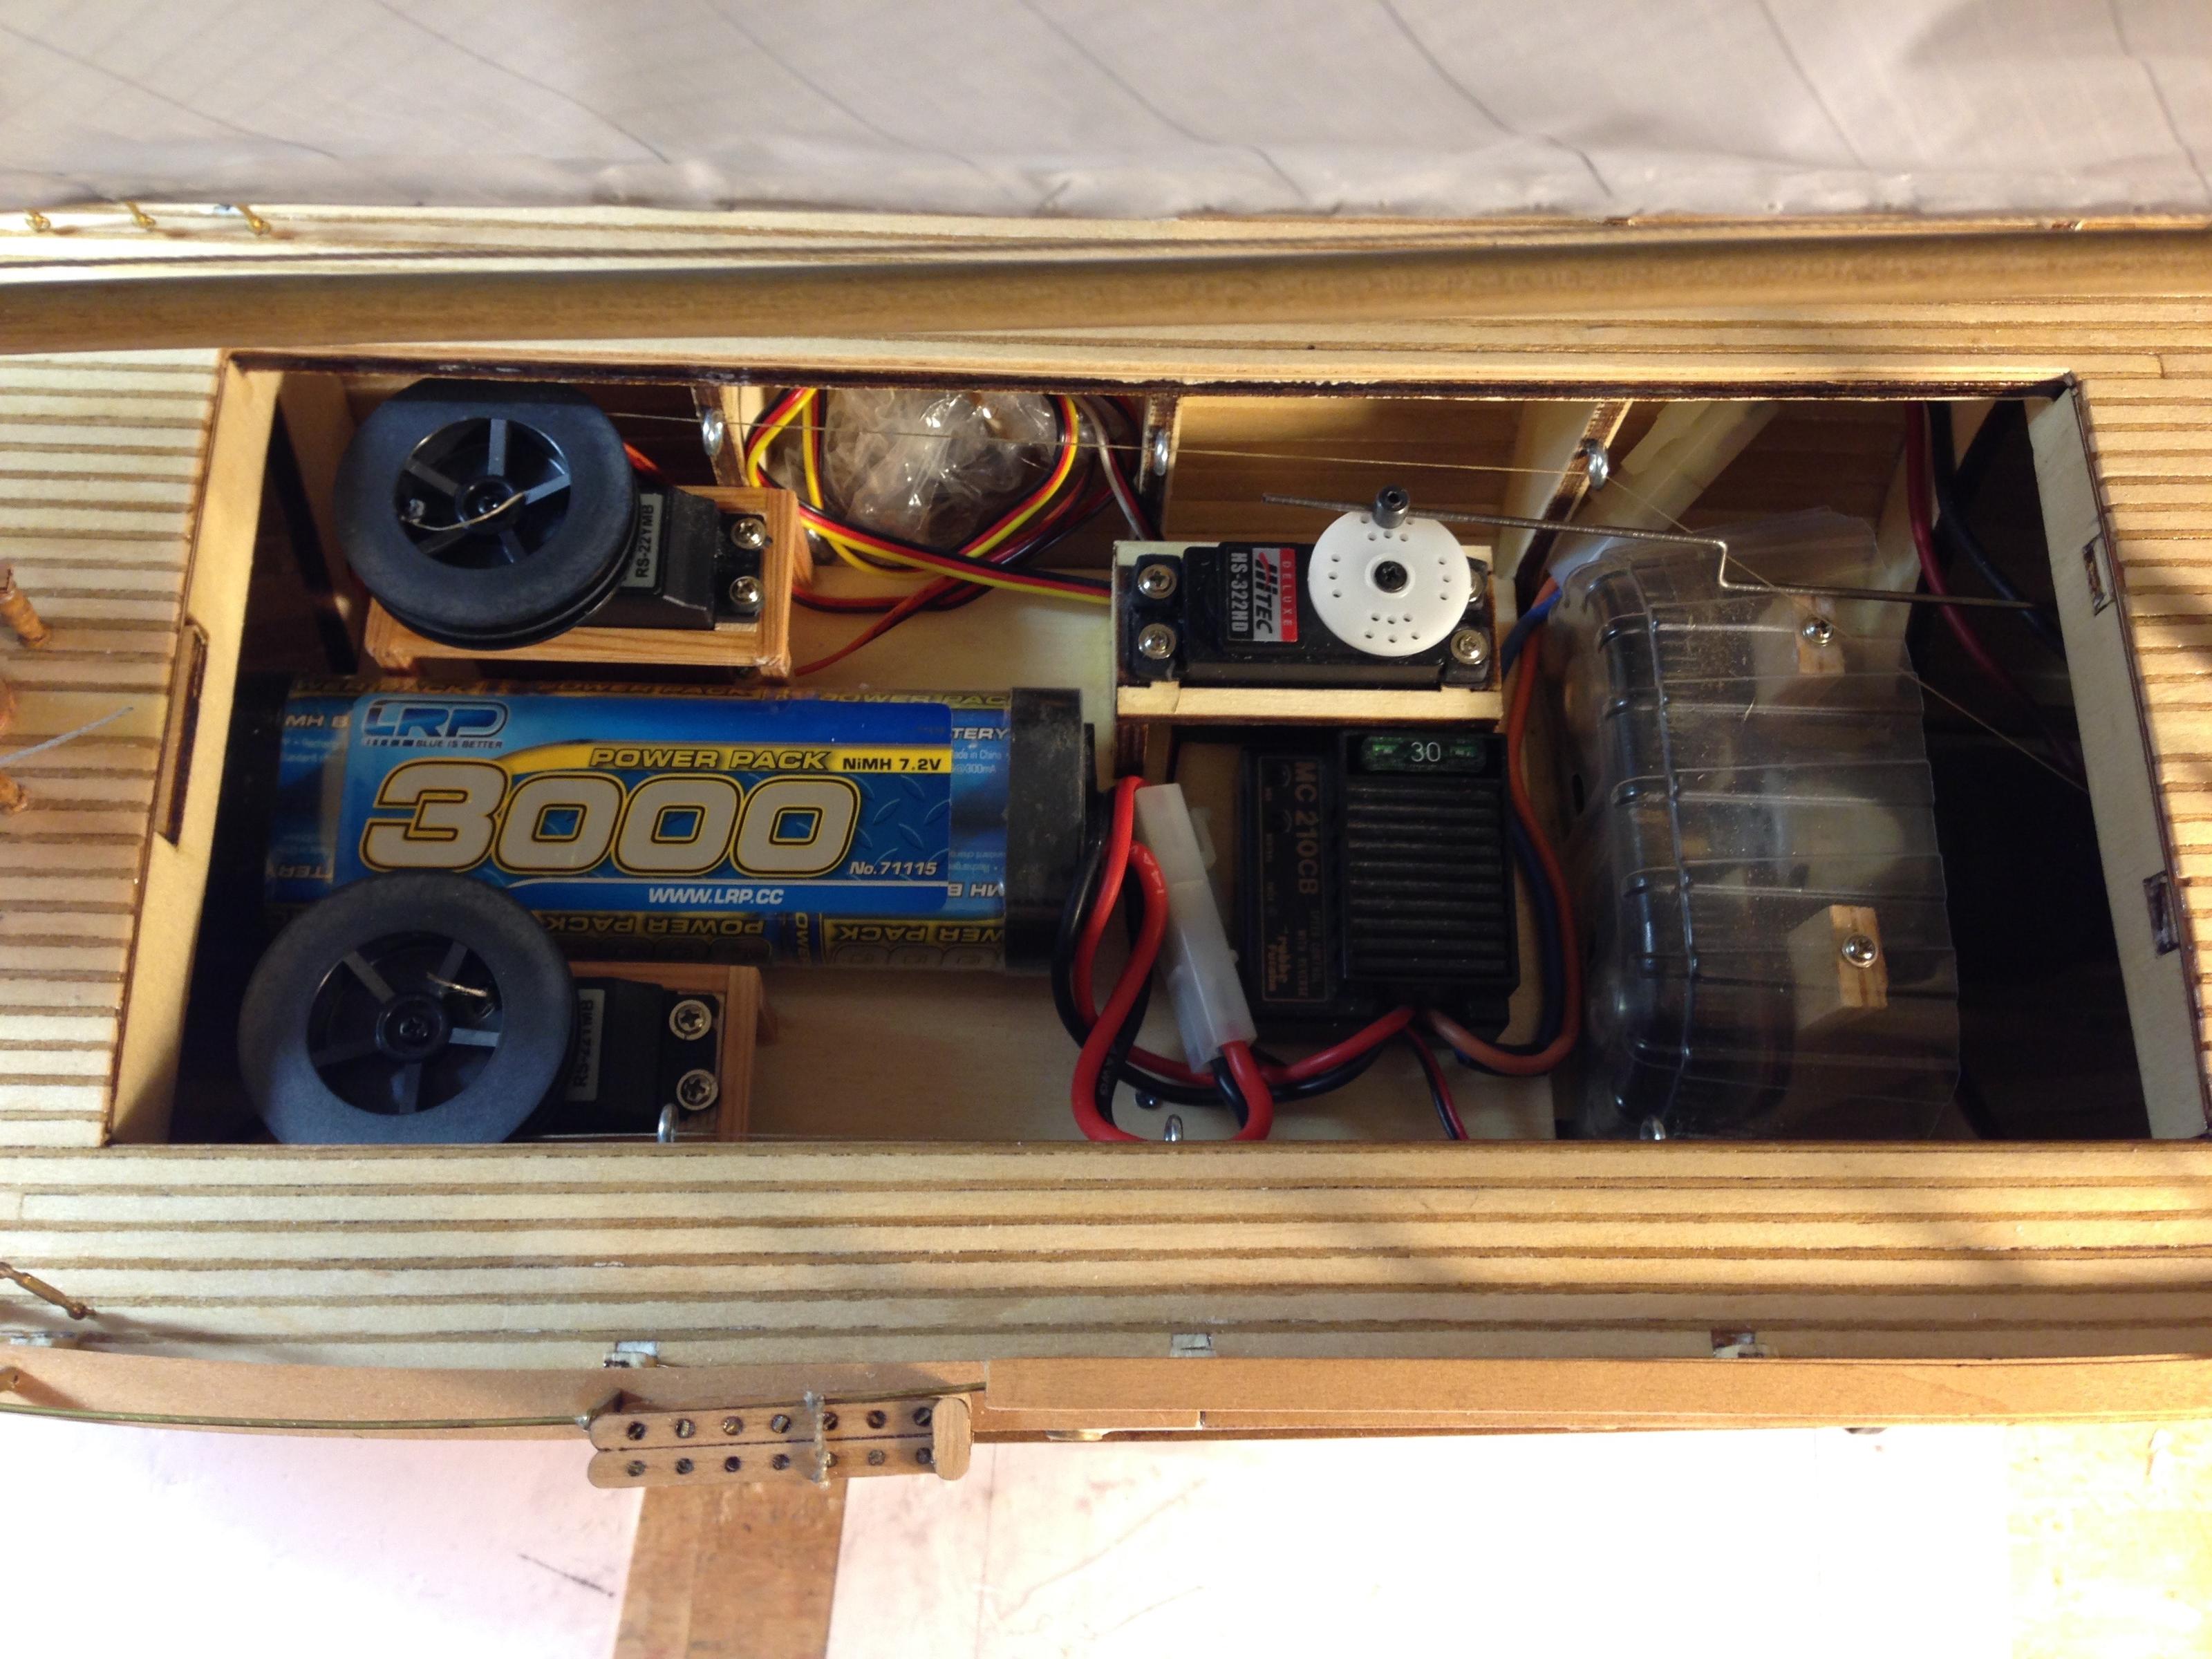
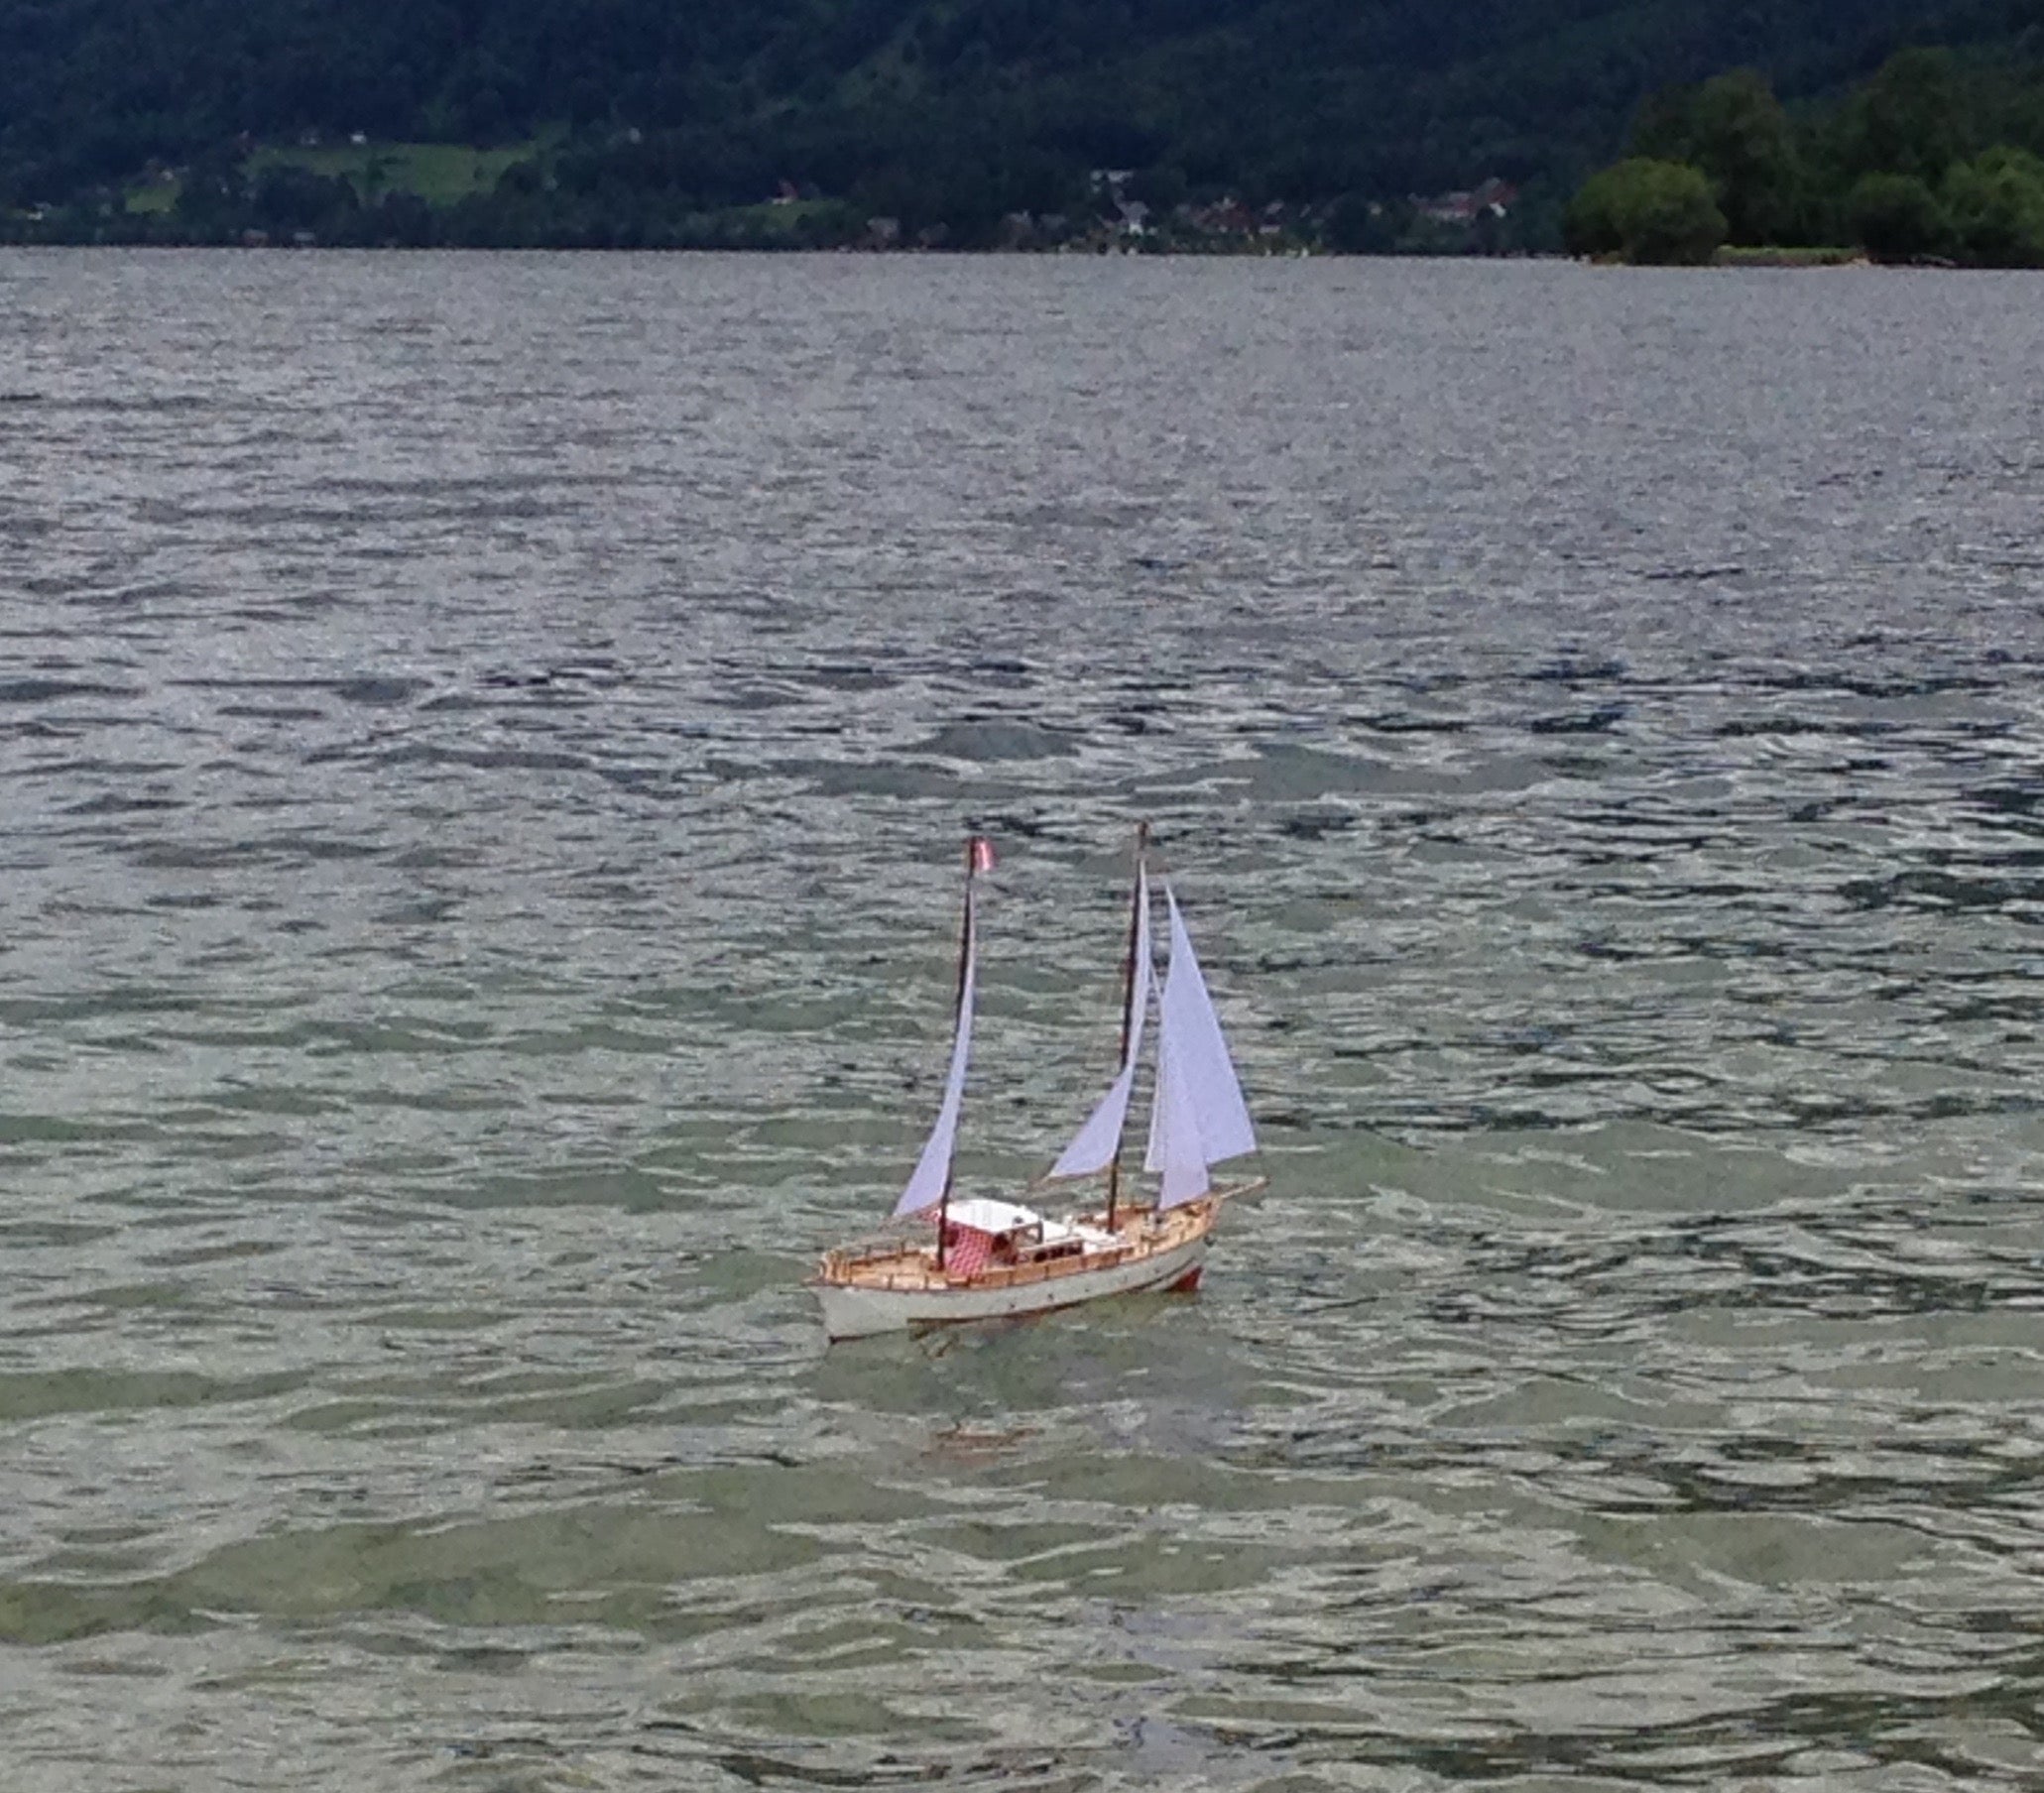
If anyone has built this kit and also added a sail conversion (which is not part of the kit) I would love to hear from you. I'm considering building this ocean going cruising yacht which can be motorised but thought it would also be great to have it as a sailing yacht.

Looking forward to hearing from anyone.

Cheers
Duncan
 
I built one some years ago but did not add sails. I ran 2 x 350 motors off 1 ESC. The main problem with them hull planking was in the area of the props. My kit had 2 x 2bladed white metal props which were too large in diameter. I fitted 3 bladed 35mm brass

P1310218.JPG
 
Thanks for you information which I'm sure I will find useful. What battery and ESC did you use please?
Cheers
Duncan
 
Thanks for you information which I'm sure I will find useful. What battery and ESC did you use please?
Cheers
Duncan
I do not have the boat anymore but as far as I recall, due to the lack of space in the hull, I used one of those inexpensive Chinese dual output esc's and a 7cell Nimh battery. That gave a bit of ballast amidships.
 
I do not have the boat anymore but as far as I recall, due to the lack of space in the hull, I used one of those inexpensive Chinese dual output esc's and a 7cell Nimh battery. That gave a bit of ballast amidships.
Thank you for your info - I'm sure will be of help when choosing the equipment. Hopefully the boat kit will arrive today or tomorrow. It was cheapest on Amazon even though it is coming from Italy to the UK! I hope it arrives Ok!
Cheers
Duncan
 
After weeks of waiting for the kit to be delivered from Italy I re-ordered instead from Cornwall Model Boats and received it next day. The box was smaller than the one for my Riva but at a quick glance all the parts seem to be there. Now that I have received the kit for this motor sailor I can start to plan how to attach a detachable keel and a detachable extension to the rudder. There is an optional motorisation pack available which uses one motor but drives two props through a gear system. Myself and another modeller are thinking of using 2 separate motors. Not sure whether with potentially 3 sails we can get away with one winch because it looks like space is at a premium. My fellow builder bought the kit before myself and has balsa planking as well as limewood planks. My kit has 112 limewood planks which should be enough for 2 layers on the hull and then the decking. I must say the Amati Italian Runabout kit (Riva Aquarama) had very much clearer build instructions than this kit with lots of photos and diagrams of various stages. Before I can start building this I need to resolve a problem with my newly fitted fire monitors on my 50+ year old RAF crash tender! Hopefully my blog will help to fill in missing information. It might be a slow build log because I'm limited with pains in my hands how much I can do at a time - so to those followers please be patient! Some photos of the box contentsIMG_20230627_122229.jpgIMG_20230627_122402.jpgIMG_20230627_122816.jpg:-
 
The Twin gear set you mention is, imo expensive and by all accounts is quite noisy when running. I used 2 small motors off 1 esc and it ran smoothly and very quietly.
 
Thank you for your info. I've ordered 2 x 385 motors with 2 ESC's. The two ESC's from China were only £5.85 for the pair! I'm going to link these into the MTroniks Wtail mixer which gives 'tank like' control to the two motors and plus rudder control. It should spin almost in its own length! Ready for the eventual sail conversion I have purchased a King Max 4 Drum sail servo and a Howes Mini high torque servo for the rudder. Advance purchase will assist in planning where everything should be placed. Just need to order some couplings once I know the diameter of the motor shaft. The prop shafts are 3.9mm (so 4mm). I'm planning to use my FlySky i6 Tx and Rx.
 
I offer a word of caution here and say that with size of the vessel and method of hull construction, there is not a lot of accessible space through the deck aperture when the cabin removed.
 
I'm hoping that buying all the equipment now I can plan how to arrange it. On the RC Groups website there is a picture of the boat with two winches - but it does look tight! I'm not sure where the propulsion motors are located and how big they are. If there isn't room I'll just have to abandon the idea of also having it as a sailing vessel! Pity the sailing option isn't an extra package you can buy from Mantua!!

a8179840-69-IMG_0569.jpg

a8179842-104-IMG_0752.jpg
 
Finally my hands weren't aching today so I've made a start on the Mantua Bruma. I've punched out all the frame parts and filed the laser burns off the joints. I then dry assembled the pieces and now I have an idea of the hull shape. Originally I thought I would glue all the frames in place and then fit the 6 reinforcement frames afterwards and these are located just below the deck. Having found lining up the frames and the reinforcements was a bit tricky I have decided because the Aliphatic glue goes off reasonably quickly I will assemble and glue in 3 stages doing the ribs and the corresponding reinforcements in the same group stage.
The mounting base in the kit for the motor is specific for the optional motor and gear system. This uses one motor to drive both propellers. I was informed that this was an expensive solution and also very noisy so I've opted for two motors with each driving a propeller. Therefore some modification will be required! Time to start to ponder the mounting! Has anyone done this before with a Bruma kit please? I will sand the laser burns from the rest of the frames and also feather the front and back frames to accept the planks with a better area of contact.

Ist Stage-Dry assembly -1.jpgStage-1 Dry Assembly-3.jpg
 
Finally my hands weren't aching today so I've made a start on the Mantua Bruma. I've punched out all the frame parts and filed the laser burns off the joints. I then dry assembled the pieces and now I have an idea of the hull shape. Originally I thought I would glue all the frames in place and then fit the 6 reinforcement frames afterwards and these are located just below the deck. Having found lining up the frames and the reinforcements was a bit tricky I have decided because the Aliphatic glue goes off reasonably quickly I will assemble and glue in 3 stages doing the ribs and the corresponding reinforcements in the same group stage.
The mounting base in the kit for the motor is specific for the optional motor and gear system. This uses one motor to drive both propellers. I was informed that this was an expensive solution and also very noisy so I've opted for two motors with each driving a propeller. Therefore some modification will be required! Time to start to ponder the mounting! Has anyone done this before with a Bruma kit please? I will sand the laser burns from the rest of the frames and also feather the front and back frames to accept the planks with a better area of contact.

View attachment 390194View attachment 390195
When I put 2 motors in mine, I reversed the mounting plate. It pushed the rudder servo back but that was not a problem. With 1 piece of scrap ply under the motor mount the shafts lined up perfectly. Can't give any pics as I no longer have boat, sorry.
 
When I put 2 motors in mine, I reversed the mounting plate. It pushed the rudder servo back but that was not a problem. With 1 piece of scrap ply under the motor mount the shafts lined up perfectly. Can't give any pics as I no longer have boat, sorry.
Thank you. I will have a look at your idea. Were you referring to the wooden floor mounting plate in the kit or the one's attached to the motors? It's a pity you can no longer able to show me a photo but I'll try to work it out!
 
Thank you. I will have a look at your idea. Were you referring to the wooden floor mounting plate in the kit or the one's attached to the motors? It's a pity you can no longer able to show me a photo but I'll try to work it out!
I seem to recall I reversed the floor plate or whatever the servo is mounted on. I know the servo ended up on the port side and I extended the rod to the rudder tiller. I think I packed under the motor mount to obtain shaft alignment.
 
I seem to recall I reversed the floor plate or whatever the servo is mounted on. I know the servo ended up on the port side and I extended the rod to the rudder tiller. I think I packed under the motor mount to obtain shaft alignment.
OK thank you for you input. I will experiment!
 
I've now created the fixings for a removeable keel. This consists of two stainless steel tubes fitted into the keel which will accept two 3mm diameter S/S machined rods which are attached to the removeable keel. The rods are secured into the removeable keel with two collets which have been sunk into the thickness of the keel. To stop the rods turning when bolting up the keel I have fitted 2x 3mm bolts into the collets rather than using the supplied grub screws (see photo). These are longer than the depth of the bolt hole and therefore stand out from the collet which creates a 'stop' as I didn't drill completely through the wood. The holes were then filled with Araldite glue. I was advised by a club member not to use the Rapid Araldite as apparently it goes soft in water so I used the slow setting
original type. Following a fellow modellers suggestion, I glued one of the 3mm ply backing pieces into place which will cover the cuts in the keel for the tubes and let it go hard. This then preserves the shape and dimensions of the keel. I then cut the two slots for the 2 keel tubes, spot glued the tubes in place with CA whilst the removeable keel was in place. I then used the epoxy glue to cement the 83mm x 4.8mm tubes in place and added the other 3mm ply to the other side of the keel and clamped them up very tightly over 24hrs. Now that the method of fixing the keel has been sorted I can now carry on with the rest of the 'normal' kit build! Last photo shows dry assembly of the frames with frames at the bow and stern with chamfered edges.

Keel fixings.jpgKeel showing tube slots.jpg

Keel tubes and rods.jpgKeel with machine rods.jpgKeel with tubes in place.jpgDry Assembly with tubes.jpg
 
This is getting a very interesting build - maybe it would be possible to create a real building log showing your work on this model?
 
Yes I will continue to create the build log. Unfortunately I suffer from pains in my hands so I can only work on the model when they are not too bad - so it maybe slow progress! Therefore please be patient with progress reports!
 
Yes I will continue to create the build log. Unfortunately I suffer from pains in my hands so I can only work on the model when they are not too bad - so it maybe slow progress! Therefore please be patient with progress reports!
This is one important part of our hobby (and also in our forum) - a modeler should never be in hurry...... we calculate in "years" for a model .......
 
Back
Top