• Win a Free Custom Engraved Brass Coin!!!
    As a way to introduce our brass coins to the community, we will raffle off a free coin during the month of August. Follow link ABOVE for instructions for entering.

Midwest Muscongus bay lobster smack 1:24 MID951

Joined
Jul 13, 2024
Messages
26
Points
48

Hello Everyone,
Welcome to this build log of Midwest kit Muscongus Bay Lobster smack.
This is my first build log, and I am starting it mid build - so thank you for bearing with me while I find my voice. I was motivated to start it thanks to kind encouragement from a few forum members, whom I thank warmly.

I will start by pointing out that there are
2 Muscongus Bay lobster smack kits: one by David Antscherl that has a functional rudder and centerboard, actually planks the hull and seems to have nicer finishing touches, and then there is the kit for this log, designed by Chuck Passaro and is simpler. The rudder is fixed, the centerboard is fake and the hull is actually comprised of 2 broad boards for each side.
I was a bit disappointed initially, as my objective was to learn how to plank. But I like the instructions by Chuck and it is still a fun little project so on we go.
Another member (Mauri Zio I believe) had a smart idea where they simply cut the boards into planks and then planked the hull like that - I wish I had thought of that before starting the hull. Ho well, live and learn.
 
I started by assembling the keel and frames. That was pretty straightforward - however it’s worth noting that some of the elements of the keel were off by as much as a couple millimeters. For example, the positions of frames 3 and 4 were too far apart compared to the planset and to the dimensions of the cockpit floor. So I had to insert some wedges to make up for this. It was a fun exercise of making sure that what I was doing looked as it should be.

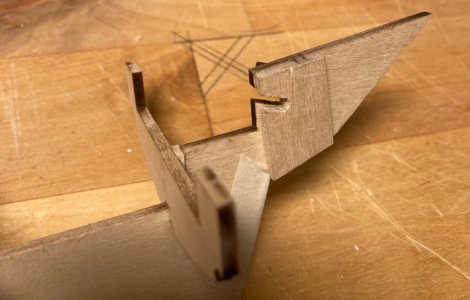
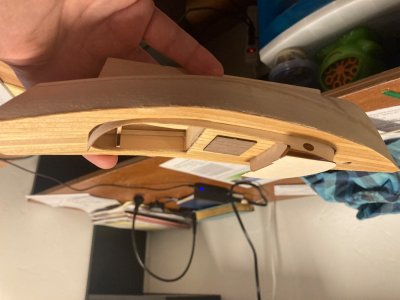
I was annoyed about the fixed rudder so decided to make it functional. Allowing for a shaft (if that’s the right word) between the tiller and the rudder meant drilling a hole thoroughly through the keel at one of its narrowest points, with obvious risks of breaking it. So I shaped reinforcing blocks to go on each side of the keel. I glued one on one side, then carefully made a hole for the rudder shaft, then glued another reinforcing block on the 2nd side. It worked quite well.
It is important to not make these blocks too bulky nor make them stick too much underneath the cockpit as to not interfere with the battens that will be placed shortly after. (My port side block for example is too long on the picture below)

IMG_8260.jpeg

IMG_8259.jpeg
 
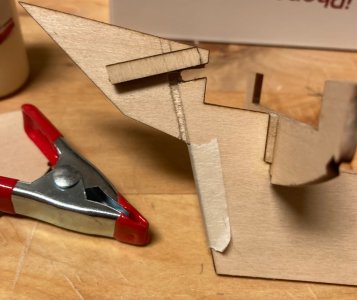
After placing the deck, I added the battens meant to support the hull. I was surprised that despite pre-bending them and what I thought was good prep, they were hard to fit perfectly within their intended notches, particularly towards the stern (frame 4 and transom). I had to re apply glue and much clamping to force them in place.

I spent a good amount of time fairing the frames - this is my 3rd model. The first one I tried was the Scotland by Corel - a great kit, but with minimal instructions. I didn’t fair the frames properly and it made planking afterwards quite challenging. I actually stopped midway through the 2nd planking to improve my skills with easier kits (like this one).

I then proceeded to place the 2 side planks. While there is for sure a time gained from using broad boards instead of planking the hull, I am not a fan of this approach. The boards are oversized on purpose, and the extra material creates a lot of conflict with the rest of the boat, particularly the deck and at the front (bow?). Their bulkiness makes them very hard to shape properly. I soaked them extensively and let them dry in place with much much clamps and rubber bands before gluing them.

After gluing in place, there were gaps in some areas (with the transom, with parts of the deck, and at the bow). I had to reapply glue and clamps in multiple spots to make them properly fit.
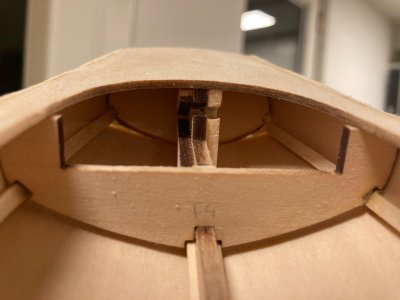
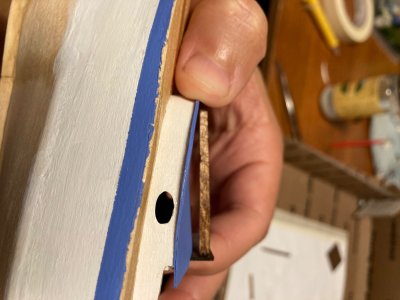
I then became quite annoyed that pushing the side boards in place actually resulted in the battens separating from the frames at the same problematic areas as before (picture below).
What’s the point of fairing if the hull boards don’t follow the frame!

IMG_9008.jpeg
 
I’ve built this kit twice, but the first time was about 35 years ago so let’s forget that one, shall we? I love your idea of the working tiller/rudder. I regret now not having at least simulated some rudder hinges on my most recent.

I found that fairing(chamfering) the batten along it’s length made a big difference when it came time to do the planks.

The trick with the batten is to go one bulkhead at a time, getting it fully seated then let the glue dry before forming the batten to the next bulkhead.

After adding the deck, I did the upper plank, faired that to the batten, then added the lower plank. As you mentioned, the planks are oversized, so the excess needed to be cut down close, then sanded to a nice curve. The planks do get thin near the batten, but with care they’ll work out fine.

Looking forward to following your progress.
 
Thanks for sharing your technique to deal with the batten Namabiiru, I will remember it for next time the situation presents itself!

I was quite frustrated last time but since then, it’s been quite satisfying.
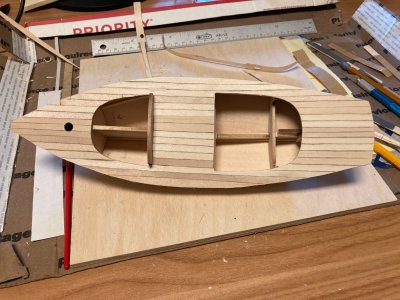
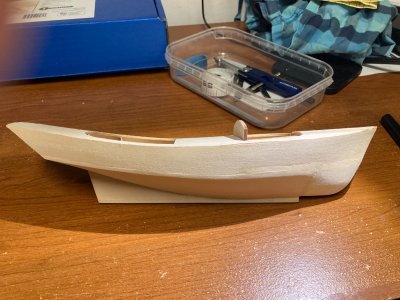
I finished assembling the hull and carved the balsa at the bow. I also planked the deck. I used a variety of scraps and am quite pleased with the result, especially after lightly staining and varnishing. I didn’t pay attention to the grain of the wood and some planks have their length perpendicular to the grain - that makes the planks much more fragile and results in a surprisingly different aspect, even color under a certain light compared to the planks parallel to the grain. I like the outcome because I wanted the deck to look uneven, however it’s a good lesson learned.

I did not want to make things too difficult so I simply planked with excess length on the edges and cropped the planks to match the hull profile. This results in very pointy and thin planks in some places. To avoid that, I could have placed a single outer plank going along the edge, but didn’t feel I had the skills nor the time to pull that off properly.
I could have also done like Namabiiru suggested: plank the deck before putting on the sides of the hull to hide the edge of the deck planks… it’s ok though, there will be a side molding to hide that later in the construction.
In any case, slow but ongoing and pleasant progress

IMG_9609.jpeg

IMG_9111.jpeg
 
Thanks a lot Namabiiru, I really appreciate the encouragement.
I’m at the point of adding the combings on the sides and have a question: I understand it’s best to paint parts or subassemblies before adding them to the model, however how do you deal with glue in this case? If I use water based acrylic and then a water based glue (such as wood glue), won’t the glue mess up the paint? If I glue something on a painted part, won’t the paint be a weak surface and risk delaminating?
Does it help to varnish on top of the paint? On that front, what do people generally do: varnish on top of paint (and if so, is it any specific kind of varnish) or leave the painted surface as is?
Thanks in advance for the pointers
 
You’re referring to the thin strips that run along the side off the hull just below the deck, right? I painted my hull, then added the combings, which I left unpainted since they were already a nice mahogany color. As long as you have a good, clean surface when you paint then you shouldn’t have a problem with glue adhesion since those are basically decorative parts that aren’t subjected to much mechanical stress.
 
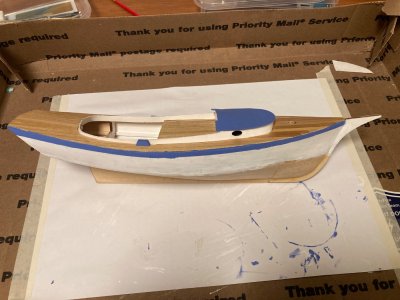
I have been gone a little sailing on an actual boat for a week off the coast of California, and have resumed building. Things have been moving fast: I put the coamings pre-painted then mounted the roof on the cabin. That is an area where I find the kit not very well done. The roof wood is very, very thin and I really struggled to bend it to shape without fear of snapping it. The grain orientation also seems poorly chosen. The plan set shows that it is curved longitudinally throughout its length, but the internal structure doesn’t provide any support to achieve the shape. Long story short, the roof doesn’t have the right shape. It would have been fine if it wasn’t for the hatch that goes on top and its rack which don’t fit properly. I scratched my head and tried a few things to correct that but the results end up looking worse than the pic below. So, for the moment, the hatch and rack are hanging above the roof and that is how they will stay until a better idea comes along.

IMG_9963.jpeg

IMG_9644.jpeg

IMG_9959.jpeg
 
Strange. I don’t recall having this problem with mine, although I did end up with the edges curled over slightly because I was lazy when I clamped it.

Is the grain of the roof running fore and aft, or transverse? It should be fore and aft. Soak the piece in water to soften it and then bend it over the deck house and use a couple of long pieces of masking tape to pull it down and sticks those to the hull till it dries. Once dry, remove it, add glue and clamp it back down again with tape.

You could also add some stiffeners inside the deck house to support the roof and keep it from bowing.

Hang in there! This is all part of the learning experience.
 
Ha, good suggestion, thank you once again. I should have added internal stiffener. I’ll remember it for next time I run into such an issue.
For wood grain direction, I’ll need to go double check the scrap wood.

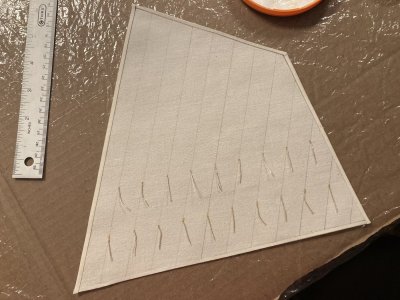
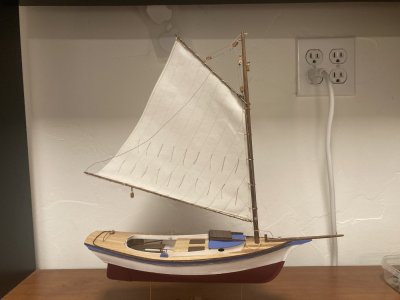
I finished prepping the masts and am about to start the sails. What is your preferred “clear finish” to coat the sails with in order to stiffen them?
And do you apply that at the start of the process or rather at the end?
I didn’t find that they needed stiffening so didn’t coat the sails on my lobster smack. I’ve seen some people use spray varnish, but just about any acrylic sealer should work. I’d recommend experimenting on some pieces of scrap cloth to figure out which one gives you the look you want.
 
After double-checking the scrap wood, the cabin roof piece had the grain running transversal, not fore and aft.

For sails: I have shellack, acrylic varnish, starch, and mod podge sealer. I will try stuff out and report.
This is the very first time I make sails. Reading online shows there are a variety of ways to do things and people each have different order in which they do stuff, which suggests… that getting good result is not particularly sensitive to the process :)
 
After double-checking the scrap wood, the cabin roof piece had the grain running transversal, not fore and aft.
That’s why your roof bowed in like that, I think. Grain should have been running the other way to keep rigidity in that direction.

… that getting good result is not particularly sensitive to the process :)
It’s all about finding the process that works for you. Everyone has their own preferred method.

Good luck!
 
Back
Top