You are using an out of date browser. It may not display this or other websites correctly.
You should upgrade or use an alternative browser.
You should upgrade or use an alternative browser.
Midwest Sea Bright Dory Build Log NCC (Navy-Curtis Craft) 1:16 [COMPLETED BUILD]
- Thread starter BMT
- Start date
- Watchers 5
-
- Tags
- completed build dory
- Joined
- Jun 17, 2021
- Messages
- 2,294
- Points
- 488

I am so glad that Model Shipways has chosen to pick up and re-introduce this Midwest line of models! They are wonderful, absorbing, non intimidating, yet challenging kits. Little treasures can be made from them. I hope you and your sister enjoy yours.
Pete
Pete
- Joined
- Sep 27, 2022
- Messages
- 221
- Points
- 113

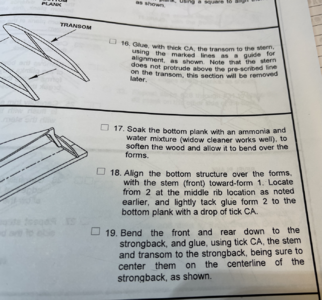
As we always say, every day is a learning experience. Today while laying the bottom plank over the jig, the building instructions noted to use ammonia and water mixture to help soften the wood for bending over the forms. Their suggestion was window cleaner. I found that to be interesting. I was concerned about some staining, but it doesn't look like there is any and I was not concerned about it over soaking the bottom plank. However what I needed be concerned about, was whether or not the window cleaner would soften up the stem and stem piece. Of course, it did in cracked right at the stress point.
I'm not a happy camper.
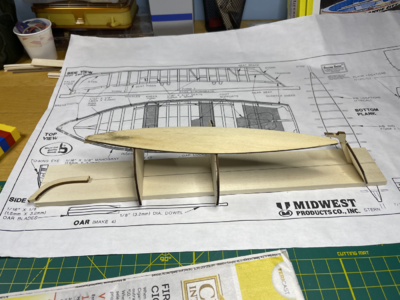
BMT
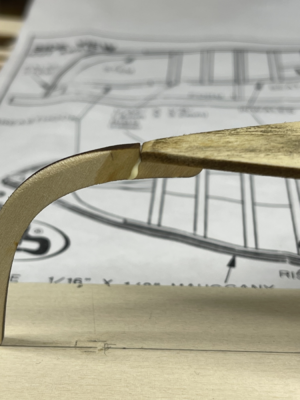
I'm not a happy camper.


BMT

Kurt Konrath
Kurt Konrath
Now I can complete my collection of the Midwest Line, as I had about 60% of them before they stopped production.I am so glad that Model Shipways has chosen to pick up and re-introduce this Midwest line of models! They are wonderful, absorbing, non intimidating, yet challenging kits. Little treasures can be made from them. I hope you and your sister enjoy yours.
Pete
- Joined
- Jun 17, 2021
- Messages
- 2,294
- Points
- 488

Now that I recall, I did come up with some work arounds for the seemingly odd, or to my mind not so well advised proceedures in the instructions in some of these Midwest kits. Pieces like the stem that have curves running cross grain, leaving weak short grain running across the width of the piece. I traced the pieces in question onto birch model maker's plywood of the same width, cut the piece out with a jeweler's saw and cleaned up the shape with a jeweler's file. For plank bending, I just dampened the pieces with plain water (no need to soak them) and bent them, using the Model Shipways heated plank bender( a turned aluminum drum attachment in a soldering iron, cheap, available from Model Shipways aka Expo) which is easy to use and forgiving. You can re-wet and reshape the plank ad- infinitum 'til you get the curve desired. As always, practice with scrap first, until you get the technique down. Then with the curve pre set there is no residual tension in the plank(or strong bottom)to be glued in place. A little tack weld of glue(be VERY sparing)where the stem and stern post touch the working base will hold them in place with a little piece of paper between the pieces and the base where they are lightly glued together will facilitate their separation with a razor blade when the time comes. This technique keeps those pieces from shifting while you work on the hull. Again a little practice with scraps helps to get the technique down. You can break all the scraps you want until you get it. This technique of temporary ("tack-weld) gluing has many applications.
On the Muscongus Bay Lobster Smack, they expect you to form a whole side of the boat out of a single sheet of balsa ! Make and spile planks for Pete's sake!
Any questions , let me know. I think I have the plans and instructions in a drawer some where.
Pete
On the Muscongus Bay Lobster Smack, they expect you to form a whole side of the boat out of a single sheet of balsa
 ! Make and spile planks for Pete's sake!
Any questions , let me know. I think I have the plans and instructions in a drawer some where.
Pete
Last edited:
- Joined
- Sep 27, 2022
- Messages
- 221
- Points
- 113

Great tip. I was going to actually make a new stem piece with some of the scrap wood but now I'll go out and find birch modeling plywood. I'm just soaking planks in hot water. I've been thinking about heated plank bender. I'll look online and see what I can find.
When I did the Muscongus Bay Lobster Smack that was challenging because it was in that series that they put together but I do find it interesting.
As I am very new to this craft what is "tack weld glue".
Thanks Pete., BMT
When I did the Muscongus Bay Lobster Smack that was challenging because it was in that series that they put together but I do find it interesting.
As I am very new to this craft what is "tack weld glue".
Thanks Pete., BMT
- Joined
- Jun 17, 2021
- Messages
- 2,294
- Points
- 488

The Lobster smack was one of the first Midwest kits I tackled back in the day when Midwest was still producing them, so that's my point of reference.
"Tack Welding" with glue refers to any glue you use for the purpose of temporarily "tacking" two pieces together, to be separated later after the purpose of temporarily immobilizing the parts is no longer needed and after which the temporary bond is to be be severed. I like using white glue, which can be released with isopropyl (rubbing) alcohol(NOT denatured!) A little bit of paper between the glued surfaces helps to make the bond a little weaker and easier to seperate.I use the term "tack welding" because that is how you hold pieces of metal together along a seam to hold them in place in order to come back and permanently weld the seam together.. Tack gluing has many similar applications, especially if the bond is only temporary.
Also, if you are building/planking over a mold, it is a good idea to wax over the edges of, or any surface of the mold that comes into contact with any parts that will be glued together over it. You want to avoid the nightmare of a hull that won't release from the mold over which it is constructed because you have inadvertently glued the two together .
.
I've always been happy with my Model Shipways modified soldering iron plank bender. It should be in their catalog and pretty cheap. If you can't find it ,call John Garcia at Model Expo. I'm sure he will help. Or you can make one by turning a billet aluminum drum head about 3/4" in diameter with a stem narrow enough to slide into the barrel of a modest plug in soldering iron. It needn't be one that gets too aggressively hot.
"Tack Welding" with glue refers to any glue you use for the purpose of temporarily "tacking" two pieces together, to be separated later after the purpose of temporarily immobilizing the parts is no longer needed and after which the temporary bond is to be be severed. I like using white glue, which can be released with isopropyl (rubbing) alcohol(NOT denatured!) A little bit of paper between the glued surfaces helps to make the bond a little weaker and easier to seperate.I use the term "tack welding" because that is how you hold pieces of metal together along a seam to hold them in place in order to come back and permanently weld the seam together.. Tack gluing has many similar applications, especially if the bond is only temporary.
Also, if you are building/planking over a mold, it is a good idea to wax over the edges of, or any surface of the mold that comes into contact with any parts that will be glued together over it. You want to avoid the nightmare of a hull that won't release from the mold over which it is constructed because you have inadvertently glued the two together
I've always been happy with my Model Shipways modified soldering iron plank bender. It should be in their catalog and pretty cheap. If you can't find it ,call John Garcia at Model Expo. I'm sure he will help. Or you can make one by turning a billet aluminum drum head about 3/4" in diameter with a stem narrow enough to slide into the barrel of a modest plug in soldering iron. It needn't be one that gets too aggressively hot.
- Joined
- Jun 17, 2021
- Messages
- 2,294
- Points
- 488

- Joined
- Sep 27, 2022
- Messages
- 221
- Points
- 113

Been under the weather for the last two weeks, the Covid has not disappeared.
Anyway, I did the planking ( one plank left) and started working on the oars in between.
I think I’m getting a little better at planking. I did buy the heated plank bender, gave it a whirl, and it did work.
Hopefully, I can get a goodly amount of this done before I have to travel again next Tuesday.
BMT
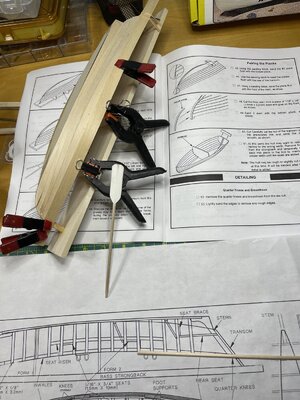

- Joined
- Jun 17, 2021
- Messages
- 2,294
- Points
- 488

Sorry you got covid! I hope it goes all the way away soon!
I'm glad the heated plank bender is working out for you. I find you can really sculpt with the thing, wetting, shaping and re-wetting the plank as many times as you like until you get it just the way you want. I like the oar. These little models are fun to build. You can get a very satisfying result with a relatively economical investment of time, developing a useful set of skills in the process. Yours is coming along nicely! Don't rush it. It will still be there when you get back from your trip.
I made one of these while recovering from a back injury and could only sit for limited periods of time. I finished it with thinned amber shellac which gave the natural wood a nice warm, mellow glow, and gave it to my mom for a keepsake around the time she turned ninety. She made it to 98. It gave her a lot of pleasure.
Pete
- Joined
- Sep 27, 2022
- Messages
- 221
- Points
- 113

Thanks, Pete feeling much better. Second, go around in less than a year. I am thinking about keeping it true to what I see at the Jersey Shore and what their box color scheme was white exterior and blue inside.
This boat has helped my overall skill set; if I can get another one of those series for $15, which I paid for this one I will, I will get another one.
This boat has helped my overall skill set; if I can get another one of those series for $15, which I paid for this one I will, I will get another one.
- Joined
- Sep 27, 2022
- Messages
- 221
- Points
- 113

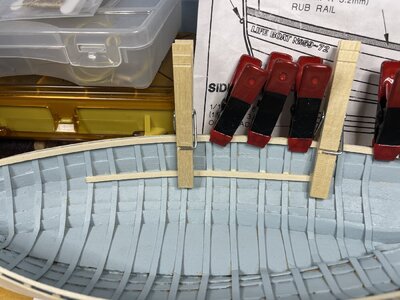
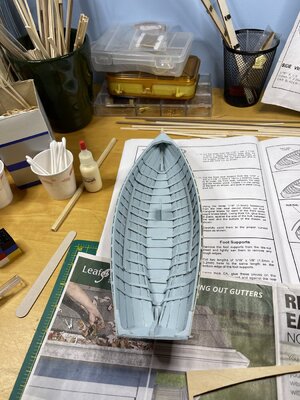
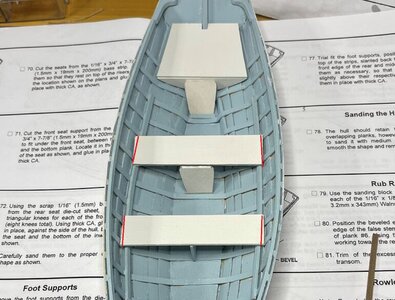
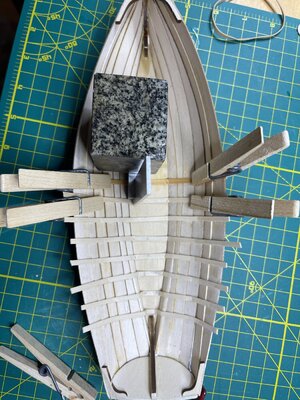
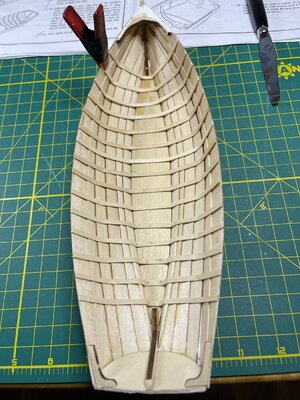
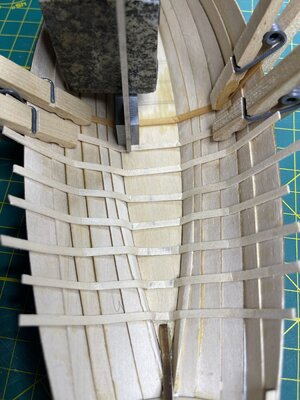
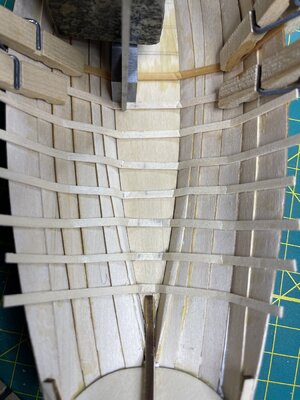
Ribs in place with the false stem. Do some cleaning up on the inside and will paint, then add the remaining parts( foot supports, rear seat, seats, keens, inwales, and risers), then give it another coat.
Once I finish the interior, I’ll work on the exterior and paint it.
The last thing I’ll do is put on their walnut rib rails around the top.
BMT
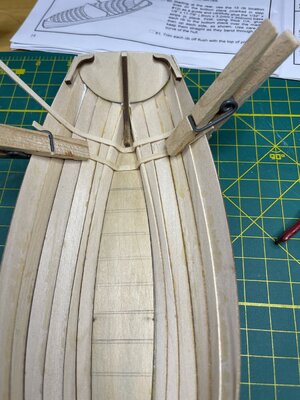
Once I finish the interior, I’ll work on the exterior and paint it.
The last thing I’ll do is put on their walnut rib rails around the top.
BMT


- Joined
- Jun 17, 2021
- Messages
- 2,294
- Points
- 488

It's all coming together nicely. I remember shaping those ribs. Planking looks great! Can't wait to see how she turns out!
Pete

Pete
- Joined
- Sep 27, 2022
- Messages
- 221
- Points
- 113

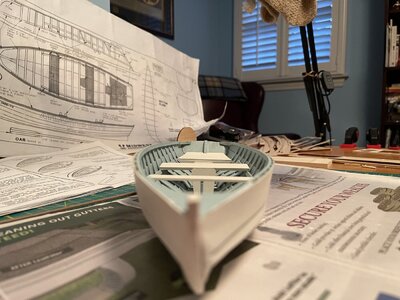
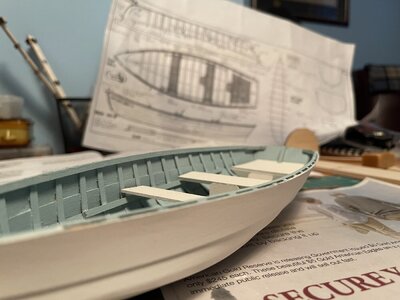
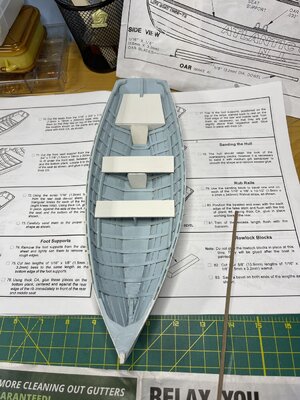
Two more ores and add the walnut rib rail.
Will continue after I come back from my trip.
BMY
Will continue after I come back from my trip.
BMY
Ribs in place with the false stem. Do some cleaning up on the inside and will paint, then add the remaining parts( foot supports, rear seat, seats, keens, inwales, and risers), then give it another coat.
Once I finish the interior, I’ll work on the exterior and paint it.
The last thing I’ll do is put on their walnut rib rails


- Joined
- Jun 17, 2021
- Messages
- 2,294
- Points
- 488

Looks great so far!
Pete
Pete

