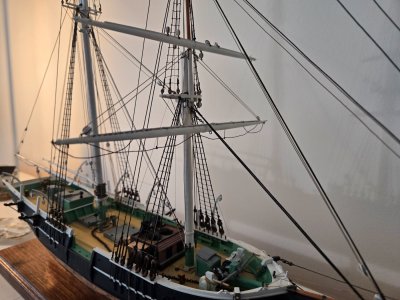
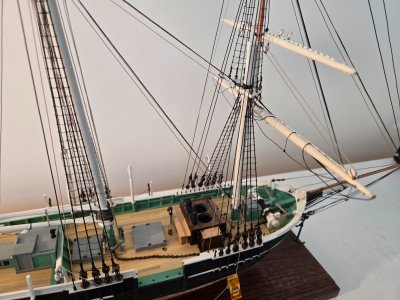
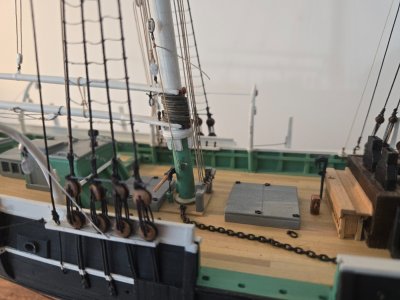
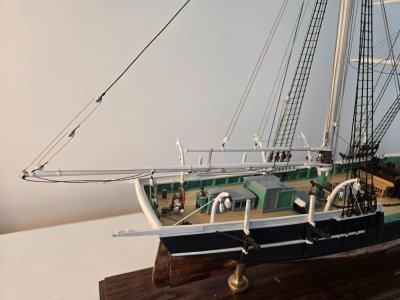
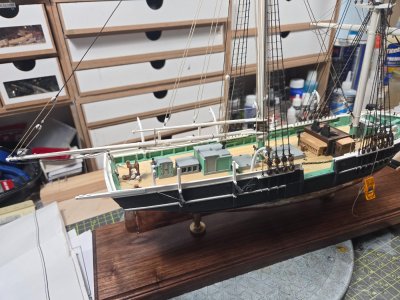
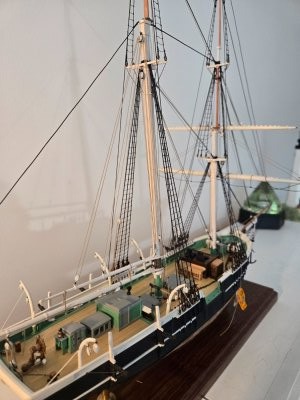
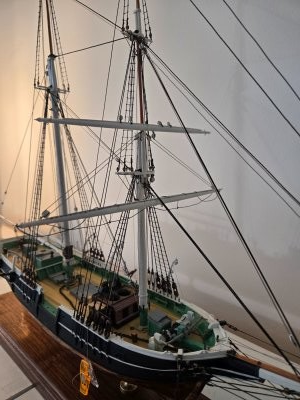
Model Shipways Kate Cory Whaling Brig

Joined
Nov 16, 2023
Messages
49
Points
68

Bought this kit along with a set of plans from New Bedford Whaling Museum many years ago and finally decided to build it. I saw the kit listed in the first Model Shipways catalog I received in 1986 when I was considering the hobby. I decided on a starting with their KATY, 1/4" scale Virginia Pilot Boat. Since then, I have built several other kits along with my other hobby interests. However, completing the Kate Cory has always been one of my primary goals. I needed motivation.

Unlike the Charles W. Morgan, there is not a great deal of historical documentation available regarding this specific ship. The New Bedford Whaling Museum, New Bedford, Ma. (USA) is the only resource I could find that offered credible documentation. This is where I obtained plans by Erik Ronnberg, Jr. which provide significantly more details and views then the kit plans. Additionally, I obtained copies of the Nautical Research Journals referenced in the Model Shipways Catalog regarding Coppering techniques, i.e., "Copper Sheathing of Whaleships", etc. I coppered two other kits using this technique and feel it provides a more realistic appearance. However, one could argue using this process without some weathering of the rest of the model is inconsistent.

Despite all the research and obtaining all the documentation I could find, I still felt I needed a good visual representation of the ship. Finally, a key motivating factor for me to starting the project was the 1/4" scratch-built model by Thomas J. Lauria, (https://tjlauria.com/gallery/whaling-schooner-kate-cory/). Tom has many other excellent builds and has been helpful answering my questions.

So, it begins! After shaping the hull, thinning the bulwarks. Next step will be to plank the Hull.

20240220_154339.jpg

20240220_154856.jpg

20240220_154916.jpg

20240220_155108.jpg

20230605_173002.jpg

20230721_155516.jpg
 
Finished the hull planking with some detail. A couple of details I had an issue with are the cabin lights and planksheer. Because of the small scale I decided not to worry about the trim on the cabin lights but simply drill a scale size hole which will be filled with clear canopy glue to represent glass once the hull has been painted. To finish the planksheer with some detail close to the plan profile, I added a piece of half round doll house moulding (Northeastern Scale Lumber Co.). While not a perfect match, once painted I think it will enhance the ships profile.

Next steps will be deck planking and bulwarks. I'll start the coppering when I basically have completed the hull. From my experience this results in less handling mishaps because once the hull is coppered it will be mounted. I find it harder to maneuver and work on the model once it is mounted.

First, I need to take a break and get back to finishing another project which was delayed because of items "lost in the mail.". Lowell Grand Banks Dory Diorama, need to add the crew (https://shipsofscale.com/sosforums/threads/lowell-grand-banks-dory-diorama.13415/#post-359372)

20240222_133246.jpg

20240222_133342.jpg

20240225_145011.jpg

20240222_134247.jpg
 
Finishing the deck planking. Items of note, "on all whalers the main deck was covered with a pine sheathing in order to withstand the wear and tear of the cutting in process, the planking was somewhat wider than the deck plank and was usually holy stoned bright". Unlike the main deck, the quarter deck planks are laid parallel to the waterway and not the centerline.

I used individual strips for planking the quarter deck and a piece of scribed decking for the main deck which will then be covered with scale 1"x12" wood strips to represent the pine sheathing. I felt it was necessary to add the bottom main deck planking, despite the fact that it will not be seen, to maintain the scale measurements of the bulwarks. Also, I wanted to make sure the plank sheer matches with the level of the waterways.

As I was planning out adding the pine sheathing for the main deck, I realized I'll need to add the waterways first.

Another issue I have been trying to resolve is the correct color of the bulwarks and deck structures. The instructions reference using "medium green" paint and grey. Well, define medium green? There is no historical standard and the only reference I could find was a "verdigris color" paint which is sort of the color of oxidized copper being used. Also, New Bedford Whaling Museum offers a print of Kate Cory which includes greenish blue color for the structures and bulwarks. From my perspective using a medium green paint, which tends to be darker in scale, would not be practical. Especially on a working whale ship.

Floquil Paints had a line of Marine Colors, historical, which included verdigris. Fortunately, I still have the color chart and will try to match it.

20230802_181706.jpg

DSC02484.JPG

20230809_150923.jpg
 
If you are still looking for inspiration check out TJ Lauria's website for his completed scratch built Kate Cory. It is amazing!

I guess he has most of his work on youtube now but you can search youtube for his Kate Cory. Totally worth it

Oldmate
 
Last edited:
I mentioned Tom in my first post, actually contacted him before I started. He's been helpful in answering questions. If you check his website there is a gallery of his work.

Thanks
 
Finished much of the bulwarks and various railings. Used my new Mini Dremel on the pin rails, great tool! I was amazed at how accurate it is, very little vibration, made the task easy. Putting in the gangway was more challenging than expected, plans were somewhat hard to interpret. But it adds a nice detail.

I was struggling with the shade of "green color paint" to use on the bulwarks and deck structures. Fortunately, Tom Lauria shared some helpful information on mix ratio's he used for his 1/4" scale build (you can find Tom's build on YouTube). I use only enamel or out of production Floquil paints and after some trial and error feel I have a decent period color representation.

As I progress with the build and anticipating next steps, I have found the kit plans are lacking in detail. I am continually reviewing the plans from New Bedford Whaling Museum as well as the two books noted in my initial post. Interestingly, both sets of plans were drawn by E A. Ronnberg Jr.
whaling historian.

My next step will be coppering the hull. I plan to use a "checkerboard" appearance. It is a tedious process involving attaching individual plates. First the copper is heated to produce variations in color, "yellow metal" I'll add more background about this process in my next post.

1000001305.jpg

20240323_093614.jpg

20240323_151218.jpg

20240323_093202.jpg

20240323_093521.jpg

20240319_152118.jpg
 
Started coppering the hull. This is a very tedious and time-consuming process, especially preparing the plates. There are many posts regarding "how to" but they basically involve using copper tape. This process involves applying individual plates.

For reference material I have books and copies of NRJ articles as noted in my prior posts. These are in addition to plans from New Bedford whaling Museum. The color of the plating is a modelers choice, I choose a dullish color similar to "yellow metal" or" Muntz metal" because after the early 1830's a composite zinc/copper mixture metal was used, Kate Cory was built in 1856. The reference material also contains a comparison of how copper plating was manufactured and stored which also impacted the color, dull versus today's bright color copper used on yachts for example.

I made a template from .020 plastic stock to mark the belts. To prepare the plates, first remove the adhesive from the copper tape by soaking the tape with backing attached in a jar of lacquer thinner. Once the backing became loose, wipe the adhesive off the tape with a clean cloth. Then, back in a jar of clean thinner. After the second cleaning, pass the tape over a heat source, I use a small candle to dull the color. This process will not produce a uniform color effect!

Next, start cutting, these plates are 1/4" x 3/4" which is close in scale (with overlap) to the 14" x 48" plates used on the Kate Cory. I estimate I cut approximately 400 plates. Once the plates were cut, back in the jar for cleaning, remove fingerprints, etc... Excluding prep time, I've spent 4 hours applying plates, long way to go.

Still need to address the gore line.

20240220_154916.jpg

1000001334.jpg

20240325_140522.jpg

1000001311.jpg

1000001312.jpg

20240403_135946.jpg

1000001340.jpg
 
Coincidently just finished coppering the hull, finishing the rudder. Need to clean and seal the plates, will post pictures shortly.

Thanks
 
Finished coppering the hull and then mounted on a temporary base. It is important not to use a cradle as it will damage the plates. The thin wood strip is a "wood guard" added at the water line as noted in the Whaling Museum plans. Next step is to finish the rudder, hinges, and give the copper a good cleaning before airbrushing a coat of Dullcote lacquer.

This stage of the build was very time consuming and I am anxious to start on the deck structures.

1000001346.jpg

20240421_145006.jpg

20240421_145231.jpg
 
Back
Top