• Ships of Scale has incorportated an extra level of security when you log In. Please follow on-screen prompts to acknowledge that you are not a robot via a "Check Box" or a "Pictorial Check Box Puzzle". This is needed due to higher level of AI Activity Security.
  • SUBSCRIBE TO SHIPS IN SCALE TODAY!

    The beloved Ships in Scale Magazine is back and charting a new course for 2026!
    Discover new skills, new techniques, and new inspirations in every issue.

    NOTE THAT OUR NEXT ISSUE WILL BE July/August 2026
  • Win a Free Custom Engraved Brass Coin!!!
    As a way to introduce our brass coins to the community, we will raffle off a free coin during the month of August. Follow link ABOVE for instructions for entering.

Model Trailways 1/12 Scale Chuckwagon

  • Thread starter Thread starter Lance
  • Start date Start date
  • Watchers Watchers 2
Joined
May 23, 2024
Messages
18
Points
48

Location
Big Sky, Montana
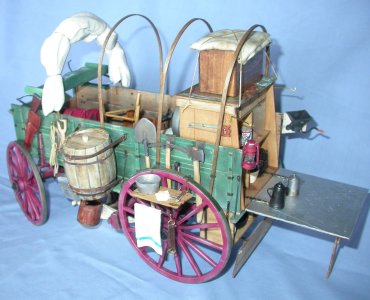
Model Trailways’ chuckwagon is a straightforward kit, less complex that their stagecoach, and with simpler décor. Minor construction flaws can be hidden with weathering or “damage” in keeping with the hard-working original vehicle. In many ways, the growing size of the project and awkwardness in handling cumbersome assemblies introduces the biggest challenge, and additions beyond the scope of the kit should be planned with care. I’ll address myself to the handful of areas I found to be somewhat tricky.
Finished port 2.JPG

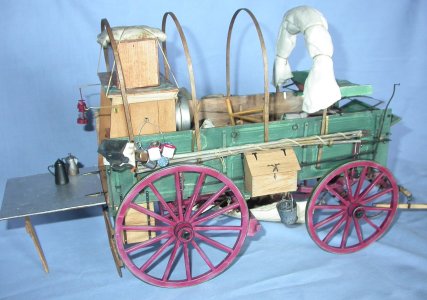
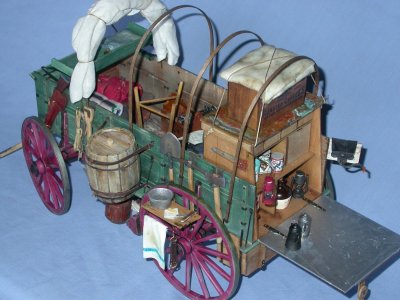
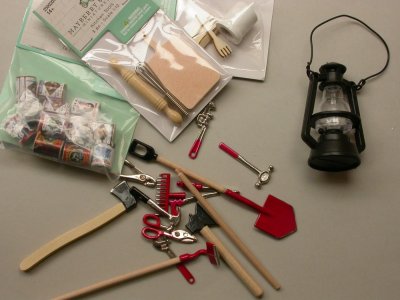
Even a cursory glance at pictures of the real vehicle and the numerous versions still at work in the hands of enthusiasts illustrate the array of accessories that can be included. The project, if taken to any length, becomes more of a still-life diorama than a model wagon. Most of this report will be devoted to the many extras I included to fully equip my version of a Montana ranch chuckwagon. I spent considerable money on doll-house miniatures, most of which needed to come from China via the proverbial slow-boat, and most of which proved unacceptable either by being too toy-like or out of scale. Some could be salvaged with judicious paintwork, modification, or tucked behind something else.
Toys.JPG

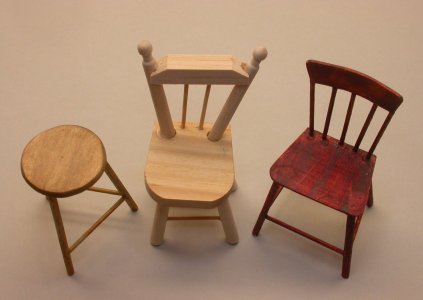
Another example is dollhouse furniture; unless one is prepared to pay for bespoke pieces, it is easier to make your own from scrap planks and dowels. Cookie wanted at least a stool to ply his trade on the trail, and I briefly considered a rocking chair before laziness intervened. Consider the middle item compared to home-made alternatives.
Furniture.JPG

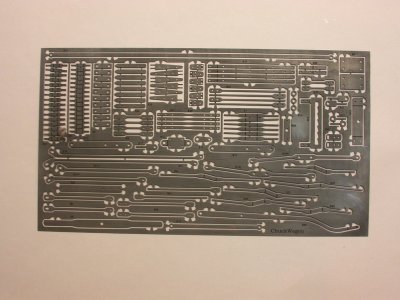
In prior projects, haphazard technique had rendered the chemical darkening of the etched brass sheet less than desirable, and I prepared the brass for the chuckwagon more carefully. Multiple baths in diluted Birchwood Brass Black, followed by thorough rinses in distilled water, left the sheet a uniform black that mimicked the look of wrought iron, and was sufficiently durable to withstand handling during construction. Removing all the components from the sheet and cleaning the sprue before blackening would have been even more effective, insofar as it would have spared me from touching up the attachment points, but I was concerned the number of pieces would overwhelm my organizational skills.

Blackened brass.JPG


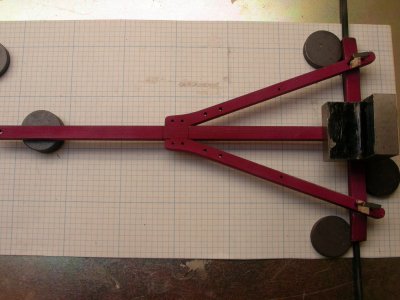
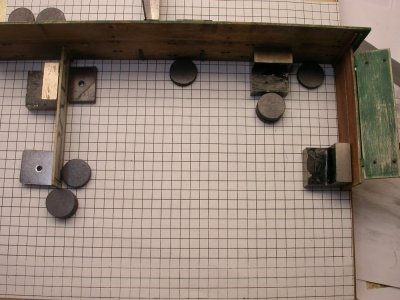
Making sure things are square is one of the most basic premises of any construction project, yet it is surprisingly often overlooked; I speak from experience. I use a number of techniques, but one of my favorites is the employment of graph paper to show deviations from straight or square. A steel building board, supplemented with magnets, will push components together while adhesives cure.
Align hounds.JPGBox building.JPG

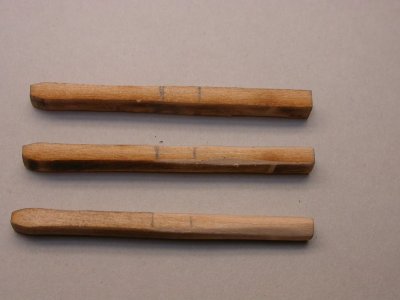
Preparing spokes is an exercise in tedium, and it is all too easy to get distracted and fail to maintain consistency. I combat this by making the process as idiot-proof as possible. Each spoke is marked where the various tapers begin and end, using a template. While sanding off the char, I use a consistent number of strokes with an abrasive stick, rotating the spoke and mentally counting for each face. The knife cuts where the profile changes from rectangular to oval need careful calibration to ensure uniformity. Finally, the oval profile is obtained, again counting the number of sanding strokes on each corner.
Spokes.JPG

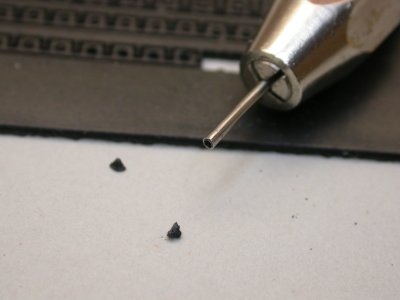
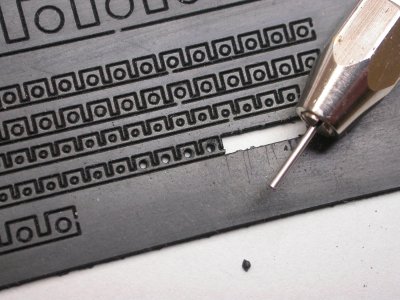
The material provided by Model Trailways to represent the nuts or bolts is an admirable compromise to real hardware, and certainly looks the part. The modeler can easily slice these from the sheet with a hobby knife, but gouging out the center hole to accept the shaft of the “bolt” is a little more troublesome. I made the process less painful by chucking a length of metal tubing into a pin vise to punch the material cleanly. Different sizes of tubing matched the various diameter of the nuts, and the whole sheet was prepared in moments.
Nut punch 1.JPGNut punch 2.JPG

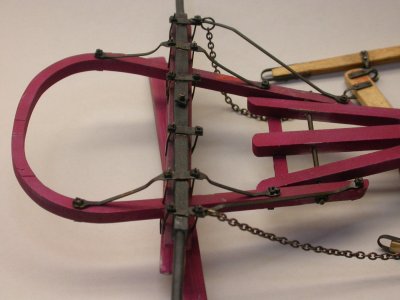
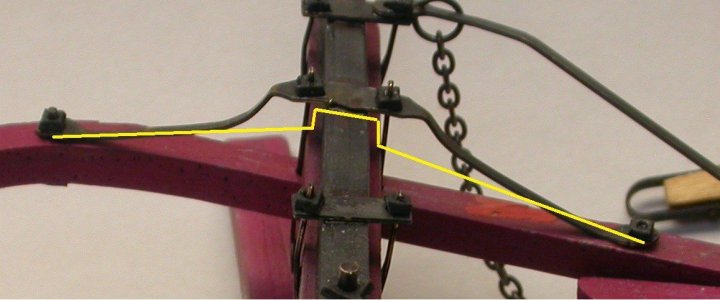
The brass shapes to represent the ironwork trusses that support the undercarriage are slightly overlong, a better problem than the alternative. I did a poor job of compensating for this, and as a result my supports are rather more curved than the ideal. Shortening the brass with cuts and re-soldering is very problematic; perhaps the best approach is illustrated here, by bending the shapes to more precisely align with the axle so that the runs to the hounds are perfectly straight.
Ironwork length.JPG

Ironwork length corrected.jpg
 
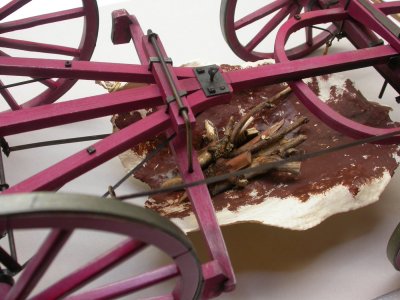
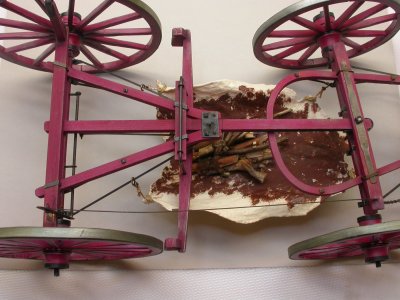
The “possum belly” was a hide or tarp stretched under the wagon to receive whatever fuel could be gleaned from the passing landscape. I replicated this by cutting a paper towel into the shape of a typical cow hide, and coating it with a generous amount of Modge Podge while hanging it beneath an approximation of the wagon’s chassis. As the “hide” became stronger, I used weights to simulate the wood load, which came out of my yard. Finally, I painted the hide an appropriate color for any one of several common cattle breeds, loaded the wood and glued it down with white glue. Brass hooks were made from eye-pins, and the finished assembly set aside until it could be teased into position at the end of the project.

Possum Belly 1.JPGPossum Belly 2.JPG

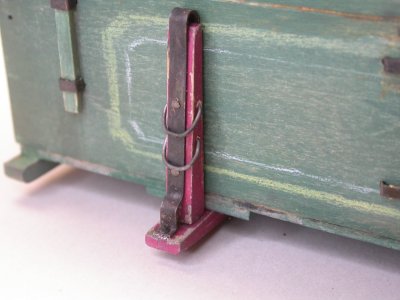
The wagon bolster uprights were mortised into the frame, a design feature that pooled moisture and eventually rotted the tenon. This was frequently repaired with iron supports, and supplemented with various tie-down features to make loading the wagon more versatile. I replicated this with brass straps bent to shape, and looped brass wire into rings that hung from holes in the uprights. A couple of “bolts” finished the assembly.

Body Bolster Upright.JPG

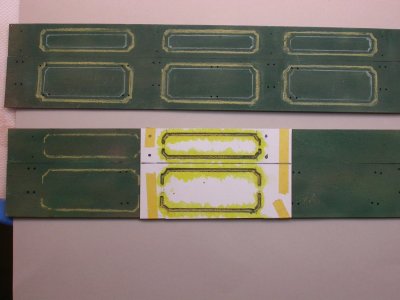
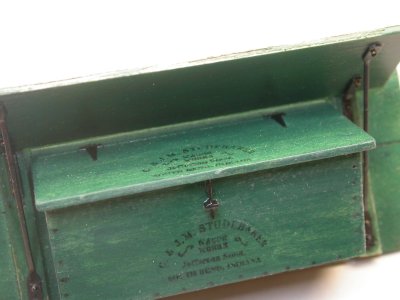
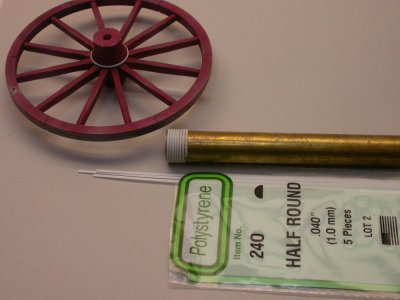
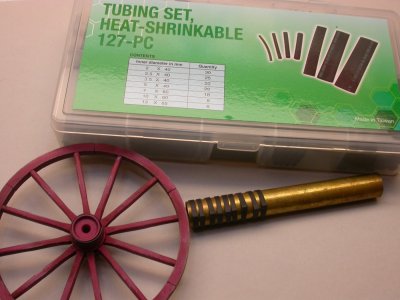
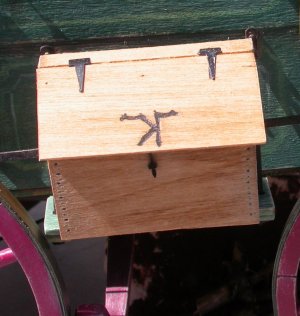
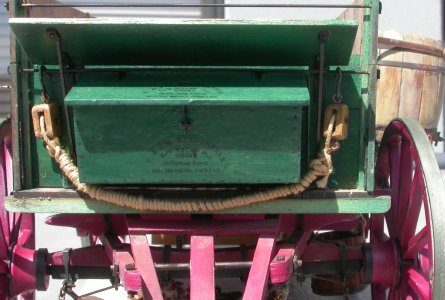
Studebaker was a major manufacturer of farm wagons, and supplied them by the thousands; many would become chuckwagons. The Model Trailways kit has several of the hallmarks of Studebaker, and I made sure to conform my model to what I could determine about that manufacturer’s product. The yellow and white décor on a green wagon box, coupled with the dark red undercarriage, were very common motifs. As I wanted my wagon to look very well used, the colors had to be faded and the yellow and white decorations much toned down. Stencils let me produce uniform lines using colored pencils, and I then scrubbed the paintwork with wire brushes and other scarifiers to render it “well-used”. Another Studebaker feature was the front jockey-box, mine made from basswood and labeled with a home-made decal. Studebaker used half-round iron hoops in the construction of their wheel hubs, a feature easily re-created with Evergreen styrene plastic strips. The rest of the iron hub details were made from heat-shrink electrical insulation tubing, an idea I promptly stole “JohnB40”’s build.

Studebaker decor.JPGJockey box.JPGWheel hub.JPGWheel hubs.JPG
 
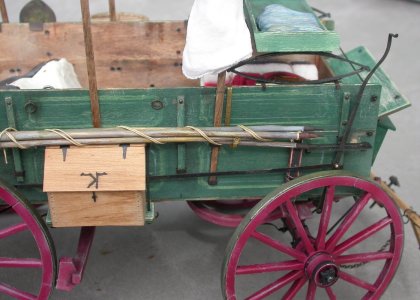
In addition to the manufacturer-supplied jockey box under the seat, many wagons affixed an after-market or home-made tool box onto the right side in front of the brake strap, often marked with the outfit’s brand. Most ranchers would read this one as the “Flying Crazy K’, but folks around these parts know it as the “Drunken K”. It’s made from scrap planks, plastic hasp and hinges, and a wood-burned “Drunken K”.

Tool Box.JPG

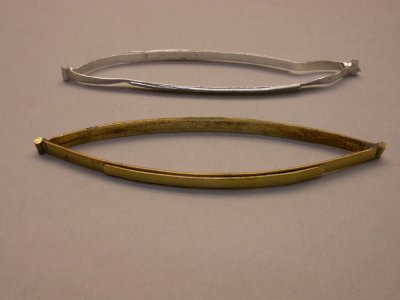
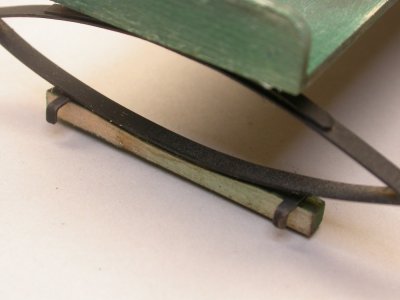
Some of the weakest parts of the Trailways kits are the white metal castings. The chuckwagon only has the seat springs in this form, but they are vulnerable to damage in their exposed position even after they are tweaked back into shape. I dispensed with them altogether and soldered new ones out of flat brass strips and rods. My research revealed that the seats merely rested on the wagon box sides, held in place by wrought iron straps bent into brackets. This made the seat adjustable to accommodate drivers of different builds, and enabled the modeler to construct the assembly and set it aside when the wagon box needed to be inverted to lay on the desk.

Seat Springs.JPG
Seat mount.JPG


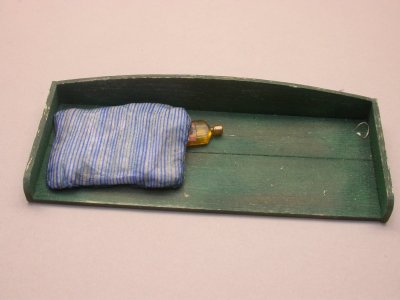
That hard wooden seat looked pretty uncomfortable to me, so I provided Cookie with a pillow to ease his ride between camps. Cookie, being fond of a nip or two during the day, slipped a pint of whiskey under the cushion. The pillow is epoxy putty, covered with a paper “ticking” that was lined with a Sharpie and a ruler; then soaked in diluted white glue and wrapped around the pillow. The whiskey is a doll house item.

Seat cushion.JPG
 
I appreciate the kind remarks! I'll continue with other features added to the kit.

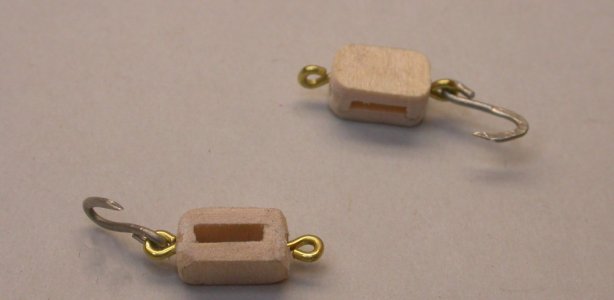
Many pictures show chuckwagons carrying block and tackle to drag a stuck wagon free. I made blocks from pieces of wood, and sandwiched those around a plastic sheave. I added brass eyes from miniature eyebolts, and fashioned hooks from flattened wire. Rope was added, and the whole slung under the wagon seat.

Blocks.JPGJockey box 1.JPG

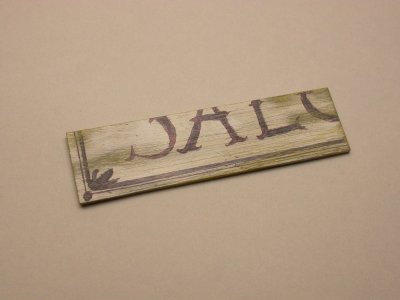
The conversion of a farm wagon into a chuckwagon would have been accomplished by local craftsmen or carpenter-cowboys on the ranch, and so can naturally look considerably different from the product as it might have come from a showroom. In my case, the chuck box backstop was salvaged from a quarter of the local saloon marquee, simply rendered with paint and markers but adding a bit of local color.

Backstop.JPG

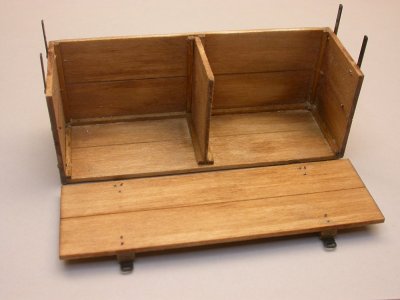
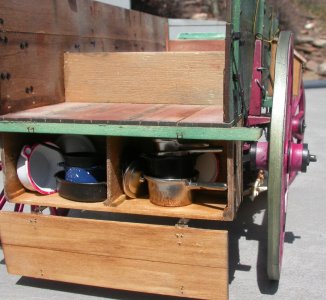
Since I wanted the pan boot open and displaying Cookie’s tools of the trade, I added some additional supports to reflect how I, a mediocre carpenter, would have assembled such an item myself.

Pan Boot 1.JPG

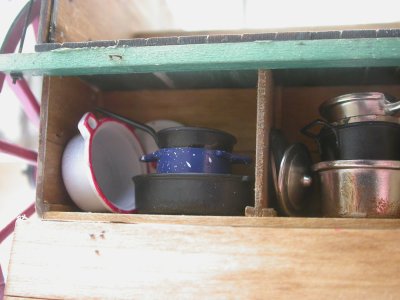
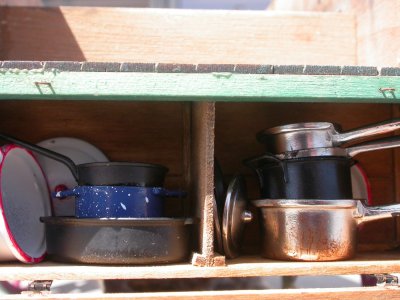
Dollhouse cookware worked here, in a hard-to-see nook under the wagon. Some items were painted to look like enamel ware or iron ware, both common in the late 19th century.

Pan Boot 2.JPG
Pan Boot 3.JPG
Pan Boot 4.JPG


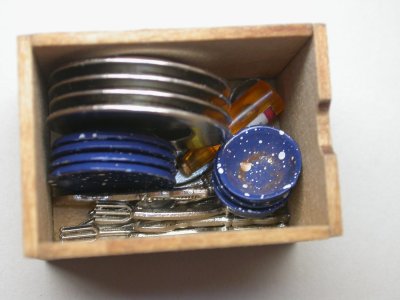
The various drawers in the chuck box can be shown open, and here again the less-than-perfect doll house dinnerware could be used to advantage. It would seem Cookie has stashed another bottle in this one. He isn’t doing a very good job washing dishes, either.

Drawer.JPG
 
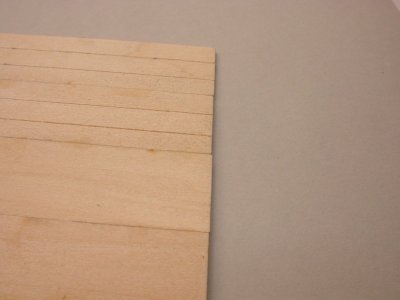
Farm wagons had tongue-in-groove floors to keep loose grain from escaping, a feature not reflected in the Trailways kit; this is easily remedied by etching lines in the floor material to recreate the look.

Tongue in groove.JPG

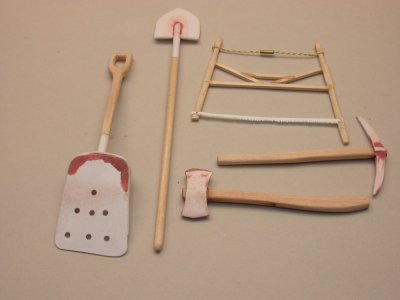
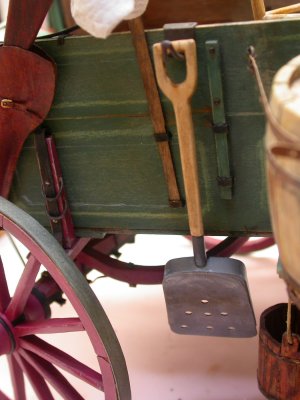
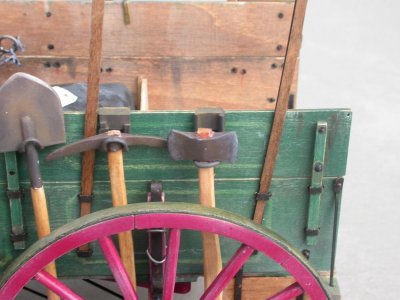
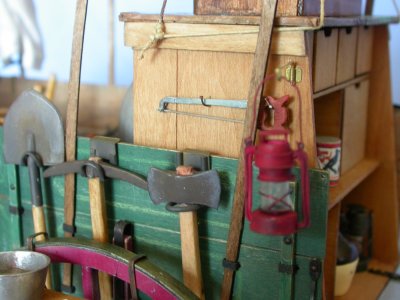
One never sees a picture of a chuckwagon without a selection of tools hanging from the box, and as the dollhouse miniatures failed to do these justice, I resorted to scratchbuilding, using photos of antique implements as a guide. These excursions are an interesting sidelight to the kit assembly, and all one needs are sheet styrene, wire, and wood.Tools 1.JPG
Tools 2.JPG
Tools 3.JPG

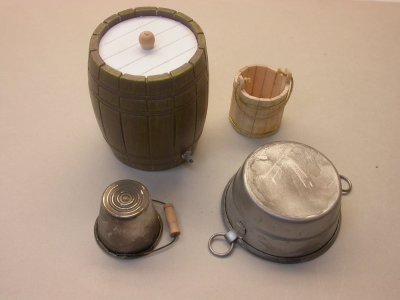
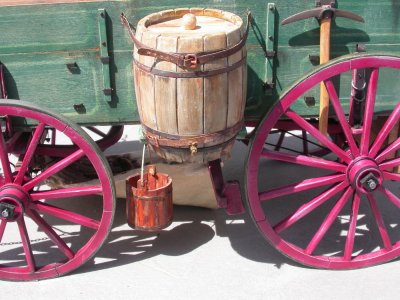
Travel in the American West can be a long way between drinks, and water barrels, buckets, and tubs are frequent passengers on any chuckwagon. Here a dollhouse barrel worked, with a spigot and top added, as did a wash tub and tin bucket. The wooden bucket was made from strip wood, and suspended underneath. The barrel was strapped to the wagon with belts, made from the “leather” Trailways supplies and brass and copper wire buckles.

Water containers.JPG
Water barrel 1.JPG

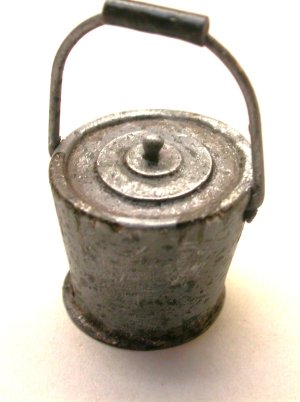
Another type of bucket stored grease to lubricate the axles; a dollhouse item served here, with a scratchbuilt lid and modified bottom.

Grease Bucket.JPG

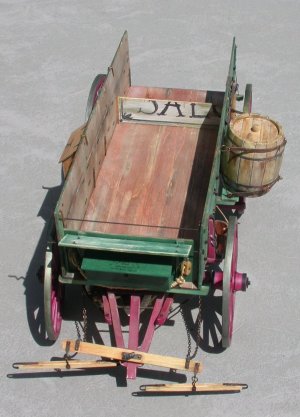
The union of the completed wagon box onto the chassis is fairly straightforward, though fiddly. After this stage, however, it is difficult to get at the remaining assemblies, as the axles, barrel and box supports on the sides, the bolster uprights, and eventually the brake lever preclude the builder from laying the model in a convenient position. I advise careful study and the construction of a holding jig. This jig, in my case, was nothing more than Styrofoam shapes, but it served to minimize damage to already completed details; when you get to the completion of the brake and brake lever, you’ll know what I mean. The project fell to the floor during one of these awkward forays, and while the damage was reparable, the blow to morale was severe.
Wagon Box Complete.JPG

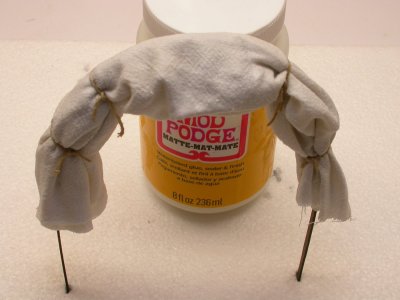
I debated a long time before deciding on the proper way to display the canvas cover. I certainly wanted to display as much of the chuckwagon’s contents as possible, so some form of “furled” canvas was indicated. This is appropriate, as the crew would be in and out of the wagon often. In the end, I opted for wrapping the full-sized cover around the front bow and tying it off with thread; the alternative was to cover all the bows, rolling up the sides to allow a glimpse into the interior. The former was a little easier to pull off, so that was the plan, and I marked a sheet of Styrofoam to support the kit bow while the top was secured. The canvas was cut to full shape, hemmed appropriately, and tied in place. Generous coats of “Modge Podge” (a sizing compound made for crafts) froze it in place.

Cover.JPG

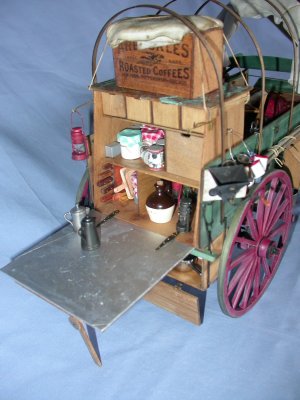
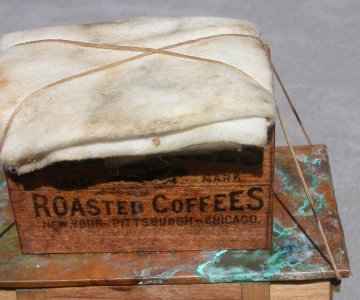
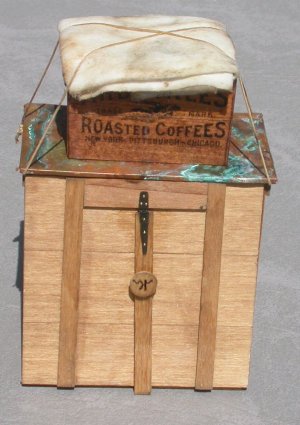
The chuck box can be built and detailed apart from the wagon, and its handier size is a pleasure to deal with after wrestling the wagon together. Mine was a little project in itself, as I intended to display it open. The instructions are all one needs, though I added the “Drunken K” brand to the support leg, and finished the piece as a lightly-varnished ranch-built item. It struck me that inclement weather might contaminate the various contents, so I equipped mine with a copper sheet over the roof, weathered with salt water to give it a patina. Arbuckles Coffee boxes are ubiquitous additions in photos of real chuckwagons. I shrunk their label to scale size, made a decal on my home printer and affixed it to a scratchbuilt wooden box, taking care to match the finish to photos of existing items. Another common addition was a canvas tarp to stretch over the kitchen area to protect from either sun or rain; I made one from heavy paper, added brass grommets, folded it to fit on top of the coffee box, and lashed the whole affair to the chuck box.
Chuck Box Roof.JPG
Chuck Box.JPG
 
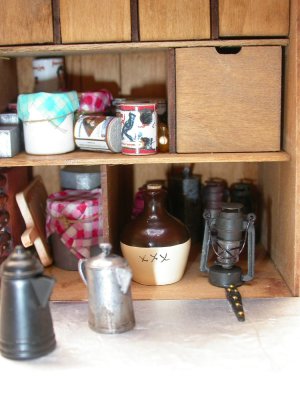
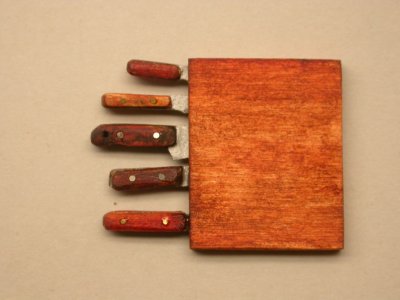
The chuck box contents again made use of dollhouse kitchen items, some discretely moved into the background, but others perfectly adequate to use as they came from the store. The knives were over scale, so I made my own with plastic, wood, and photoetched brass and copper. They were housed in a wooden case for safe storage and easy access.

Knives.JPG

Besides the knives, sourdough starter, lanterns, canned goods, and miscellaneous utensils filled the chuck box, including the two coffee pots that stand ready on the folding table. There is a sizeable jug of whiskey, and sharp-eyed viewers will spot another flask of Cookie’s private stash. The door/worktop was often protected with a sheet of tin or copper, and I used dull aluminum foil to stand in for this feature.

Chuck Box Interior 1.JPG
Chuck Box Interior 2.JPG

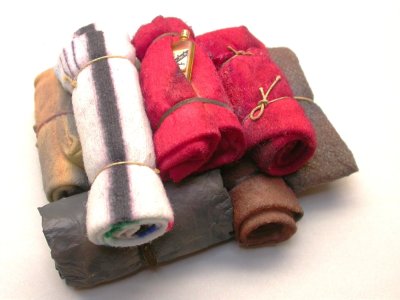
The wagon bed was full of the implements of the roundup, in addition to the personal items of the crew. These blankets were made from facial wipes, and their thick nature ideally simulated wool. Rolled up, they were secured with either twine or belts. I used markers to add the colored bands common to Hudson Bay blankets and those used by the US army, and spray painted the basic colors. The oilcloth roll was made with waxed paper. I suspect that Cookie’s bedroll may be the one with the nightcap handy.

Bedrolls.JPG

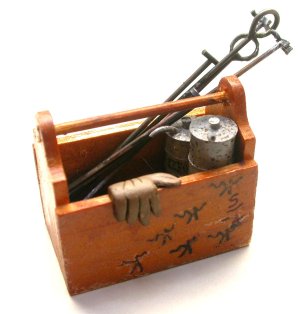
The brands of nearby ranches might be carried to mark unbranded calves, a neighborly thing to do, in addition to the Drunken K brands of the outfit. And a “running iron” might be used to alter some existing brands of cattle that would make a good addition to the home herd. Gloves and kerosene jugs are also in evidence. The box was a dollhouse toolbox, roughed up some and marked with a couple of test firings to see if the irons were hot enough. The brands themselves are plastic rod and strips glued together, the kerosene cans from styrene tubes with sheet plastic additions, and the gloves are epoxy putty.

Brands.JPG

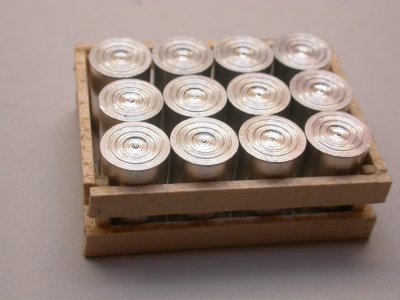
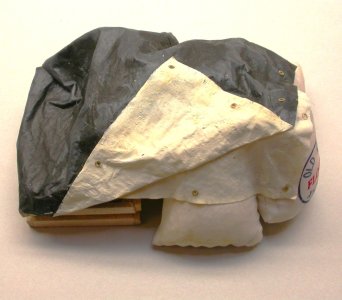
Dollhouse cans were okay to use as long as the sides were hidden with a make-shift case, as were some bags of dry foods in discrete glimpses. But to simulate an entire store of backup rations would require camouflage. This came in the form of an oilcloth poncho, made of waxed paper soaked in diluted white glue and carefully draped over the cache. Grommets were added from brass circles.

Canned Goods.JPG
Food.JPG

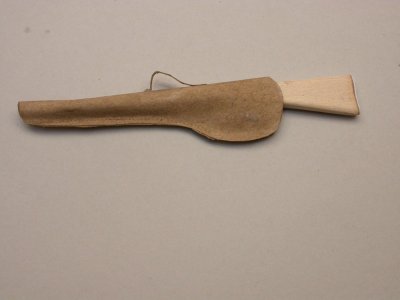
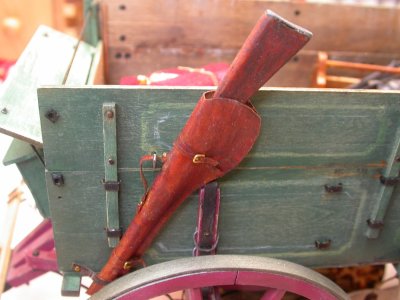
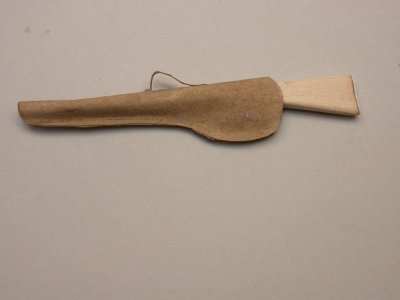
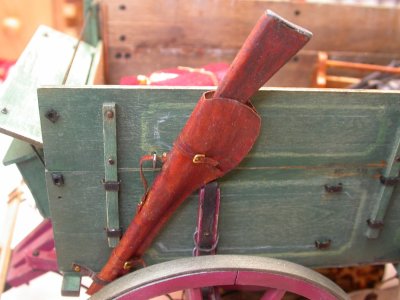
Cookie is almost certainly prepared to shoot anything that might be thrown into the supper mix, and a shotgun is the logical weapon of choice. I carved the stock and a rough outline of the gun’s barrel, then used this to shape a “leather” scabbard. To this basic assembly was added buckles, straps, and a butt plate for the shotgun. The completed gun was hung within easy reach for the driver.

Shotgun 1.JPG
Shotgun 2.JPG

Shotgun 1.JPG

Shotgun 2.JPG
 
Forgive the double-post of the shotgun, I'm ham-fisted.

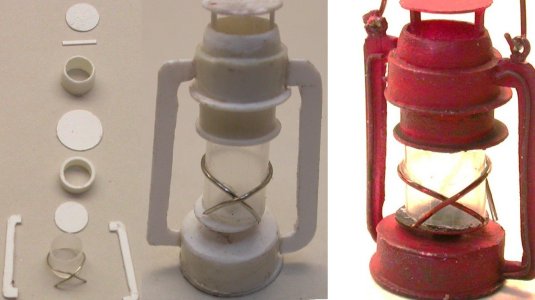
Lanterns would be a logical convenience, and in the fire-prone American west, safer than an open flame. I could find nothing in scale that was remotely similar to the real thing, so a complicated assembly of plastic was undertaken. Styrene disks and tubes constituted most of the body, with a clear tube supplying the “glass”. Wire completed the detail, and the whole painted and weathered.

lanterns.jpg

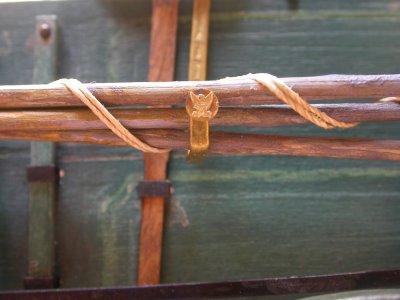
Protection from sun or rain could be important to the food preparation, and many wagons carried poles to spread a tarp over the chuck box. Here are four, prepared with wrought iron pegs to fit into the tarp grommets, and guy lines to stake them out behind the wagon. The brass support that holds the poles to the wagon for travel has a decorative eagle, a remnant of a photoetched Civil War cap badge for a 1/32nd soldier.

Poles.JPG
Pole holder.JPG

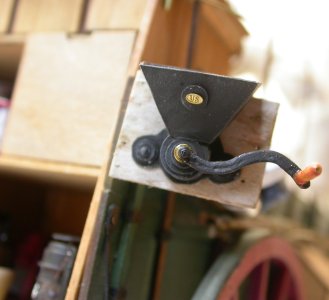
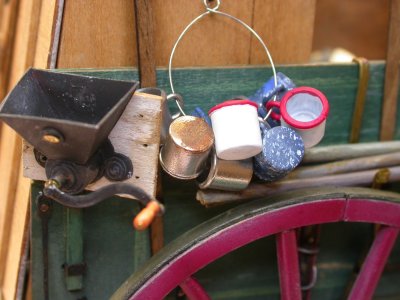
If a crew needed an entire case of coffee, they certainly needed a way to grind it, so I provided a scratchbuilt grinder and mounted it to a hinged board that could be swung out of the way when not in use. Styrene provided most of the material, but I turned a wooden handle and used a brass rod for the crank. Photoetched brass provided the manufacturer’s badge. The crew’s cups were hung from a handy wire hoop; these are pained dollhouse items.

Coffee Grinder.JPG Cups.JPG

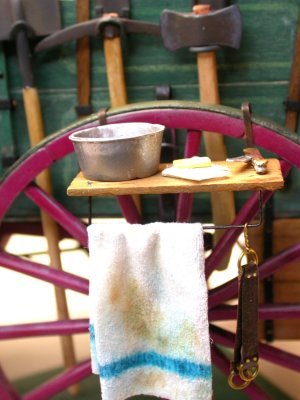
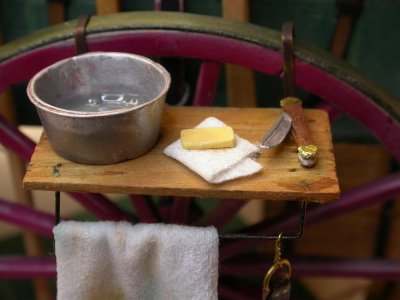
Fastidious cowboys seem like a longshot on the trail, but near town some might want to shave and wash up. It is common to see a makeshift wash station mounted over a wheel, so I created one from a scrap board and some bent metal. The basin is plastic, the razor a combination of plastic and brass foil, and the towel a section of facial wipe, suitably folded and frozen into position with Modge Podge. The razor strop is Model Trailways’”leather”, with brass hoops and rivets.

Wash Station 1.JPG

Wash Station 2.JPG

A hacksaw served as a handy means of butchering animals destined for the pot; this one is plastic, with a jeweler’s saw blade. Also of interest are a finished lantern and the swiveling brass arm that supports it.

Saw.JPG

Folks interested in western wagons can really go to town with this basic kit, and I can recommend the instructions, plans, and materials of Model Trailways’ products without reservation. The kit was designed and prototyped by Bob Crane.

Finished Stb 1.JPG
Finished stern 1.JPG

Thanks for taking a look!
 
Back
Top