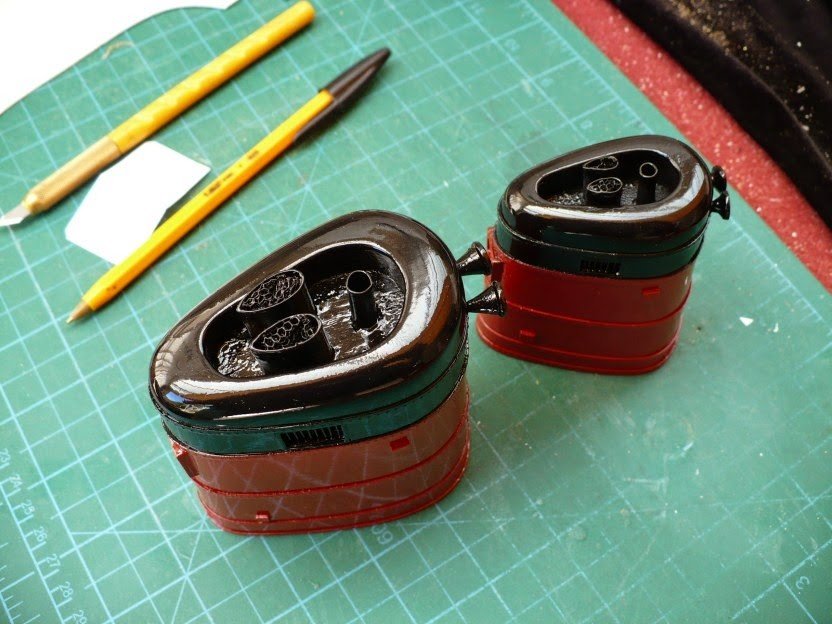
FERRY CROSS THE MERSEY
Being an ex-patriot of Liverpool living in South Africa since 1980, I decided to scratch build a model of the Mersey ferry MV Mountwood, as she was originally fitted out in the early sixties.
BRIEF HISTORY
The Mountwood was the slightly older sister ship of the MV Woodchurch. Both ferries were built for Birkenhead Corporation and were based loosely on the designs of the Wallasey ferries Leasowe and Egremont and were built by the same company, Messrs. Philip and Sons Ltd. of Dartmouth. Mountwood was launched by Mrs Hugh Platt on the 6 July 1959 into the river Dart, and after being fitted out was delivered to the Mersey in 1960. She was named after an overspill post-war housing development of Birkenhead. In her early years Mountwood was an unreliable ship, breaking down several times whilst crossing the river and having to anchor. In May 1961, she suffered a main engine failure, with her passengers having to be rescued by Woodchurch.
The Mountwood remained in operation up until she was withdrawn for refurbishment in 1989. She was rewired, internally refurbished and her bridge wheelhouse and cabs were plated over to form one large navigation bridge, although she retained all the original equipment. The most noticeable change was the colour of the funnel, flame red and black, harking back to the 1920s Birkenhead steamships. The new 'Mersey Ferries' logo was painted on each side of the funnel. The Mountwood returned to service in July 1990 and remained in operation up until 2001, when she was withdrawn from service for a major refit. Her only major work during the period 1990-2001 was the addition of a shelter abaft the bridge, which also had a small bridge deck area. The black band on the funnel was reduced and the logo resized giving the ferry an oddly small looking funnel.
In 2001, the Mountwood was withdrawn and taken to Birkenhead's former Cammell Laird shipyard (which became owned by A&P), and then to Clarence graving docks, where she was stripped of her fittings and parts of her superstructure were removed and rebuilt. Unfortunately the ferry remained dormant for some time due to problems at the shipyard. She was then re-engined and more or less completely rebuilt. Noticeable changes were the addition of a new, angle fronted, large wheelhouse and bridge deck, plus her funnel, which was reinstated after the refit, was moved further back to fit with the position of the new engines. Her central saloons were also extended to the full width of the ship. She looks quite similar to the Woodchurch's refit to Snowdrop. The ferry contained many items that would be classed as nautical antiques and quite valuable, such as engine telegraphs, binnacles and much brassware. The helm and binnacles were reinstated onto the new bridge, however all the other items are in storage at Mersey Ferries' archives.
Mountwood's nameplate now reads "Royal Iris of the Mersey". It cannot be shortened to "Royal Iris", as the previous vessel of that name (the MV Royal Iris) is still listed on Lloyd's Register of Shipping in the same class. The ferry still carries her original pair of Kockums Supertyfon fog horns, as do her two sister ships.
On 29 October 2002, a tremendous storm hit the Mersey, with windspeeds measured at force 10-11. The Clipper round the World race start was delayed and tugs were called to ships in the Mersey to keep them at port, battling against the raging waves. The Royal Iris of the Mersey was in service that Sunday, and was tied up at the Liverpool landing stage. Her mast rigging was blown down and her Mainmast had to be lowered for safety. Ferry services were cancelled and severe damage was caused to many properties along the waterfront. The vessel could not berth at Seacombe during this time because the resulting swell of the storm was that strong. The last storm of such strength to hit the Mersey was the 1989 hurricane.
The Mountwood was used in the film "Ferry Cross the Mersey", a musical named after the Gerry & the Pacemakers song. It also appeared in the opening titles for the television series, The Liver birds.
THE MODEL
Due to the scarcity of aftermarket model items, this would be a totally scratch built model, the only purchased items would be a 1m x 300mm x 25mm plank of Jelutong for the hull planking, deck planking and benches, and 2m x 1metre styrene sheets in sizes 0,4mm, 0,7mm and 1mm for the superstructures. This is far cheaper than using "Evergreen" eg. A 2m x 1m sheet of 1mm styrene sheet cost me the equivalent of approximately £7.00 from the local plastic sheeting supplier.
My previous modelling experience was with static wooden kits, a Mantua kit of HMS Victory, A Billings kit of the sail training ship Danmark and two Hachette weekly partworks, 1:250 RMS Titanic and 1:200 KM Bismarck.
The first thing to do was to track down plans of the boat on the internet. I eventually found the Naval architects who designed the original boat and her sister ship, the Woodchurch. They had paper copies of the original plans which had been drawn on silk.
I obtained permission from Mersey Ferries to purchase a copy of these plans and the architects sent the paper copies out to be scanned into (1/4" x 1 foot - Scale 1:48) pdf files. There was a set of three plans relative to my needs:-
1. The LINES PLAN & OFFSETS plan,
2. GENERAL ARRANGEMENT, "AS FITTED", MAIN & LOWER DECK plan
3. GENERAL ARRANGEMENT, "AS FITTED", PROFILE & PROMENADE DECK plan.
These they then e-mailed to me after receiving my electronic bank transfer payment. I tell you, they cost me an arm and a leg but they were worth it after seeing the finished model!
Living in South Africa, I did not have access to any Mersey Ferries archive material or Liverpool Maritime museum so I had to rely solely on my plans and any pictures that I found on the Internet. I was fortunate to find an American website that converted sixties and seventies musicals to DVD from the original cinema 35mm prints and I purchased a copy of "Ferry Cross the Mersey" from them. From the DVD, I extracted the ferry boat segment and from it captured about 80 snapshots of various scenes on the boat including some good shots of the ventilators, benches and general on board layout views.
The hull would be constructed in the normal double plank on frame method but due to the design of the main, promenade and bridge decks, I would have to use styrene sheet for these constructions.
As I had never used styrene sheet before, and not being able to decide on the scale, I decided to build two boats. I would scale down the plans to 1:60 and build a prototype on which to experiment with construction methods. After the certainty of making mistakes and finding solutions, I would make a final 1:48 scale model.
I took the pdf files to the local print shop where they printed them out full size (1:48 scale) and also a set of 80% full size (1:60 scale). These were pinned up on the wall to be used as reference.
On my computer, I printed out the half frames from the Lines and offset plan pdf file and scanned them into MS paint. From these I made a set of frame and keel templates for each scale (compensating for the thickness of the planking).
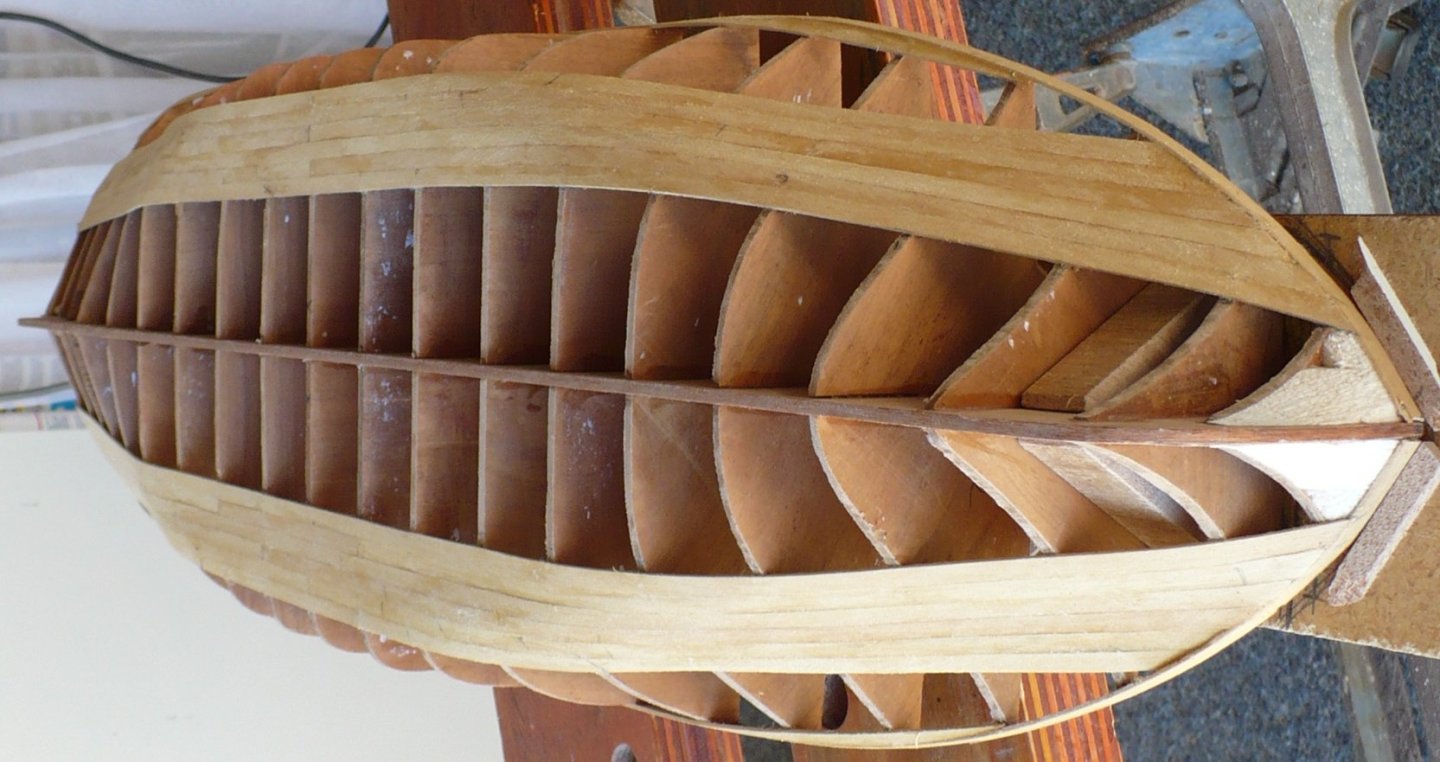


The 1st layer of hull planking strips were cut from the plank of Jelutong and the second layer from Meranti.
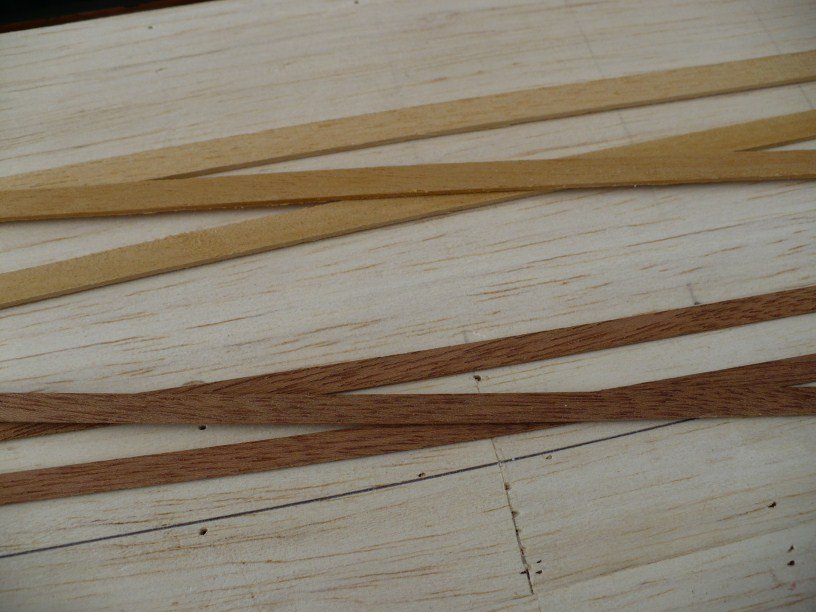
After the planking was finished, the hull was sanded down and given a coat of diluted PVA to fill in any gaps between the planking. It was then sanded down again and given 2 coats of sanding sealer. When this was dry, a further light sand and then a light coat of primer was applied to show up any imperfections. These were corrected with filler.
When the hull appeared to be perfect, it was given two brush coats of white car primer and then four brush coats of grey car primer.
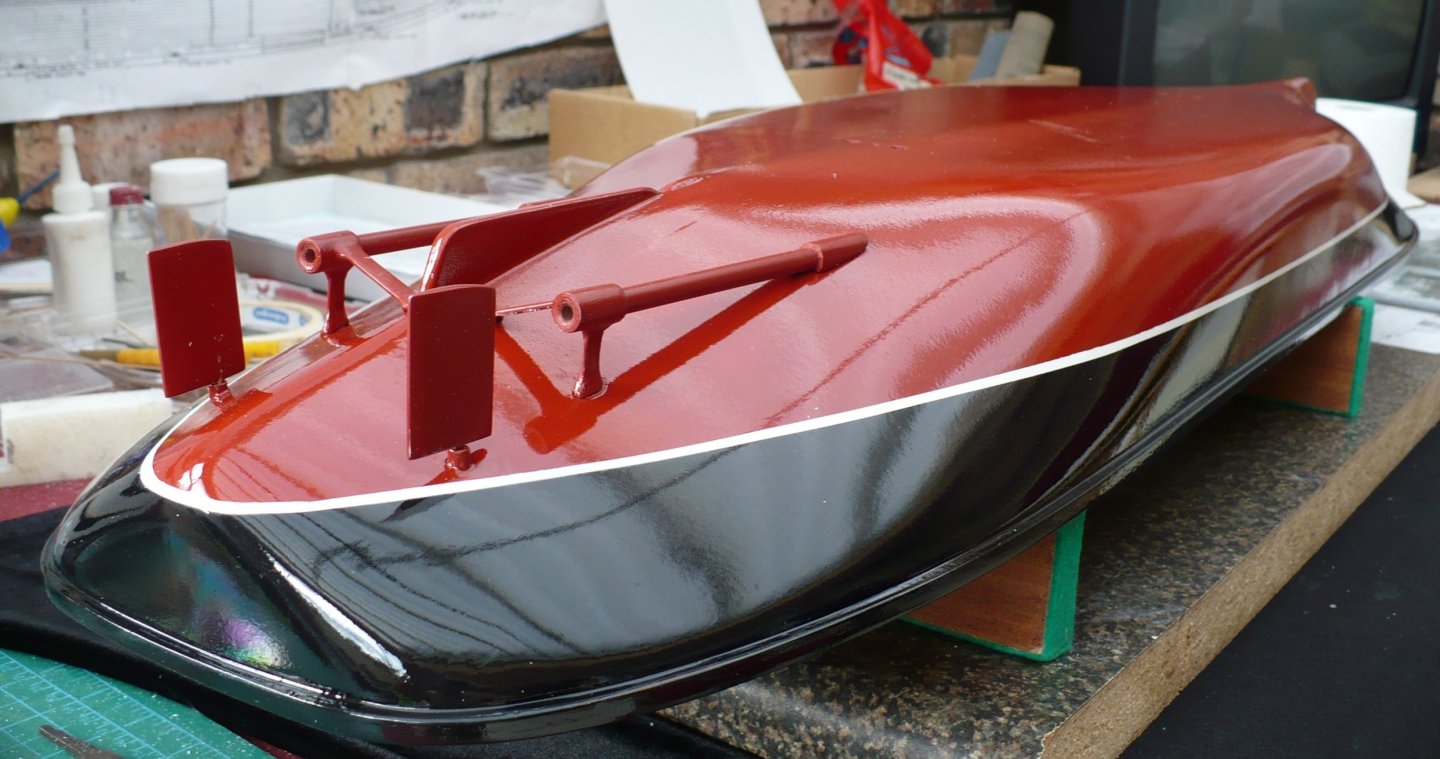
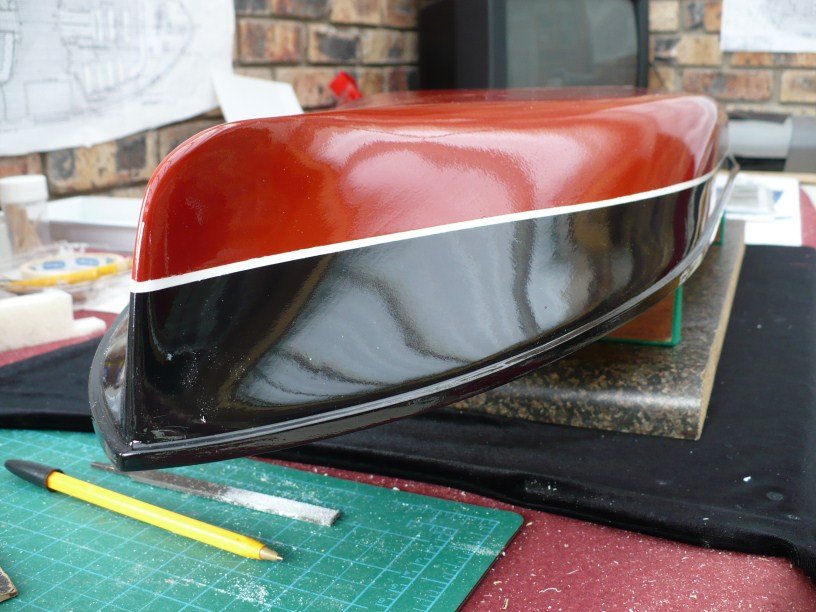
This was allowed to cure for a couple of days and then sanded down with 600 grit wet & dry used wet. It was sanded down until the white started to show through the grey and then I stopped. This method prevents you sanding back to the wood but the thickness of the primers acts as a final filler to any imperfections and gives a finish like glass as can be seen in the below photos.
The red and black hull colours were sprayed using solvent based primers (galvanised roof primers) and the white stripe was basecoat paint left over from bodywork on my car. The hull was then given a coat of two-part 2K clearcoat (basecoat/clearcoat car finish). This acrylic clearcoat is the same finish as on your car and is therefore very scratch resistant.
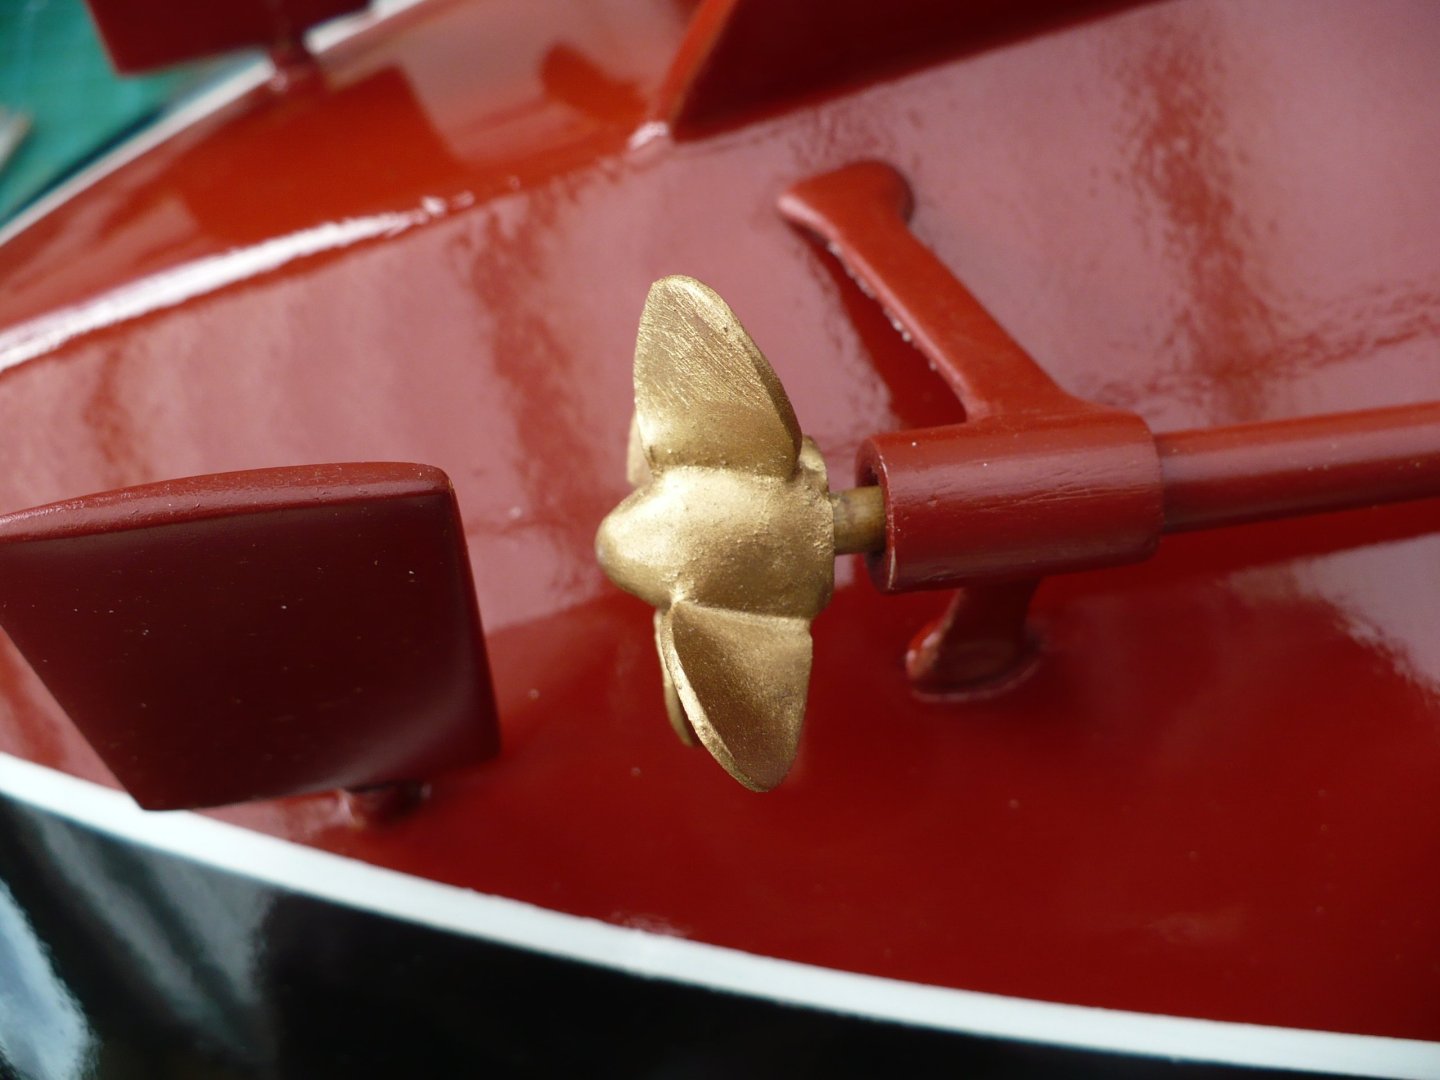
The propeller shafts were made from brass tubing and dowelling and the "A" frame brackets from tubing, wooden strips and filler for the mounting flanges to the hull.
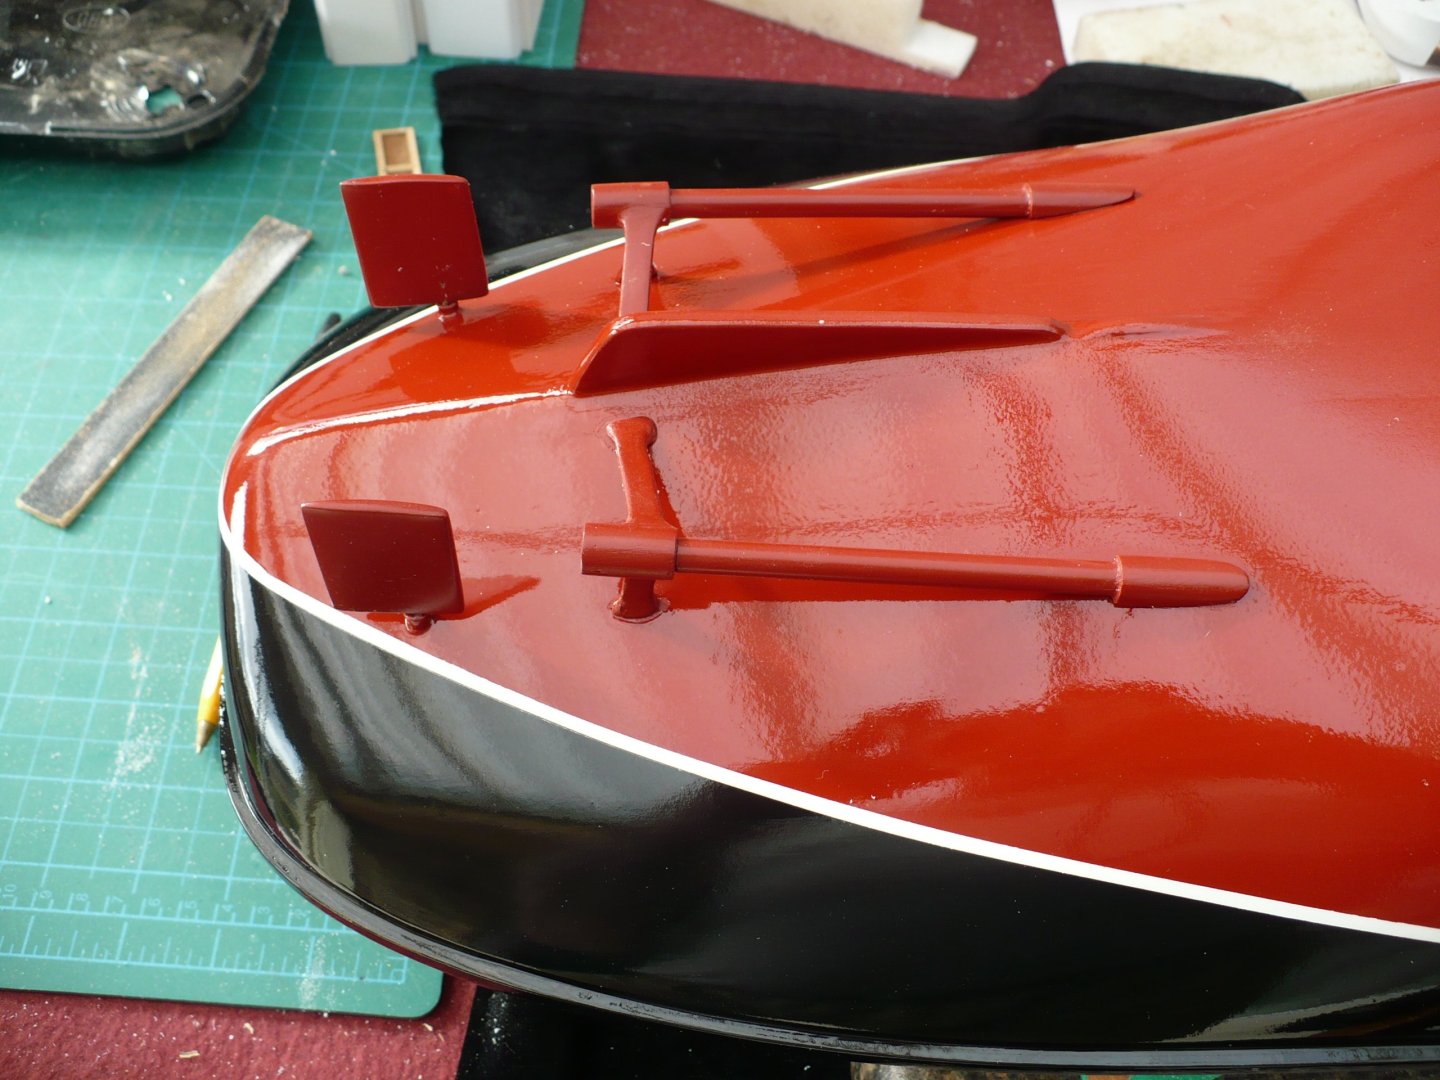
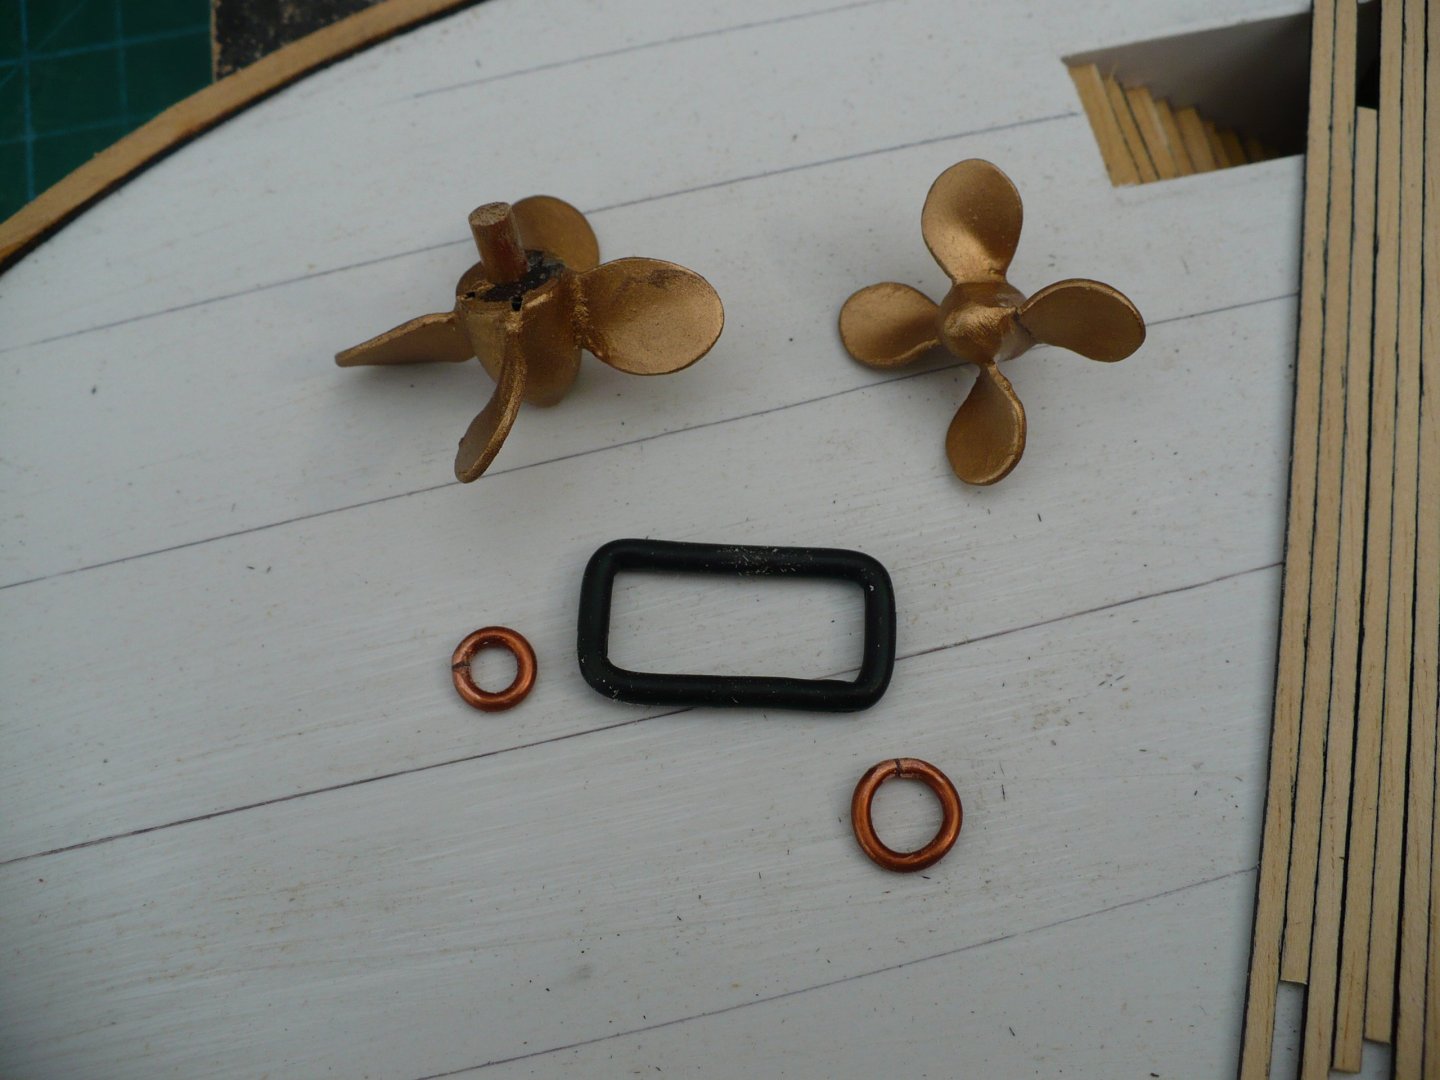
The propellers were made from wooden "bullets" for the bosses and the blades cut from styrene sheet. The bosses were grooved diagonally for the blades to be glued into.
The top of the second planking was finished 3mm below the top of the first planking. The rubbing strip was fitted overlapping the top of the second planking, forming a 1mm wide groove between the deck edge (top of the first planking), and the rubbing strip. This was to enable the styrene bulwarks to be fitted to the hull in this groove, the join being covered by the rubbing strip.
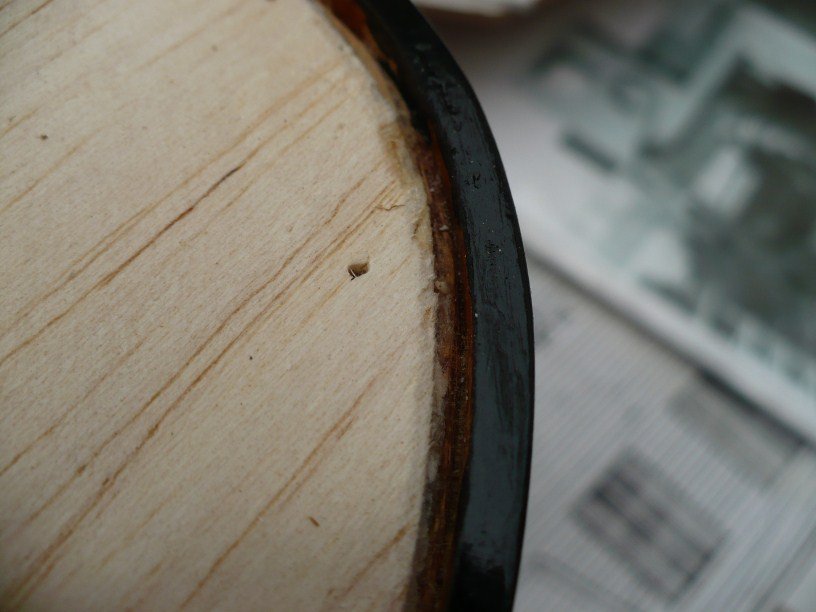
The top of the frames were covered with a thin layer of balsa to provide a base on which to glue the deck planking.
FRONT BULWARKS
The forward bulwarks were then cut to shape and hawse holes and bollard holes cut out and lined with inserts made from copper cable.
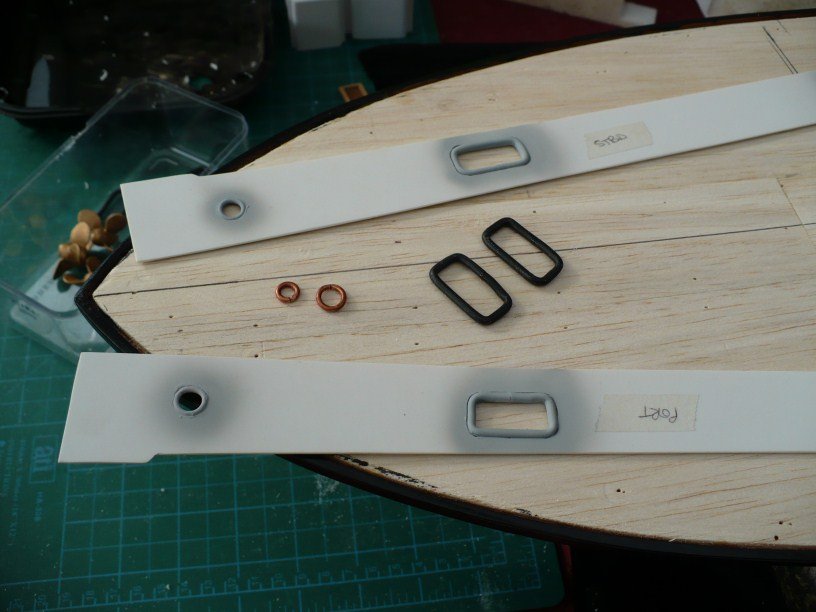
The Bulwarks were then dry fitted and a front piece of 0.4mm styrene was then cut to shape and a line of rivets was formed in this piece using a dressmakers scoring wheel. This piece was then glued into place covering the join where the two bulwarks meet at the bow. The bulwarks were then removed and spray painted on the outside. When dry, they were glued into place. The forward saloon was dry fitted and its outline marked on the balsa deck. A piece of 1mm styrene was cut to the shape of the steel deck section between the forward saloon and the bow. This was checked for fit and then glued to the balsa sub deck. This deck piece was painted green and then the insides of the forward bulwarks were fitted with support stays. The insides of the bulwarks were then painted with iced coffee colour. (I am not building a rivet-counter’s model so I used approximate colours and these were paints that I had lying around in my garage).
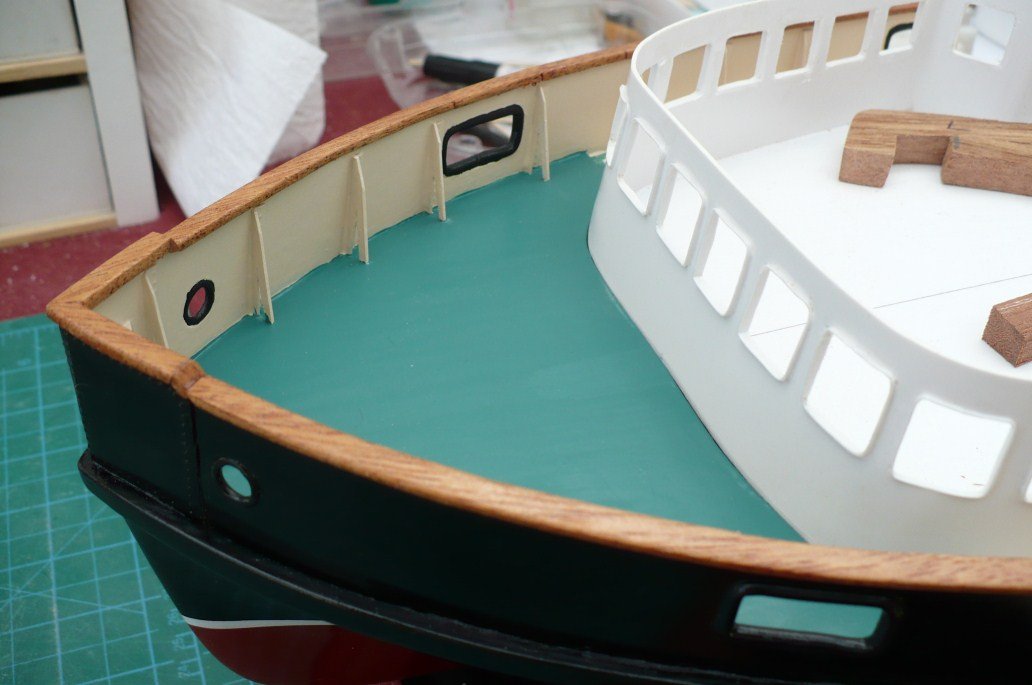
The bulwarks were then fitted with handrails cut from Meranti using a scroll saw. These were grooved underneath so as to fit over the bulwarks. After they were glued in place, they were given a couple of coats of sanding sealer.
MAIN DECK SALOONS AND TOILET BLOCK
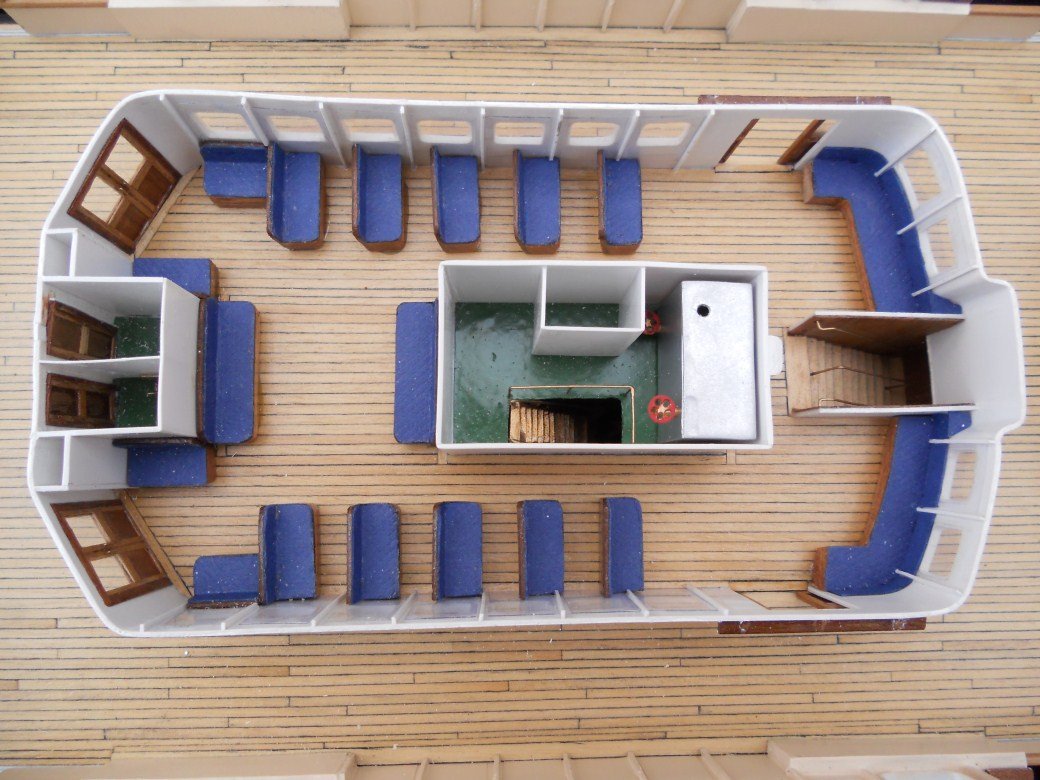
Wooden formers were made for the main deck structures and these were moulded with 1mm styrene strips using a heat gun and clamps. The bases of the structures were fitted with a 0.7mm styrene sheet sub floor.
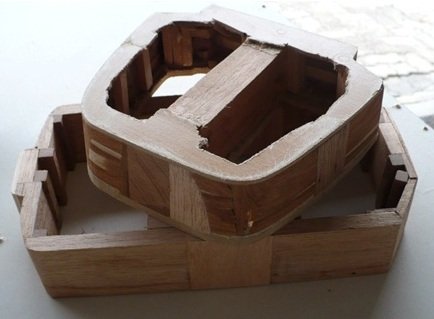
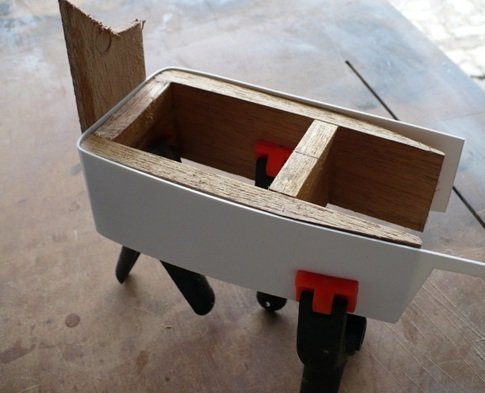
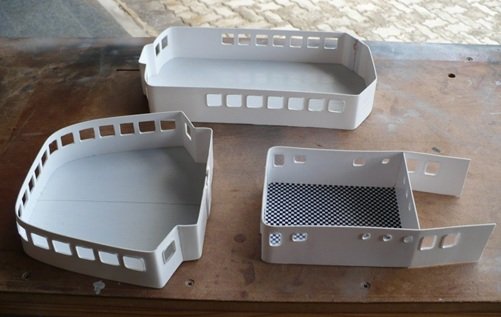
The structures were then marked off and the windows cut and lined with thin strips of 0.7mm styrene. The insides of the windows were then covered with pieces of acetate sheet.
The main deck structures were then dry fitted, their margin planks fixed in place and then the structures removed, to be fitted after the deck was planked.
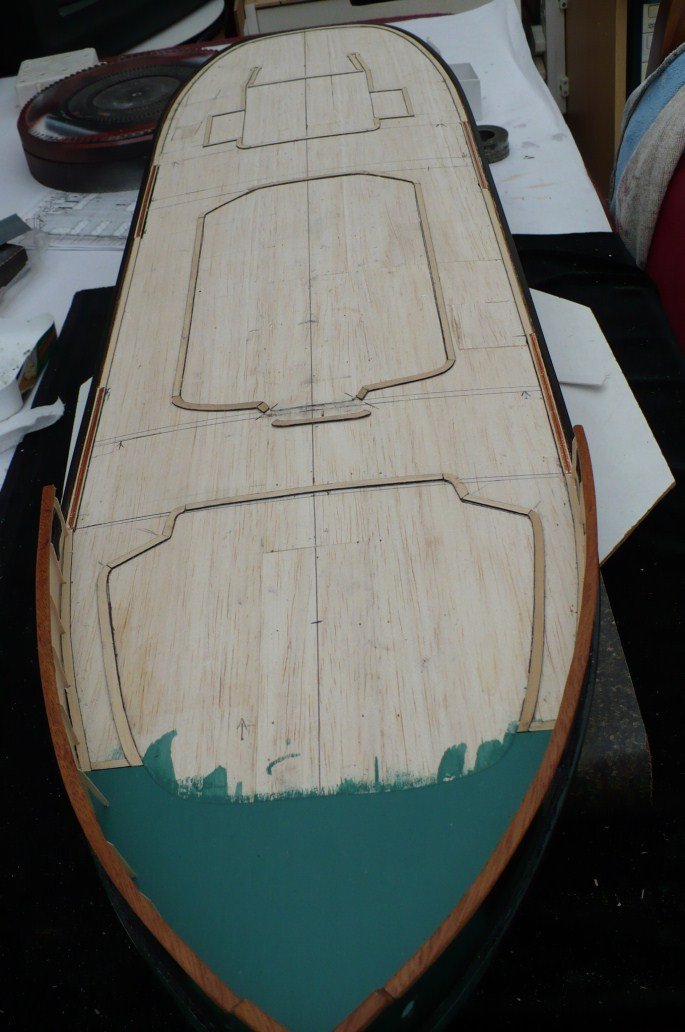
The guide rails for the gangway sliding gates were made from grooved strips with adhesive copper tape inserts.
PLANKING MAIN DECK
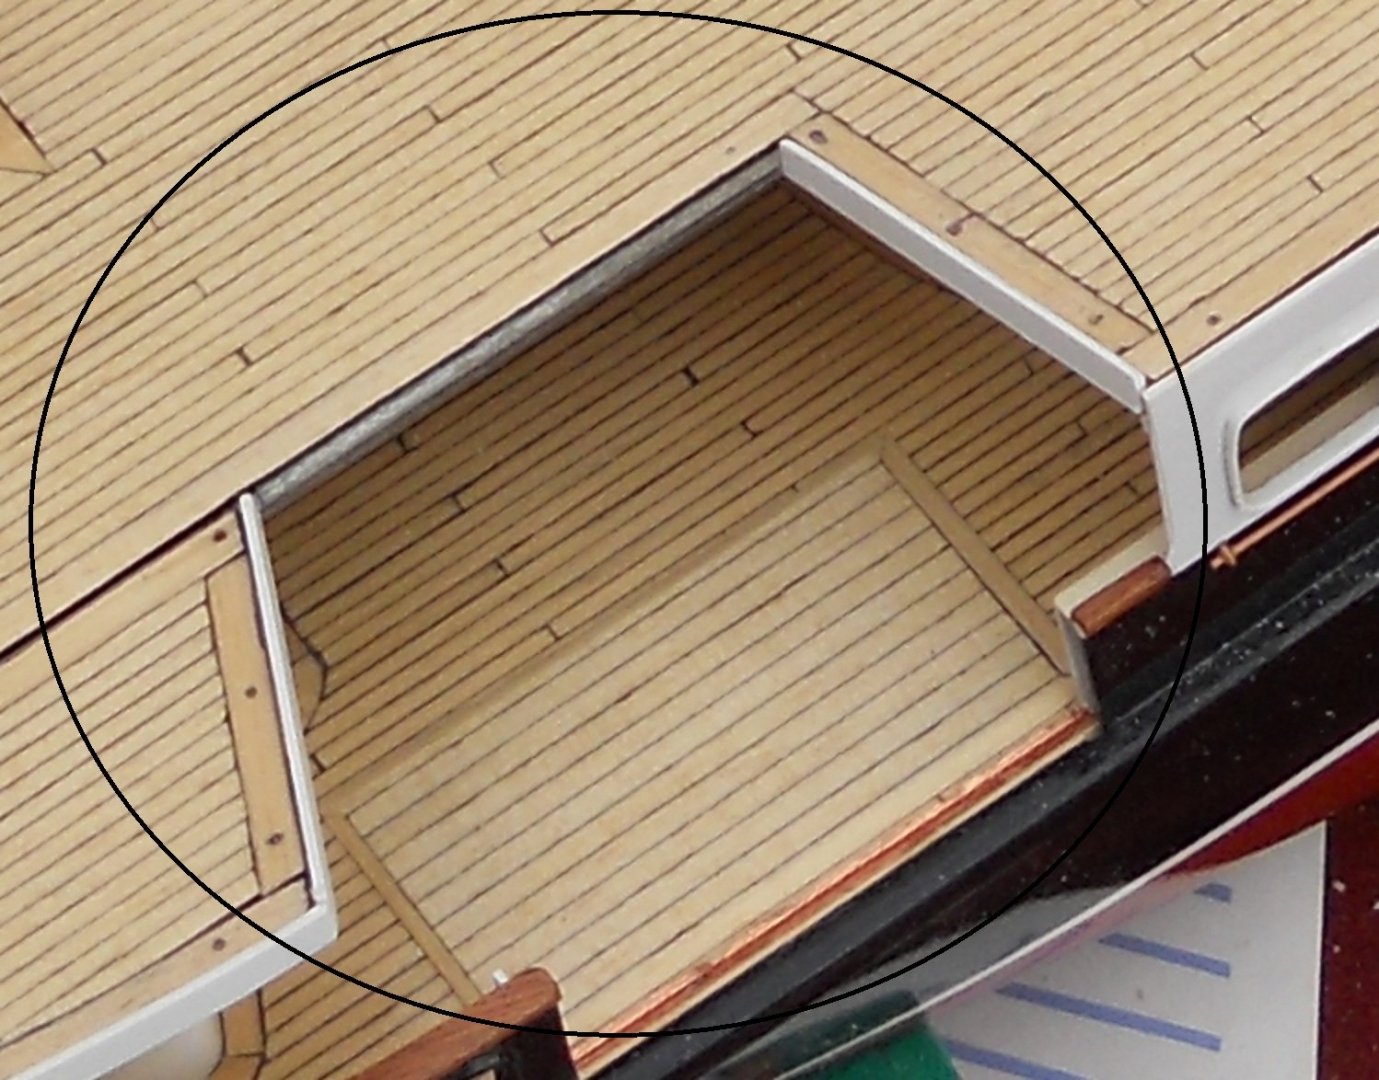
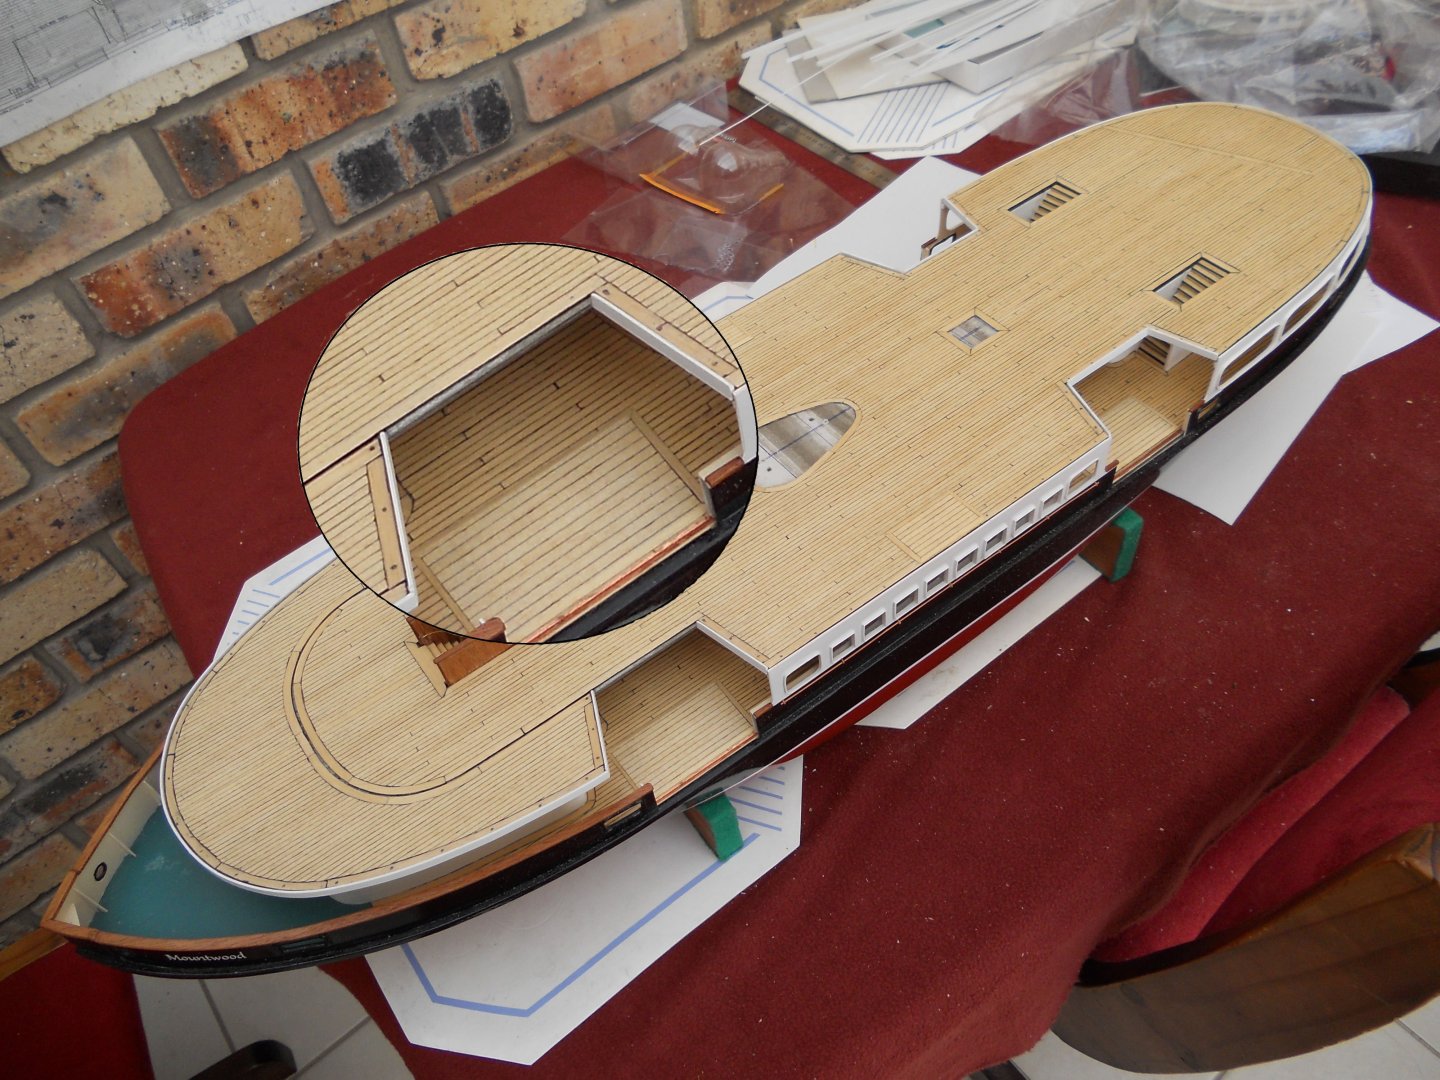
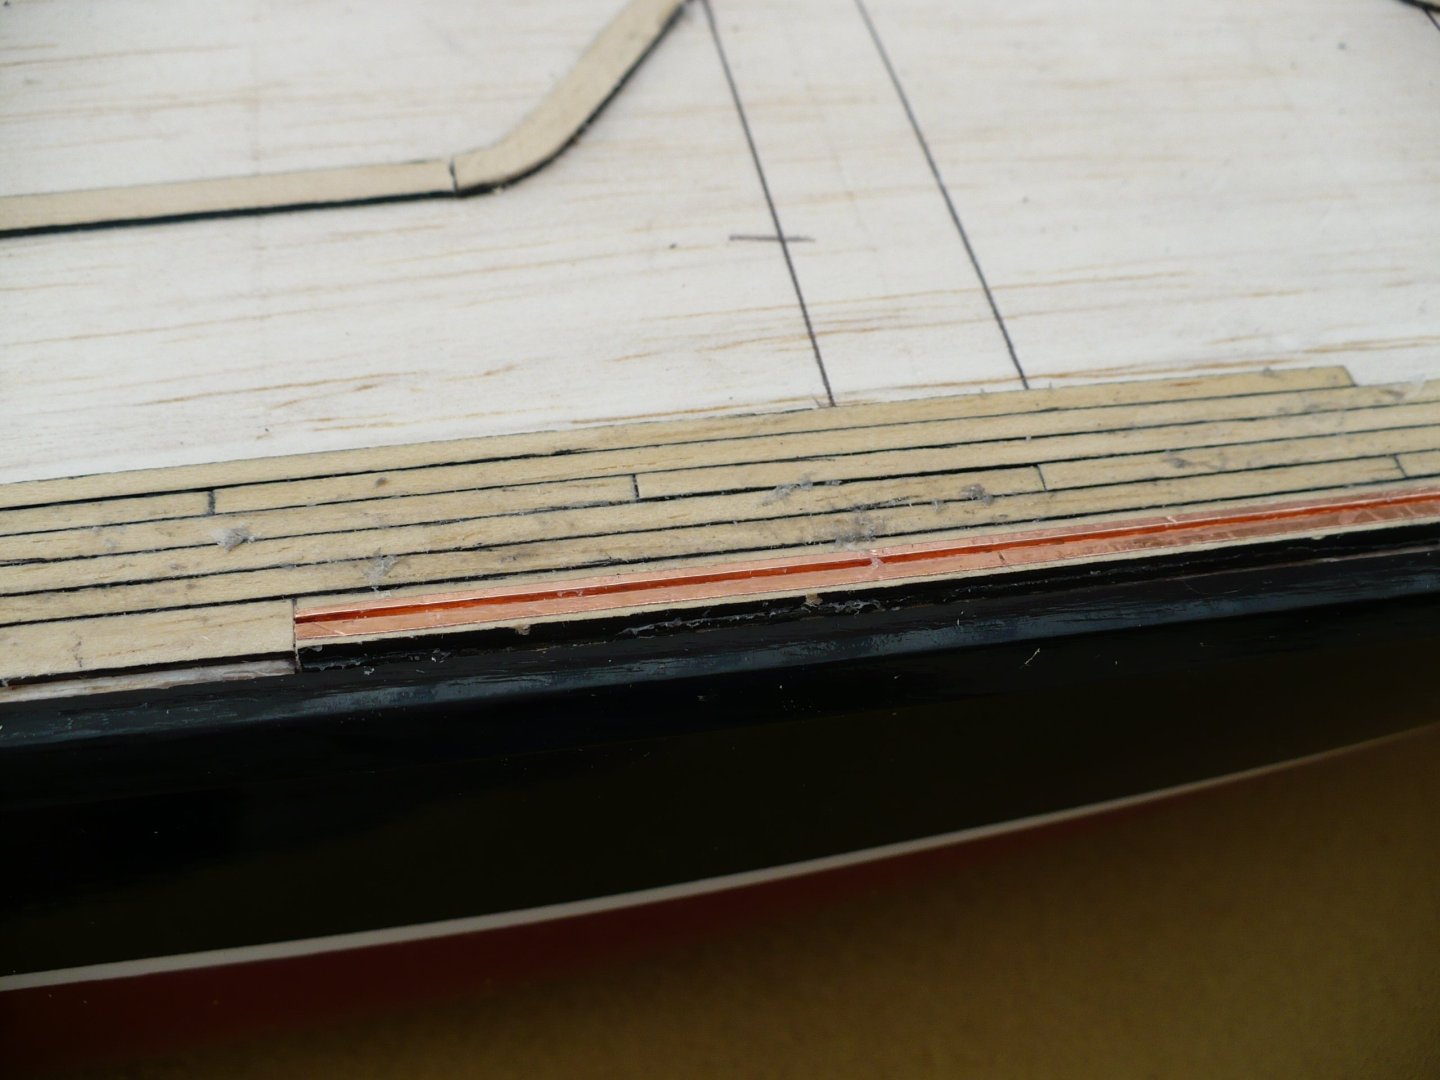
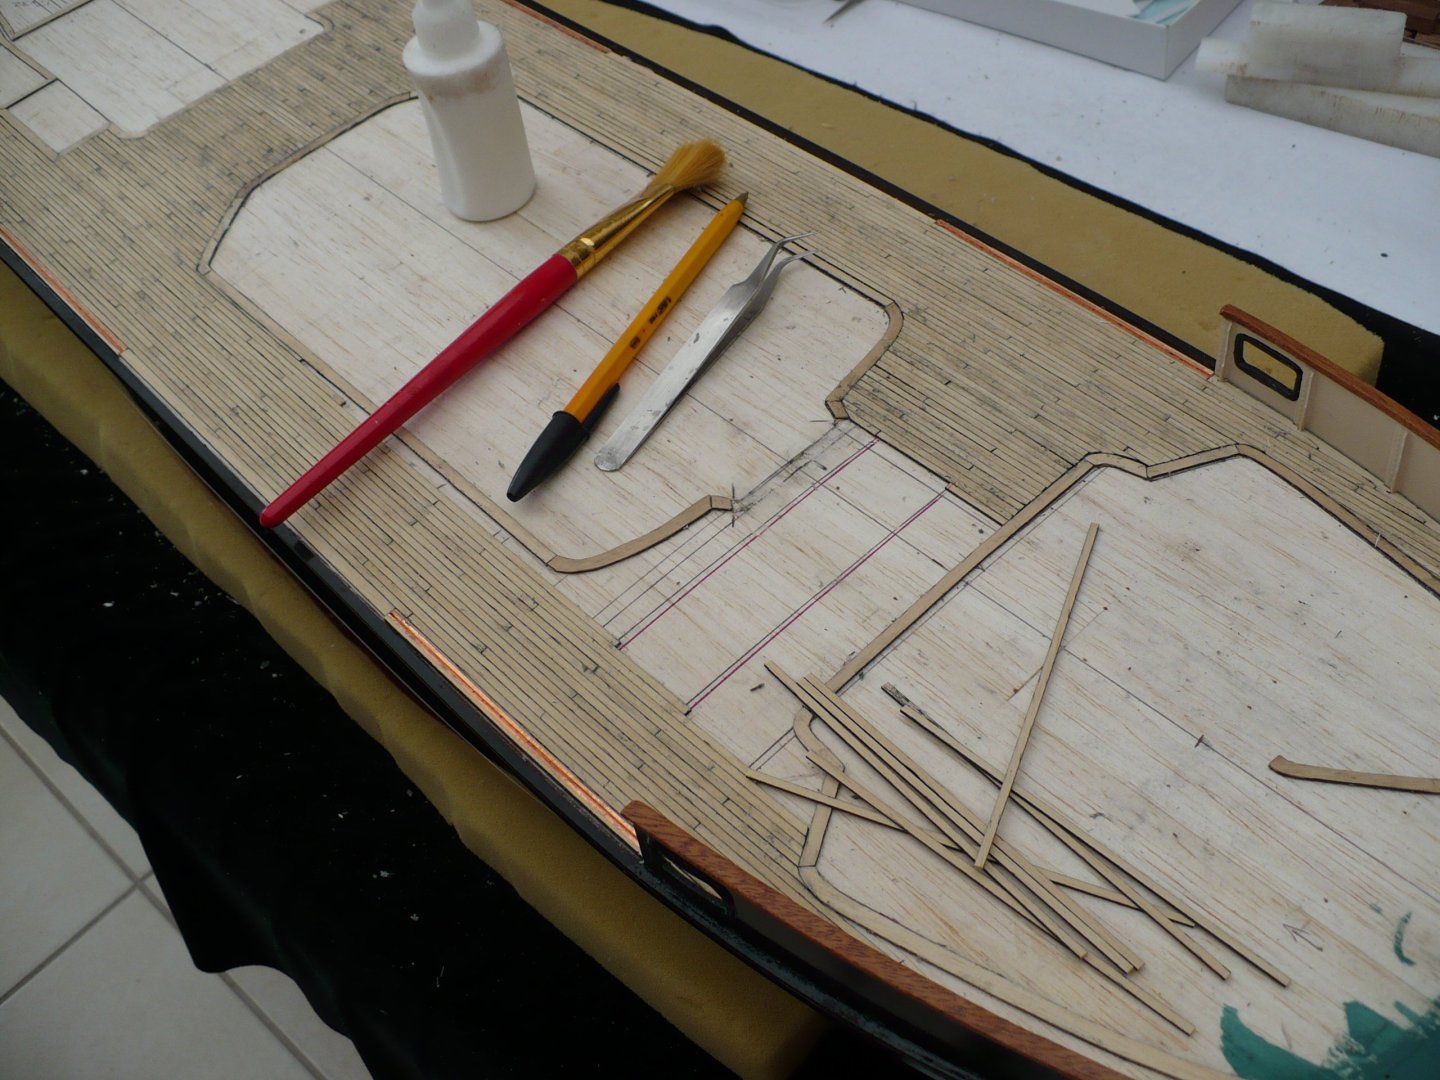
The main deck was now planked.
A hole was cut in the balsa deck at the front end of the Main saloon position to allow for the “Down” staircase to the lower saloon which is located underneath the Forward saloon that is situated on the Main deck.
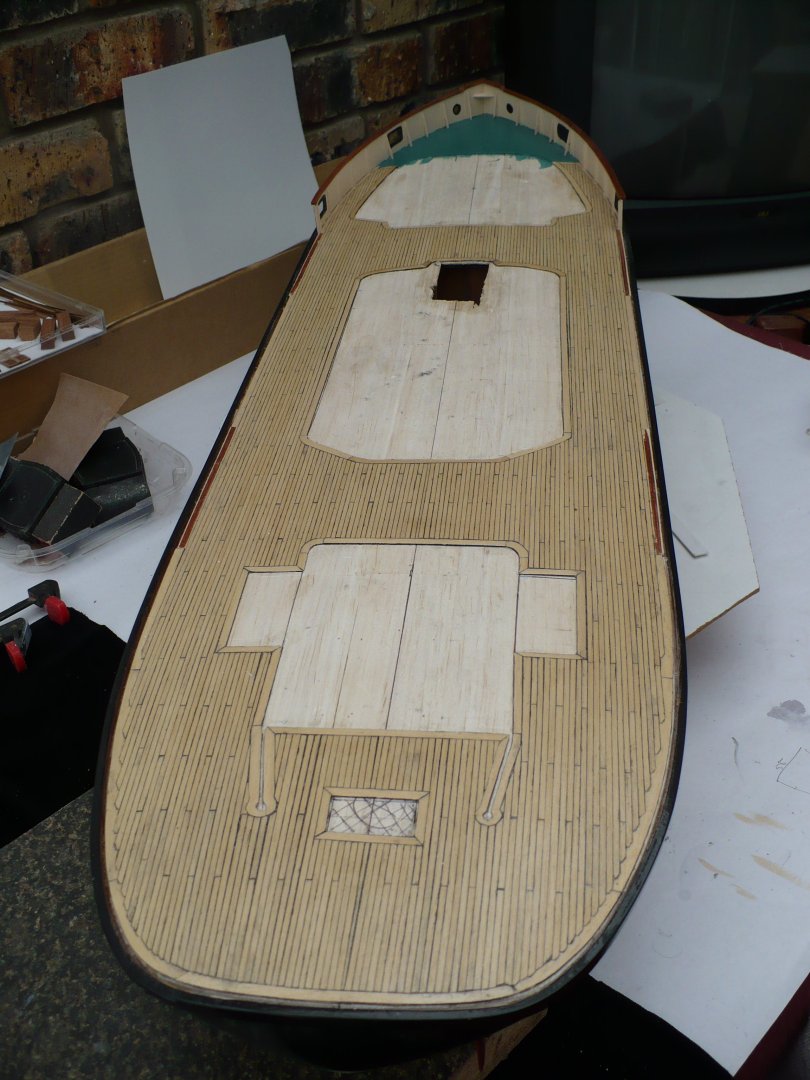
The decking was given 2 coats of sanding sealer and allowed to dry. It was then sanded with 400grit and then given a final coat of sanding sealer.
Build diary of MV Mountwood
Being an ex-patriot of Liverpool living in South Africa since 1980, I decided to scratch build a model of the Mersey ferry MV Mountwood, as she was originally fitted out in the early sixties.
BRIEF HISTORY
The Mountwood was the slightly older sister ship of the MV Woodchurch. Both ferries were built for Birkenhead Corporation and were based loosely on the designs of the Wallasey ferries Leasowe and Egremont and were built by the same company, Messrs. Philip and Sons Ltd. of Dartmouth. Mountwood was launched by Mrs Hugh Platt on the 6 July 1959 into the river Dart, and after being fitted out was delivered to the Mersey in 1960. She was named after an overspill post-war housing development of Birkenhead. In her early years Mountwood was an unreliable ship, breaking down several times whilst crossing the river and having to anchor. In May 1961, she suffered a main engine failure, with her passengers having to be rescued by Woodchurch.
The Mountwood remained in operation up until she was withdrawn for refurbishment in 1989. She was rewired, internally refurbished and her bridge wheelhouse and cabs were plated over to form one large navigation bridge, although she retained all the original equipment. The most noticeable change was the colour of the funnel, flame red and black, harking back to the 1920s Birkenhead steamships. The new 'Mersey Ferries' logo was painted on each side of the funnel. The Mountwood returned to service in July 1990 and remained in operation up until 2001, when she was withdrawn from service for a major refit. Her only major work during the period 1990-2001 was the addition of a shelter abaft the bridge, which also had a small bridge deck area. The black band on the funnel was reduced and the logo resized giving the ferry an oddly small looking funnel.
In 2001, the Mountwood was withdrawn and taken to Birkenhead's former Cammell Laird shipyard (which became owned by A&P), and then to Clarence graving docks, where she was stripped of her fittings and parts of her superstructure were removed and rebuilt. Unfortunately the ferry remained dormant for some time due to problems at the shipyard. She was then re-engined and more or less completely rebuilt. Noticeable changes were the addition of a new, angle fronted, large wheelhouse and bridge deck, plus her funnel, which was reinstated after the refit, was moved further back to fit with the position of the new engines. Her central saloons were also extended to the full width of the ship. She looks quite similar to the Woodchurch's refit to Snowdrop. The ferry contained many items that would be classed as nautical antiques and quite valuable, such as engine telegraphs, binnacles and much brassware. The helm and binnacles were reinstated onto the new bridge, however all the other items are in storage at Mersey Ferries' archives.
Mountwood's nameplate now reads "Royal Iris of the Mersey". It cannot be shortened to "Royal Iris", as the previous vessel of that name (the MV Royal Iris) is still listed on Lloyd's Register of Shipping in the same class. The ferry still carries her original pair of Kockums Supertyfon fog horns, as do her two sister ships.
On 29 October 2002, a tremendous storm hit the Mersey, with windspeeds measured at force 10-11. The Clipper round the World race start was delayed and tugs were called to ships in the Mersey to keep them at port, battling against the raging waves. The Royal Iris of the Mersey was in service that Sunday, and was tied up at the Liverpool landing stage. Her mast rigging was blown down and her Mainmast had to be lowered for safety. Ferry services were cancelled and severe damage was caused to many properties along the waterfront. The vessel could not berth at Seacombe during this time because the resulting swell of the storm was that strong. The last storm of such strength to hit the Mersey was the 1989 hurricane.
The Mountwood was used in the film "Ferry Cross the Mersey", a musical named after the Gerry & the Pacemakers song. It also appeared in the opening titles for the television series, The Liver birds.
THE MODEL
Due to the scarcity of aftermarket model items, this would be a totally scratch built model, the only purchased items would be a 1m x 300mm x 25mm plank of Jelutong for the hull planking, deck planking and benches, and 2m x 1metre styrene sheets in sizes 0,4mm, 0,7mm and 1mm for the superstructures. This is far cheaper than using "Evergreen" eg. A 2m x 1m sheet of 1mm styrene sheet cost me the equivalent of approximately £7.00 from the local plastic sheeting supplier.
My previous modelling experience was with static wooden kits, a Mantua kit of HMS Victory, A Billings kit of the sail training ship Danmark and two Hachette weekly partworks, 1:250 RMS Titanic and 1:200 KM Bismarck.
The first thing to do was to track down plans of the boat on the internet. I eventually found the Naval architects who designed the original boat and her sister ship, the Woodchurch. They had paper copies of the original plans which had been drawn on silk.
I obtained permission from Mersey Ferries to purchase a copy of these plans and the architects sent the paper copies out to be scanned into (1/4" x 1 foot - Scale 1:48) pdf files. There was a set of three plans relative to my needs:-
1. The LINES PLAN & OFFSETS plan,
2. GENERAL ARRANGEMENT, "AS FITTED", MAIN & LOWER DECK plan
3. GENERAL ARRANGEMENT, "AS FITTED", PROFILE & PROMENADE DECK plan.
These they then e-mailed to me after receiving my electronic bank transfer payment. I tell you, they cost me an arm and a leg but they were worth it after seeing the finished model!
Living in South Africa, I did not have access to any Mersey Ferries archive material or Liverpool Maritime museum so I had to rely solely on my plans and any pictures that I found on the Internet. I was fortunate to find an American website that converted sixties and seventies musicals to DVD from the original cinema 35mm prints and I purchased a copy of "Ferry Cross the Mersey" from them. From the DVD, I extracted the ferry boat segment and from it captured about 80 snapshots of various scenes on the boat including some good shots of the ventilators, benches and general on board layout views.
The hull would be constructed in the normal double plank on frame method but due to the design of the main, promenade and bridge decks, I would have to use styrene sheet for these constructions.
As I had never used styrene sheet before, and not being able to decide on the scale, I decided to build two boats. I would scale down the plans to 1:60 and build a prototype on which to experiment with construction methods. After the certainty of making mistakes and finding solutions, I would make a final 1:48 scale model.
I took the pdf files to the local print shop where they printed them out full size (1:48 scale) and also a set of 80% full size (1:60 scale). These were pinned up on the wall to be used as reference.
On my computer, I printed out the half frames from the Lines and offset plan pdf file and scanned them into MS paint. From these I made a set of frame and keel templates for each scale (compensating for the thickness of the planking).
HULL CONSTRUCTION
I then constructed the hull using the normal double plank on frame method. The frames and the keel were cut from some 4mm veneer faced hardboard that I had in the garage. The first planking was done with 7mm x 1.5 mm strips of Jelutong and the second planking from 5mm x 1.0mm strips from spare Meranti that I had. The planks were cut with a miniature table saw that I made, using a Dremel circular saw blade. I made the two hulls at the same time, 1:60 and 1:48 as there was no trial and error here.
The 1st layer of hull planking strips were cut from the plank of Jelutong and the second layer from Meranti.

After the planking was finished, the hull was sanded down and given a coat of diluted PVA to fill in any gaps between the planking. It was then sanded down again and given 2 coats of sanding sealer. When this was dry, a further light sand and then a light coat of primer was applied to show up any imperfections. These were corrected with filler.
When the hull appeared to be perfect, it was given two brush coats of white car primer and then four brush coats of grey car primer.
This was allowed to cure for a couple of days and then sanded down with 600 grit wet & dry used wet. It was sanded down until the white started to show through the grey and then I stopped. This method prevents you sanding back to the wood but the thickness of the primers acts as a final filler to any imperfections and gives a finish like glass as can be seen in the below photos.
The red and black hull colours were sprayed using solvent based primers (galvanised roof primers) and the white stripe was basecoat paint left over from bodywork on my car. The hull was then given a coat of two-part 2K clearcoat (basecoat/clearcoat car finish). This acrylic clearcoat is the same finish as on your car and is therefore very scratch resistant.
The propeller shafts were made from brass tubing and dowelling and the "A" frame brackets from tubing, wooden strips and filler for the mounting flanges to the hull.

The propellers were made from wooden "bullets" for the bosses and the blades cut from styrene sheet. The bosses were grooved diagonally for the blades to be glued into.
The top of the second planking was finished 3mm below the top of the first planking. The rubbing strip was fitted overlapping the top of the second planking, forming a 1mm wide groove between the deck edge (top of the first planking), and the rubbing strip. This was to enable the styrene bulwarks to be fitted to the hull in this groove, the join being covered by the rubbing strip.

The top of the frames were covered with a thin layer of balsa to provide a base on which to glue the deck planking.
FRONT BULWARKS
The forward bulwarks were then cut to shape and hawse holes and bollard holes cut out and lined with inserts made from copper cable.

The Bulwarks were then dry fitted and a front piece of 0.4mm styrene was then cut to shape and a line of rivets was formed in this piece using a dressmakers scoring wheel. This piece was then glued into place covering the join where the two bulwarks meet at the bow. The bulwarks were then removed and spray painted on the outside. When dry, they were glued into place. The forward saloon was dry fitted and its outline marked on the balsa deck. A piece of 1mm styrene was cut to the shape of the steel deck section between the forward saloon and the bow. This was checked for fit and then glued to the balsa sub deck. This deck piece was painted green and then the insides of the forward bulwarks were fitted with support stays. The insides of the bulwarks were then painted with iced coffee colour. (I am not building a rivet-counter’s model so I used approximate colours and these were paints that I had lying around in my garage).

The bulwarks were then fitted with handrails cut from Meranti using a scroll saw. These were grooved underneath so as to fit over the bulwarks. After they were glued in place, they were given a couple of coats of sanding sealer.
MAIN DECK SALOONS AND TOILET BLOCK
Wooden formers were made for the main deck structures and these were moulded with 1mm styrene strips using a heat gun and clamps. The bases of the structures were fitted with a 0.7mm styrene sheet sub floor.


The structures were then marked off and the windows cut and lined with thin strips of 0.7mm styrene. The insides of the windows were then covered with pieces of acetate sheet.
The main deck structures were then dry fitted, their margin planks fixed in place and then the structures removed, to be fitted after the deck was planked.

The guide rails for the gangway sliding gates were made from grooved strips with adhesive copper tape inserts.
PLANKING MAIN DECK
The main deck was now planked.
A hole was cut in the balsa deck at the front end of the Main saloon position to allow for the “Down” staircase to the lower saloon which is located underneath the Forward saloon that is situated on the Main deck.
The decking was given 2 coats of sanding sealer and allowed to dry. It was then sanded with 400grit and then given a final coat of sanding sealer.


