• Win a Free Custom Engraved Brass Coin!!!
    As a way to introduce our brass coins to the community, we will raffle off a free coin during the month of August. Follow link ABOVE for instructions for entering.

My Log (GaryA): The Bounty Build from Plans and Partial Kit from the Lumber yard for Model Shipwrights

Joined
Mar 28, 2024
Messages
173
Points
88

Hi, Fellow Shipwrights and Wannabe Shipwrights (like me).
I have never attempted to create a model ship of history or of time, as I am about to start.
First of all, I would like to thank Dave and his Wife From the Lumberyard for Model Shipwrights for reaching out to me to supply a semi kit to build this wonderful model at 1/4 scale, or commonly called a 1:48 scale model of the Bounty.
Most of the builds shown on SOS don't have a real beginning, but as I love to scribble, and photos, and also videos, I will give a real, accurate account of the build, as from the Gecko ( Aussie Slang meaning " Get Going"). Videos shown on YouTube, if interested.
Why the Bounty? As there are many better model ships with character, Model Shipwrights would like to build those ships, but I want to build a ship I have an interest in, as it's close to home. I live in Australia ( as the flag depicts on my namesake.), and believe it or not, a lot of sailing disasters and also another Mutiny as well, ( I think it must have happen when the rum runs dry in the kegs, the sun bites into the heads of the sailors in olden days, even today! LOL.
The story has been told many times about the Bounty and the Mutiny on the Bounty, and I don't need to tell it again. Even a resurrection of the Journey to East Timor has already been done in the "Jolly Boat".
This will be my first build of a model wooden ship, and of course, the first thing one asks is, Do I have the right gear to undertake such a mission? Well, I will paste up a few of my thingamajigs I have already. Must apologize for what appears to be a mess in one of my areas, and which it is, but please take it to heart and understand this is what happens when metal and wood collide. Standby:
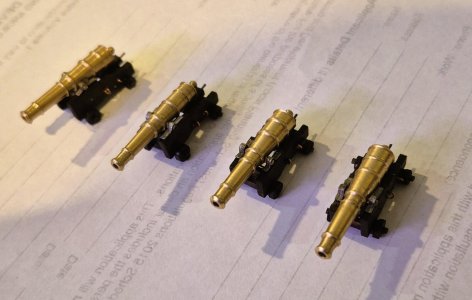
Well, sorry, I have already started, as I did not know what was coming in the kit from the Lumberyard, and first up, turned up and also made the gun carriages, the 4x4-pounder cannons, and I will use them in this build: 1:48 scaled cannons from the Bounty:
20250710_090841.1.jpg
Now I show pics of what i have to build this model, and you will see just too much gear, but if needed, it's fine. P.S. This is a collection of machinery tools and gadgets over the last 40 years that I have collected on my builds ( Many can be found on Youtube under GaryPArmstrong, if you'd like to have a venture to my homepage) to do all the little projects I have undertaken, from making didgeridoos, carvings, and also fine furniture, which decorate my home and others homes.
20250924_171042.jpg
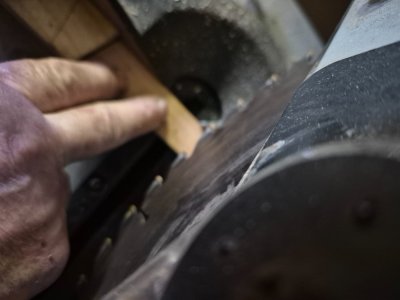
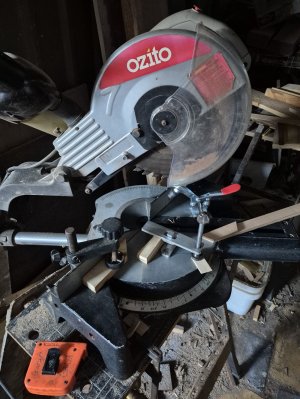
With this cutoff saw, I have started and nearly completed cutting all the rough outs for the Frames.
I had to do some modifications to this saw to save my fingers, as very dangerous, as I show in the next pic:
and the first modification is a clamp;.................. Note the Clamps I have added and have more to the machine as well, as it really makes a difference if the wood is clamped on both sides to stop kickback from the saw blade!
Remember, I said only 0.2mm wobble in the blade? Well, for the record, under power, the saw moves 0.2mm on its extremity of its diameter( which is good), but that is how kick back happens. When the trigger switch is released, the saw will move back to its non-powered option.
All cut-off saws have movement regardless of the arbour and bearing setup.
 
Last edited:
This cut-off saw above is 30 years old, and the play (Wobble) on the saw blade is only .2 of a mm. The accuracy of the angle gauge, as long as one sets the angle properly, is very accurate.
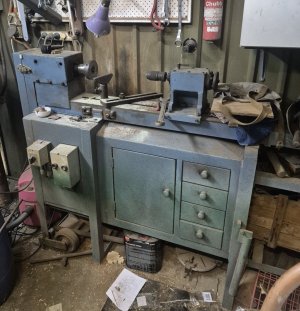
Here is a Wood Lathe I built myself, all from scrap, and the majority of the attachments hand-made by me:

20250924_200132.jpg
20250924_171143.jpg
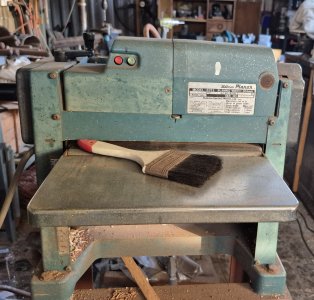
Makita Thickenesser 300 mm wide and has been used since 1990, very accurate, but has the problem of under cutting for the first 50mm, it will machine to 3mm Thickness
20250924_171235.jpg
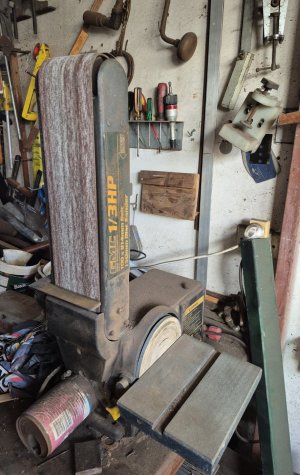
Had this sander for many years now. It's a godsend for sure!
However, I had to make modifications to the top idle shaft as it was always running dry, and, after rectifying that, it has worked a treat.
Note the Can attached, that is the outlet for the vacuum to attach to, as I was in a hurry and did not want to go downtown and buy an adapter. Works a treat and never bothered to buy the proper part.
20250924_171336.jpg
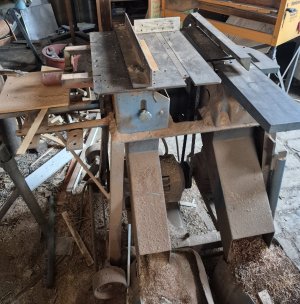
This very old bench saw, complete with a 4" Planer, I did for a trade for a job to fix a small sailing dinghy. I have heavily modified it by using larger 3-phase motor/s, one 2.5 horsepower (Overkill) for the Saw blade operation, and also a 3/4 horsepower motor for the planer. The arbor for the saw is only 1/2" in diameter! I don't use dull blades and sharpen them myself.
The drum sander on the LHS is what I have used to make thin wood pieces over the years, and it works a treat. With any drum sander, the trick is not to take heavy cuts and clean the abrasive regularly.
20250924_171407.jpg
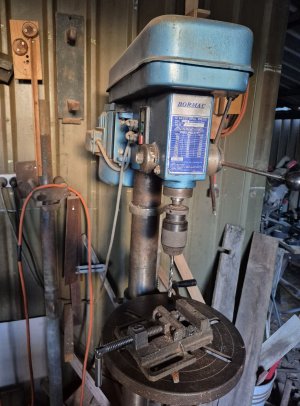
Pedestal Drill with a 1/2 inch Jacobs chuck (hand-tighten) but can take a No. 2 Morse Taper drill bits, etc. Had this since the late 1980s, and what it has not done is not worth worrying about. Bearings and the whole unit are in excellent condition.
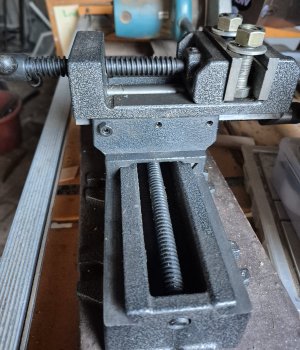
I have recently bought this X-Y vice, and that is such a blessing as well .......
20250924_171522.jpg
 
Last edited:
Well, we move over to another building, which used to House Exhibition Budgerigars. The Aviary, or some countries call it a loft, is quite large, but when I decided to breed the Budgerigars for exhibition purposes, I had to build something substantial for the hobby and me to do well.
In 2018, I finished breeding them after 22 years, and the reason was that I had most of the best stock stolen, and anyone in the breeding of livestock knows very well that if your quality birds ( Livestock) you don't have anymore, then you have to start over again. My status in the hobby was also lost.
My birds were stolen in 2012, and I started over again and managed to produce some nice birds again, but it was coming very hard to do, and I was getting tired of early morning starts and late nights after attending the nestboxes.
I call the aviary now the Loft, as I will be building the Bounty in this area, and I have plenty of space to work. Ships are built in lofts?
I know I am rattling on, but stay with me as I carry on.
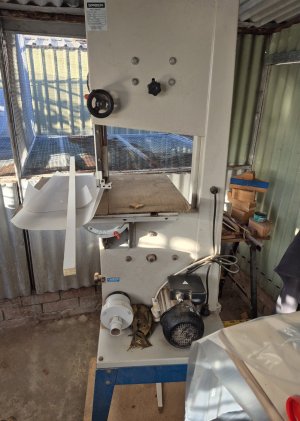
This next item is the 10" Bandsaw, and I bought that in 2018 to help me make Didgeridoos, as I thought a great idea, but no one wanted to buy them, so I stopped making them. They took about 5 weeks for a didgeridoo to be hollowed out, decorated, painted, and varnished, and were very labour-intensive.
20250924_171742.jpg

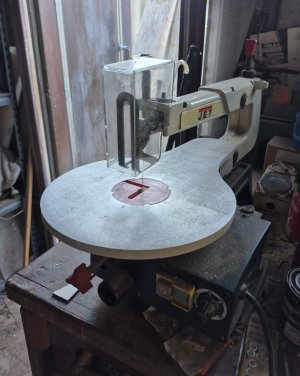
The next is a Jigsaw by Jet, and I just bought that about 8 years ago. Seems to work quite well, but takes a bit of skill to operate. I would like to use it to cut the frames. I am spending a bit of time practicing cutting material with it first. I think the bandsaw has its problems too, but I will see.
20250924_171513.jpg
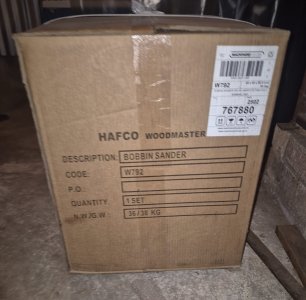
The next Machine is still in its package, as I have not opened it up yet.
20250924_221633.jpg
The next few items need no introduction, but are so useful if on hand
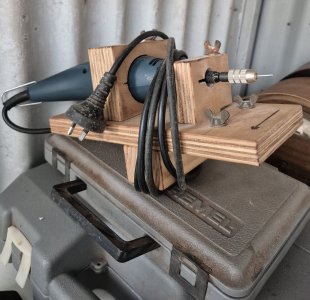
I found that a Dremel is ok, but they can die as well but a Ryobi is much cheaper to buy and does the same type of work, and the tooling for the Dremel fits the Ryobi also.
20250924_172006.jpg20250924_171959.jpg
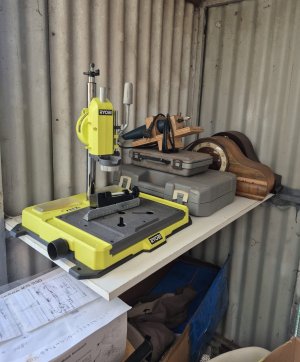
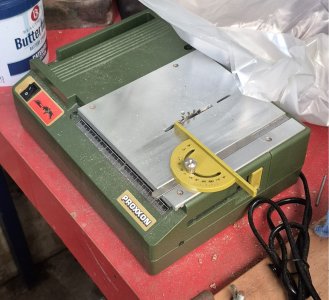
Proxxon Saw bench. It cuts well, but the Tee slide is absolutely useless for cutting on an angle. I may stick some emery tape to at least be able to grab hold of the material I am cutting at an angle.
20250924_172032.jpg
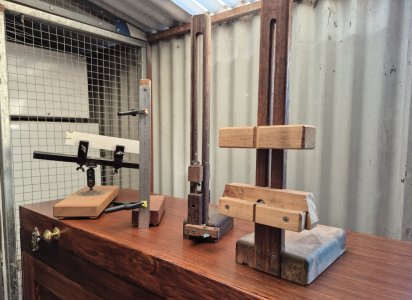
The next items I use for marking off work are exceptionally accurate, and the majority of the sliding parts are made from wood.
The height gauge works very well, and I do use it for marking off on steel as well as on wood. The hacksaw blade, sharpened to a cutting edge, works exceptionally well.
20250924_173108.jpg
So I hope this gives you an idea. I have the tools, but do I have the skill to pull this build off?

Hang around, as I will show you what I have started to do to the build of this ship, The Bounty.
 
Last edited:
Looks like a pretty complete shop. The press can be used as a mill for wood without killing the bearings. If I could add one thing it would be an appropriate set of books. If two things, the library and a thickness sander. If three things, the books, a thickness sander and a lathe. Skill comes with practice. :)
Allan
Hi Allan, thanks for viewing and commenting. I am thinking of making a better Thickness sander using my wood lathe, as this Drum Sander on the side of the bench saw is a bit shabby as it can flex as the outer end of the shaft is not supported. Must only take small cuts with it.
What books would you suggest I purchase to help me learn more about model shipbuilding?
BTW, I do have the book, "Armed Transport Bounty" by John McKay, but I notice a few obvious mistakes here and there, as well as the original drawing from the Greenwich Nautical Museum in the UK.
My concern is when it comes to making the masts, and finding out what type of string to use, and what thickness to use, etc.
With the drill press and with the x-y vice, I will attempt to make the "Lazy Susan" to mill the Helm Wheel up, as I think you sent me an attachment showing how to do it. I think that would be a fun project to do.
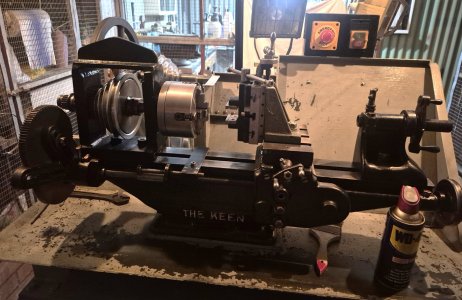
I do have in mind to machine up a spigot and a faceplate to locate in a bearing hole mount, which will be fitted to the X-Y vice. I do have a Machine lathe, although very old can do many things as I compensate for its weaknesses.
20250924_221755.jpg

Here, I have it set up to do milling work. The machine is a lifesaver for me. It is nearly 100 years old, and it has a name, and that is "Arnie", after Arnold Swarznegger from the Terminator series, where his body keeps on being renewed with new metal. LOL
 
What books would you suggest
I am sure everyone has their personal favorites. A lot depends on what you want to build be it era, nation, warship, merchant ship, etc.
For English warships my favorites for the 17th century into the 19th century are The Construction and Fitting of the English Man of War, The Arming and Fitting of English Ships of War, The Masting and Rigging of English Ships of War, The Elements and Practice of Naval Architecture, The Elements of Rigging and Seamanship, The Fully Framed Model volumes I, 2, and 4, The History of English Sea Ordnance. There are dozens more but again, it depends on what you are building. Books are not cheap so I have built my library a book or two at a time over the years.

as well as the original drawing from the Greenwich Nautical Museum in the UK.
There are at least five drawings including two before her conversion to a nursery, both profile and deck plans. I assume you have all of them, but if not, it is interesting to see the differences.

Allan
 
Allan said, "There are at least five drawings, including two before her conversion to a nursery, both profile and deck plans. I assume you have all of them, but if not, it is interesting to see the differences."
I have only the drawing after she was converted. Simply straightforward with not too much of the mast, etc.
As regards the books, I have written them all down. Have taken a liking to two books, and they were to do with the rigging of English Ships of War, although the Bounty was not exactly built/converted to be a ship for war; although saying that, her frames were as for warships.
Thanks for the Book names, and I will follow up and see what I can get in Australia, as too expensive outside this country
 
Hi

I just noticed that you start a new thread for each update of your build ,the log should up undee one thread only ,I am going to merge them into one thread and if you post an update just reply at the bottom of thread


Zoltan
 
Hi

I just noticed that you start a new thread for each update of your build ,the log should up undee one thread only ,I am going to merge them into one thread and if you post an update just reply at the bottom of thread


Zoltan
Hi Zoltan, so do I go to edit and add???
 
My first model ship I ever built was the Bounty, my wife gave me a Kit
which I started, gave up very quickly, picked it up again fifteen years
later, finished the model which now cased sits in our den .I am still
building models, will be 93 this coming December.
Cheers Winova
PS, I have read numerous books on Captain Bligh, amazing person.
Hi Winova, do you have any pics of her?
I think he was also, but the young members of his crew had problems with their brains and let something else overrule their thinking.
Hope you have many more years of modeling. Best of health.
Regards
 
Last edited:
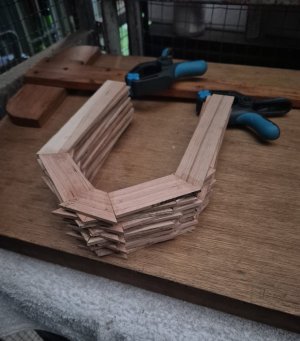
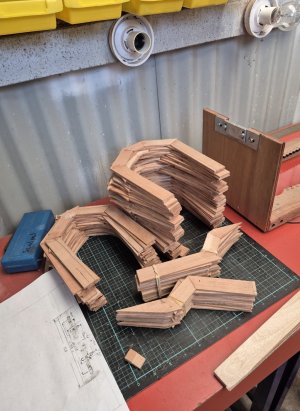
So, all, I have done a bit of work on the model and have built all the frames, well, the fitting of the rough shape outlines of the frames at least. At first, and on the first set of frames, I blind folded myself when I built them. There were a few slits where the wood sections did not quite fit together. Then after that, I used my cutoff saw and, with clamping, had great success. First, I used the Proxxen Saw, and cutting at angles proved to be very challenging to set up and maintain due to the slight movement of the wood stock against the angle of the blade. Here they all are.
20250820_175720.jpg 20250924_171925.jpg

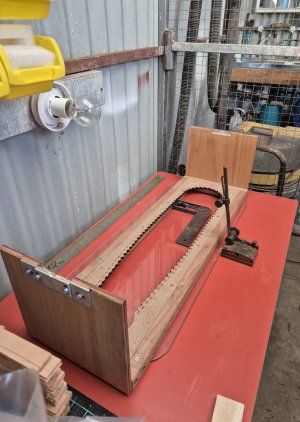
So, after finishing the frames, I took a look at the Framing Jig sent to me, and it seemed to be so accurately made, it was a wonderful experience to have this jig made, as I thought it would be a huge stumbling block for me when fitting these frames and keeping the angle smooth and true.
I spent a fair bit of time searching here on SOS and also on the web, and one of the members of SOS had included a video on how a certain individual had advanced the Harold Hahn build in regards to how to use some clever ingenuity to help make building the ship's hull, little easier.
I am going to follow similar lines with this build, following engineering and also the techniques of old to accomplish the accuracy of the hull shape.

20250924_171911.jpg
So, what I have achieved so far is to find out what height the frames will be, and I have added a centre line X-Y bracketing that can be moved if needed, and then I lock it into place once it is correct. A weighted string line will be attached, and that will be how I keep the alignment of the frames tracking correctly, hopefully.
Although not shown in this photo, I will include the teebar and slots to accurately hold the frames square and true.
For the jig to sit and lay straight and flat, and after checking the table for bumps, I laid a piece of glass, 6mm thick, down and carefully checked for flatness, and is certainly flat enough to not cause any hindrance to the build.
I am also going to have a clamping system fitted to the end of the framing jig to hold the keel and bow section in place, so I can learn to work around this and not destroy the model with overexertion if that comes to mind.
Any suggestions will be welcomed.
 
Last edited:
Back
Top