• LUCZORAMA SHIPWRECK SCAVENGER HUNT GIVEAWAY. 4 Weeks of Fun • 1 Legendary Prize ((OcCre’s Fram Ship)) • Global Crew Welcome!
    **VIEW THREAD HERE**

new mode to make crewmen

I'll try to answer you question.

Using the AI tool that this thread is discussing, these would be the basic steps:
- describe what you want the AI tool to create a model of
- the AI tool then generates the model file in an .stl format (.stl is what's commonly used in many 3D parametric modeling applications like AudoDESK's Fusion 360, or sites like TinkerCAD). If you want to "tweak" the model, you can open it in one of the 3D file creation tools I just mentioned (there are others, but these are two examples), and then you can modify the AI created model file. Again, save the modified .stl file.
- you then download the .stl file and open it in a slicer application that you use with a 3D printer. The slicer does what it's name implies... you provide the parameters you want applied for strength, quality, supports, etc.... and the application then creates a sequence of "slices" that the printer uses to build up the model, one slice at a time. Kind of like how a LEGO model might be built up layer by layer. That slice information is essentially a long list of plotter commands that tell the printhead where to move in the X,Y,Z axis)
- once the file has been printed, it will be stuck to the printbed... you pop it off, remove the supports, and trim any bits left behind from the supports. In most cases, and especially if you print using a fine printhead (0.2mm size), and very thin slices (0.1mm thick), there should be very little if any sanding required. Because of the very small size of these figures, especially if you're making them for model ships in the 1/72 to 1/100 scale... or smaller... you really need to be using a small nozzle printhead and very thin slice layers to ensure the detail possible is captured in the printed output.
- lastly, you would paint the model you've printed
- some printers have the ability to print multiple colours of filament into the model, but for something like these figures, they're too complex and contain way too many colours for that purpose... so painting is the obvious answer

One thing I hadn't thought of till now would be the concept of creating figures to scale, but doing so with a transparent filament such that when they're placed in our ship model, they appear as ghosts. Not for the Halloween scary ghost kind of aspect, but rather as a representation of human scale in the ship model, but not drawing attention away from the ship model itself. Kind of like looking at the HMS Victory in dock at Portsmouth and dreaming about what she might have looked like with the working crew members crawling all over her.
Thanks for the explanation
 
Here's what I came up with in a quick mess around. Can't try printing until I get home in a few days. It's supposed to be Russel Crowe as Jack Aubry.
Here's the image it's based upon.

View attachment 532029
And below is the STL for anyone interested.

Cheers,

Todd
Okay, I just finished a couple of print tests using your .stl file.
Both used Bambu Lab PLA Basic White filament.
Both were printed using slim tree supports on essential areas only, only on base, and small overhangs left intact.
Both used 0.2mm for the first layer, and 0.1mm for second and remaining layers.
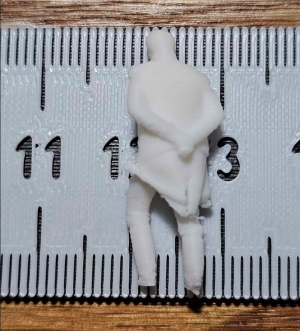
The size of the print came out around 26mm high (very close to one inch).
The first print used a 0.4 hardened steel nozzle, and the outcome was okay but not great. It lost a lot of detail, even with the small layer height.
Print times were very similar. Around 35 minutes for the 0.4mm printhead version, and 41 minutes for the 0.2mm printhead version (those times include all the printer pre-checks that occur before the print actually begins... bed leveling, flow calculations, etc. etc.).

Of course, if printed in a larger size, much more of the detail would show up, but at 26mm, this would be something close to 1:72 scale, based on a human height of 1.65m (around 5'-8").
This is the result while still on the build plate:
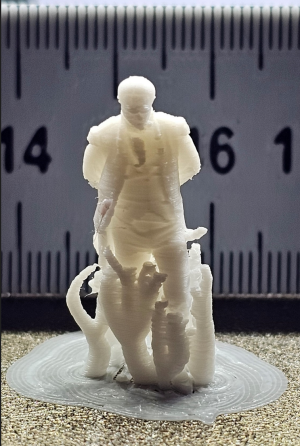
1752616156377.png

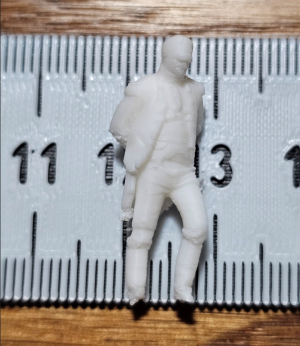
And here are the results front and back after trimming off supports. You can see that a lot of the details are gone... facial structure, sword, hands, buttons on jacket, etc.
1752616383168.png 1752616456607.png

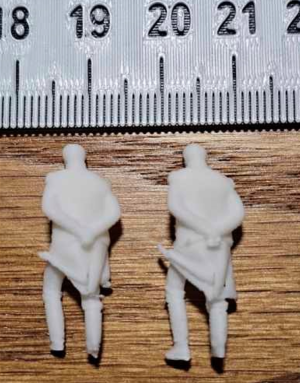
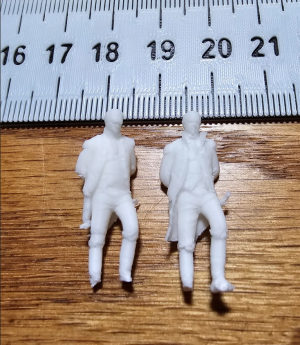
Now here are images of the front and back of the versions printed with 0.4mm and 0.2mm nozzle. In each of the two images below, the 0.2mm nozzle printed object is on the right, and you can clearly see much more defined details even at that small scale. Now the face is nicely defined, sword and back of coat, hands, etc. So using a 0.2mm printhead is definitely the route to go, along with a 0.1mm layer height. Everything else if printed at this scale would be lost if using a larger nozzle or thicker layer heights.
1752616591008.png 1752616671436.png
 
Last edited:
Seadeep, You're off to a good start. Definitely use the 0.2mm nozzle as you will get much finer detail but at the cost of much longer print times. There are lots of YouTube videos on using resin slicers to slice your model using Lychee slicer or something similar and then printing on your FDM printer. Search for FDM miniatures on YouTube. Here's one which includes a printer profile that works well.


Once you have your miniatures sliced check out this video. It shows how to prepare your miniatures for printing using Blender. It's dead easy and uses a plugin. You need not know anything about Blender. I'm away from home so can't show you what I've done so far. I've been playing with Heroforge to create sailors and poses.


There's more and more stuff on YouTube about printing miniatures with FDM printers and they mostly focus on the Bambu A1 or A1 Mini.

Cheers,

Todd
 
Last edited:
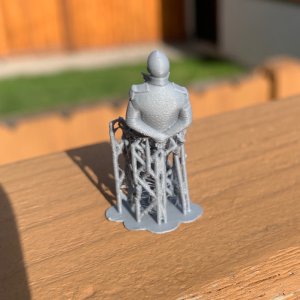
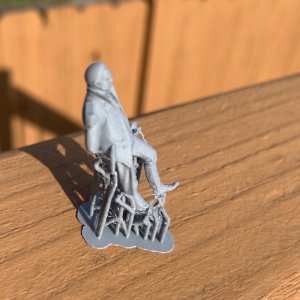
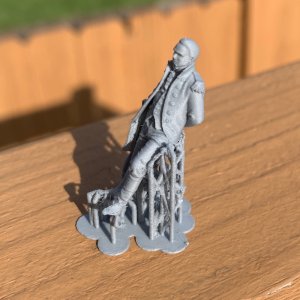
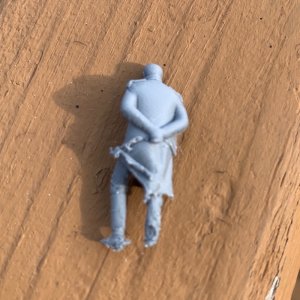
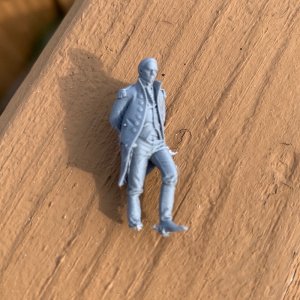
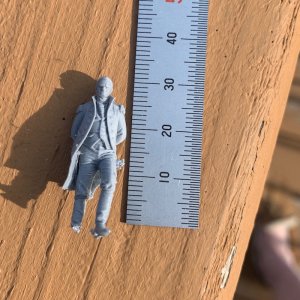
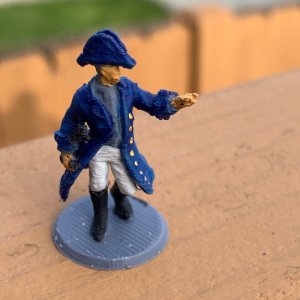
Back home this afternoon. I printed this using my Bambu A1 Mini and the Fat Dragon Games Profile for the A1 Mini that I downloaded here. Sliced in Lychee Slicer with resin printer supports and then processed in Blender as in the second video in my last post. Finally, sliced it in BambuStudio using the above profile. Sword didn't work so well and the feet need some attention but it's a promising start. The last image is a figure that I created in Heroforge and paid to download the STL. It too needs some fine tuning but is pretty good for an FDM print. It was my first attempt. Will get better.

IMG_4768.jpgIMG_4770.jpgIMG_4767.jpgIMG_4772.jpgIMG_4771.jpgIMG_4773.jpg
IMG_4774.jpg

Cheers,

Todd
 
Back
Top