Ringbolts are a very common part of the ship, they are used by means to secure and interconnect various ropes. They could just have an eye or complete with a ring together. We need them a lot! One way to buy those is on Amazon or other online stores. But making them from scratch could be really fun, and could be an 'in-between' task. Many of us already posted our own methods of making the ringbolts. Recently, I have already discussed one of my methods.
Today, I will post yet another method, designed by our member Sergey (@bibigon) a long time back. It is simple enough and with a little practice, you can archive great results. This method is great when you need small ring bolts with an eye diameter of 0.6mm or less.
What tools will we need for this method? We need flat pliers and cutters (nippers). We also will need to make a small jig. Let's start with making a jig first. Find a piece of steel block, and drill the hole. The hole size should be a drill bit size of the inside diameter of your ringbolts. For my exercise, I drilled a hole using a 0.59mm drill bit. Then using the hammer and piece of broken drill bit 0.6mm I created a pin (see image below). Later, we will form the ring around this pin. Another hole, near the pin, was drilled to hold the wire.
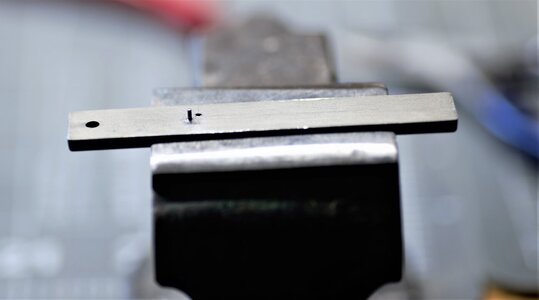
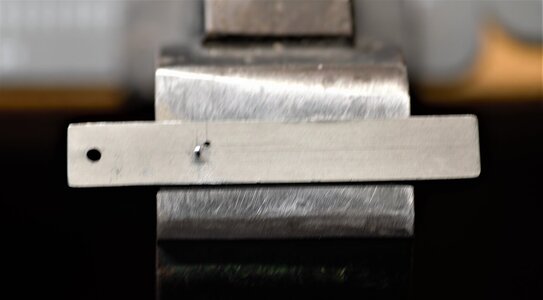
The jig is ready, let's start the process. I am using Hillman's Dark annealed steel wire 24 gauge (0.54mm). You can use brass or copper wire as well. The following images will show the step-by-step process.
Cut about 100mm long wire and insert one end into the hole. Just enough so it will hold the wire.
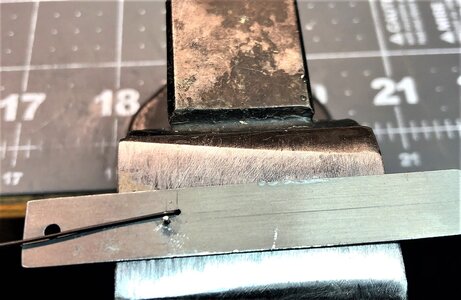
Holding another end of the wire plyers wrap the wire around the pin (counter clock)
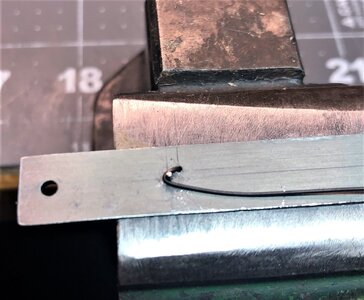
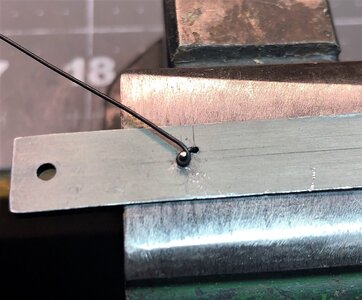
Holding the loop with pliers, form the ring. This time I will use Sergey's images.
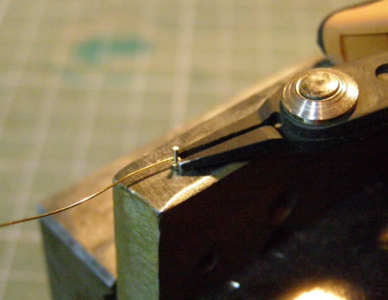
When you remove the formed wire from the jig, it should look the same as in the below image
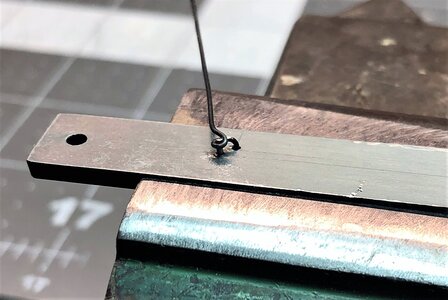
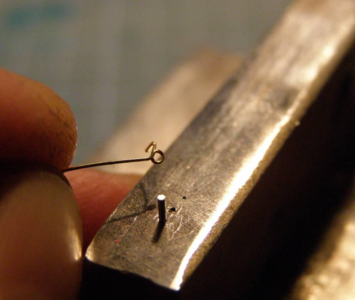
The next step, to cut the excess wire from the loop. Here you need to pay attention, and practice to cut only close to the loop's 'end'. Also, make sure to use the opposite side of a cutter facing the inside of a loop. This will make a cut flat.
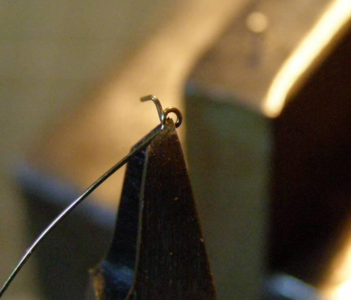
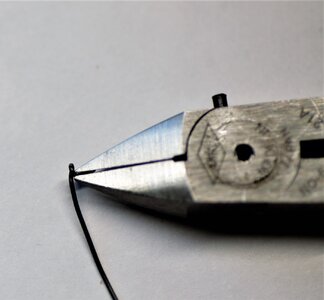
Here is how the ring looks after you cut the forming part
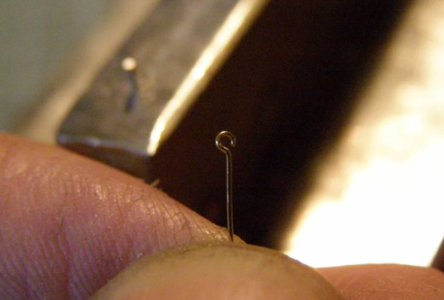
Now form the loop
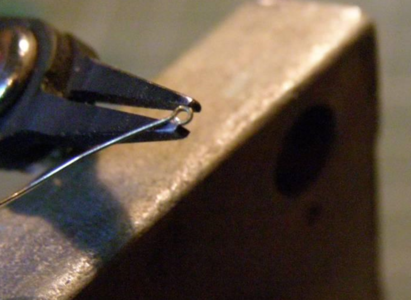
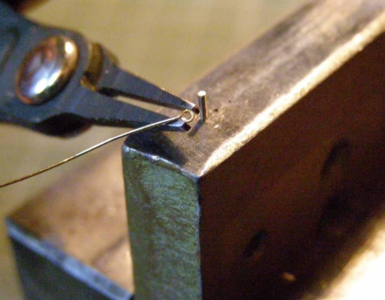
And you have a complete ringbolt
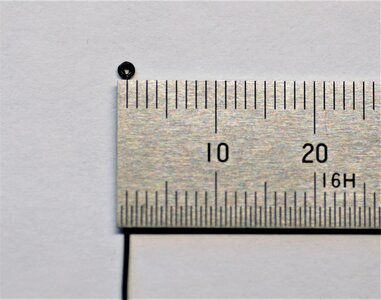
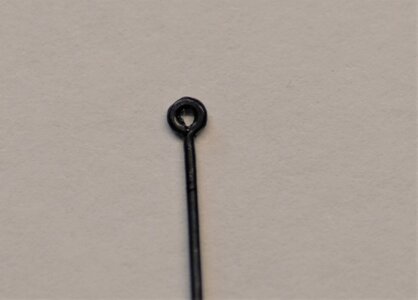
Making the rings we discussed many times. My favorite way is to wind the wire around the drill bit of suitable diameter and cut using the thin saw blade.
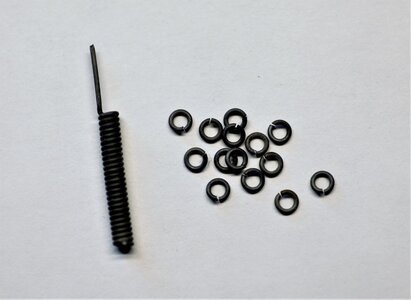
Here is a complete product
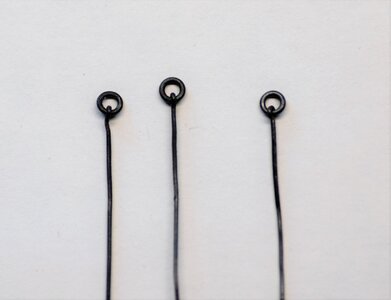
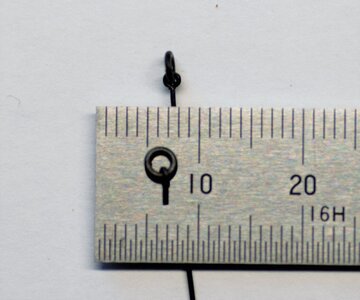
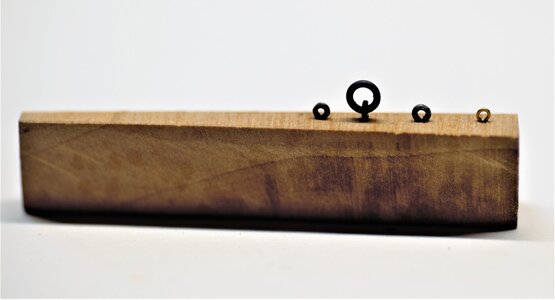
So... you may be asking: "Jim, how the heck you made those rim bolts black?" There is a very famous old trick that naturally protects the steel from rust. Heat it to a red\orange color and instantly dip it in the mix of oil and wax. That simple!
I made a short video to depict the entire process of making ring bolts (except the blackening part), hope you like it!
Thank you!!!
Making the Ringbolts - an introduction to metalsmith works
Jimsky, Great Tutorial, I think I can do this following your method. Looking forward to the soldering portion, I’ve never had much success with that type of work. Jan Hello Jan, Thank you for the good words and I am really happy you found it useful.
shipsofscale.com
Today, I will post yet another method, designed by our member Sergey (@bibigon) a long time back. It is simple enough and with a little practice, you can archive great results. This method is great when you need small ring bolts with an eye diameter of 0.6mm or less.
What tools will we need for this method? We need flat pliers and cutters (nippers). We also will need to make a small jig. Let's start with making a jig first. Find a piece of steel block, and drill the hole. The hole size should be a drill bit size of the inside diameter of your ringbolts. For my exercise, I drilled a hole using a 0.59mm drill bit. Then using the hammer and piece of broken drill bit 0.6mm I created a pin (see image below). Later, we will form the ring around this pin. Another hole, near the pin, was drilled to hold the wire.


The jig is ready, let's start the process. I am using Hillman's Dark annealed steel wire 24 gauge (0.54mm). You can use brass or copper wire as well. The following images will show the step-by-step process.
Cut about 100mm long wire and insert one end into the hole. Just enough so it will hold the wire.

Holding another end of the wire plyers wrap the wire around the pin (counter clock)


Holding the loop with pliers, form the ring. This time I will use Sergey's images.

When you remove the formed wire from the jig, it should look the same as in the below image


The next step, to cut the excess wire from the loop. Here you need to pay attention, and practice to cut only close to the loop's 'end'. Also, make sure to use the opposite side of a cutter facing the inside of a loop. This will make a cut flat.


Here is how the ring looks after you cut the forming part

Now form the loop


And you have a complete ringbolt


Making the rings we discussed many times. My favorite way is to wind the wire around the drill bit of suitable diameter and cut using the thin saw blade.

Here is a complete product


So... you may be asking: "Jim, how the heck you made those rim bolts black?" There is a very famous old trick that naturally protects the steel from rust. Heat it to a red\orange color and instantly dip it in the mix of oil and wax. That simple!
I made a short video to depict the entire process of making ring bolts (except the blackening part), hope you like it!
Thank you!!!


