Thank you Jim, enjoying this little build and learning a lot from it also, and using my tools also learning. Don
-

Win a Free Custom Engraved Brass Coin!!!
As a way to introduce our brass coins to the community, we will raffle off a free coin during the month of August. Follow link ABOVE for instructions for entering.
-

PRE-ORDER SHIPS IN SCALE TODAY!
The beloved Ships in Scale Magazine is back and charting a new course for 2026!
Discover new skills, new techniques, and new inspirations in every issue.
NOTE THAT OUR FIRST ISSUE WILL BE JAN/FEB 2026
You are using an out of date browser. It may not display this or other websites correctly.
You should upgrade or use an alternative browser.
You should upgrade or use an alternative browser.
progress pictures for this little fun build hopefully will be finished this week most of the time spent is the thickness sanding of the wood and drying time for the tung oil. side planking installed(HOLLY) toe rails dry fitted(CHERRY), cabin roof dry fitted(CHERRY) bottom planking dry fitted(CHERRY), Hatches dry fitted( BOXWOOD AND ROSEWOOD) this exercise i hope shows all modelers, what can be done at $5.00 scrap wood(not neccessary to thickness sand) but to use woods that you have on hand, hope critisims and coments always welcome![20190509_234109[5208].jpg 20190509_234109[5208].jpg](https://shipsofscale.com/sosforums/data/attachments/79/79642-e9b0c81d99e22c9912b4bca6660c631d.jpg?hash=6bDIHZniLJ)
![20190512_195235[5207].jpg 20190512_195235[5207].jpg](https://shipsofscale.com/sosforums/data/attachments/79/79643-86c328f7b31de6c85cd021435ac12162.jpg?hash=hsMo97Md5s)
![20190512_195458[5206].jpg 20190512_195458[5206].jpg](https://shipsofscale.com/sosforums/data/attachments/79/79644-eb1dd0f563aad6c945707c28abf3ca10.jpg?hash=6x3Q9WOq1s)
![20190512_195623[5205].jpg 20190512_195623[5205].jpg](https://shipsofscale.com/sosforums/data/attachments/79/79645-98bf21b2f2f5f374185ab0f1cf00d441.jpg?hash=mL8hsvL183)
![20190509_234109[5208].jpg 20190509_234109[5208].jpg](https://shipsofscale.com/sosforums/data/attachments/79/79642-e9b0c81d99e22c9912b4bca6660c631d.jpg?hash=6bDIHZniLJ)
![20190512_195235[5207].jpg 20190512_195235[5207].jpg](https://shipsofscale.com/sosforums/data/attachments/79/79643-86c328f7b31de6c85cd021435ac12162.jpg?hash=hsMo97Md5s)
![20190512_195458[5206].jpg 20190512_195458[5206].jpg](https://shipsofscale.com/sosforums/data/attachments/79/79644-eb1dd0f563aad6c945707c28abf3ca10.jpg?hash=6x3Q9WOq1s)
![20190512_195623[5205].jpg 20190512_195623[5205].jpg](https://shipsofscale.com/sosforums/data/attachments/79/79645-98bf21b2f2f5f374185ab0f1cf00d441.jpg?hash=mL8hsvL183)
She looks good, Don. Great job!
Love that deck, great looking wood.
Hi J.W. and Dave thanks for the comments, J.W. the deck is RED GUM, took a 1/4 inch piece and using my poor mans thickness sander got it down to 1/16, has one coat of tung oil, will give every thing anothr coat an finis it up with a coat of poly, again thanks guys. Don
more updates, coming along OK so far, showing the door to the cabin dry fitted, need scraping to get glue off (MADE UP OF PEAR AND BOXWOOD with cutoff belayingt pin as door knob, also showing bottom planking(cherry), stem (rosewood), the windows of the cabin are made with index card, will try to get a more weathered look, also cabin roof and bulkhead veeners are installed(cherry), looks like I will be finished this week, 98% of materials was thickness sanding, and band saw cuts, also showing something that has been a problem in the past if you notice the IRWIN bar clamps they have a slight bend in them witch causes a lot of slippage the other clamp I got from MENARDS are flat no slppage![20190513_211503[5213].jpg 20190513_211503[5213].jpg](https://shipsofscale.com/sosforums/data/attachments/80/80085-9b693e1dd9b08a353c9dfa9293155bdd.jpg?hash=m2k-Hdmwij)
![20190514_174704[5222].jpg 20190514_174704[5222].jpg](https://shipsofscale.com/sosforums/data/attachments/80/80086-9f0e77dd761216001f54149d4a51c7dc.jpg?hash=nw533XYSFg)
![20190514_174903[5221].jpg 20190514_174903[5221].jpg](https://shipsofscale.com/sosforums/data/attachments/80/80087-d90057b18e7da47b0257c5d8d2622ecb.jpg?hash=2QBXsY59pH)
![20190514_175100[5220].jpg 20190514_175100[5220].jpg](https://shipsofscale.com/sosforums/data/attachments/80/80088-097ea0ab87dede1765b52ec88b45ae48.jpg?hash=CX6gq4fe3h)
![20190514_175342[5219].jpg 20190514_175342[5219].jpg](https://shipsofscale.com/sosforums/data/attachments/80/80089-0b3db9f231ab9f0ddd8aa689d975c767.jpg?hash=Cz258jGrnw)
![20190514_175451[5217].jpg 20190514_175451[5217].jpg](https://shipsofscale.com/sosforums/data/attachments/80/80090-95f08216e4001dc42824a23b9c2817dd.jpg?hash=lfCCFuQAHc)
![20190514_175733[5216].jpg 20190514_175733[5216].jpg](https://shipsofscale.com/sosforums/data/attachments/80/80091-c3968c5350f4d593ba2d189b9893f06b.jpg?hash=w5aMU1D01Z)
![20190514_180536[5215].jpg 20190514_180536[5215].jpg](https://shipsofscale.com/sosforums/data/attachments/80/80092-9ef875ad7587e8e54c5fb84c03601c7f.jpg?hash=nvh1rXWH6O)
![20190513_211503[5213].jpg 20190513_211503[5213].jpg](https://shipsofscale.com/sosforums/data/attachments/80/80085-9b693e1dd9b08a353c9dfa9293155bdd.jpg?hash=m2k-Hdmwij)
![20190514_174704[5222].jpg 20190514_174704[5222].jpg](https://shipsofscale.com/sosforums/data/attachments/80/80086-9f0e77dd761216001f54149d4a51c7dc.jpg?hash=nw533XYSFg)
![20190514_174903[5221].jpg 20190514_174903[5221].jpg](https://shipsofscale.com/sosforums/data/attachments/80/80087-d90057b18e7da47b0257c5d8d2622ecb.jpg?hash=2QBXsY59pH)
![20190514_175100[5220].jpg 20190514_175100[5220].jpg](https://shipsofscale.com/sosforums/data/attachments/80/80088-097ea0ab87dede1765b52ec88b45ae48.jpg?hash=CX6gq4fe3h)
![20190514_175342[5219].jpg 20190514_175342[5219].jpg](https://shipsofscale.com/sosforums/data/attachments/80/80089-0b3db9f231ab9f0ddd8aa689d975c767.jpg?hash=Cz258jGrnw)
![20190514_175451[5217].jpg 20190514_175451[5217].jpg](https://shipsofscale.com/sosforums/data/attachments/80/80090-95f08216e4001dc42824a23b9c2817dd.jpg?hash=lfCCFuQAHc)
![20190514_175733[5216].jpg 20190514_175733[5216].jpg](https://shipsofscale.com/sosforums/data/attachments/80/80091-c3968c5350f4d593ba2d189b9893f06b.jpg?hash=w5aMU1D01Z)
![20190514_180536[5215].jpg 20190514_180536[5215].jpg](https://shipsofscale.com/sosforums/data/attachments/80/80092-9ef875ad7587e8e54c5fb84c03601c7f.jpg?hash=nvh1rXWH6O)
Looking very good, Don!! The different species of wood made a nice contrast.
Thanks Jim that was one of my goals, to take a basic build and do something different with it, enjoyable so far, loike I said before a lot of time thickness sanding and have learned quite a bit one of the best tools I have ever got well worth the money half the cost of other thickness sanders. Don
Great progress, Don!
T hanks KNUT AND DOC, Knut that was the main purpose of the build to take the simplests kit and do something else with it 98% of the wood was throw aways that I used my poor mans thickness sander on and the band saw to cut the strips, I was able to take a 1/4inch piece of ROSEWOOD and take it down to 3/64 inch, then put it on the Band SAW. Don
These are some niiiice hull made!!! They are the same type of ships, correct?
- Joined
- Dec 3, 2018
- Messages
- 2,451
- Points
- 538

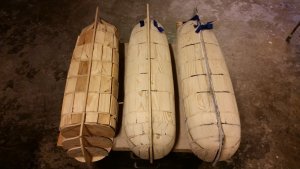
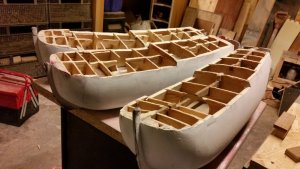
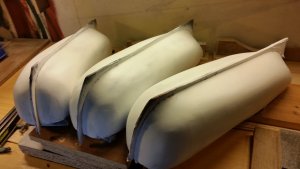
JIM, this is 3 hulls of HMS Endavor, which I just made for planking exercise.
Something I will probably do before my future POF project.
Now I have purchased the plans of The Rattlesnake by navy board models.
So, soon the great planning, will soon begin. Yiippi,
Hilsen-
Something I will probably do before my future POF project.
Now I have purchased the plans of The Rattlesnake by navy board models.
So, soon the great planning, will soon begin. Yiippi,
Hilsen-
Excellent outcome, Done. I absolutely like the different wood contrast. Now, you need a stand, i guess.
already working on it Jim. Don
Hi everyone, finishing this little project this weekend as long as power is still on,STORMS ALL OVER THE PLACE HERE right now working on the stand for it I just want to show my POOR MANS THICKNESS SANDER and how it does certain tasks pictures will show before and after on a piece of 1/2 inch unfinished PEAR, then have to put it on the BAND SAW TO CUT OUT WHAT I NEED now the thickness is down from the 1/2 inch to 7/16 inch![20190523_172054[5254].jpg 20190523_172054[5254].jpg](https://shipsofscale.com/sosforums/data/attachments/82/82160-f8affcd5c6111c205ea26c26c643be75.jpg?hash=-K_81cYRHC)
![20190523_172147[5253].jpg 20190523_172147[5253].jpg](https://shipsofscale.com/sosforums/data/attachments/82/82161-40ddd8c75e186693a23be8395cb5cb41.jpg?hash=QN3Yx14YZp)
![20190524_144448[5258].jpg 20190524_144448[5258].jpg](https://shipsofscale.com/sosforums/data/attachments/82/82162-24aab31b0642faf2618ec0d647cb09df.jpg?hash=JKqzGwZC-v)
![20190524_144541[5257].jpg 20190524_144541[5257].jpg](https://shipsofscale.com/sosforums/data/attachments/82/82163-0910485807696e1036ca28dd9f0c7854.jpg?hash=CRBIWAdpbh)
![20190523_172054[5254].jpg 20190523_172054[5254].jpg](https://shipsofscale.com/sosforums/data/attachments/82/82160-f8affcd5c6111c205ea26c26c643be75.jpg?hash=-K_81cYRHC)
![20190523_172147[5253].jpg 20190523_172147[5253].jpg](https://shipsofscale.com/sosforums/data/attachments/82/82161-40ddd8c75e186693a23be8395cb5cb41.jpg?hash=QN3Yx14YZp)
![20190524_144448[5258].jpg 20190524_144448[5258].jpg](https://shipsofscale.com/sosforums/data/attachments/82/82162-24aab31b0642faf2618ec0d647cb09df.jpg?hash=JKqzGwZC-v)
![20190524_144541[5257].jpg 20190524_144541[5257].jpg](https://shipsofscale.com/sosforums/data/attachments/82/82163-0910485807696e1036ca28dd9f0c7854.jpg?hash=CRBIWAdpbh)


![20190515_180601[5233].jpg 20190515_180601[5233].jpg](https://shipsofscale.com/sosforums/data/attachments/80/80207-dd50c1ab049b9cfad87f4ceaf22f03a8.jpg?hash=3VDBqwSbnP)
![20190515_180738[5232].jpg 20190515_180738[5232].jpg](https://shipsofscale.com/sosforums/data/attachments/80/80215-698e9fef9fd9aa24d3e0b50f1a1070af.jpg?hash=aY6f75_Zqi)
![20190515_180842[5231].jpg 20190515_180842[5231].jpg](https://shipsofscale.com/sosforums/data/attachments/80/80227-ab70e89bb72f32a42fe5e52b0b8800f6.jpg?hash=q3Dom7cvMq)
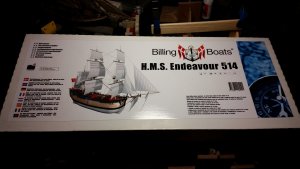
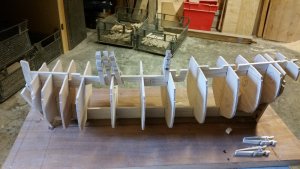
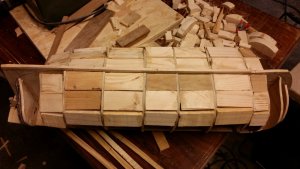
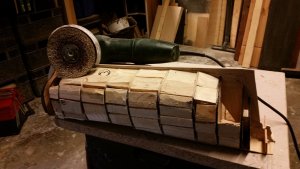
![20190516_205140[5237].jpg 20190516_205140[5237].jpg](https://shipsofscale.com/sosforums/data/attachments/80/80479-8c4629604630dbd1b0eb1bb87dcf5ea4.jpg?hash=jEYpYEYw29)
![20190521_183509[5240].jpg 20190521_183509[5240].jpg](https://shipsofscale.com/sosforums/data/attachments/81/81612-a2ad2cea36239e299f423a5076ecb817.jpg?hash=oq0s6jYjni)
![20190521_183626[5239].jpg 20190521_183626[5239].jpg](https://shipsofscale.com/sosforums/data/attachments/81/81613-85a9dfcf58dc236c4830cf95b520e0f0.jpg?hash=hanfz1jcI2)