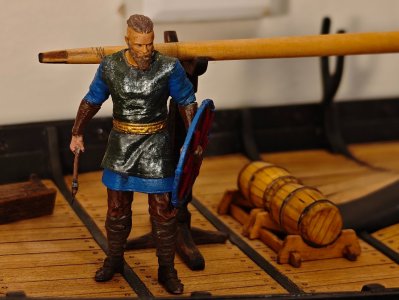
I especially like the shields. I think somewhere in a post somebody mentioned aging with regard to the use of felt pens. I imagine that if in time the coloration deteriorated it would look great and have a nice weathered look and evolve with the model. Cool 
-

Win a Free Custom Engraved Brass Coin!!!
As a way to introduce our brass coins to the community, we will raffle off a free coin during the month of August. Follow link ABOVE for instructions for entering.
-

PRE-ORDER SHIPS IN SCALE TODAY!
The beloved Ships in Scale Magazine is back and charting a new course for 2026!
Discover new skills, new techniques, and new inspirations in every issue.
NOTE THAT OUR FIRST ISSUE WILL BE JAN/FEB 2026
You are using an out of date browser. It may not display this or other websites correctly.
You should upgrade or use an alternative browser.
You should upgrade or use an alternative browser.
pavel nikitin oseberg 3
- Thread starter yancovitch
- Start date
- Watchers 9
- Joined
- Jun 17, 2021
- Messages
- 3,202
- Points
- 588

WOW! Pretty convincing match!not an actual build log, but rather my take on this kit, and in a nutshell, what i'm doing with it....
first issue is a prayer for ukraine...god help them find their way through this insanity....
when i put the hull together, something didn't feel right, so i looked online at photos of the original in the olso museum, and was impressed with the narrow refined bow and stern.....soooooo....i cut off the bow and stern of the model ends, tapered down the planking, so they will mate with the thickness of the two ornate end pieces glued together......
obviously a messy job and i had much sanding and filling to make it look acceptable......it would be easy if modified a new kit from scratch.......you can see from the comparison photos included compared to the kit version, of course which still looks nice...but i got picky....
of course, to cover up the mess, i had to paint the krylon hull dark brown satin, and flattened it with krylon crystal clear flat spray...great stuff.....actually, if i rebuilt the kit, i would make the bow even a tiny bit thinner....
View attachment 549837
View attachment 549838
View attachment 549839
- Joined
- Jun 17, 2021
- Messages
- 3,202
- Points
- 588

I can relate. That's a pretty accurate description of my own approach to building model ships. Roger's wealth of knowledge is impressive and elucidating!thanks for that .......amazing these people who do extensive research....but sadly, i'm just a romantic modeler...i just look for the lines, balance and form which is pleasing to me....i rely on people like you for guidance, and i understand what you expressed....
oh, do you have any idea what those grated walkways are called?.....i'll be making intuitive changes there too....
- Joined
- Jul 9, 2018
- Messages
- 128
- Points
- 133

Last edited:
- Joined
- Jul 9, 2018
- Messages
- 128
- Points
- 133

pavel responded on facebook:
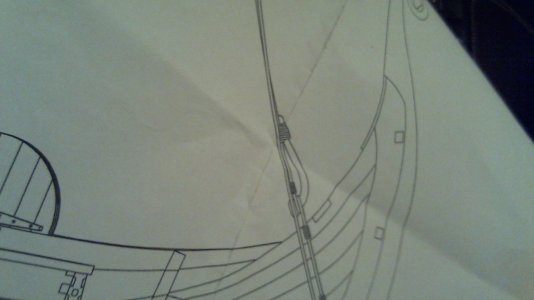
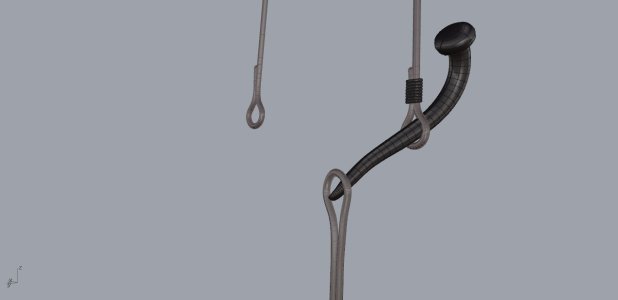
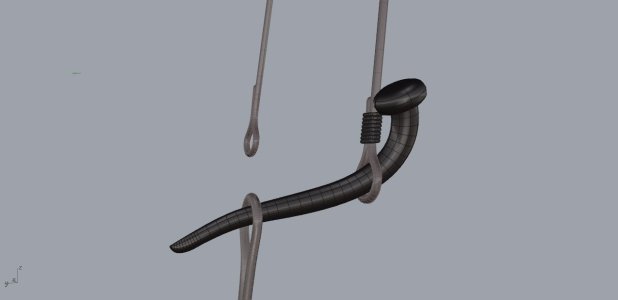
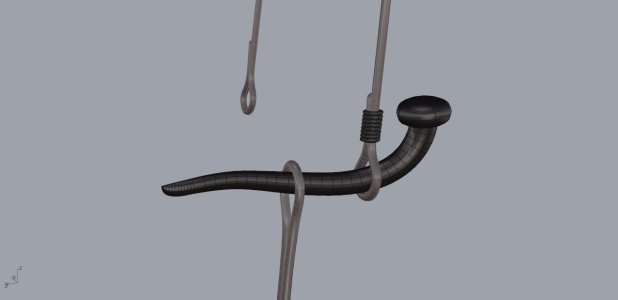
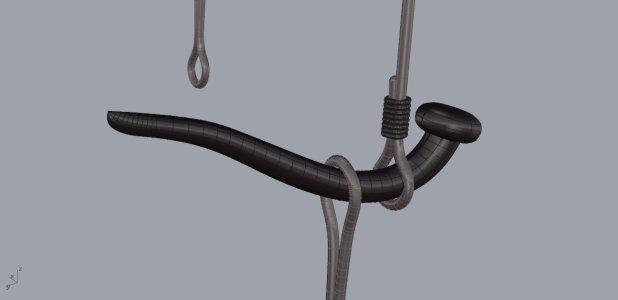
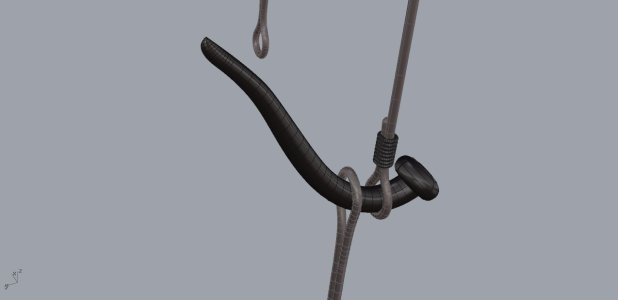
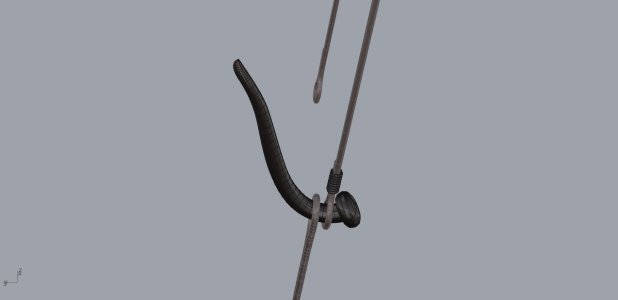
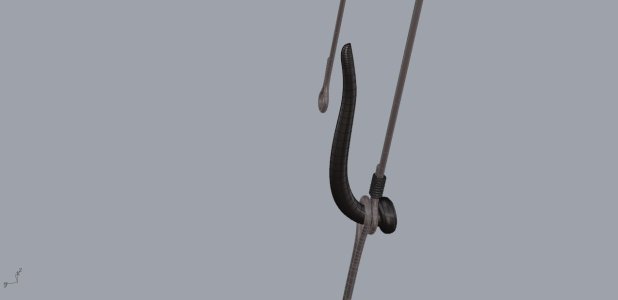
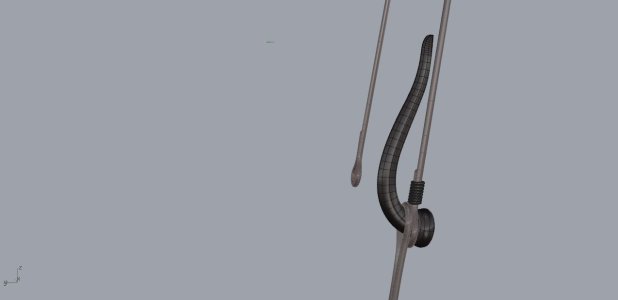
These are the so-called “bows” — they are used for tensioning the shrouds of the mast. Their key feature is that they can be installed and removed very quickly. This was important because the entire rig of a drakkar was designed to be removable. According to historians, the full rig could be set up in about 10 minutes, and taken down even faster.
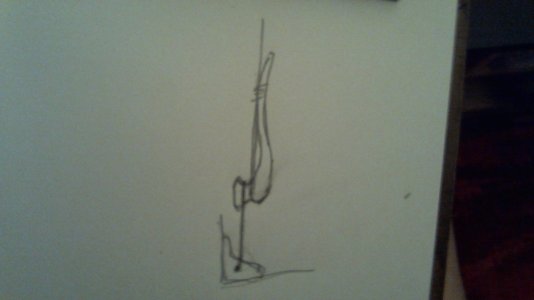
There was no need to cut a slot in the “bow.”Please look carefully at the two drawings you sent — the issue is the order in which the ropes are threaded. Swap them: first the “bow” goes through the upper loop, then through the lower one. Right now you have it reversed, which is why the loop is slipping.
i wrote back................... but i still don''t understand how they work....my way, the lower loop can be easily slipped off by pulling down on the line, which i guess, may be too insecure....but if i knew how they worked, i would be able to see where i'm wrong......will see how he responds....
- Joined
- Jul 9, 2018
- Messages
- 128
- Points
- 133

pavel responded......
In this system the tension is not adjustable — it has a different function: to create a pre-calculated fixed tension. Imagine a crew that has to step the mast, tension the shrouds and stays, and raise the sail in about ten minutes. No one was “fine-tuning by eye” — all standing rigging ropes were made to the exact required length from the start, and they were tightened using this bow with the knob. Its shape works as a lever that provides a strictly predetermined amount of tension.Please look carefully at the sequence in the diagrams I sent you — steps 1 through 8. If the principle is still not clear from those, then I honestly don’t know how else to explain it. You are the first — out of roughly 485 completed builds so far — to ask specifically about how this knot works, even though it is very simple and has been in use for about 1200 years.This setup is taken from Bishop’s book. On my model this system allows me to step the mast in about five minutes: the shrouds and stays become perfectly tight, and the mast simply stands in the step — it cannot even be moved, that’s how rigidly everything is held.
maybe there is someone else besides me, who didn't know this...so i posted this...or maybe i missed it in the plans.....
mystery solved......cheers.....


Last edited:
- Joined
- Jul 18, 2019
- Messages
- 409
- Points
- 323

Victor, there are no “stupid questions” here — if something can’t be read from a drawing, then it really can’t be read. That’s exactly why we share diagrams and explanations — to make life easier for each other
To be honest, the only reason I understood this knot is because my grandfather showed it to me when I was a child — he was a hereditary carpenter and often used old methods that almost nobody remembers anymore…
This knot is present in the kit, but without a dedicated diagram the principle is indeed hard to “read with the eyes.” You did absolutely the right thing by posting the drawing in the SOS thread — such images save nerves and time for dozens of people who might otherwise be shy to ask the same question.
- Joined
- Sep 10, 2024
- Messages
- 1,031
- Points
- 393

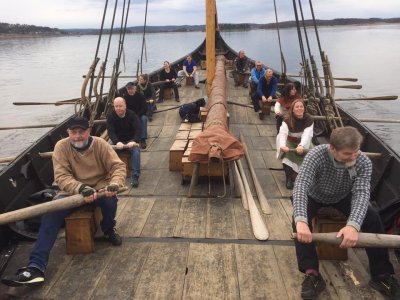
You can see them in use on Saga Oseberg (the sailing reproduction) at this page of the Viking Ship Museum web site. Look at photo #3.
- Joined
- Jul 9, 2018
- Messages
- 128
- Points
- 133

super....thank you!You can see them in use on Saga Oseberg (the sailing reproduction) at this page of the Viking Ship Museum web site. Look at photo #3.
- Joined
- Dec 31, 2017
- Messages
- 292
- Points
- 158

Where do the shrouds attach to the hull? This is not shown in the plans, at least I don't see them in the plans.Victor, there are no “stupid questions” here — if something can’t be read from a drawing, then it really can’t be read. That’s exactly why we share diagrams and explanations — to make life easier for each other
To be honest, the only reason I understood this knot is because my grandfather showed it to me when I was a child — he was a hereditary carpenter and often used old methods that almost nobody remembers anymore…
This knot is present in the kit, but without a dedicated diagram the principle is indeed hard to “read with the eyes.” You did absolutely the right thing by posting the drawing in the SOS thread — such images save nerves and time for dozens of people who might otherwise be shy to ask the same question.
- Joined
- Jul 9, 2018
- Messages
- 128
- Points
- 133

there are little pre-drilled holes in the ends of the four ribs, through which they are threaded.....maybe you missed seeing the holes ....they may need to be enlarged a bit which is a bit tricky......
- Joined
- Jul 18, 2019
- Messages
- 409
- Points
- 323

- Joined
- Jul 9, 2018
- Messages
- 128
- Points
- 133

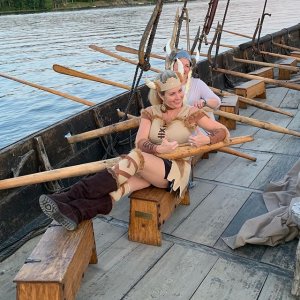
hahaha......wonderful pavel....thanks mucho.....and the top of the oars, being thicker and heaver, would help with the power needed to pull the oars, and the rowers can be a bit closer to the bulwarks
Last edited:
- Joined
- Jun 29, 2024
- Messages
- 1,525
- Points
- 438

An early version of the sliding seat.
- Joined
- Jul 9, 2018
- Messages
- 128
- Points
- 133

as long as there are no splinters ....!!
- Joined
- Jul 9, 2018
- Messages
- 128
- Points
- 133

- Joined
- Jul 9, 2018
- Messages
- 128
- Points
- 133

yep, it seems like it....''they''did a pretty good job of it......i dry brushed a little metalic silver, to give the illusion of chain mail to liven him up a bit, although they likely didn't use it....artistic licence ...
- Joined
- Jul 9, 2018
- Messages
- 128
- Points
- 133

haha.....i've ordered blue and yellow striped cloth out of deep respect for the suffering ukraine is going through.......


