• Win a Free Custom Engraved Brass Coin!!!
    As a way to introduce our brass coins to the community, we will raffle off a free coin during the month of August. Follow link ABOVE for instructions for entering.

Planking - New Method for me

Joined
Jun 7, 2025
Messages
102
Points
113

Location
New Castle, Indiana, USA
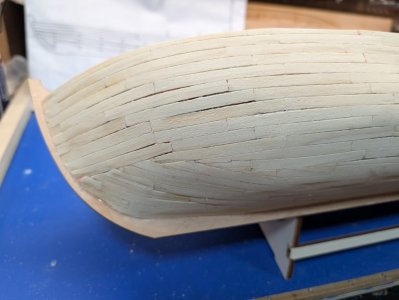
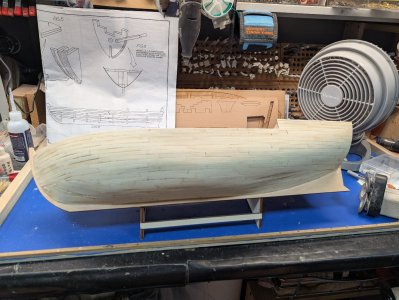
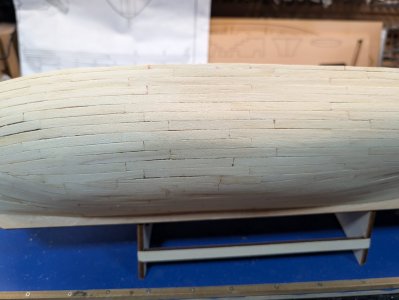
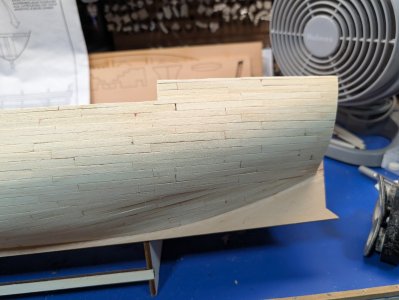
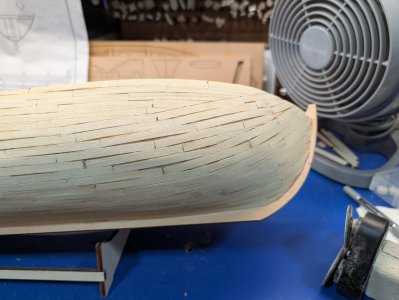
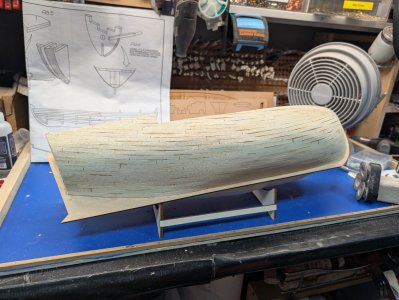
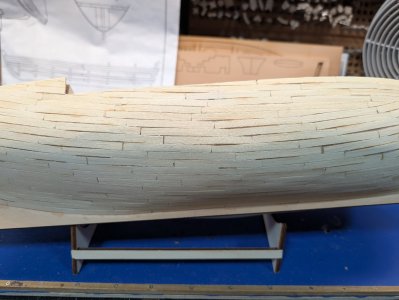
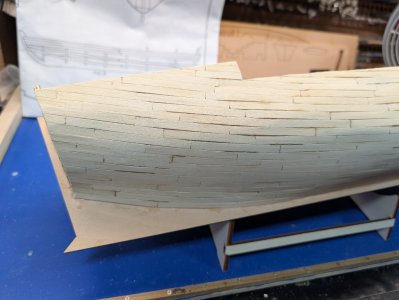
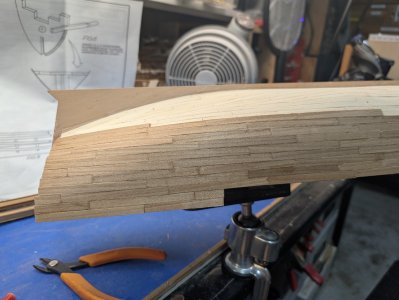
Well, after some reading and finishing the base layer of planking for my armed launch. I decided to do the second layer in shorter strips rather than longer ones. I read that most original ships were built from shorter pieces of wood anyway. I decided to use a three step planking method. I cut most of the strips in 70mm lengths with several in 35mm lengths and several in 17.5mm lengths. Then I started the planking with a full length strip, the next row I started with a 35mm strip and the next row a 17.5mm strip. Starting the fourth row I went back to the 70mm strip and so on. By doing this none of the joints from the base layer matched up to the second layer which should add structural stability to the hull as I finish. It was also much easier to plank the curved sections of the hull using shorter planks.

When I begin the final exterior layer of planking I will switch to a 90mm, 45 mm and 22.5mm lengths. Again, this will keep any joints from the second layer from lining up with the final layer. It will also make a nice planking pattern as I finish. (I hope!!)

As I finish the second layer I will post some photos of the planking and then some more as I get into the final layer of planking. The biggest differences are it takes much more time to cut the shorter strips and fit them cleanly against each other to keep any gaps from developing. But, it does make it easier than using full length strips. Maybe I figured out how I should have been doing it anyway or, I'm doing it all wrong. But, it is working well and the planking pattern looks much better than with the long strips.

I'm open to thoughts, advice, criticism and even a little laughter.............
 
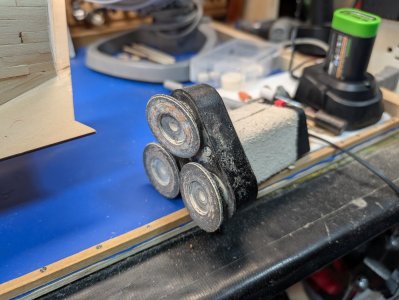
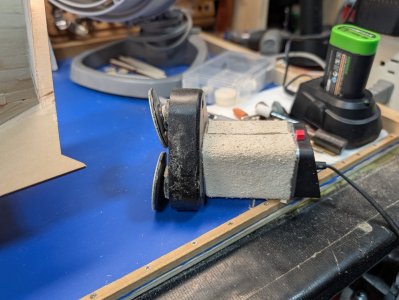
Your wish is my command!! First, I used the Microlux contour sander I got from MicroMark for sanding. I don't think they sell it anymore, but if you can get one it's like a floating head shaver. Really works well for curves on hull! (I put a piece of lambs skin on the body of the sander. It was so slick it was hard to grip and use for a longer period. The lambs skin is soft and got a nice texture to it) Anyway, the port side had a few small gaps I had to deal with. My hands are shaking some these days so I'm learning how to deal with it. I used a light filler in some places but it is smooth as a baby's butt for the third layer to go on. I started the port side from the top of the hull and worked downward to see how it would work out. The only place I ran into trouble was midway down on the bow. Wasn't as clean as I would like it. Too many smaller pieces.

On the starboard side I started from the keel and worked upward. That's the side I had trouble with the gaps. Not sure if it was from my hands or just not taking my time. From the results I think when I do the third layer of planking I'm going to work from the top edge down. I think it looks better overall and makes a good looking pattern.

Not sure if this helps anyone but it is fun to try different things! Again, I'm open to suggestions or any help! Laughter will also be welcome as I make fun of myself all the time to thicken my skin for the inevitable laughter I get from my wife when I do things. After 49 years shes had a lot to laugh about!!! LOLOL

Microlux 3D Contour Sander.jpg

Microlux contour sander.jpg

Microlux High powered digital transformer.jpg

Portside bow.jpg

Portside full.jpg

Portside midship.jpg

Portside stern.jpg

Starboard bow.jpg

Starboard full size.jpg

Starboard midship.jpg

Starboard stern.jpg
 
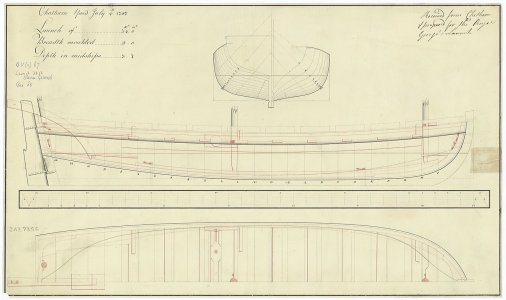
Will the third planking follow the outline of the second or will it follow the full length of the keel and thus cover the deadwood aft? The reason I ask is because there is no rabbet in the photo where the stern post would meet against the deadwood.
Thanks Geno
Allan
 
Being an amateur at this, I’m researching the rabbet. Do you have to have the rabbet the full length of the keel or is it just at the bow? No matter what I do with planking I’m not going to cover the deadwood. The finished work b6 others and on the plans do not show the deadwood covered. You’re thoughts?
 
Looking at contemporary launches, armed launches, etc. I found the following that seems to have the rabbet follow a curve above the deadwood similar to yours. I don't think the planking would be short stubby pieces though, but if it is to be painted, it really would not be noticeable.

Allan

1756426452863.jpeg
 
But I'm short and stubby!!! I get your drift!! There will be no short and stubby planks on the final layer. I did get a steamer to help me with the bending. Should make it a little easier. The box and instructions show it as painted on the lower half. I will probably follow that guide. It should "hide" any problems that crop up due to my lack of experience and shaky hands! Another member built the same kit as I'm working on. I've asked him to post more photos to help guide me along. He posted three but I'd love to see more detail as his finished product was absolutely stunning. I've got a lot to learn about this hobby. Fortunately I also have the time and willingness to read and learn more as I build. I really appreciate your help and the prints you found.
 
I think that you should look at videos of real ship building. You could search at Youtube.
Here is a very long swedish video, if you look ca 30 minutes in you find planking.

I dont know what kind of ship you are buillding a model of but it seems that the planks are very short.
 
Your wish is my command!! First, I used the Microlux contour sander I got from MicroMark for sanding. I don't think they sell it anymore, but if you can get one it's like a floating head shaver. Really works well for curves on hull! (I put a piece of lambs skin on the body of the sander. It was so slick it was hard to grip and use for a longer period. The lambs skin is soft and got a nice texture to it) Anyway, the port side had a few small gaps I had to deal with. My hands are shaking some these days so I'm learning how to deal with it. I used a light filler in some places but it is smooth as a baby's butt for the third layer to go on. I started the port side from the top of the hull and worked downward to see how it would work out. The only place I ran into trouble was midway down on the bow. Wasn't as clean as I would like it. Too many smaller pieces.

On the starboard side I started from the keel and worked upward. That's the side I had trouble with the gaps. Not sure if it was from my hands or just not taking my time. From the results I think when I do the third layer of planking I'm going to work from the top edge down. I think it looks better overall and makes a good looking pattern.

Not sure if this helps anyone but it is fun to try different things! Again, I'm open to suggestions or any help! Laughter will also be welcome as I make fun of myself all the time to thicken my skin for the inevitable laughter I get from my wife when I do things. After 49 years shes had a lot to laugh about!!! LOLOL

View attachment 540087

View attachment 540088

View attachment 540089

View attachment 540090

View attachment 540091

View attachment 540092

View attachment 540093

View attachment 540094

View attachment 540095

View attachment 540096

View attachment 540097
That's a mini version of the Bosch sander, or Bosch is a larger version of that one.
 
I think that you should look at videos of real ship building. You could search at Youtube.
Here is a very long swedish video, if you look ca 30 minutes in you find planking.

I dont know what kind of ship you are buillding a model of but it seems that the planks are very short.
Interesting video. It seems that in all cases the bolts fastening hull planks and deck planks are counterbored below the surface and then wooden plugs are hammered in, then anything that stands proud of the deck is chiseled off. So in the end the bolt heads are invisible. This is why I don't model plank bolt holes on my models. That's my personal interpretation.
 
I have also recently taken to using shorter planks to simplify planking in areas where I am struggling. I usually cut them in half or third of the full length (so they join around the middle, where the hull is the “flattest” and I vary the joint position so it doesn’t line up with the planks above). For me the value is that I can deal with the stern and the bow separately. If I mess up a plank on one end, I don’t have to redo the other… I can also focus on tapering/ bending planks on one side at a time. I know it’s certainly not accurate, but it helps me make nicer looking hulls overall.
 
I'm going to redo the starboard side with planks that are 1/3 full length so I can deal with the curved sections better but have less joints. Should look a little better. I'm only painting the hull to just above the waterline. Glad I have lots of matching planks left over from other projects!! I''l post some more photos when I've replanked this side so you can see the difference.
 
Back
Top