not "perhaps" - we really hope so, that Mark make onePerhaps starting a build-log?
-

Win a Free Custom Engraved Brass Coin!!!
As a way to introduce our brass coins to the community, we will raffle off a free coin during the month of August. Follow link ABOVE for instructions for entering.
-

PRE-ORDER SHIPS IN SCALE TODAY!
The beloved Ships in Scale Magazine is back and charting a new course for 2026!
Discover new skills, new techniques, and new inspirations in every issue.
NOTE THAT OUR FIRST ISSUE WILL BE JAN/FEB 2026
- Home
- Forums
- Ships of Scale Build Logs
- Super Detailing Static Models / Other Genres
- Super Detailing Static Models
You are using an out of date browser. It may not display this or other websites correctly.
You should upgrade or use an alternative browser.
You should upgrade or use an alternative browser.
Pocher 1:4 Ducati Panigale S ‘Anniversario’ + ‘Final Edition
not "perhaps" - we really hope so, that Mark make one
Looks nice, Mark. It’s worthy to start a own build-log! To show your techniques and skills.
And we know indeed: our details are there.
Regards, Peter
- Joined
- Nov 22, 2022
- Messages
- 18
- Points
- 48

Hi Peter- thanks for putting such detailed explanation’s of your progress on- most inspiring.Chapter 2 and 3:
View attachment 174768
View attachment 174769
Again first all parts collected, some painted into the right color.
View attachment 174770
Eventually all these parts with 35 bolts secured.
As the right side now looks with part of the oil filter and on the inside of the two cylinder heads the intakes on which the fuel injection system will soon be installed:
View attachment 174771
And the left side:
View attachment 174772
The dynamo is also in place, with its decal, applied to thickened alu-foil from the Hardware-kit :
View attachment 174773
I mentioned that I had bought the Hardware Set from Paul Koo.
Here is a print-screen of 1 of the pages as Paul has documented the application of the extras. His manual consists of 71 pages with on an additional DVD a lot of extra info and pictures of the original.
View attachment 174774
Pocher itself is a kit that can be put together properly and neatly in accordance with the manual. But with Paul's additions, you'll have a lot more happy building time. That's really fine-tuning.
Regards, Peter
I’m waiting to start the final edition panigale (once I’ve finished my current build) and so I’ve been keenly looking through your posts.
I too have bought Paul Koos additional pack but was curios as to how you managed both Paul’s guide and the pocher manual? There seems to be so much detail flying around between the two..
Great work anyway and I’ll be using this feed to help also!
Keep up the good work.
James
Hi James. Thanks for visiting this build-log. Nice to read you have the ‘final’ to start.Hi Peter- thanks for putting such detailed explanation’s of your progress on- most inspiring.
I’m waiting to start the final edition panigale (once I’ve finished my current build) and so I’ve been keenly looking through your posts.
I too have bought Paul Koos additional pack but was curios as to how you managed both Paul’s guide and the pocher manual? There seems to be so much detail flying around between the two..
Great work anyway and I’ll be using this feed to help also!
Keep up the good work.
James
About this: “I too have bought Paul Koos additional pack but was curios as to how you managed both Paul’s guide and the pocher manual?”
I always read a few chapters ahead, constantly comparing the two manuals. In his manual Paul refers very neatly and clearly to the chapters of Pocher. Once you get the logic, it comes naturally. Good luck and hope you can start soon with the build.
Regards, Peter
Hi Mark. Nice to see the state of your build. The new exhaust fills up nicely the gap above the rear wheel.
A new build-log is always nice.
Regards, Peter
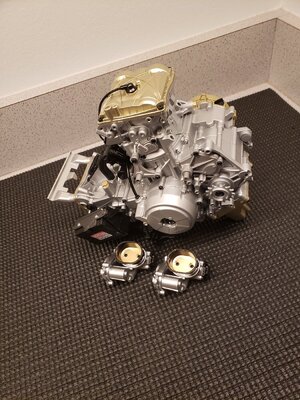
Indeed, Mark. The exhaust with the big screw holes is the minor part of the kit. But yours look very nice!I had used cutoff sections of sprue to fill in those unsightly holes in the 12 pc exhaust. The exhaust pipes were the biggest disappointment in this kit. But I needed a solution.... and all that glue and putty weren't an option.
View attachment 342018
Regards, Peter
- Joined
- Nov 22, 2022
- Messages
- 18
- Points
- 48

Mark- nice tip regarding the sprues to fill the holes. I’ll be using that one! Out of curiosity- have you decided on what make of paint and colour you’ll be using to finish the exhaust pipes?I had used cutoff sections of sprue to fill in those unsightly holes in the 12 pc exhaust. The exhaust pipes were the biggest disappointment in this kit. But I needed a solution.... and all that glue and putty weren't an option.
View attachment 342018
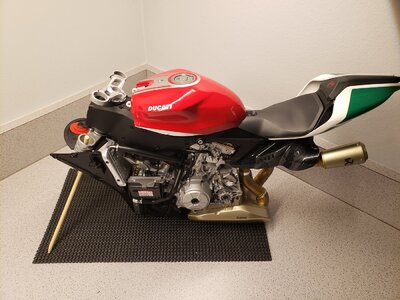
for the exhaust I used an antique bronze.maybe its not exactly what real titanium pipes would look like but I liked the color and then used bare metal foil on the joints. I made a stand to hold this thing up while I worked on it because I didn't want it laying on its side. Ill put the tires and wheels on last.
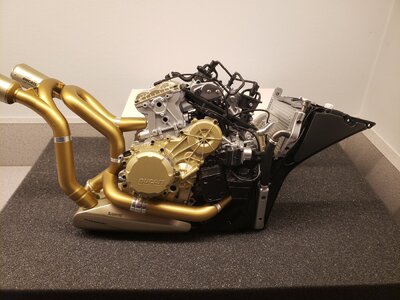
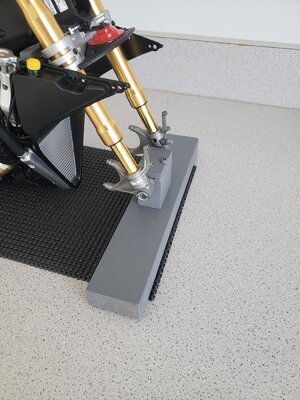


A nice painted exhaust, Mark. And a clever idea, that clamp. I had such a clamp to transport my previous MTB in my car, but never had the idea for using it during my build of the Duc.for the exhaust I used an antique bronze.maybe its not exactly what real titanium pipes would look like but I liked the color and then used bare metal foil on the joints. I made a stand to hold this thing up while I worked on it because I didn't want it laying on its side. Ill put the tires and wheels on last.
View attachment 342496
View attachment 342497
Regards, Peter
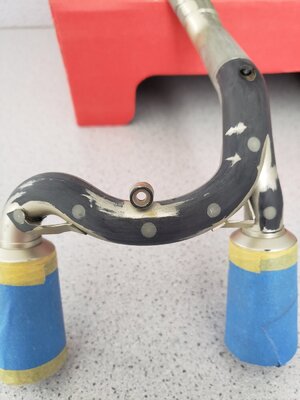
Mark, No offense, but you shouldn’t be starting a build log of your model inside of someone else’s build log. It is best if you start your own build log.Notice how i've painted the shock seals at the bottom of the fork tube.Most every part is clear coated or resprayed.
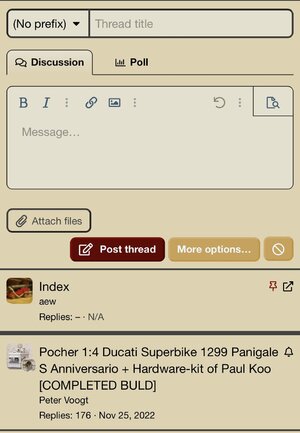
Click on the thread title and enter the title of your log. Then start your first post in the message area. Then click post thread…boom…you have started your own build log!
I promise Peter will see it and follow and answer any questions. He’s a great guy who is always willing to help.
No worries, you are doing great work. With your own build log you will have followers, comments and contributions.I agree and should have known better. I apologize and will start my own log tonight. I'm halfway thru the build and have a lot to show.


