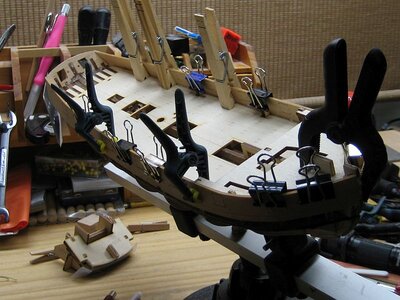
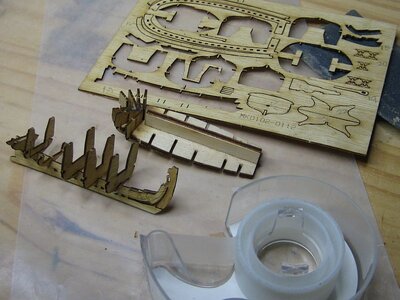
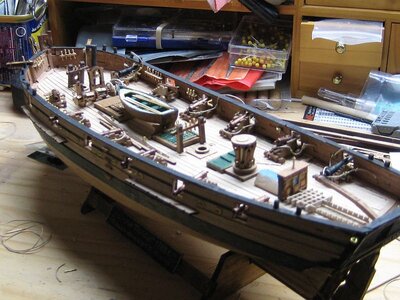
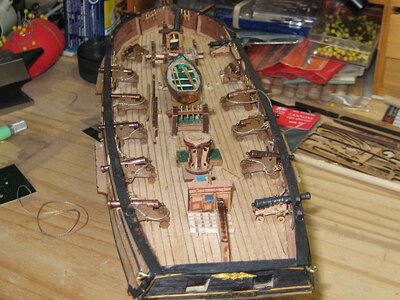
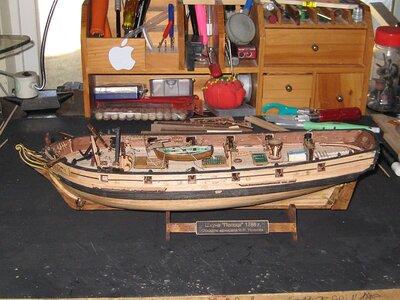
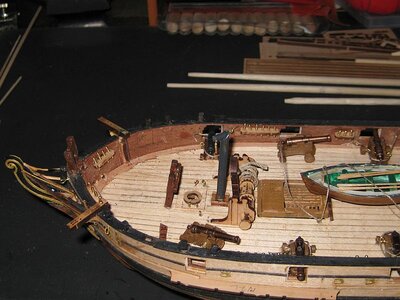
Well I'm back on this build. I found an old build log on this ship, but the builder used the photographs instead of following the written instructions. He had to do some deconstruct and rebuild. I like this type of build with precise instructions, however it requires some decision on builder concerning fit and finish. An example would be the two sub assemblies referred to as "conductors". Backing into Russian equivalent indicates the word means "guide". I would say it is a framework to guide the attachment of binder clips and other means of holding parts while glue dries. They are held in place by pegs. Do not glue in place as they must be removed as build progresses. Laser cuts are very precise and require a lot of sanding and filing for good fit. Be sure to bevel as directed using grey etched lines. The plywood is very strong and there is little or no danger of breaking ribs as in other models. Plans recommend using furnished brass nails to hold rough planking and stern parts when gluing. I could not make this work, even with a push tool. I used as you can see push pins. It takes some pressure to get these in the plywood, but works for me. OK. I have seen comment on other site saying this is a good beginner build. Maybe because of extensive written instructions. I am glad I had experience with four other kits.. Enough editorializing.
![IMG_0417[1].jpg IMG_0417[1].jpg](https://shipsofscale.com/sosforums/data/attachments/238/238269-1ef318346a368dc06b15d55b122fa6a1.jpg?hash=HvMYNGo2jc)
![IMG_0420[1].jpg IMG_0420[1].jpg](https://shipsofscale.com/sosforums/data/attachments/238/238270-5fa1022d89db92c88c1dd3ce2d7e68c0.jpg?hash=X6ECLYnbks)
garboard strake. Later attaches to grove boards {Garboard strake ?}-
![IMG_0425[1].jpg IMG_0425[1].jpg](https://shipsofscale.com/sosforums/data/attachments/238/238272-c113730632e433bec5b6881ebfb4aa76.jpg?hash=wRNzBjLkM7)
![IMG_0422[1].jpg IMG_0422[1].jpg](https://shipsofscale.com/sosforums/data/attachments/238/238271-910de4824aa22719b0134118019d12b2.jpg?hash=kQ3kgkqiJx)
![IMG_0429[1].jpg IMG_0429[1].jpg](https://shipsofscale.com/sosforums/data/attachments/238/238274-3d46c3c0c8ee142387a3e2bc11a64787.jpg?hash=PUbDwMjuFC)
Stern conductor
![IMG_0448[1] frame rear.jpg IMG_0448[1] frame rear.jpg](https://shipsofscale.com/sosforums/data/attachments/238/238278-e8e05bc385ed1b1a9f48d7304d5cb671.jpg?hash=6OBbw4XtGx)
conductors after removed. I broke bow conductor because I accidently glued it to rib.
![IMG_0452[1] frame after removal.jpg IMG_0452[1] frame after removal.jpg](https://shipsofscale.com/sosforums/data/attachments/238/238280-f86cab18775a1667ec9b03422486fe54.jpg?hash=-GyrGHdaFm)
conductors in position
![IMG_0434[1].jpg IMG_0434[1].jpg](https://shipsofscale.com/sosforums/data/attachments/238/238281-aaab071b4826c8e03c483f7b73a140a9.jpg?hash=qqsHG0gmyO)
Using clips and bow conductor
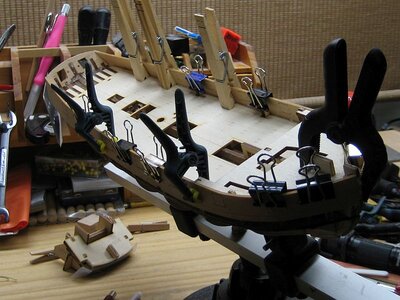
Bulwarks attached and conductors removed
![IMG_0453[1] conductor frame removed.jpg IMG_0453[1] conductor frame removed.jpg](https://shipsofscale.com/sosforums/data/attachments/238/238283-be8a8c89b42f2c4f5ea87274d9dd3253.jpg?hash=voqMibQvLE)
Keep from gluing parts to rear conductor
![IMG_0440[1] tape.jpg IMG_0440[1] tape.jpg](https://shipsofscale.com/sosforums/data/attachments/238/238285-e0ce45cc0a12c258ea4550d836f327dc.jpg?hash=4M5FzAoSwl)
Stern is a challenge. Always try parts for fit before glue. Tremendous use of small files. Manual says don't over grind(sand)
![IMG_0441[1].jpg IMG_0441[1].jpg](https://shipsofscale.com/sosforums/data/attachments/238/238286-9341d368ea1c33e4ca8cd705964317d4.jpg?hash=k0HTaOocM-)
Rough planking. My cute little plank clamps did not work on this small scale. Push pins for me.
![IMG_0461[1] start planking.jpg IMG_0461[1] start planking.jpg](https://shipsofscale.com/sosforums/data/attachments/238/238287-e8ec601c5a1802cd16984f9ffa2860d4.jpg?hash=6OxgHFoYAs)
That last pending plank is called the adjustment plank. I spent a long time sanding for fit
![IMG_0467[1].jpg IMG_0467[1].jpg](https://shipsofscale.com/sosforums/data/attachments/238/238288-9dacd719a6e9ba02dbfec9cb047f1b1f.jpg?hash=nazXGabpug)
Now planking larboard side. more to follow...
![IMG_0407[1].jpg IMG_0407[1].jpg](https://shipsofscale.com/sosforums/data/attachments/234/234584-e85223620ffed89276e93207639a5197.jpg?hash=6FIjYg_-2J) . I love this type of build. More to come.
. I love this type of build. More to come.![IMG_0408[1].jpg IMG_0408[1].jpg](https://shipsofscale.com/sosforums/data/attachments/234/234585-453c354dcda40d7e0f45dc025106e418.jpg?hash=RTw1Tc2kDX)
![IMG_0409[1].jpg IMG_0409[1].jpg](https://shipsofscale.com/sosforums/data/attachments/234/234586-05a0d0d631f29a4a490e591353f41a76.jpg?hash=BaDQ1jHymk)
![IMG_0411[1].jpg IMG_0411[1].jpg](https://shipsofscale.com/sosforums/data/attachments/234/234587-43d2e2bf480ea3a94120040f75310de0.jpg?hash=Q9Liv0gOo6)
![IMG_0412[1].jpg IMG_0412[1].jpg](https://shipsofscale.com/sosforums/data/attachments/234/234588-833ca724822a2088cb40a00e25eb30d6.jpg?hash=gzynJIIqII)
![IMG_0414[1].jpg IMG_0414[1].jpg](https://shipsofscale.com/sosforums/data/attachments/234/234589-4c32ca0270db73237ffac45a3ac63b7d.jpg?hash=TDLKAnDbcy)
![IMG_0416[1].jpg IMG_0416[1].jpg](https://shipsofscale.com/sosforums/data/attachments/234/234590-7e589fca5d7beb99e58c556189e4c3a5.jpg?hash=flifyl1765)
![IMG_0420[1].jpg IMG_0420[1].jpg](https://shipsofscale.com/sosforums/data/attachments/234/234591-93149a09aacece0634bdeb081dacf7be.jpg?hash=kxSaCarOzg)
![IMG_0423[1].jpg IMG_0423[1].jpg](https://shipsofscale.com/sosforums/data/attachments/234/234592-383303124bd9b034f8f8b4d573e60bcc.jpg?hash=ODMDEkvZsD)


![IMG_0417[1].jpg IMG_0417[1].jpg](https://shipsofscale.com/sosforums/data/attachments/238/238269-1ef318346a368dc06b15d55b122fa6a1.jpg?hash=HvMYNGo2jc)
![IMG_0420[1].jpg IMG_0420[1].jpg](https://shipsofscale.com/sosforums/data/attachments/238/238270-5fa1022d89db92c88c1dd3ce2d7e68c0.jpg?hash=X6ECLYnbks)
![IMG_0425[1].jpg IMG_0425[1].jpg](https://shipsofscale.com/sosforums/data/attachments/238/238272-c113730632e433bec5b6881ebfb4aa76.jpg?hash=wRNzBjLkM7)
![IMG_0422[1].jpg IMG_0422[1].jpg](https://shipsofscale.com/sosforums/data/attachments/238/238271-910de4824aa22719b0134118019d12b2.jpg?hash=kQ3kgkqiJx)
![IMG_0429[1].jpg IMG_0429[1].jpg](https://shipsofscale.com/sosforums/data/attachments/238/238274-3d46c3c0c8ee142387a3e2bc11a64787.jpg?hash=PUbDwMjuFC)
![IMG_0448[1] frame rear.jpg IMG_0448[1] frame rear.jpg](https://shipsofscale.com/sosforums/data/attachments/238/238278-e8e05bc385ed1b1a9f48d7304d5cb671.jpg?hash=6OBbw4XtGx)
![IMG_0452[1] frame after removal.jpg IMG_0452[1] frame after removal.jpg](https://shipsofscale.com/sosforums/data/attachments/238/238280-f86cab18775a1667ec9b03422486fe54.jpg?hash=-GyrGHdaFm)
![IMG_0434[1].jpg IMG_0434[1].jpg](https://shipsofscale.com/sosforums/data/attachments/238/238281-aaab071b4826c8e03c483f7b73a140a9.jpg?hash=qqsHG0gmyO)

![IMG_0453[1] conductor frame removed.jpg IMG_0453[1] conductor frame removed.jpg](https://shipsofscale.com/sosforums/data/attachments/238/238283-be8a8c89b42f2c4f5ea87274d9dd3253.jpg?hash=voqMibQvLE)
![IMG_0440[1] tape.jpg IMG_0440[1] tape.jpg](https://shipsofscale.com/sosforums/data/attachments/238/238285-e0ce45cc0a12c258ea4550d836f327dc.jpg?hash=4M5FzAoSwl)
![IMG_0441[1].jpg IMG_0441[1].jpg](https://shipsofscale.com/sosforums/data/attachments/238/238286-9341d368ea1c33e4ca8cd705964317d4.jpg?hash=k0HTaOocM-)
![IMG_0461[1] start planking.jpg IMG_0461[1] start planking.jpg](https://shipsofscale.com/sosforums/data/attachments/238/238287-e8ec601c5a1802cd16984f9ffa2860d4.jpg?hash=6OxgHFoYAs)
![IMG_0467[1].jpg IMG_0467[1].jpg](https://shipsofscale.com/sosforums/data/attachments/238/238288-9dacd719a6e9ba02dbfec9cb047f1b1f.jpg?hash=nazXGabpug)
![IMG_0524[1].jpg IMG_0524[1].jpg](https://shipsofscale.com/sosforums/data/attachments/272/272497-6d2d766abf5b2092d1b081d78df7d6a7.jpg?hash=bS12ar9bIJ)
![IMG_0525[1].jpg IMG_0525[1].jpg](https://shipsofscale.com/sosforums/data/attachments/272/272498-c243f9ba565fe9d8cfbbffa58fd1aa82.jpg?hash=wkP5ulZf6d)
![IMG_0523[1].jpg IMG_0523[1].jpg](https://shipsofscale.com/sosforums/data/attachments/272/272500-1570142b4aa2d1b44f51b245cf9e3376.jpg?hash=FXAUK0qi0b)
