Rangeley Boat

Joined
Jan 20, 2024
Messages
28
Points
58

Location
Texas
I completed my Beachcomber Alpha Dory in 1/2" scale a few weeks ago. I decided my next build would be sort of model railroad related. I model a Maine 2-ft railroad in O scale (1/4"=1ft). I've shown a few photos on this site.
The Rangeley boat was developed for the fishing hobby in the Rangeley Lakes region of Maine starting in the late 1800s. Originally it was double-ended and looked more like a canoe. After WW1, they were adapted to use a small outboard motor by adding a transom on one end. That is the style I decided to build. When complete, I came use it on my model railroad or pass it along to a friend modeling the Sandy River and Rangeley Lakes Railroad.
I referred to John Gardner's book "Building Classic Small Craft" for the lines.
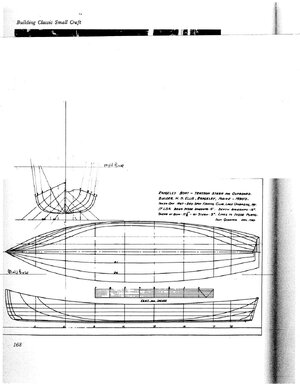
Fig 1 - JGardner Lines for Rangeley.jpg
My plan was to scratch build the model using close-to-scale wood. Since these boats didn't have frames, I build a fixture/mold from sheet styrene. I glued a photocopy of the scaled drawing onto .060" styrene and laid out the location of the mold frames on another sheet.
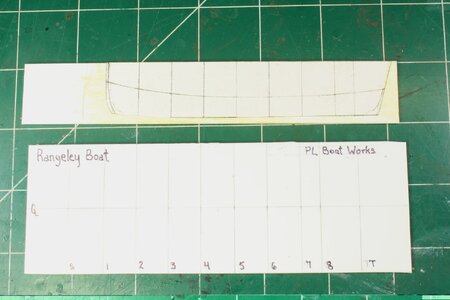
Fig 2 - Building the mold form.JPG
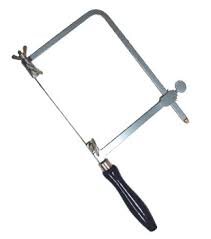
I cut out the profile using a home-made "jeweler's" vise and a hobby coping saw. (I really need to get a powered scroll saw....)
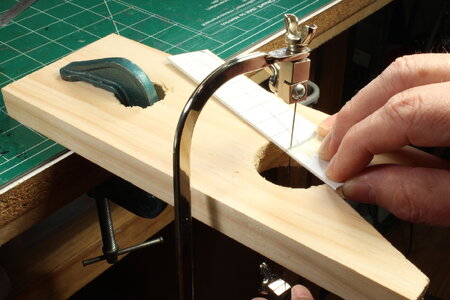
Fig 3 - Cutting out the shapes.JPG
To ensure the frames were exact copies of each other, I tacked 2 pieces of .040" styrene together, temporarily glued a copy of the from on top, and cut both out using the coping saw. Then I separated the 2 halves with a Xacto chisel.
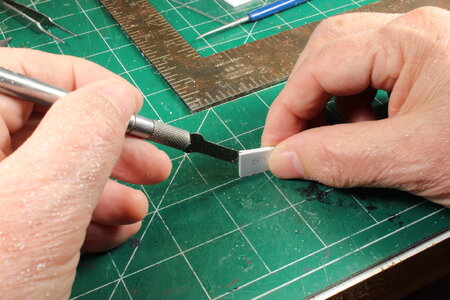
Fig 4 - Frames for the Mold.JPG
I then glued the profile along the base's centerline and then followed with the frames. Here I've tacked to a strip of 3/4" wood to make it easier to handle.
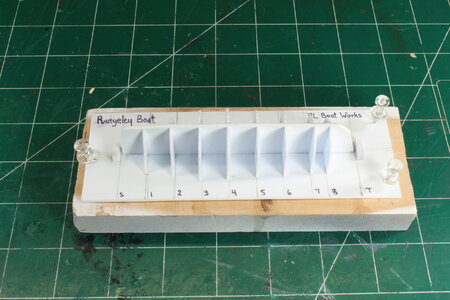
Fig 5 - The mold.JPG
Then I constructed the backbone of the boat by forming the inner keel and gluing it to the inner stem and transom.
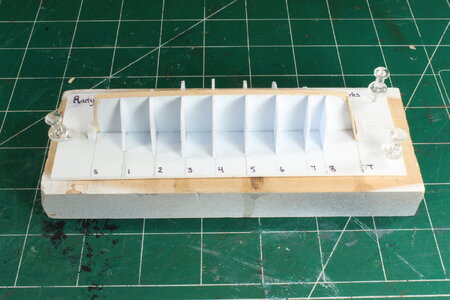
Fig 6 - Inner Keel Connects Stem and Transom.JPG
Next came the planking process. These boats were planked with lapstrakes so I needed thin-narrow strips of wood. Fortunately, I have a stash of model stripwood in various scales from my 40+ years of model railroading. Some packages are more than 40 years old! (It pays to never throw stuff out!) Most of it is HO, which works out to about 1/2 of O scale. So, a 1" think HO board is about 1/2" in O. Close enough for my purposes. Here I am about halfway through the planking process.
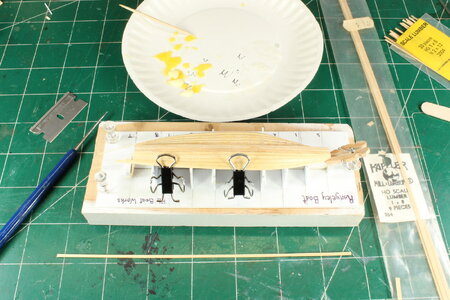

Fig 7 - Planking Process.JPG
So far, I have spent about 20 hours over the last few weeks building this. I likely have about that much more to complete it.
Pete
 
I will be scratch-building a model and want to use a hobby-sized coping saw. I see you have been using one. What make and model is it, or what do you or others recommend? Thanks.
 
Carleroo,
I am using one made by XACTO. I've had it for years and don't remember where I got it. It may have been from Micro Mark but I an not sure. it may have been from a hobby shop.
Pete
 
I will be scratch-building a model and want to use a hobby-sized coping saw. I see you have been using one. What make and model is it, or what do you or others recommend? Thanks.
That's known as a jeweler's saw. They are widely available.

If you want to power up, take a look at the Dremel Moto-tool. I have one of those and find it a useful tool. One note: use it with a shop vac attached to the included vacuum fitting. Otherwise it's annoying to keep clearing the sawdust off the work.
Fair winds!

jewelers saw.jpegdremel moto saw.jpeg
 
I referred to John Gardner's book "Building Classic Small Craft" for the lines.
Very nice project! I love the idea of building models of traditional small craft. Please tell us more about assembling the styrene molds and attaching the planks without gluing them to the molds. Thanks for sharing.
 
AndyA,
I've use styrene to build the molds when the boat is to be made from wood. Yellow wood glue doesn't stick to the styrene well. You still have to be a bit careful with the glue and keep as much off of the mold as possible.. To assemble the styrene mold, I use readily available liquid plastic solvent/cement, the kind used to build plastic models. If I were to build something from styrene that needed a mold, I would build it from wood and use the liquid cement for the styrene. It doesn't adhere to the wood. In ether case, you cannot use CA without risking gluing everything together.
I hope this helps clarify things.
Pete
 
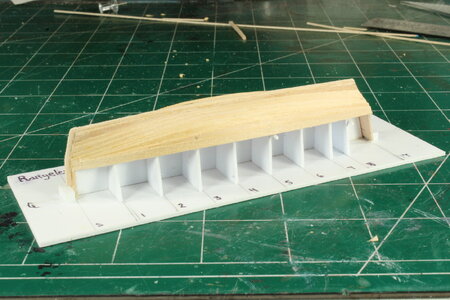
Work continues on the Rangeley boat. I completed the planking on the styrene mold.
Fig 8 - Planking Complete.JPG
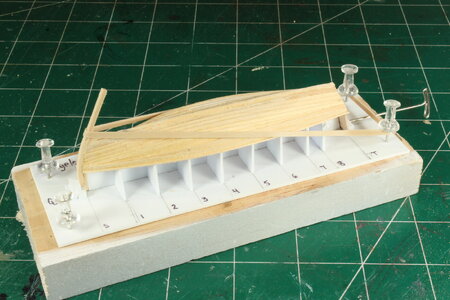
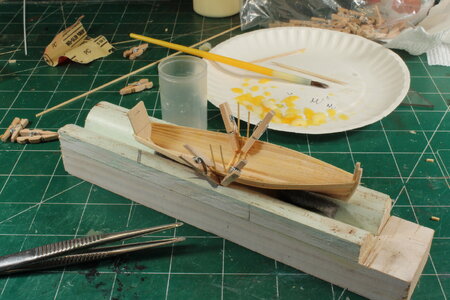
Before removing the hull from the mold (fingers crossed!), I wanted to bend and attach the outer stem. These boats didn't use a rabbited stem but were made with two pieces of bent wood. The temporary glue job wasn't holding well on the transom so I drilled a hole through the styrene stop to insert a pin to keep the transom in place. You can see the T pin on the right. I also mounted the mold to a scrap piece of wood using push pins.
Fig 9 - Bending the Outer Stem.JPG
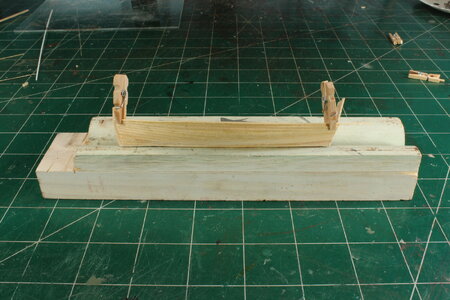
I must admit, I was a bit concerned if the hull was going to come off of the mold. My theory was to use yellow glue on the wood that shouldn't adhere well to the plastic. It worked! Here it is off of the mold and getting the rub rails installed to help stiffen the structure.
Fig 10 - Attaching the Rub Rails.JPG
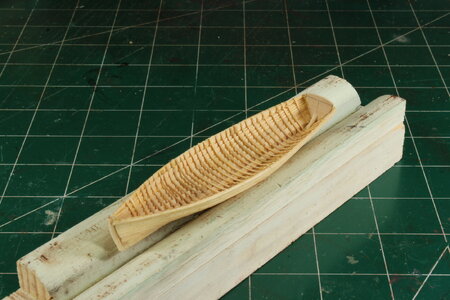
This is the first boat I've built that didn't have frames. These used ribs. I used 1/2" x 1" scale boards applied one at a time.
Fig 11 - Installing the Ribs.JPG
The process was quite tedious and I learned a few things for any future builds. One idea would be to construct a few spacers from styrene to aid in keeping them straight.
Fig 12 - Ribs Complete.JPG
The rib installation isn't perfect but it turned out better than I hoped. Now I need to give the interior a coat of paint before adding all of the details: inner rails, thwarts, oars, etc.
Pete
 
This is the first boat I've built that didn't have frames. These used ribs. I used 1/2" x 1" scale boards applied one at a time.

The process was quite tedious and I learned a few things for any future builds. One idea would be to construct a few spacers from styrene to aid in keeping them straight.
Model is looking good! Yes, installation of those ribs seems like quite a chore. Steve Rogers shows a different method in several of his books*. He carves a solid wood block to the lines to the inside of the ribs. He then bends the ribs around the block, tacking them in place. Planking is glued on over the ribs and, after drying, the entire construction is pulled off the block.
Fair winds!

* e.g., "Model Boat Building: The Lobster Boat" and "Model Boat Building: The Menhaden Steamer"
 
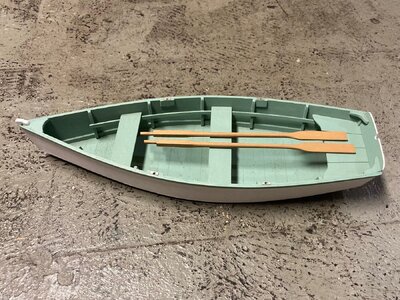
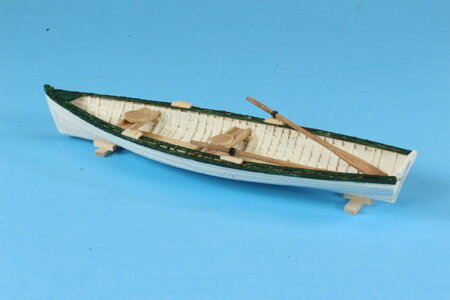
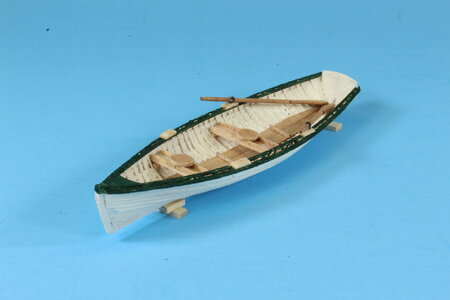
Well, I completed the Rangeley boat model.
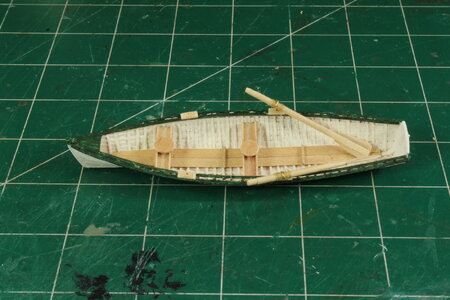
This view shows the interior and the oars. The circular seats on the thwarts helped the fisherman turn to work his line. These boats were used by sportsman fishing for trout in the Rangeley Lakes region of Maine.
Fig 13 - Completed boat.JPG
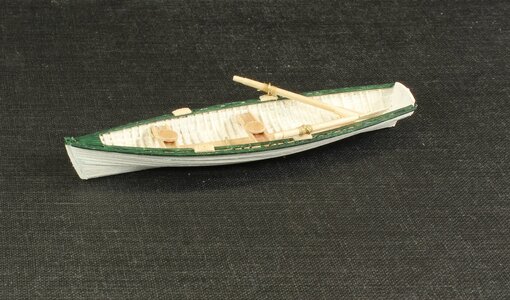
One last look. It is posed on a copy of the John Gardner book that inspired the build.
Fig 14 - Posed on a the book that inspired it.JPG
I may go back and create a fixture to build the double-ended version of the boat.
Pete
 
Well, I completed the Rangeley boat model.
Brother Pete:
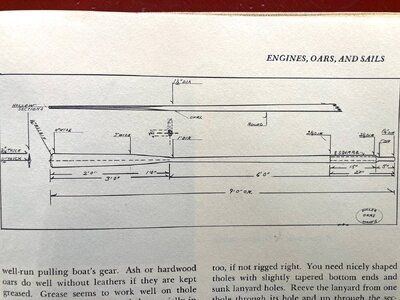
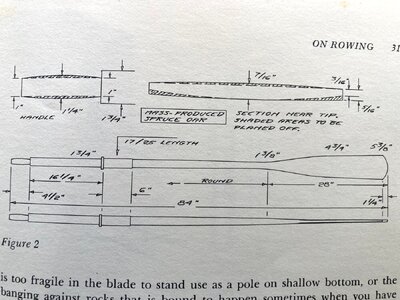
That's a fine, unique model! This isn't easy to say but your oars aren't worthy of the boat. They are very clunky and out of scale. The good news is that it's easy to fix. Below are dimensioned plans for oars that will allow you to fashion ones to scale. The first is by Pete Culler from his marvelous book "Skiffs and Schooners." The second is by Phil Bolger from "Small Boats." With a beam of 4', your Rangeley should carry oars of about 8'. So the Culler oars are too long at 9' and the Bolger oars are too short at 7', but the proportions of either would work. Also included is a pic of a 1:12 flattie skiff model with oars. Those oars are square on the inboard end of the loom.
Fair winds!

oar culler.jpgoar bolger.jpgflattie 1.jpg
 
AndyA,
I agree with your comments on the oars. I've struggled fashioning them and have thrown several away. I appreciate the information and I will try the Bolger design.
Pete
 
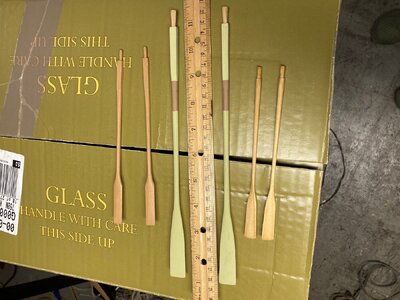
Ok folks. Thanks to AndyA, I went back and tried building new oars using the information he provided (Thanks, AndyA!)
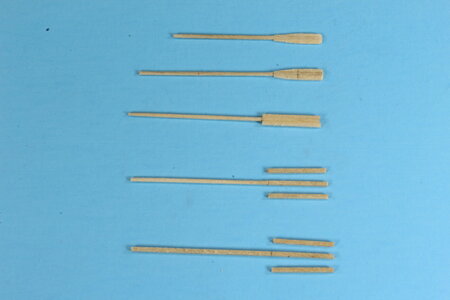
I found some scale 2X2 stripwood in my stash. Referring to the photo below and starting from the bottom:
I cut a length longer than needed (~10 scale feet). I also cut 2 pieces 3 ft long
Next, I rounded one end with various grits of sandpaper, but kept the right hand 3-ft squared
I glued the 2 pcs of 3-ft strips to the squared end to form the blade.
I cut the blade end to ~28" and ruff shaped the blade.
Finally, I cut the oar to 8 feet, carved a handle about 4-5" long and gave the whole thing more sanding.
Fig 15 - Oar Construction.JPG
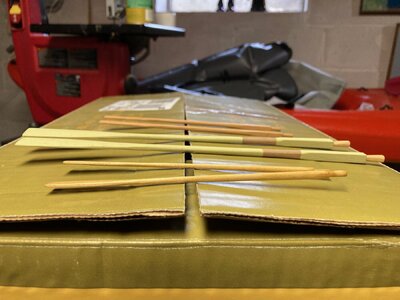
I stained the oars with an acrylic wash and mounted them (temporarily) to the boat.
Fig 16 - Side View.JPG
Fig 17 - Quarter View.JPG
Not perfect but I think a lot better than my earlier attempts.
While I was at it, I build another pair to replace the sad ones in a Banks dory I built some time ago..
I really appreciate the feedback from my bro, AndyA!
Pete
 
Not perfect but I think a lot better than my earlier attempts.
Indeed. We are pursuing progress, not perfection. One thing would bring your new oars closer to perfection is tapering. If you look at the drawings in post #11 and the model oars below, you'll see that they taper from the inboard end of the loom (1-3/4" or 2-1/4" on the drawings) down to the tip of the blade (7/16" or 1/2"). For that sort of work, I use some combination of a hobby knife, a little plane, and a large sanding block.
Fair winds!

oars 1.jpgoars 2.jpg
 
Back
Top