- Joined
- Sep 3, 2021
- Messages
- 5,176
- Points
- 738

Good question!Daniel,
When this project is complete will the Higgins be removable or permanently affixed to the fuselage?
 |
As a way to introduce our brass coins to the community, we will raffle off a free coin during the month of August. Follow link ABOVE for instructions for entering. |
 |
 |
The beloved Ships in Scale Magazine is back and charting a new course for 2026! Discover new skills, new techniques, and new inspirations in every issue. NOTE THAT OUR FIRST ISSUE WILL BE JAN/FEB 2026 |
 |

Good question!Daniel,
When this project is complete will the Higgins be removable or permanently affixed to the fuselage?
Hi Ron, I am going to attempt to use @Namabiiru excellent suggestion of placing rare earth magnets inside each structure. All other less desirable methods suggest glue or wire.Daniel,
When this project is complete will the Higgins be removable or permanently affixed to the fuselage?
Ha! I see your going to make me earn this Johan. The contour I came up with was based on the Higgins A-1 repair manual which I received in a PDF format. The PDF was 'locked' preventing me from scaling it directly, so I printed the two primary photos you see in my post #1. The narrative that came with the manual stated the stationing was on 3foot centers so BAM! I had my numbers to come up with a scale factor (full scale) to draw the structures up on my CAD program. See post #1 and you see where I wrote the factors based on using my scale of 40 at the bottom of each drawing. Once I had the CAD drawings at full scale, I needed a way to print them out at the models 1:48 scale. The solution was simple, scale down the extents of the cad drawing to 1:48 which means multiply everything by .020833 which then I sent to the programs print screen, telling the printer to use 1:1 scale and I get what you see on my post. So, through all this I am at the mercy of the correctness of the 1:48 model itself and as you might expect the matchup was less than perfect but close enough that a little sanding here and there made it work.I am looking forward to an in depth explanation of the fuselage contour conforming top failing of the life boat.

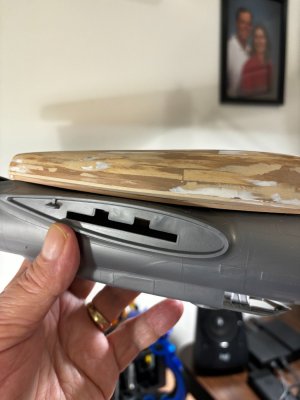
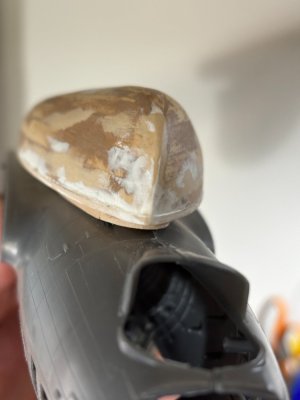

Ha! I see your going to make me earn this Johan. The contour I came up with was based on the Higgins A-1 repair manual which I received in a PDF format. The PDF was 'locked' preventing me from scaling it directly, so I printed the two primary photos you see in my post #1. The narrative that came with the manual stated the stationing was on 3foot centers so BAM! I had my numbers to come up with a scale factor (full scale) to draw the structures up on my CAD program. See post #1 and you see where I wrote the factors based on using my scale of 40 at the bottom of each drawing. Once I had the CAD drawings at full scale, I needed a way to print them out at the models 1:48 scale. The solution was simple, scale down the extents of the cad drawing to 1:48 which means multiply everything by .020833 which then I sent to the programs print screen, telling the printer to use 1:1 scale and I get what you see on my post. So, through all this I am at the mercy of the correctness of the 1:48 model itself and as you might expect the matchup was less than perfect but close enough that a little sanding here and there made it work.
I mentioned before there was a rubber foam seal on the real one which lined the top of the coming and if I can replicate that all minor irregularities are absorbed into it. Whew! feel like I just took a test.
View attachment 485457View attachment 485458
 , you passed!
No, I'm not planning on adding any kind of launching or releasing mechanism, for one thing I don't have any hard data for that, and it would be beyond the scope of my plans for now.From the pictures there appears to be a sort of sling mechanism to launch the boat. Are you planning to add that (working) to your model as well?


 I'm in!
Welcome Peter!All of the above.I'm in!
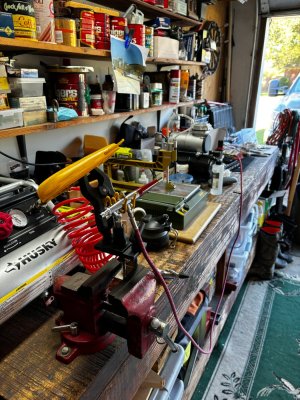
That looks very nice, Daniel. The detailed painting as well as the jigsaw-puzzle-garage.I have a weekend update here; my focus has been on painting from airbrushing to micro hand brushing. The air brushing has to be done in my garage where I also have my jig saw set up along with other tools compressors etc. This picture shows the temporary clutter that in and of itself would make a great photo for a 1500-piece jigsaw puzzle.
View attachment 486230
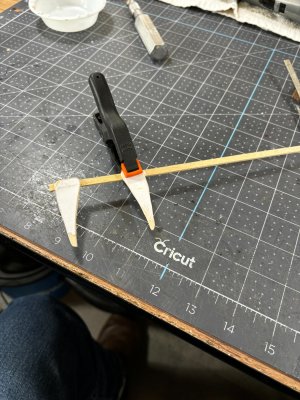
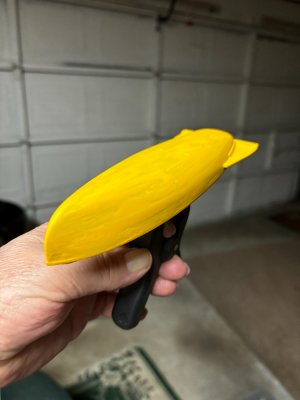
I really am a novice when it comes to model painting, as you can see, I did not plan very well prior to painting the yellow. The paint is so thin I will need to put 15 layers on it to cover the body fillers. I should have hand brushed some kind of thick undercoat of white or off white first to cover the blemishes. Next are the stabilizer fins I added, they were removable by the rescued once everyone was in the boat. You can also see Im on my 5th coat of paint and the fillers are starting to be covered.View attachment 486231View attachment 486232
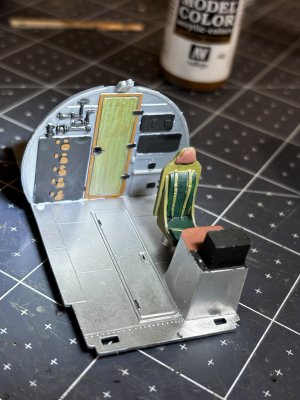
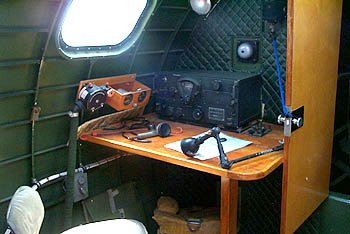
Next up is my attempt at hand painting small detail. I did spray on an under layer of metalized silver then hand painted the various colors you see. Shown is the radio operators' section where I started.View attachment 486233
All this area will be covered over when I glue up the fuselage, but I suppose it's good practice. The metallic silver clogged up my airbrush almost limitedly and my heart sank because I planned to air brush the wings and fuselage with it. Then it dawned on me I have three needle sizes with this brush so after trying the biggest size set up and an increase in pressure it flowed out perfectly! Big relief. Another great innovation of glueing (at least for me, not the plastic builder experts) long runs of plastic is ultra-thin fast setting liquid glues where you just touch the micro brush dipped in it onto a joint of two plastic pieces held together by hand and the glue will wick into the joint by capillary action. Now my only problem is figuring out which items to paint first then glue or vice versa.
Till next time hope you all enjoy.

Looking good, Dan.I have a weekend update here; my focus has been on painting from airbrushing to micro hand brushing. The air brushing has to be done in my garage where I also have my jig saw set up along with other tools compressors etc. This picture shows the temporary clutter that in and of itself would make a great photo for a 1500-piece jigsaw puzzle.
View attachment 486230
I really am a novice when it comes to model painting, as you can see, I did not plan very well prior to painting the yellow. The paint is so thin I will need to put 15 layers on it to cover the body fillers. I should have hand brushed some kind of thick undercoat of white or off white first to cover the blemishes. Next are the stabilizer fins I added, they were removable by the rescued once everyone was in the boat. You can also see Im on my 5th coat of paint and the fillers are starting to be covered.View attachment 486231View attachment 486232
Next up is my attempt at hand painting small detail. I did spray on an under layer of metalized silver then hand painted the various colors you see. Shown is the radio operators' section where I started.View attachment 486233
All this area will be covered over when I glue up the fuselage, but I suppose it's good practice. The metallic silver clogged up my airbrush almost limitedly and my heart sank because I planned to air brush the wings and fuselage with it. Then it dawned on me I have three needle sizes with this brush so after trying the biggest size set up and an increase in pressure it flowed out perfectly! Big relief. Another great innovation of glueing (at least for me, not the plastic builder experts) long runs of plastic is ultra-thin fast setting liquid glues where you just touch the micro brush dipped in it onto a joint of two plastic pieces held together by hand and the glue will wick into the joint by capillary action. Now my only problem is figuring out which items to paint first then glue or vice versa.
Till next time hope you all enjoy.
I believe the door to the radio compartment was also made out of wood. But, as you stated, once the fuselage is closed up you will see little if any of the radio compartment.I have a weekend update here; my focus has been on painting from airbrushing to micro hand brushing. The air brushing has to be done in my garage where I also have my jig saw set up along with other tools compressors etc. This picture shows the temporary clutter that in and of itself would make a great photo for a 1500-piece jigsaw puzzle.
View attachment 486230
I really am a novice when it comes to model painting, as you can see, I did not plan very well prior to painting the yellow. The paint is so thin I will need to put 15 layers on it to cover the body fillers. I should have hand brushed some kind of thick undercoat of white or off white first to cover the blemishes. Next are the stabilizer fins I added, they were removable by the rescued once everyone was in the boat. You can also see Im on my 5th coat of paint and the fillers are starting to be covered.View attachment 486231View attachment 486232
Next up is my attempt at hand painting small detail. I did spray on an under layer of metalized silver then hand painted the various colors you see. Shown is the radio operators' section where I started.View attachment 486233
All this area will be covered over when I glue up the fuselage, but I suppose it's good practice. The metallic silver clogged up my airbrush almost limitedly and my heart sank because I planned to air brush the wings and fuselage with it. Then it dawned on me I have three needle sizes with this brush so after trying the biggest size set up and an increase in pressure it flowed out perfectly! Big relief. Another great innovation of glueing (at least for me, not the plastic builder experts) long runs of plastic is ultra-thin fast setting liquid glues where you just touch the micro brush dipped in it onto a joint of two plastic pieces held together by hand and the glue will wick into the joint by capillary action. Now my only problem is figuring out which items to paint first then glue or vice versa.
Till next time hope you all enjoy.
Hello Peter, the learning curve is steep, and I've a long long way to go, but I believe that the results will be worth the effort.And air-brushing needs indeed a lot of practice.
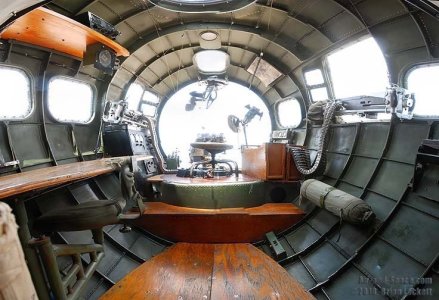
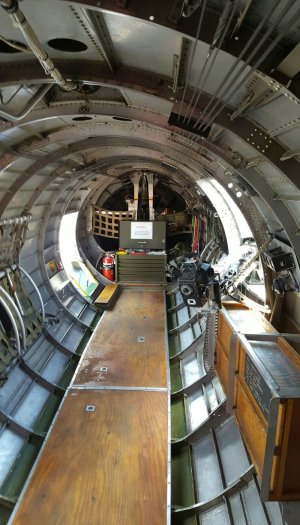
First, thank you for all those great pictures of the 17's interior. I will study them as I go along. At this point I am following the models paint scheme which specs all the level flooring to be Zinc Chromate. The model designers probably had novices like me in mind when they chose that color. Seeing as how everything will be hidden from eye view with the exception of what can be seen through the plastic windows, I will just stay within the instruction's parameters on the interior. My main focus will naturally be on the planes exterior and what will be its visual impact. Once again, I find myself trying to build beyond my skill level (due to lack of practical experience in paint and plastic) and produce an acceptable model to myself and as judged by my peers. Wow! I guess that's a long-winded way of saying no to the wood flooring.By the way, you painted the floors in an aluminum finish, but do you plan to add the wooden floorboards to the model?
Glad to have you along Stephan.I'm logged in with this one. We will see what you make out of this flying fortress.
Indeed, it is Paul.Learning (relearning?) news skills is part of the fun!
