• Ships of Scale has incorportated an extra level of security when you log In. Please follow on-screen prompts to acknowledge that you are not a robot via a "Check Box" or a "Pictorial Check Box Puzzle". This is needed due to higher level of AI Activity Security.
  • SUBSCRIBE TO SHIPS IN SCALE TODAY!

    The beloved Ships in Scale Magazine is back and charting a new course for 2026!
    Discover new skills, new techniques, and new inspirations in every issue.

    NOTE THAT OUR NEXT ISSUE WILL BE July/August 2026
  • Win a Free Custom Engraved Brass Coin!!!
    As a way to introduce our brass coins to the community, we will raffle off a free coin during the month of August. Follow link ABOVE for instructions for entering.

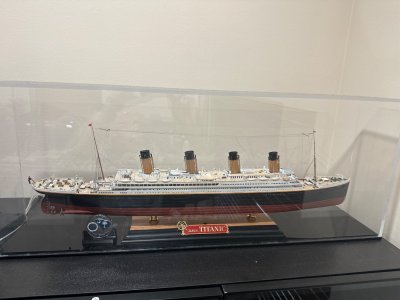
RMS Titanic minicraft 1:350 Scale

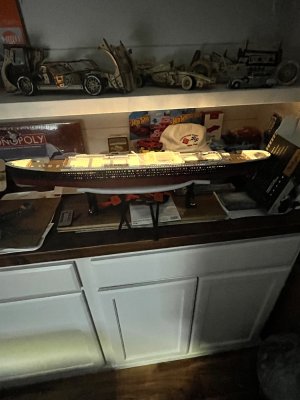
If you’re planning to light the Interior, and are using LED strips, as I did, one thing I use for a diffuser was large translucent straws. Worked great for dispersing the light and do go for the lower intensity as Edison lights, used in that era, were quite dull. Braunschweiger has a very good article on that. Although he used different lighting. Also, I built the 400 scale academy kit and used my own LEDs. It was the first ship I’ve built in many years. I read it for either battery or 9 V adapter to be used off the base. Also, I use fly tying thread for 90% of my rigging. In retrospect, I would’ve used a little bit more like or thread on areas that would take tension. I do recommend you buying the brass masts if you do not have them already. Should you need, I am happy to be of any assistance. Also, as you probably know, the center propeller should be a three blade not a four blade. I ordered 3-D printed propellers from D Stefan. We worked on properly designing the pitch and rotation of the propellers. My only issue was they were slightly larger than my scale so I’m sure they would work in your 1/350 scale and he has quite a few Titanic items in his inventory. Best part is he’ll work with you on perfecting anything you see that needs correcting.

 
I know it’s too late to tell you this, but I did order my Titanic upgrade from Flyhawk. The number was FH400001 it included wooden deck with docking bridge included, a plethora of PE and resin, including lifeboats, ventilators, turn brass bollards,etc. I don’t know if they make it in the one 1/350 scale,however it was a bargain and reduced my need to go searching everywhere for parts. Although I did order some PE from White Ensign and Tom’s. I hope some of this information will be of used to you.

image.jpg
 
I know it’s too late to tell you this, but I did order my Titanic upgrade from Flyhawk. The number was FH400001 it included wooden deck with docking bridge included, a plethora of PE and resin, including lifeboats, ventilators, turn brass bollards,etc. I don’t know if they make it in the one 1/350 scale,however it was a bargain and reduced my need to go searching everywhere for parts. Although I did order some PE from White Ensign and Tom’s. I hope some of this information will be of used to you.

View attachment 635679

Very nice job. Thank you for your advice. I did get the Minicraft set from Tom’s Model Works and Gold Metal Models PE. I also relied on China 3D with their set of 3d printed structures and equipment set. They just started with the walls and bulkheads for all of the kit!

Thank you for you encouragement
 
I know it’s too late to tell you this, but I did order my Titanic upgrade from Flyhawk. The number was FH400001 it included wooden deck with docking bridge included, a plethora of PE and resin, including lifeboats, ventilators, turn brass bollards,etc. I don’t know if they make it in the one 1/350 scale,however it was a bargain and reduced my need to go searching everywhere for parts. Although I did order some PE from White Ensign and Tom’s. I hope some of this information will be of used to you.

View attachment 635679

How did you secure the cable lines to the funnels?

I have the China 3D funnels and they are brittle
 
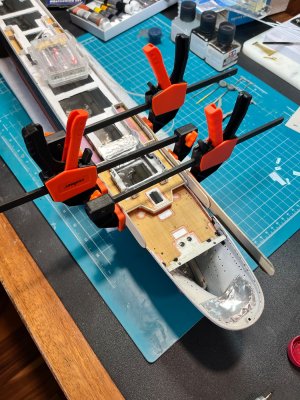
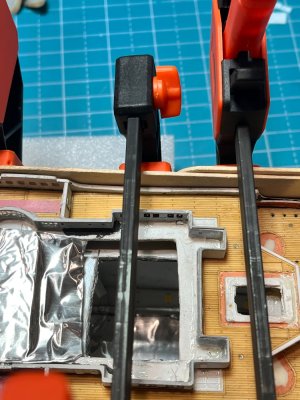
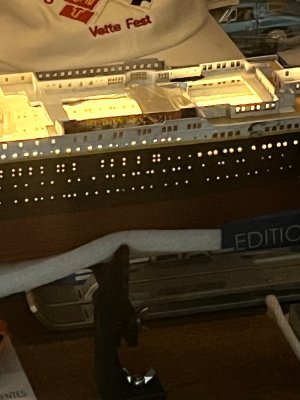
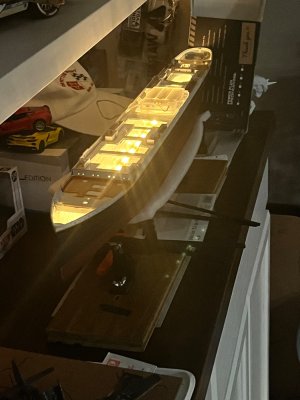
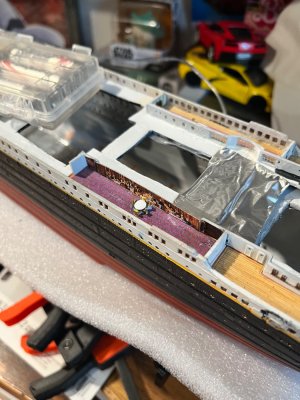
Well, I finally got the B/C deck attached and light leak tested. There were more waves on the side of the kit hull than the Atlantic Ocean the night the Titanic sank :)

IMG_3638.jpegIMG_3639.jpeg

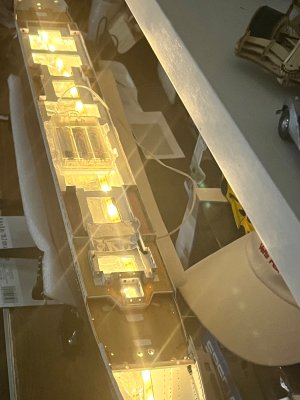
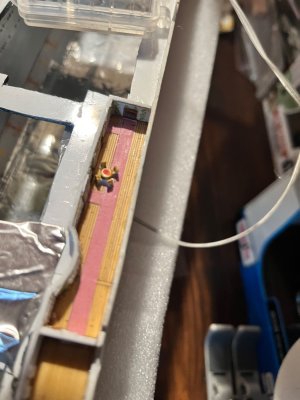
Light test revealed that there were no leaky lights were it shouldn’t be.

IMG_3829.jpegIMG_3830.jpegIMG_3832.jpegIMG_3833.jpeg

I will have some touch up to do in the upper superstructure where I had some adhesive leak from an opening (window) that smear some of my white paint.

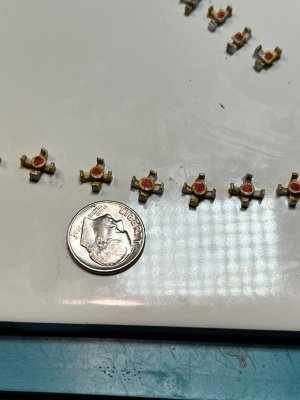
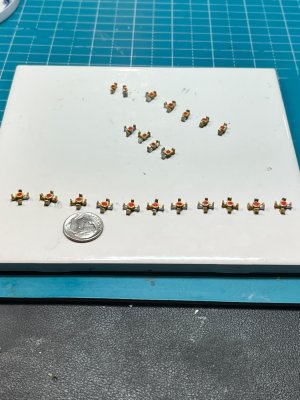
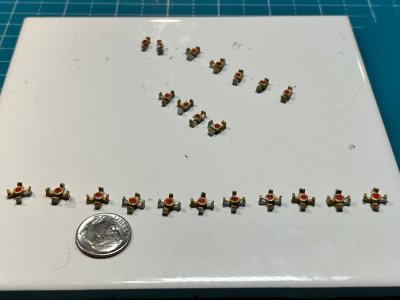
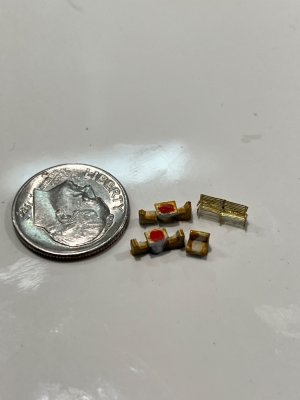
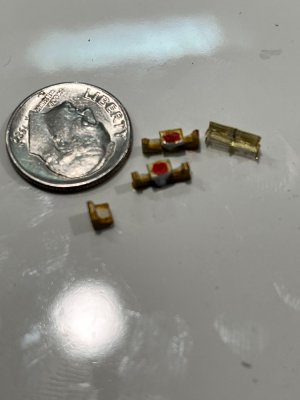
I re-shaped the kit benches the Rivet-Counter guide suggested originally to cut into 3rds. I cut then to about 2 mm width so that it is more into scale (the original cut pieces where more the size of couches when compared to the GMM or Tom’s MW deck benches and lounge chairs). I cleaned up the tables and then decided to glue the chairs to the table so that when I installed the final pieces on the wood veneer deck, it is a one shot deal instead of fiddling with each table and chair piece individually.

Seeing the table units

IMG_3652.jpegIMG_3653.jpegIMG_3654.jpeg

Now seeing the re-worked tables/chairs units compared in scale to GMM bench.

IMG_3651.jpegIMG_3650.jpeg

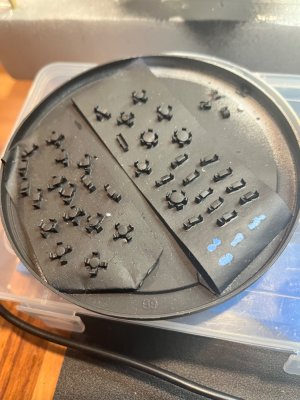
I finished by priming the units black. This is so when I paint the correct colors for each of the restaurant’s unique chairs, I can paint in the legs and leave the negative space black.

IMG_3828.jpeg

And here you can see the table units in their respective restaurants (prior to priming).

IMG_3656.jpegIMG_3657.jpeg

I am continuing the benches and lounge chairs building so the I can add them onto the A Deck promenades when I attach that deck. It’s tedious but if I can knock out a lot of them, then I can concentrate on the fun stuff.

After seeing InkMots incredible recent RMS Titanic in 1/200 scale posts of the Navigation Bridge ceiling beams, I plan to see if it’s feasible to add beams on the 1st Class A Deck promenades ceilings. But before that, I need to detail the Cafe Parisien and Ala Carte Restaurant areas.

Immediately next will be then finishing of details of the for’castle and poop deck sections.

I am also taking some time to finish a hyper detailed Eduard’s FW 190 A-5 light fighter diorama in our Super-Detail Static Models forum (Please visit the post).

Happy Modeling - PeteG

IMG_3829.jpeg

IMG_3830.jpeg

IMG_3832.jpeg

IMG_3833.jpeg

IMG_3828.jpeg


IMG_3638.jpegIMG_3639.jpeg

Light test revealed no light leaks in the wrong areas.

IMG_3657.jpeg

IMG_3656.jpeg

IMG_3654.jpeg

IMG_3653.jpeg

IMG_3652.jpeg

IMG_3651.jpeg

IMG_3650.jpeg

IMG_3638.jpeg

IMG_3639.jpeg
 
Last edited:
Back
Top