- Joined
- Aug 14, 2018
- Messages
- 825
- Points
- 403

Thank you Paul, It really means a lot to me that you like her.Love your work, Jack! Every posting is a feast of details!
Mianta is fearr JJ..
 |
As a way to introduce our brass coins to the community, we will raffle off a free coin during the month of August. Follow link ABOVE for instructions for entering. |
 |
 |
The beloved Ships in Scale Magazine is back and charting a new course for 2026! Discover new skills, new techniques, and new inspirations in every issue. NOTE THAT OUR FIRST ISSUE WILL BE JAN/FEB 2026 |
 |

Thank you Paul, It really means a lot to me that you like her.Love your work, Jack! Every posting is a feast of details!

Cheers Peter, she is coming on nicely.Beautiful detailing Jack.


A very nice scratch build A-frame, Jack. It’s nicely detailed.The ‘A’Team, Frame
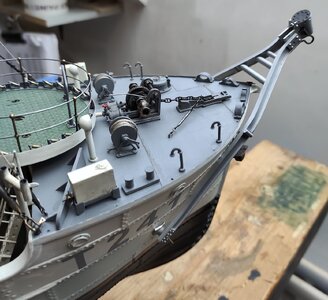
The last piece of actual construction is the ‘A’ frame boom supporting the SA Type A Mark II pneumatic hammer. The air driven ‘road hammer’ proving more reliable than the electric ‘Kango’ and was use right up to the end of the war. The white metal bits from Caldercraft looked very good in this case and I would have happily used them except they proved to be too short. I think not Caldecraft fault this time as their parts measure the same as the Lambert drawings they look to have copied. I have noticed a few inaccuracies in these drawings in the past but other wise they are very good.
So I thought it better to have a go and make one from scratch , for the main struts I used some styrene ‘I’ frames that I bent using a hot air gun. I think it turned out ok.
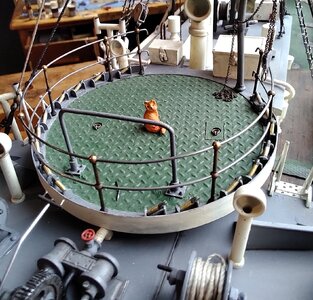
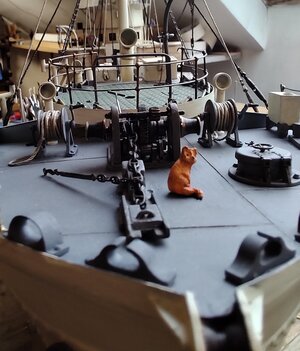
As well as the frame I have added the forecastle deck detail including an escape hatch, a bow fairlead and a anchor chain stop, none of these where included with the kit. The anchor I painted as if it had a bit of rust.
On the hull I have added the ships pennant number and started to add the depth markings, they are meant to be 1/48 scale but look big to me, so I left them to have a think. The finished ‘A’ frame will not be added until I ‘weather’ the hull a bit.
Here are some more photographs of my progress. Rigging next.
View attachment 444685View attachment 444686View attachment 444687View attachment 444688View attachment 444689View attachment 444690View attachment 444691View attachment 444692View attachment 444693View attachment 444694View attachment 444696
Cheers JJ..
View attachment 444695


You flatter me Paul.Once again this is simply superb modeling Jack!
True storyOnce again this is simply superb modeling Jack!


Thank you Paul for your encouraging comments. I think I am lucky in that by building a ship from the WW2 era I have a lot of photographs to look at and this gives me an idea of what I need to add. I must say I am getting to like building in this larger scale and might be tempted to build another, maybe something from WW1 next. As for the hull, I will be adding a few bumps and bruises near the end but I have to add some depth markings and other odds and sods first. All along the deck I have tried to graduate the 'grime' the boat getting dirtier the further towards the stern you go. Sir Kay spent her whole service life in British home waters so I wont be turning her into a rust bucket like the photos of some that returned from Artic convoy duty.I have to say that I'm starting to feel sort of overwhelmed by the level of detailing. I'm building at the same scale, but you manage a level of realism that escapes me.
Question: the hull looks too pristine - am I missing something?

Pleased to allay your concern. JJLooking forward to seeing some grime on the hull- that will resolve my 'concern.'
Good evening Jack. For a moment I thought you had gone down to the docks and taken some pics of the real thing. Awesome detail. Cheers GrantHi folks,
Got a bit done this evening that I had been putting of for awhile.as I feared that I might not be able to make the little cable tensioners close enough to scale as they are quite small at 18 inches in reality, about 9.5mm to scale. the best I could make using 1mm dia. brass tube was 10mm from end to end. To look realistic I cut a 4x0.5 mm slot through the tube to represent the levering slot and fixed a small eyelet at each end. I needed these tensioners as strung between the last four struts is a flexible steel wire cable ( silver thread) rather than the normal rails. In real life the flexible cable is there so that the struts can be detached in order to facilitate mooring. Although mine are fixed in one position I think they look good. That's the forecastle about completed.
Some pics..
View attachment 445107View attachment 445108View attachment 445109View attachment 445110View attachment 445111View attachment 445112View attachment 445113View attachment 445114
Cheers JJ..


A nice and complex rigging on the masts, Jack. It is completely in harmony with the other details. And Ging is in full control at all places to find the rats.Hi Folks,
It took a while but I have now finished and rigged the fore mast. I had not thought about it, but it is a bit obvious that the cables, being 'steel', are a lot thinner than their hemp counterparts and to my surprise I found myself using 'steel rope' a lot thinner than expected despite the 1/48 scale. It was quite a task (for me) to get all the horizontal RT aerial cables balanced with the same nice belly to them. For the very thin RT leads I used stuff called EZ line, used by train modelers, it is very thin and works well, joined with a spot of super glue. That's most every thing built now, bar maybe a grindstone as seen sitting beside the kite balloon winch. I decided to run with the first winch I built even though the one Peter showed me fitted the silhouette of T242 really well. I took a look at the web page describing that winch as a barrage balloon winch but it looked too insubstantial to my eye to be used with a balloon that would have been eighty or so feet long. I stand to be corrected.
Some photographs
View attachment 446984View attachment 446985View attachment 446986View attachment 446987View attachment 446988View attachment 446990View attachment 446991View attachment 446993View attachment 446994
Oh nearly forgot!
My last build (HMS Scarbourgh) was plagued with rats, so to ensure Sir Kay remains rodent free I have installed a Lords patented ball bearing rat trap.
View attachment 446995View attachment 446996
His name is Ging!
Cheers JJ..
