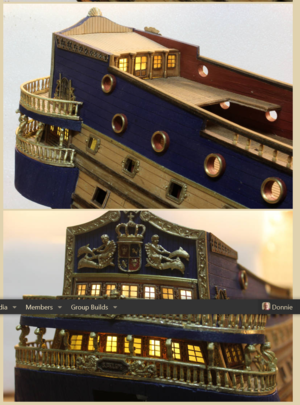
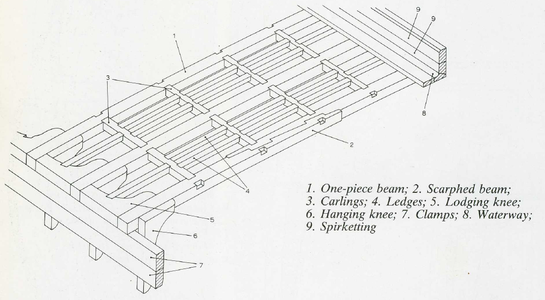
San Francisco II: Adding Lower Decks... Call me mad: I Don't Mind. I'm Doing It.

Joined
Jan 29, 2022
Messages
99
Points
78

Location
Cumbria, that's in England.
I'm referring to the Artesiana Latina kit Of 'San Francisco II' (San Francisco De Florencia).

I decided to build this more accurately and in more detail than the kit supplied. I'm not an experienced wooden ship modeller, but I am a mechanical design engineer... is that enough? Anyway, totally undetermined by the fact that I assembled the keel and 'false' bulwarks, main decks etc, years ago, I (stupidly?) decided to add all of the lower decks, cannon, barrels... ooh. I even thought about making lanterns lit by LEDs... enough of the fairy tales.

It wasn't even enough to learn that some of the false bulwarks would clash with cannon. I may have to accept compromises, but I'm trying to get a ship with the gun ports open, so that I can look through the ship and see roughly what should be there... that's the engineer speaking.

My first step is to add whipstaff steering that works. Got that. It'll work. I've then got to open up the lower decks whilst retaining the strength of the model. I intend to do this in stages.... one deck/compartment at a time. Here's step 1 in the photo... or step 'a few', maybe.

I intend to reinforce the structure with the decks, one at a time. I'll add cross-wise beams that aren't seen through the gun ports to strengthen the model beam-wise. The decks will strengthen it keel-wise. Doing it a bit at a time, I'll end up with a structure stronger than the original.... it just takes a bit of work.

I'm not so naive that I believe that I can make the interior exactly authentic, but strength and practicality win the day. My goal is to make her 'reasonably realistic' and much more detailed.

I'll post more of this if it's of interest to anybody.
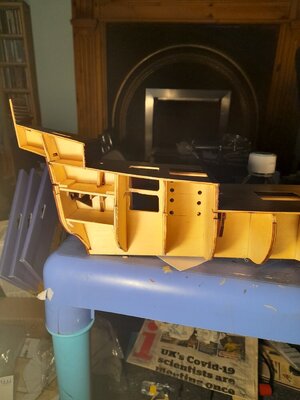
Start Of Lower Decks.jpg
 
Yes, I am interested. If you go with LED's then look up Evans Designs as they have LED's down to like 1mm square and up to 5mm square and are prewired.

 
Thanks for the interest. Those LEDs may be cool. The lighting, though, depends on just how well I think I've got to illuminate. Primarily, I just want to make what is below cecks as being realistic. Actually, since this kit is not meant to show the lower decks, I'm being... enthusiastic. Doing it anyway.

Donnie, if you've illuminated ships (and I think you have), I can't help but worry about the 'bulbs' failing. I know it's a bit ahead, but if I want to do it, I need to plan now. I wanted to add nano LEDs to a few discrete points, inside home-made lanterns. I was thinking micro brass tube to slide the replacement 'bulbs' into place. What do you think?
 
Speaking of 'mad' shipbuilding... I commend the following to you:

 
That's my kind of madness. For me, the idea of taking a model that isn't designed to show lower decks and retro-fitting it to do so, is a bit stupid (and needs a bit of thought). It's fun, though and that's what it's about, I think. I'm no expert model maker, just an old engineer who's very enthusiastic, loves the kit he has but thinks it deserves to be more spectacular.
 
Let me think more. I am away from home at the moment. You might need to explain to me a little more about using the brass tube to slide the LED’s in place. I assume the brass tube is part of the latern assembly and u want the wiring to go up through?
 
Let me think more. I am away from home at the moment. You might need to explain to me a little more about using the brass tube to slide the LED’s in place. I assume the brass tube is part of the latern assembly and u want the wiring to go up through?
No, though I see why you'd assume that. My idea is to carve a few deck lanterns, since I can't buy any at a reasonable scale. I'll hang the lanterns below deck close to bulkheads or above piles of barrels. The brass tubes will be run from a point close to the keel that will be hidden by any stand I build for the ship. I would gently bend them and run them like electrical conduit to emerge immediately below the lanterns, but the tubes themselves will be out of sight. I'll end up with a hidden set of conduits like an upturned set of tree roots.

This will allow me to install the switch, resistors and power supply in the main plynth of the base. The nano LEDs are connected there and can be fed up through the the individual tubes until they emerge inside the lanterns. This way I can replace each LED without having to access the inside of the model at all. All you'll see is one little on/off switch in the base.

I'm only intending to add 3 or 4 lanterns belowdeck, maybe a couple either end of the main deck, Plus 1 for the stern navigation light. I reckon that 2mm brass tube will be sufficient to slide the led and wires to where they're needed.That would be a cluster of 7 tubes in a hexagon pattern, so will be contained within a radius of 6mm... easily hidden inside one of the supports for the ship's hull.

I don't want bright lights at all. I'll add resistors to the circuit, or maybe an adjustable potentiometer, so I can vary the brightness until I'm happy. I'll use yellow/amber light to try to create a realistic level of light from oil lamps. Another advantage of this approach is that I can wire the lamps in parallel, rather than series, since all of the required wiring is contained in the base. It would make no sense to wire in series, especially since one LED failure would need me to do trial and error bulb replacement. Parallel means I know which LED needs to be replaced.

I even wanted to add a Marie Rose style brick hearth and cooking pots and I thought that flickering LEDs in red and yellow would simulate flames... then I found that the hearth was usually located in the hold, which I have no intention of showing, except for ladders down from the lower gun deck... shame.

Any ideas will be welcome... as I said, I'm no expert modeller. I'm just thinking as a design engineer, but I realise that my skills in designing process plant and equipment may not exactly transfer to ships of scale! It's more of a starting point for what may be possible.

Thanks for your interest and support... it gives me more motivation to go further than I otherwise may have done. Much appreciated. I love this website.

I just adore the concept of light shining through the gun ports and up onto the sails at night through the deck gratings, casting a blend of direct light from the weather deck lanterns and indirect, chequered light from the gratings.

Sorry for the long post... I get stupidly enthusiastic at times!
 
I like long post -
so, I see now what is going on - wow - scale conduit - nice !!! I added lights to the gallery in my San Felipe - I put a switch to turn it on and off. I have to hunt down the post that I made on it. This was my first (and probably only lighting project - HA) - not sure if I want to tackle this again or not. You are doing great by your planning ahead and it can be just as fun to plan. I am an Engineer as well. My occupation is Radio Studio Engineering.

1645893431723.png
 
Donnie, again you are fuelling my enthusiasm! Beautiful. Ooh. That's what I'm after!

I'll post pictures of the conduits, as I install them. It could be useful for others, especially since I don't see it working perfectly first time, so I'll have to perfect it. I have to plan ahead because this all has to be in place and working before I even start the hull planking. I'm a bit nervous about doing this, but I'll show my work, if it helps.

So far, I'm drilling/chiselling/reinforcing the belowdeck area. It's starting to look good to adapt the ship to show most of the lower decks, whilst retaining (or maybe even improving) the strength of the structure. That gives me the impetus to plough ahead with the lighting... one won't work without the other!

Off topic: I could have used you when I made a mod for Skyrim Special Edition. Myself and my daughter did the voice acting and I've got a half-decent mic, backed up by mounting it on a heavy Turkish marble chessboard, of all things, with iso-accoustic Orea mounts under it... the mounts almost entirely removed the low frequency hum I was getting from the PC fans I have iso-accoustic AV mounts under my HiFi speakers and they not only improve the sound quality, they virtually eliminate ultra low bass transmission to my neighbour's house. This means that I can play the Pink Floyd 'Comfortably Numb' guitar solo to the max that my NAD amp can cough up. Sweet. This is not an ad... these things are good. I hope my audio for the mod was good, but I'm sure you could have done better with my raw files than I did using Audacity.
 
No, though I see why you'd assume that. My idea is to carve a few deck lanterns, since I can't buy any at a reasonable scale. I'll hang the lanterns below deck close to bulkheads or above piles of barrels. The brass tubes will be run from a point close to the keel that will be hidden by any stand I build for the ship. I would gently bend them and run them like electrical conduit to emerge immediately below the lanterns, but the tubes themselves will be out of sight. I'll end up with a hidden set of conduits like an upturned set of tree roots.

This will allow me to install the switch, resistors and power supply in the main plynth of the base. The nano LEDs are connected there and can be fed up through the the individual tubes until they emerge inside the lanterns. This way I can replace each LED without having to access the inside of the model at all. All you'll see is one little on/off switch in the base.

I'm only intending to add 3 or 4 lanterns belowdeck, maybe a couple either end of the main deck, Plus 1 for the stern navigation light. I reckon that 2mm brass tube will be sufficient to slide the led and wires to where they're needed.That would be a cluster of 7 tubes in a hexagon pattern, so will be contained within a radius of 6mm... easily hidden inside one of the supports for the ship's hull.

I don't want bright lights at all. I'll add resistors to the circuit, or maybe an adjustable potentiometer, so I can vary the brightness until I'm happy. I'll use yellow/amber light to try to create a realistic level of light from oil lamps. Another advantage of this approach is that I can wire the lamps in parallel, rather than series, since all of the required wiring is contained in the base. It would make no sense to wire in series, especially since one LED failure would need me to do trial and error bulb replacement. Parallel means I know which LED needs to be replaced.

I even wanted to add a Marie Rose style brick hearth and cooking pots and I thought that flickering LEDs in red and yellow would simulate flames... then I found that the hearth was usually located in the hold, which I have no intention of showing, except for ladders down from the lower gun deck... shame.

Any ideas will be welcome... as I said, I'm no expert modeller. I'm just thinking as a design engineer, but I realise that my skills in designing process plant and equipment may not exactly transfer to ships of scale! It's more of a starting point for what may be possible.

Thanks for your interest and support... it gives me more motivation to go further than I otherwise may have done. Much appreciated. I love this website.

I just adore the concept of light shining through the gun ports and up onto the sails at night through the deck gratings, casting a blend of direct light from the weather deck lanterns and indirect, chequered light from the gratings.

Sorry for the long post... I get stupidly enthusiastic at times!
Where do you take the exact information of how to build the hearth? which books / articles? Thank you
 
Speaking of 'mad' shipbuilding... I commend the following to you:

LOL! Hold my beer....
 
I'm referring to the Artesiana Latina kit Of 'San Francisco II' (San Francisco De Florencia).

I decided to build this more accurately and in more detail than the kit supplied. I'm not an experienced wooden ship modeller, but I am a mechanical design engineer... is that enough? Anyway, totally undetermined by the fact that I assembled the keel and 'false' bulwarks, main decks etc, years ago, I (stupidly?) decided to add all of the lower decks, cannon, barrels... ooh. I even thought about making lanterns lit by LEDs... enough of the fairy tales.

It wasn't even enough to learn that some of the false bulwarks would clash with cannon. I may have to accept compromises, but I'm trying to get a ship with the gun ports open, so that I can look through the ship and see roughly what should be there... that's the engineer speaking.

My first step is to add whipstaff steering that works. Got that. It'll work. I've then got to open up the lower decks whilst retaining the strength of the model. I intend to do this in stages.... one deck/compartment at a time. Here's step 1 in the photo... or step 'a few', maybe.

I intend to reinforce the structure with the decks, one at a time. I'll add cross-wise beams that aren't seen through the gun ports to strengthen the model beam-wise. The decks will strengthen it keel-wise. Doing it a bit at a time, I'll end up with a structure stronger than the original.... it just takes a bit of work.

I'm not so naive that I believe that I can make the interior exactly authentic, but strength and practicality win the day. My goal is to make her 'reasonably realistic' and much more detailed.

I'll post more of this if it's of interest to anybody.
View attachment 293276
Yes, please keep posting on your progress. I have SF II in a box awaiting construction, and your build log will be helpful. I am a marine engineer, so we have something in common. The frame/bulkhead locations in kits often conflict with gun carriages, usually so close to a carriage that the gun tackle on one side cannot be rigged. Any changes you add with some scratch building are improvements.
 
Last edited:
Back
Top