
-

SUBSCRIBE TO SHIPS IN SCALE TODAY!
The beloved Ships in Scale Magazine is back and charting a new course for 2026!
Discover new skills, new techniques, and new inspirations in every issue.
NOTE THAT OUR NEXT ISSUE WILL BE July/August 2026 -

Win a Free Custom Engraved Brass Coin!!!
As a way to introduce our brass coins to the community, we will raffle off a free coin during the month of August. Follow link ABOVE for instructions for entering.


You are using an out of date browser. It may not display this or other websites correctly.
You should upgrade or use an alternative browser.
You should upgrade or use an alternative browser.
Santìsima Trinidad 1:84 by Artesania Latina - Build log


I recovered the 2 mm Amati blocks and used them on the smaller guns. Here's the result: on the left, the 3.8 mm blocks, on the right the new ones


It seems like a much more balanced effect to me, so I'll use them to replace those already installed on the smaller guns and install them on all the carronades.
Conversely, I decided to leave the supplied blocks already installed on the larger guns, since these are placed on the lower deck; they're almost entirely obscured by the upper deck, so these details are practically invisible.


A very nice upgrade! But not so easy to work with!
Dear all, I tried to finish the hull planking before going to the beach, but global warming deniers be damned, it's 38°C (98°F) here!
Even with the air conditioning on full blast, you lose concentration, and these are the results...

Nothing serious, I'm just annoyed that I've evened the score with my wife, who cut a tendon in her thumb with gardening shears last year... I'll let you imagine the comments!
See you in September, happy holidays everyone!
Even with the air conditioning on full blast, you lose concentration, and these are the results...
Nothing serious, I'm just annoyed that I've evened the score with my wife, who cut a tendon in her thumb with gardening shears last year... I'll let you imagine the comments!
See you in September, happy holidays everyone!
Hello everyone!
After a scorching summer, I’ve finally reopened my shipyard. Actually, taking advantage of the cool air in my basement workshop, I used the break to finish preparing all the cannons. After that, I focused on completing the hull, with the results shown below.
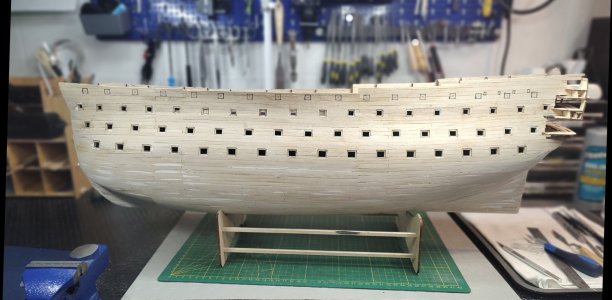
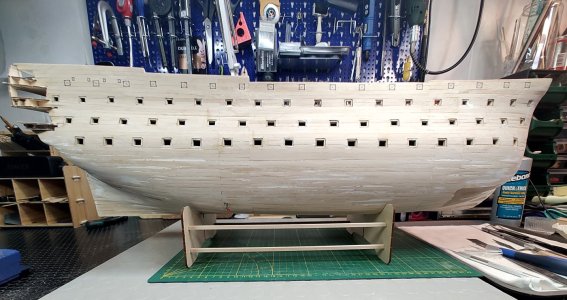
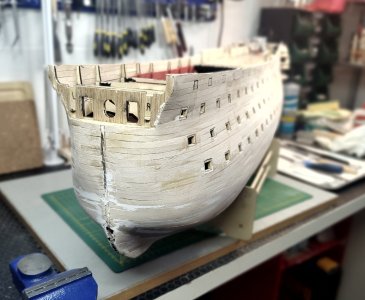
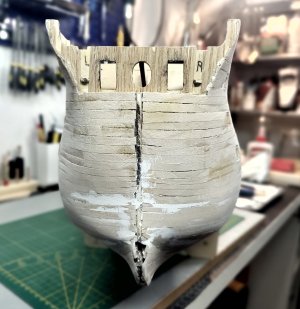
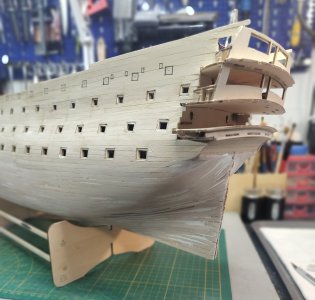
I’d like to share a few observations:
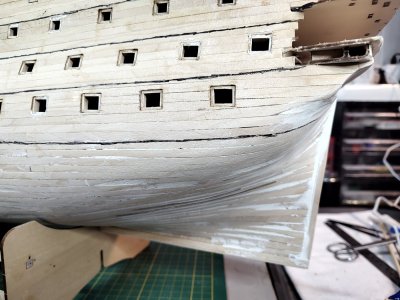
1. First of all, this was my first experience building a single-planked hull, and the process left me rather perplexed.
2. I found it difficult to work with the 2mm-thick planks, particularly regarding the curvature and the cutting and shaping of the pieces (see my previous post...).
3. I am not at all satisfied with the result; it would be completely unacceptable if the hull were to remain as it is, without any cladding or paint.
4. To achieve a passable shape, I had to use a lot of wood filler and do extensive sanding, especially on the lower part of the bow.
5. Considering that the entire submerged section of the hull will be copper-plated, the upper sides are largely taken up by gun ports and wales (which have yet to be installed), and the unclad areas will be fully painted anyway, I expect an acceptable final result (though I might still touch up exposed areas with 0.5mm planks before painting).
6. In any case, I have the utmost admiration for fellow modelers who manage to create high-quality single-planked hulls (I’ve seen incredible examples on the forum), but I’ve decided right now that for future models, I will always use double planking—even on kits designed for single planking. The cost of additional high-quality 0.5 mm thick strips is well within my budget... especially since it saves me a lot of hassle!
After a scorching summer, I’ve finally reopened my shipyard. Actually, taking advantage of the cool air in my basement workshop, I used the break to finish preparing all the cannons. After that, I focused on completing the hull, with the results shown below.
I’d like to share a few observations:
1. First of all, this was my first experience building a single-planked hull, and the process left me rather perplexed.
2. I found it difficult to work with the 2mm-thick planks, particularly regarding the curvature and the cutting and shaping of the pieces (see my previous post...).
3. I am not at all satisfied with the result; it would be completely unacceptable if the hull were to remain as it is, without any cladding or paint.
4. To achieve a passable shape, I had to use a lot of wood filler and do extensive sanding, especially on the lower part of the bow.
5. Considering that the entire submerged section of the hull will be copper-plated, the upper sides are largely taken up by gun ports and wales (which have yet to be installed), and the unclad areas will be fully painted anyway, I expect an acceptable final result (though I might still touch up exposed areas with 0.5mm planks before painting).
6. In any case, I have the utmost admiration for fellow modelers who manage to create high-quality single-planked hulls (I’ve seen incredible examples on the forum), but I’ve decided right now that for future models, I will always use double planking—even on kits designed for single planking. The cost of additional high-quality 0.5 mm thick strips is well within my budget... especially since it saves me a lot of hassle!

Whew.....she is a beast of a ship. Looking good Enea. Cheers Grant
Thanks Grant, but I'm not really satisfied. I hope it'll be better with the bow and keel, that I'm installing now...Whew.....she is a beast of a ship. Looking good Enea. Cheers Grant

I feel your pain. The one thing I have learned is that the upside is the more hulls you build the better you get. The shaping of the ribs is so important before the planking goes on. When I built the Vespucci the smoothness of the hull was frictional due to the painting. The glossier the paint the more it shows every little dent. You’re doing pretty good.
I am currently installing the keel and the bow, and to trim the coverings applied to both sides, I used my new ultrasonic cutter extensively for the first time.
It is a fantastic tool for this type of work because it allows for precise cuts with absolutely no effort—and, above all, requires only minimal pressure on the pieces being trimmed, thereby preventing the glue from failing at any point. I highly recommend it to everyone!
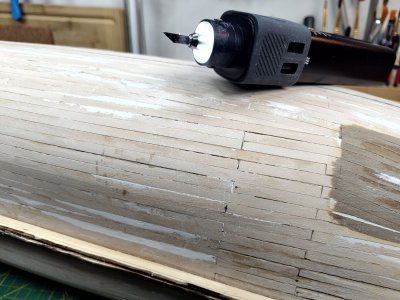
It is a fantastic tool for this type of work because it allows for precise cuts with absolutely no effort—and, above all, requires only minimal pressure on the pieces being trimmed, thereby preventing the glue from failing at any point. I highly recommend it to everyone!
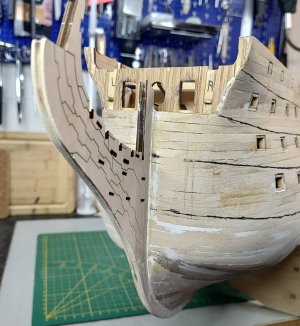
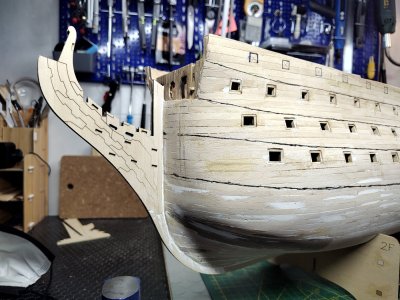
I usually study the upcoming stages of my model builds so I can prepare in advance and acquire any necessary materials. I examined the copper plating supplied with the kit and didn't like it at all; it consists of a self-adhesive strip designed to simulate copper, which requires a special tool to emboss the rivet details, and I have serious doubts about how well it would stay in place once applied.
In contrast, the Mantua Models *Victory* kit came with real copper plates; applying them one by one required a great deal of patience, but the final result was excellent.
I have some left over and could use them—buying more if needed—but the scales differ (1:78 for the *Victory* vs. 1:84 for the *Santísima Trinidad*), so I feel the effect wouldn't look realistic.
Does anyone know where I could get copper plates in 1:84 scale, or something close to it?
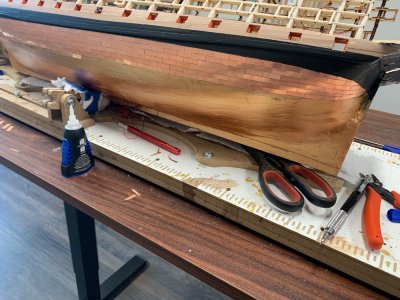
Check out Amati. I bought some from Age of Sail here in the US.
Unfortunately, Amati no longer has it in their catalog. It would have been very convenient for me, since I live 80 km from their warehouse.Check out Amati. I bought some from Age of Sail here in the US.
Thanks
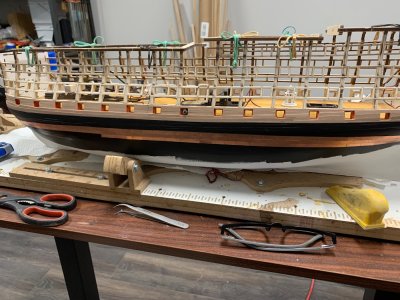
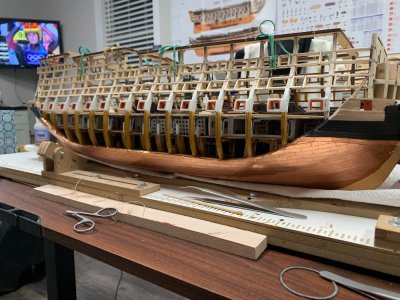
Age of Sail in California looks like they have 2 different sizes in stock. I’ve used them and there great. It would be worth a little extra cost and wait time but check them out.
I used them instead of the copper tape on my HMS Victory Anatomy
I used them instead of the copper tape on my HMS Victory Anatomy
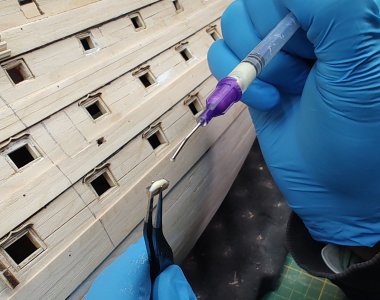
To install the components that make up the ladders on the sides, I decided that Titebond glue was the best solution; it provides just enough time to adjust the positioning of each piece, dries quickly, and can be sanded and painted. Given the tiny size of the parts—and the need to avoid using too much glue—I used a small syringe to apply it, which worked very well.
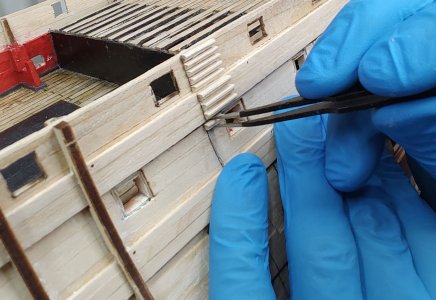
Once the installation of the hull reinforcements at the bow and the ladders on the sides was complete, I applied the first coat of primer to the entire hull.
Given that half of the hull is to be clad in copper and the other half painted in three different colors, this primer serves to create a more uniform surface, ready for both the adhesive and the paint.
Furthermore, in my view, the appearance of the hull is finally much more satisfactory, and the flaws inherent in the single-planking technique are significantly less noticeable.
I can’t wait to see it finished with the copper cladding and the paint!
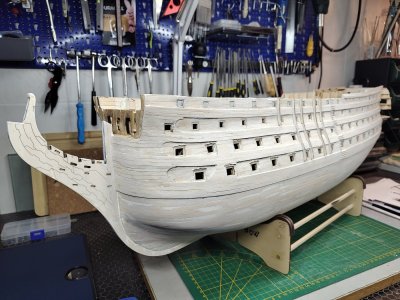
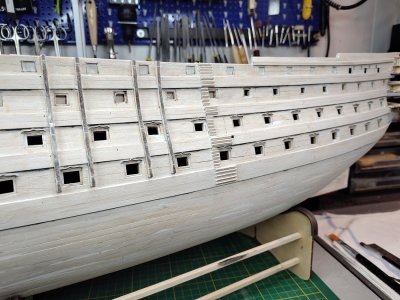
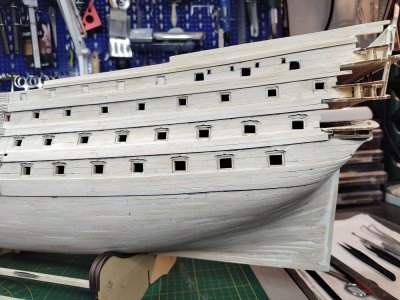
Given that half of the hull is to be clad in copper and the other half painted in three different colors, this primer serves to create a more uniform surface, ready for both the adhesive and the paint.
Furthermore, in my view, the appearance of the hull is finally much more satisfactory, and the flaws inherent in the single-planking technique are significantly less noticeable.
I can’t wait to see it finished with the copper cladding and the paint!
Once the primer and the white base coat were applied, I moved on to the masking required to achieve the three colors for the upper part of the hull.
Two observations:
1. It’s a good thing I managed to get hold of some 2mm-wide masking tape beforehand; otherwise, achieving the desired effect with any precision would have been impossible.
2. Now I understand why auto body shop bills are always so steep... Masking is a crucial task, but it’s extremely time-consuming because it demands the utmost attention and precision.
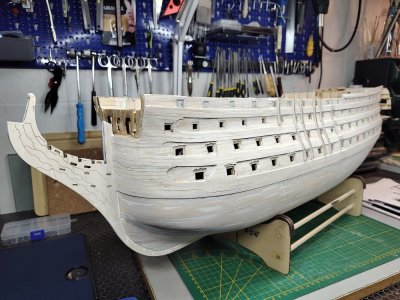
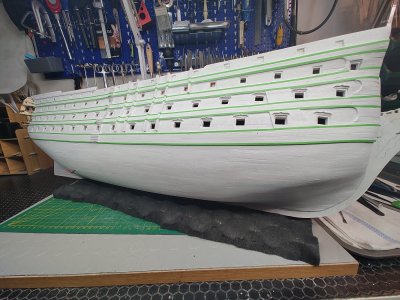
Two observations:
1. It’s a good thing I managed to get hold of some 2mm-wide masking tape beforehand; otherwise, achieving the desired effect with any precision would have been impossible.
2. Now I understand why auto body shop bills are always so steep... Masking is a crucial task, but it’s extremely time-consuming because it demands the utmost attention and precision.