Schooner 'Albatros' from OcOcre

Joined
Jan 14, 2021
Messages
7
Points
23

Welcome and thank you for taking time to look over my build of the Albatros from OcCre. This is a beginner log focused on showing my solutions to build issues I experienced. Feel free to comment with alternate methods and suggestions. This is my first build.
 
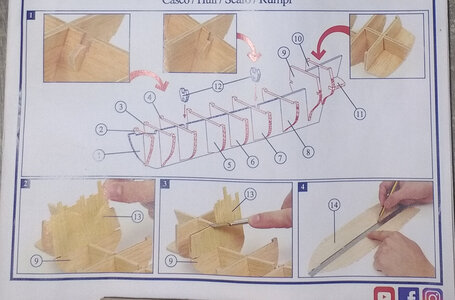
Steps1-4_Instuctions.jpgstep1.jpg

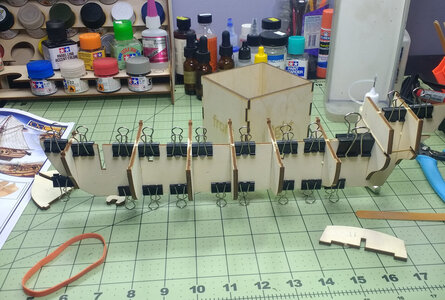
Steps 1:
The bulkheads are quickly dry fitted to the false keel and then glued in place with binder clips to help keep everything aligned. There are two bulkheads that I skipped due to crowding. These bulkheads are installed after the glue has dried on the first batch.

Prior to any gluing, I dry fitted the false deck to make sure that it would fit, and also to see if any of the raised tabs on the bulkheads were too long and would have interfered with the deck planking. It turns out that several tabs needed sanding to bring them flush with the top of the false deck.

Step 2 and 3:
I skip this step (I'm already changing the build order!). I had read on another log that planking the vertical face of the bulkhead shown led to alignment issues when installing the deck.

Step 4:
The center of the false deck is struck in preparation for deck planking.
 
Last edited:
5_9_Instructions.jpgClick to enlarge

Step 5:
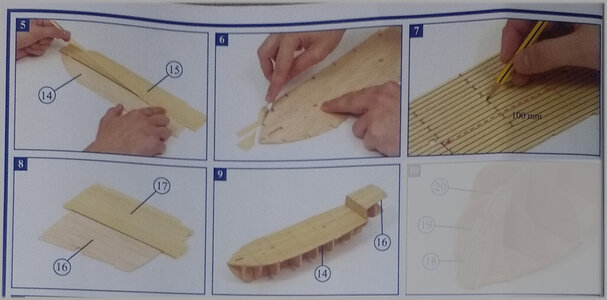
The planks are prepped by lightly sanding each face and rubbing a pencil across the edges using the instructions I found here.

I plank out the false deck using contact cement as suggested by the instructions. I could have used a wood glue and I don't think there is really 'right' answer to which glue is best. One thing I will note is that as thick as the glue was coming out of the pot, it was quickly absorbed by the wood and I wish that I had applied a second coat to either the plank backs or the false deck prior to mating the two surfaces. Not shown is how to glue up the backs of the planks. This video shows the process.

Step 6:
the planking is cut back per the instructions.

Step 7:
The plan show to mark the butt ends at 100 mm intervals with adjacent planks staggered by 50 mm. I once again go my own way and mark the butt ends of the planks using the following ratio: 5:2:4:1:3 (in my case, I stay with a plank measuring 100 mm, so I have a repeating pattern of 5 'starter' planks with the following lengths: 100:40:80:20:60). I also omit penciling in any nail plugs as I have read that they would not really have been visible at this scale.

Step 8:
I skip for now.

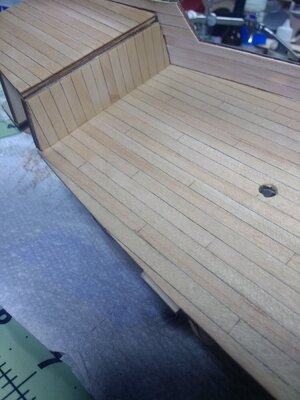
Step 9:
The two decks are glued onto the bulkheads and held tight using rubber bands. At this point, I installing planks to both the upper deck and to the vertical bulkhead I had skipped in steps 2-3. I also shellaced the deck planks at this point. Maybe I should have waited, but I knew I would be handling the model quite a bit while I faired the hull and installed the planking so I decided to protect the deck now. Bull's Eye shellac says NOT TO THIN...like that, in capitals. Well, it goes on way too thick and it took me a few attempts to get the finish right. I really should have experimented on a small mock up before shellacing the deck, but I did learn how to turn a heavy handed finish into something that looks pretty good. Going forward, I WILL THIN the darn shellac and I WILL test the results before applying it to the model! As a side note, shellac is quite the rabbit hole if one is inclined to learn about it as I was forced to.
 
Last edited:
Looking good so far, keep up the work and photos.

The best way to do things varies a lot, depending on kit, part of world and experience level.

As you mentioned, see what others have done and what worked or didn't work for them.

Stay safe and keep the essential workers in the dry docks busy!
 
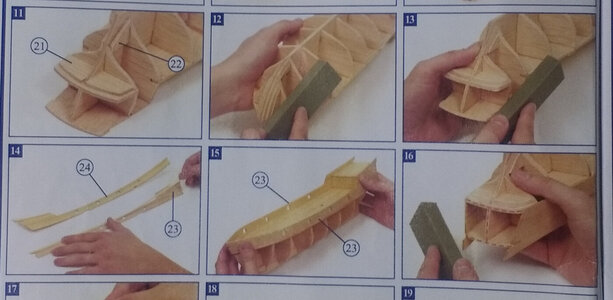
11-16_instructions.jpgIMG_20210117_131345583.jpg

Steps 10-13:
Additional blocks are glued and sanded to help shape the planks that will be applied later. As you can see in the second photo, I have begun to fair (fare?) the bulkheads and blocks to accept the hull planks.

Steps 14-15:
I first bent the laser cut plywood sides using water and an electric plank bender I bought from Amazon. I then installed one side and glued planking in place. On the other side, I pre-installed the planking before attaching the side to the model. Both methods worked although the there are two spots where the planks did not stay tight to the curvature of the plywood. You can't see it and it's likely that those areas will be covered, but I may need to figure out a way to re-glue those spots.

Step 16:
fairing the back to accept the false transom.
 
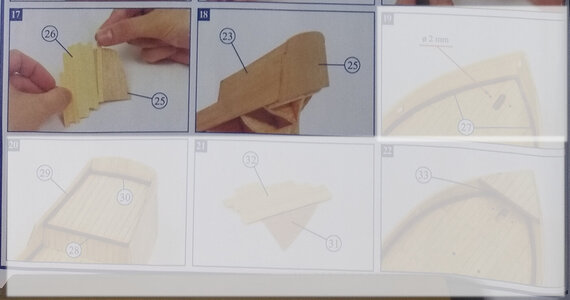
17-18_instructions.jpgbroken transom.jpg

Step 17:
As previously, I skip this step with the intent to install the planking after the transom is installed.

Step 18:
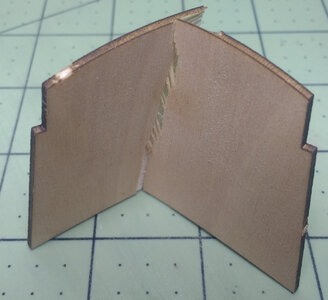
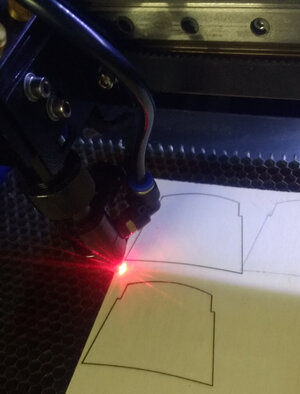
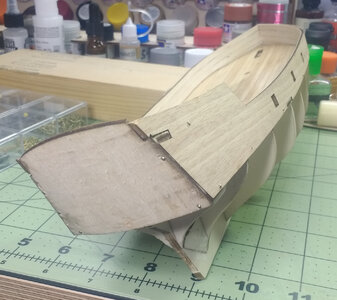
Unfortunately, a little too much pressure resulted in a broken transom. A run to the hobby store netted me a new piece of plywood, although it is 1 mm thicker than the old piece, the new piece is more pliable. Now, how to cut the new plywood? Well, I happen to have an ace up my sleeve...down in the garage sits a 50W laser cutter! A quick run through the scanner and a quick outline in Inkscape and I'm off to the freezing cold garage to fab up a new transom. Hopefully this tool will get a lot more use as I explore this hobby (remember, this is my first build).
So after a rocky start, I am able to save the day and get my boat back on schedule.

laser transom.jpgfinished transom.jpg
 
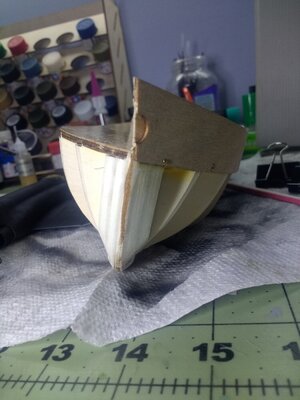
bow boat question.jpgtrim bow question.jpg

A question:

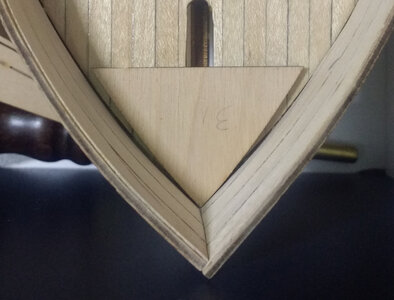
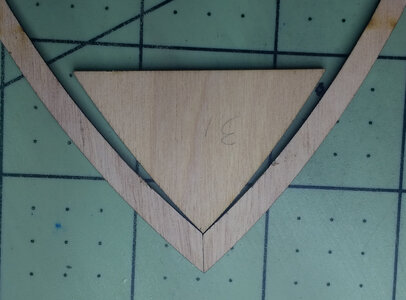
As you can see from the two images above, the raised deck (part 31) up by the bow really doesn't fit well. I originally thought that my bow would need to be coaxed to fit the curve of part 31, but looking at the pre-cut pieces that finish off the gunwale, I see the same issue. This leads me to believe that my gunwale shape is pretty close to where it wants to be. At this point, I'm thinking of modifying part 31 to conform to the shape of the laser cut gunwale capping, but I thought I'd see if anyone has any other ideas.
 
Welcome and thank you for taking time to look over my build of the Albatros from OcCre. This is a beginner log focused on showing my solutions to build issues I experienced. Feel free to comment with alternate methods and suggestions. This is my first build.
Hallo Mike alias @grumpydaddy845
we wish you all the BEST and a HAPPY BIRTHDAY
Birthday-Cake
 
Back
Top