Scratch-built generic tug.

Joined
Jul 19, 2019
Messages
34
Points
68

Workbench 1.jpgWorkbench 2.jpgSo far.jpg

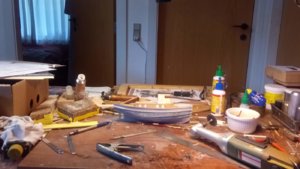
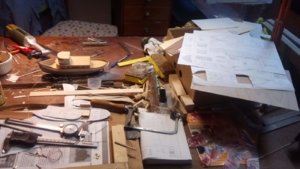
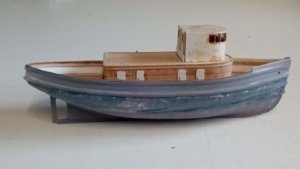
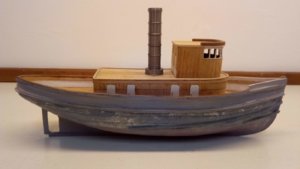
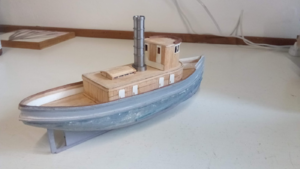
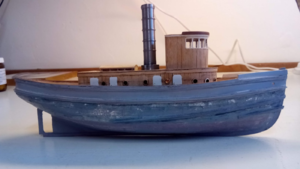
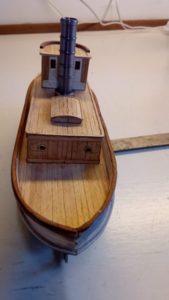
Some time ago I promised to send a couple of pictures of 'my work in process'. I found a plan of a generic American harbour tug which rather took my fancy. It was in 'Model Boats' last year and the plan itself could be reduced to a single A4; making it to a scale of about 1:100. (about 9" long). The hull is completed and rather fancifully 'plated' with small plates made from a sheet of computer paper. I really don't know whether this was the case in the first part of the 20th. century, but I wanted to try it out. The crew's quarters and deck house are in the process of being constructed and the brown paint is my painting of the deck house interior. The mess outside will be covered when I complete the cladding of of the exterior. I've been experimenting with acrylic water colours to get a more subdued effect than that acheived by Humbrol tinlet colours. On small models it can get rather garish I think. Now I have to clear my work bench so I can bring on my trusty Cowells lathe. There are 14 portholes to turn plus a funnel. I've used some plastic card as it's more bendable than wood and, when it's all painted, can not be seen. The pencil marks from door to door is the pencil line for the railings. Why is it I can't keep a clear and tidy bench? Sorry about the pictures, but I've had the devil of a job just to get these three on (plus 3 thumb nails pics.) Hope it will be better next time.
William (Denmark)

Edit by Admin Uwek: done

Workbench 1.jpg


Workbench 2.jpg


So far.jpg


Last edited by a moderator: Wednesday at 9:04 AM
Reply
 
I have been busy turning portholes (18) and the funnel. I've also clad the deckhouse, so things are looking up.
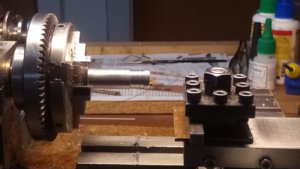
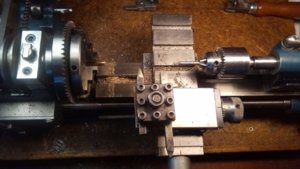
The funnel was turned from a piece of MS tubing that was just over the tolerances required. The bands around the the funnel, so charateristic, had to be turned very carefully to achieve the right distance between them
IMG_20190827_221118.jpg

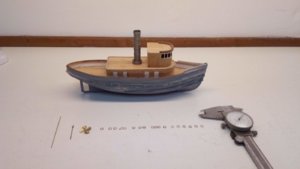
The next was the base for the funnel. This can be seen on the picture of the tug itself. Then the port holes: 4.5 x 0.5mm and a dia. of 2.7. In itself simple turning but parting off at the right thickness! No good using a parting-off tool - waste of good brass plus the chance of them flying off to heaven knows where. I used a sharply pointed tool to make a reference mark deep enough to take my finest hacksaw blade; just a mite over 0.5mm and then saw off very carefully with my hand underneath (I only lost one!)
IMG_20190901_153843.jpg

I also turned the ventilator dome and the mast, the latter needing to be tapered. Bit of a job on the lathe as it's only 1.5 mm at the base and then tapered to one.
Finally, today, I've cladded the the deckhouse and put on the combing on the top of it. That gave me some head-scratching since I couldn't bend any wood of the required thickness. It's a 'horse shoe' in shape, so I cut and glued in segments to the right profile and clad all three sides with thin veneer strip before getting ready to glue it on top. It looks OK. That's it so far. Just a couple of shots of madam so far.
By the way Robert. You commented on the colouring. Well, actually, it was only a trial painting just to see what it would look like with acrylics. All you can see are the pale remains after I had wiped it off again.
IMG_20190904_202359.jpg
IMG_20190904_202339 (1).jpg

Regards to all.
William (Denmark)
 
When making small brass porthole rims, I put the fine tube in the lathe, and a drill in the tailstock, that I advance inside the tube. I part them off with a fine jeweller's saw blade, and when they part off, the drill in the tailstock retains them, in fact as they are spinning, they fly down the drill and out of the way of the next one! Tug coming along great -
Bob
 
Dear Robert, So pleased to hear that your operation was a sucess. I read about it on your web site yesterday. So, we're looking forward to hearing from you again in the near future. And as one says in Denmark: 'God bedring' (lit. Good getting better).
William
 
Great looking tug I worked on a few and since I was a kid they hold a special spot in my heart
 
Thanks for your kind remarks. It's a showery Saturday here in Denmark, so after a walk down to the sea (the Baltic about 7 mins. walk away) I'll start on putting in those port holes and build the top lights on the crews quarters. I'm keeping my fingers crossed in getting the port holes in an equi-distant and very straight line. On a model of this size it has to be right. Hope to show my attempts shortly.
William (Denmark)
 
Thanks for replies and best wishes after my eye op. It i still a bit sore, and now a bit blurred, but that was expected. If I look through a jeweller's glass, everything is crysrtal clear, so it appears to be just a matter of it settling down.
Best wishes
Robert
 
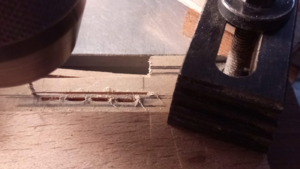
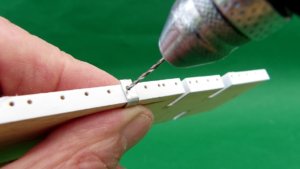
Well, I took a walk to the sea and came back refreshed. Now was the time to build the sky light for the deck house. It was going to be rather fiddly since the windows were 4x1mm and a surrounding frame of 1mm. I chose 0.5mm model aircraft 3ply - expensive but with a very fine grain and hard. Being inherently mean with expensive wood I thought I could spare one straight edge by drawing the window close to it and then by using dental burrs from my 'friendly' dentist gouge-out the 1mm slit. How wise I quickly became! So, I had to redraw in the middle of a piece of my nice plywood and mill it out on the Proxxon miller by using the cross slide. This requires very accurate lining-up at this size. I usually put a very fine-pointed drill in the chuck and transverse the longest line on the drawing to check that it doesn't wander. Then off I went using a 0.8mm miller. It took 4 attempts to get two sides, which is reasonable for me.
1568117690727.png
After that it was time to construct the skylight housing. On the whole it turned out quite well. It now just requires staining in a medium-brown.
Putting the housing on the upper deck made me aware that I'd made the wheel house too long. I'd simply overseen the fact that there was a staircase up to the two rear doors of the wheel house and this, of course, made it too long. It was midnight when I discovered this and -'muck or nettles' - as Mum used to say I put the saw to the offending rear of the wheel house and sawed off 5mm. I managed to salvage the two back doors and with a bit of modeller's licence patched up the whole thing. By one o'clock the foul deed had been accomplished.
1568118111642.png

To sum up. I think that the tug has now got a more 'aggressive' look to it than before (if that's the right word). So something good came out of it. Now it's time for the port holes but, should I stain the woodwork first or afterwards??
William (Denmark)
 
Thanks Robert. I've just put on the port holes. Looking at the close-ups they're not quite in line but look OK at normal viewing distance.
1568133662590.png

1568133733256.png
After handling the wood there's quite a residue of glue and muck etc. that will have to be cleaned off before staining. Not looking forward to that. 'Super glue' is neither easy to remove nor takes kindly to paint.
William.
 
Railing against railings! Just one little railing to do and then steps complete up to the wheelhouse. Soldered up using 0.3mm and 0.4mm brass rodding. This was the second attempt, by the way. Took it outside to spray a grey undercoat when I dropped it amongst the pebbles in the drive. After a 10 mins. fruitless search I decided to solder up another rather than have a mental break down. Soldered it up and the railings weren't quite equidistant, so switch on the iron and try again (4th. attempt). This time having got it right I gave it an undercoat spray where I sat and risked the fumes rather than the railings doing yet another awol. Think I'll take up knitting. Hang on! You can also drop stitches!!
William
1569951633598.png
The culprit!
 
Hallo William,
we wish you all the BEST and a HAPPY BIRTHDAY
Enjoy your day
Birthday-Cake
 
Workbench 1.jpgWorkbench 2.jpgSo far.jpg

Some time ago I promised to send a couple of pictures of 'my work in process'. I found a plan of a generic American harbour tug which rather took my fancy. It was in 'Model Boats' last year and the plan itself could be reduced to a single A4; making it to a scale of about 1:100. (about 9" long). The hull is completed and rather fancifully 'plated' with small plates made from a sheet of computer paper. I really don't know whether this was the case in the first part of the 20th. century, but I wanted to try it out. The crew's quarters and deck house are in the process of being constructed and the brown paint is my painting of the deck house interior. The mess outside will be covered when I complete the cladding of of the exterior. I've been experimenting with acrylic water colours to get a more subdued effect than that acheived by Humbrol tinlet colours. On small models it can get rather garish I think. Now I have to clear my work bench so I can bring on my trusty Cowells lathe. There are 14 portholes to turn plus a funnel. I've used some plastic card as it's more bendable than wood and, when it's all painted, can not be seen. The pencil marks from door to door is the pencil line for the railings. Why is it I can't keep a clear and tidy bench? Sorry about the pictures, but I've had the devil of a job just to get these three on (plus 3 thumb nails pics.) Hope it will be better next time.
William (Denmark)

Edit by Admin Uwek: done

Workbench 1.jpg


Workbench 2.jpg


So far.jpg


Last edited by a moderator: Wednesday at 9:04 AM
Reply
Hallo @William and Inger
we wish you all the BEST and a HAPPY BIRTHDAY
Birthday-Cake
 
Back
Top