Soleil Royal by Artesania Latina

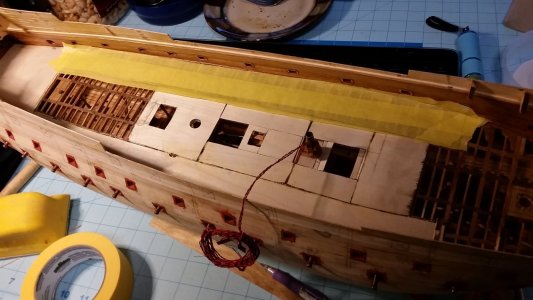
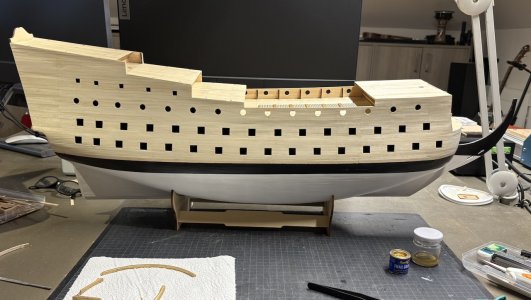
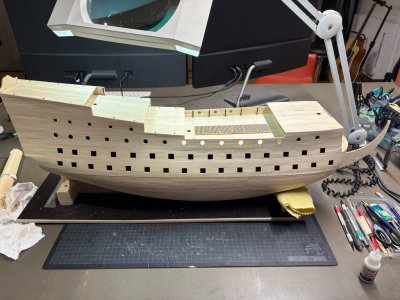
With the second layer of planking in place for the upper part, it was time to cut the gun ports. Using the supplied paper template as a reference, I meticulously marked their positions with a pencil, double-checking for accuracy and alignment. To create the openings, I first drilled small pilot holes at each corner of the gun ports. Next, I carefully carved out the shapes using a sharp hobby knife, working slowly and steadily to maintain clean edges. After cutting, I sanded the edges smoothly and made necessary adjustments. Next will be second layer for the lower part...
Day 70.jpg
 
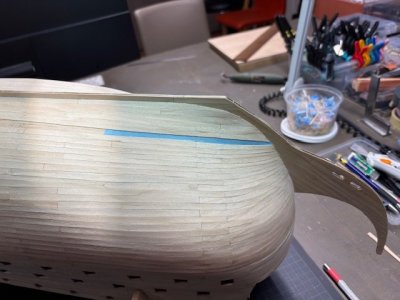
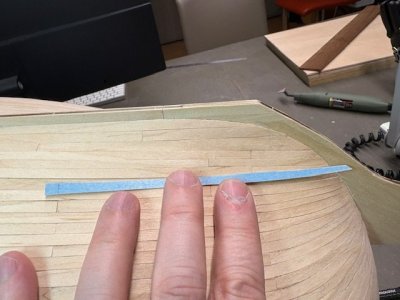
I continued working on the second layer of planking. The most challenging aspect is addressing the curvature of the bow. This can only be resolved by spiling the planks. To do this, I first cut a paper strip to match the curve of the bow. This acts as a template, which I then transfer onto the wooden sheets. For this process, I rely on "French curves" and a hobby knife to ensure precision. Since the material is thin, cutting and shaping it isn’t overly difficult.

Day 80a.jpeg
Day 80b.jpeg
 
I continued working on the second layer of planking. The most challenging aspect is addressing the curvature of the bow. This can only be resolved by spiling the planks. To do this, I first cut a paper strip to match the curve of the bow. This acts as a template, which I then transfer onto the wooden sheets. For this process, I rely on "French curves" and a hobby knife to ensure precision. Since the material is thin, cutting and shaping it isn’t overly difficult.

View attachment 495965
View attachment 495966
For thin veneers that have to be spiled, I use very sharp Fiskars scissors to cut the veneer. It's safer for me than risking a slip of the knife and ruining a strip. I don't have French curves to help steady my hand. Perhaps I should obtain some.

1737257675334.png

The "tape pull" method of making templates is a favorite technique. When I was making medieval armor and wanted to copy a pauldron or a knee cop, for example, covering the piece with strips of tape and pulling them off as a pattern, allows creation a 2-D pattern from a 3-D finished piece. You then mash the template flat and trace the outline onto new sheet metal, them form the new piece using forms and the anvil with smithing hammers until you stretch the metal into the same 3-D shape as the original. It works very well.

Another example. Tape pull method used for creating pieces of false deck from thin plywood.
651 Use Masking Tape to Make a Pattern.jpg
 
Last edited:
For thin veneers that have to be spiled, I use very sharp Fiskars scissors to cut the veneer. It's safer for me than risking a slip of the knife and ruining a strip. I don't have French curves to help steady my hand. Perhaps I should obtain some.

View attachment 496022

The "tape pull" method of making templates is a favorite technique. When I was making medieval armor and wanted to copy a pauldron or a knee cop, for example, covering the piece with strips of tape and pulling them off as a pattern, allows creation a 2-D pattern from a 3-D finished piece. You then mash the template flat and trace the outline onto new sheet metal, them form the new piece using forms and the anvil with smithing hammers until you stretch the metal into the same 3-D shape as the original. It works very well.

Another example. Tape pull method used for creating pieces of false deck from thin plywood.
View attachment 496017
Thanks for the feedback, Kurt! I just ordered a Fiskars scissors on Amazon—can't resist the urge to add another tool to the collection! I'll give the tape pull method a try for creating templates; it seems much more precise than the trial-and-error approach with paper strips.
 
Thanks for the feedback, Kurt! I just ordered a Fiskars scissors on Amazon—can't resist the urge to add another tool to the collection! I'll give the tape pull method a try for creating templates; it seems much more precise than the trial-and-error approach with paper strips.
Those sharp little scissors have been essential in rigging. The tips can get into tight places and cut very precisely. I am quite impressed by them. And, the tape pull method will serve you well when you need it.
 
Welcome back, :)
So this is where you are hiding ;)

I am at the permanent rigging stage in mine.:p
In this model, (Rigging) it is really complicated. :rolleyes:

And I will already say that the best istructure for the lines in Soleyl Royals is the Heller manual. Thumbsup

Good luck to you. I will be following your work. :)

Apologies for the video quality... :);)

View attachment 475184700_9099094153508573_2910451756364341020_n.mp4
 
Very nice! Were the instructions clear for a relatively new builder? I built the Harvey about 35 years ago and am now working on an HMS Victory (Panart) which haven't even finished the 1st layer of planking on. I wish was not doing this particular Victory. I would rather build the Caldercraft Victory with its larger scale and better instructions and materials. Some days I feel like just putting the Victory aside and getting something better. I've had this victory for almost 30 years but only until I recently retired have I been motivated to build another ship. I don't recall, or I didn't look around enough 30 years ago to discover the better versions. I like Caldercraft and Occre.

Anyone ever bail on a version to get a better one?
I don’t have any experience with Caldercraft or Occre kits. My previous build was the Bounty from Billing Boats, and compared to that, the instructions from Artesania Latina are very detailed. You can download them from their website, and they provide a clear, step-by-step guide for building the model. However, I do miss having a full-scale (1:1) paper plan, which would be helpful for measuring distances and getting a better overall view of the project. To the defense of Billing Boats, though, they did include a full-scale paper plan :p
 
Thank-you for this insight. I will go to AL's website and take a look at those plans.

I just went to the website and viewed the plans. They do look quite clear! Great
 
Welcome back, :)
So this is where you are hiding ;)

I am at the permanent rigging stage in mine.:p
In this model, (Rigging) it is really complicated. :rolleyes:

And I will already say that the best istructure for the lines in Soleyl Royals is the Heller manual. Thumbsup

Good luck to you. I will be following your work. :)

Apologies for the video quality... :);)

View attachment 498197
Thank you for sharing the video! Very nice work! Is this a Caldercraft kit? I found it really interesting, also the use of a CNC router. Impressive! I have been looking at CNC routers for certain aspects of model shipbuilding. I have some knowledge of CAD but don't know if this is something I can master.
 
Last edited:
Thank you for sharing the video! Very nice work! Is this a Caldercraft kit? I found it really interesting, also the use of a CNC router. Impressive! I have been looking at CNC routers for certain aspects of model shipbuilding. I have some knowledge of CAD but don't know if this is something I can master.
Hi ;)
No it's a set from Deagostini.
I will tell you that we do not have much technical information about this model on the internet. :(
I am building it but honestly every now and then I discover something new that should be done completely differently. :rolleyes:
I've been browsing non-stop through several tutorials from him and there's something different in each one.
The best option is to turn a blind eye to many aspects.;) (I don't like many things about it. Cautious)
If you observe the creation of such a model, ;) It is at home that something can go wrong.:p


When it comes to CNC, it's a cool thing. It's my profession, but I think there's nothing difficult for the willing and everything can be learned.:)
Such a small machine, for little money, can help. ;)
The shell and the whole deck are relatively easy to make, but the ropes will be an obstacle. :);) (But slowly to the goal)


I apologise for my English, but as I wrote, I use a translator and it probably translates badly sometimes.
 
Last edited:
Hi ;)
No it's a set from Deagostini.
I will tell you that we do not have much technical information about this model on the internet. :(
I am building it but honestly every now and then I discover something new that should be done completely differently. :rolleyes:
I've been browsing non-stop through several tutorials from him and there's something different in each one.
The best option is to turn a blind eye to many aspects.;) (I don't like many things about it. Cautious)
If you observe the creation of such a model, ;) It is at home that something can go wrong.:p


When it comes to CNC, it's a cool thing. It's my profession, but I think there's nothing difficult for the willing and everything can be learned.:)
Such a small machine, for little money, can help. ;)
The shell and the whole deck are relatively easy to make, but the ropes will be an obstacle. :);) (But slowly to the goal)


I apologise for my English, but as I wrote, I use a translator and it probably translates badly sometimes.
Thanks for the information! Maybe it's time for me to take the plunge and invest in a CNC router...
 
For thin veneers that have to be spiled, I use very sharp Fiskars scissors to cut the veneer. It's safer for me than risking a slip of the knife and ruining a strip. I don't have French curves to help steady my hand. Perhaps I should obtain some.

View attachment 496022

The "tape pull" method of making templates is a favorite technique. When I was making medieval armor and wanted to copy a pauldron or a knee cop, for example, covering the piece with strips of tape and pulling them off as a pattern, allows creation a 2-D pattern from a 3-D finished piece. You then mash the template flat and trace the outline onto new sheet metal, them form the new piece using forms and the anvil with smithing hammers until you stretch the metal into the same 3-D shape as the original. It works very well.

Another example. Tape pull method used for creating pieces of false deck from thin plywood.
View attachment 496017
I also find for longer thin cuts such as in veneers, I use a french curve and a sharp Fiskar rotary knife. The plastic french curves usually come in sets and there are different sizes available. I coarsely draw in the curve with a pencil then align the french curve to match.
 
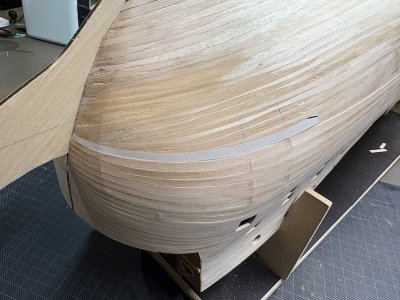
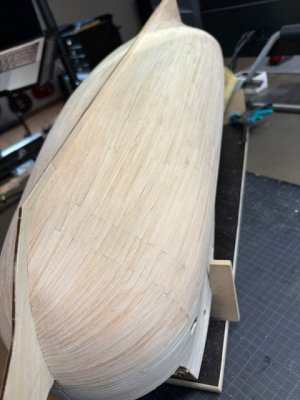
I’ve finished the second layer of planking on the hull! I continued using the tape-pull method to shape the planks, which has worked well. I keep the tape on the cut piece and remove it immediately after gluing it to the hull. This helps prevent accidental breakage.

Once again, thanks for the tip, Kurt! :)

Day 95-1.jpg

Day 95-2.jpg

Day 95-3.jpg
 
Back
Top