• Ships of Scale has incorportated an extra level of security when you log In. Please follow on-screen prompts to acknowledge that you are not a robot via a "Check Box" or a "Pictorial Check Box Puzzle". This is needed due to higher level of AI Activity Security.
  • SUBSCRIBE TO SHIPS IN SCALE TODAY!

    The beloved Ships in Scale Magazine is back and charting a new course for 2026!
    Discover new skills, new techniques, and new inspirations in every issue.

    NOTE THAT OUR NEXT ISSUE WILL BE July/August 2026
  • Win a Free Custom Engraved Brass Coin!!!
    As a way to introduce our brass coins to the community, we will raffle off a free coin during the month of August. Follow link ABOVE for instructions for entering.

Spanish Galleon by Revell - Quick Build

Got another section done. This was an open box with a few missing pieces. It came with an Elizabethan Manowar that was also open and missing pieces. Ive managed to scavenge a few parts from the Manowar to make up for the missing pieces on this one. But no Bilge pump sadly. I believe I have all the remaining pieces needed to finish the model.
20260628_111734.jpg20260628_112218.jpg
 
Excellent work I love it, Spanish Galleons are definitely one of my favorite types of ship. Thank you for posting, I will keep following your build log.
 
Finished the Gallery, installed the side boards with the dead eyes and tied off the anchor. The deadeye assembly was a real pain getting in between the ropes with the paint.
I saw on some other build log launch boats being tied down and oars tied up, which I really liked. So I glued some extra fasteners to the deck and tied everything down.
Also, came up with another missing piece. This time it was one of the smaller supports for the gallery. There was a cheap listing of this kit on Ebay, so I went ahead and grabbed an extra copy.

20260703_094024.jpg20260703_094213.jpg20260703_094609.jpg
 
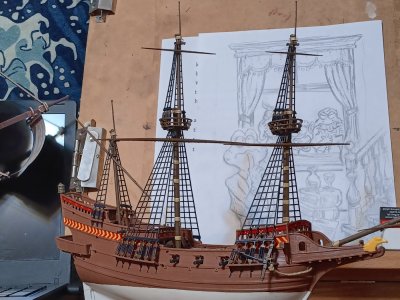
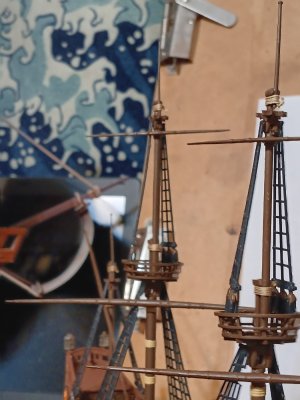
Masts are glued and primered. I wanted the masts turned a great deal so I pushed the angle as close to G as the model would let me go.
I put them in dry to see how they fit. I had to cut into the starboard shrouds a little to clear the mast. Hopefully this wont create problems when it comes time to do the rigging.

20260620_221044.jpg20260712_144442.jpg20260712_144512.jpg


I bought this childrens book on 16th century galleons. Very enjoyable, and I thought this blurb about the Mary Rose Captain was funny in that sort of "More things change the more things stay the same" sort of way.
20260620_220815.jpg
 
I like the idea of turning the spar or yards to the angle you chose compared to the typical 90-degree layout. Are you planning on outfitting with sails? The sails will block the crows nest from viewing depending on how you display your model. When positioning the flags make sure you take into consideration the direction of the wind. I think your model is looking really good and your making great progress.

I like the quote from the Admiral, just like you stated some things always stay the same. I imagine the Admiral had a lot to do with the fact he could not lead the men, a lot of times the issues start at the top and work downward.
 
Right! That is sort of the leadership test, can you take a bunch of knaves and lead them into working well together. Of course this takes time and good officers, so who knows!

I didnt think about the Crows nest being covered up. Thats ok, the model is meant to be displayed on both sides.
 
Glued the mast in and began painting them.
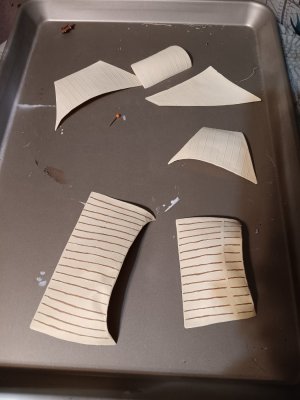
I didnt realize that both the sail, and the yard arm for the lateen sail are not designed to have the sail on port side. I had to cut off the clip and glue it at a 180 degree angle to make the Lateen yard arm attach to the starboard side. I then bent the sail inside out... I dont think it will be noticable, the plastic sails are pretty pliable.

I also broke off the prow yard arm and glued it in the same angle as the other masts. WHen I started, I didn't realize this sail was meant to be anything but forward.
20260719_162932.jpg20260719_163207.jpg

Im going to have to slide some paper inbetween the shrouds and the hull. They are almost touching and I need to paint the shrouds still. In retrospect, I should have painted all but the parts except near where I would be glueing, but I was inpatient to get the masts in.

I thought this was neat. Sailors up on the shrouds and crows nests, watching a hanging near the docks.

20260531_122706.jpg

Im glad I bought another kit. I ended up using all the masts from the new kit, as the old kit they were all a little bent.
The instructions are more detailed concerning the rigging as well.
20260719_212053.jpg

20260719_212122.jpg
 
Last edited:
Finished painting and and putting on the resin finish.
The masts were a pain to paint already assembled, but I wanted a strong bond with the plastic cement.
Next I lashed the masts and began painting the sails. I went with a 2 parts beige, 1 part off white.

View attachment 621904View attachment 621905View attachment 621906
Nice work, but I think it a pity you used these plastic shrouds. I know what pain it is knotting them from real thread, especially at at that scale, but the actual ones simply look far too 'big around'. Many "Heller"-kits come with a frame to make shrouds from glued thread. Still not the 'real thing', but a step in the right direction.
 
Last edited:
Nice work, but I think it a pity you used these plastic shrouds. I know what pain it is knotting them from real thread, especially at at that scale, but the actual ones simply look far too 'big around'. Many "Heller"-kits come with a frame to make shrouds from glued thread. Still not the 'real thing', but a step in the right direction.

I know what you mean. The plastic shrouds were my biggest hesitation when I chose this model. Yet, compromises had to be made, I wasnt even sure I would finish this when I started. Having come this far I feel I judged correctly, I am the right amount of overwhelmed/exhausted with this project, which is just slightly.
Thanks for the recommendation though, I hadnt heard of shroud frames before. I will file it away for next time.
 
Keep in mind as well that there are many variants of Spanish Galleons. Some were huge ships that carried over a hundred guns of all sizes. Some were smaller and carried less than twenty guns. Very few even resembled others. I recommend that you find references, find something that you like, and have fun making adjustments. Perhaps my favorite plastic galleon was produced by Lee and Imai.
 
I looked at the following thread about the museum galleon Andalusia visiting Liverpool. She is a plethora of interesting details that you can build into your model. Consider the hull work, the cannons, the lack of a figurehead, even the beak work. You are much closer than you believe to a reasonable model of a galleon!
 
I started gluing this weekend. I tried to glue as much as I could and still be able to paint all the nooks properly.
I also tried putty for the first time. Im still experimenting with when I should use it. I also sanded down the seam like on the bottom of the hull, which seemed like an easy win.
View attachment 606808


It had rained most of the week and into the weekend and it's always humid here in Southeast Texas, so I was afraid it would be several weeks before I got a chance to primer anything. Then a dryer north wind blew in today which brought us down to 60 percent humidity. So I got to spraying!View attachment 606809View attachment 606811

I debated glueing the cannon down first before using primer, but was worried it would be hard to paint the deck around them. I guess I will have to sand down a small spot after everything is painted to use the cement? Or maybe super glue them after painting... Im not sure. Anyways, the Cannon are primed and ready for paint.

View attachment 606810


Next weekend is busy, but hopefully I can fit a little painting in.

Look carefully at the cannons. Spanish cannons of the period generally only had the two from wheels and a slide at the end.
 
Back
Top