Temporary planking

Joined
May 10, 2018
Messages
8
Points
43

Location
Martlesham,Suffolk UK
Hi folks

This post will reveal the lack of experience that I have with wooden ship models, but I am getting desperate.

I have completed two models (HMS Pickle and Agamemnon both from Cadecraft) with reasonable results but I am completely at a loss as to how to fix temporary battens to the ribs. I have tried pushing pins in not good as I cannot push them in hard enough. I have tried using a hammer (v small) to knock the pins in, but it is then difficult to get accurate alignment. I have tried screw in plank fixings. but that leaves a lot of holes.

I am sure that I am missing something...any assistance or suggestions would be much appreciated.

Am about to launch into the Syren and want to be sure that I have a reasonable chance.

Regards Chris Beale
Hallo Chris,
are you still working on the HMS Badger from Caldercraft? Maybe you do not know the Jotika web-page, where they show some working steps in a small tutorial with some interesting photos......

Reference to your question: Do you mean the installation of the gun-port pattern?
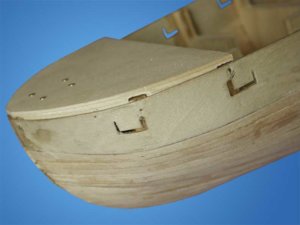
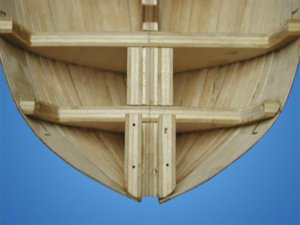
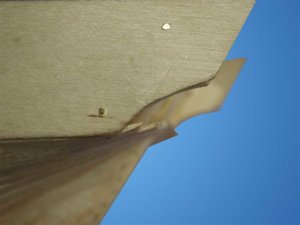
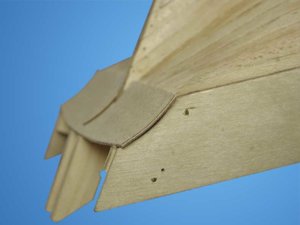
Herefore, do not try to push with extreme pressure or with a hammer - Please use a small drill through the pattern into the bulkheads, so you have already prepared a hole, slightly smaller than the diameter of the nail you use to fix the pattern.
Badger_Const008_lrg.jpg Badger_Const009_lrg.jpg

Badger_Const011_lrg.jpg Badger_Const013_lrg.jpg
 
Hi folks

This post will reveal the lack of experience that I have with wooden ship models, but I am getting desperate.

I have completed two models (HMS Pickle and Agamemnon both from Cadecraft) with reasonable results but I am completely at a loss as to how to fix temporary battens to the ribs. I have tried pushing pins in not good as I cannot push them in hard enough. I have tried using a hammer (v small) to knock the pins in, but it is then difficult to get accurate alignment. I have tried screw in plank fixings. but that leaves a lot of holes.

I am sure that I am missing something...any assistance or suggestions would be much appreciated.

Am about to launch into the Syren and want to be sure that I have a reasonable chance.

Regards Chris Beale
 
Chris you might try some CA glue very fast dry time and with the spray activator it dry almost right away, be careful not to get your fingers stuck (yes that fast), they are not temporary anymore but do the trick.
 
You mentioned you use a BRAD DRIVER. If you are using steel brads or standard brass escutcheon pins from the hardware store, you will NOT be successful driving them in without splitting wood. They are TOO THICK, and often ribbed to prevent them from backing out, which means they do not go into wood without a hammer. If you buy thin, 0.7 mm thick and 8mm long pins from Model Expo, Modeling Central , or other ship model supply store, you will get VERY thin pins that push into wood easily. They are 1/3 the diameter of regular escutcheon pins. Use the CORRECT SIZED pin pushing tool bought from the same store and for the brand of pins you buy, and save that Great Neck brad tool for what it's supposed to be used for: home carpentry. Get the right tools for the job, and you will be STUNNED how easy the work becomes. See links below.

Ship Model Pins

Pin Driving Tool

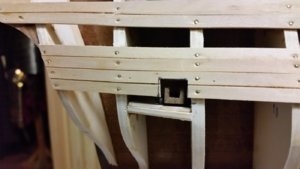
I occasionally use a small tack hammer to drive in the thin ship model plank pins. You can't hold the pin with fat fingers, you use a small needle nose pliers, and make sure the hull is supported such that it will not shift. Use a couple light blows to get the head of the pin stuck into the wood, and let the pliers grip the pin with light pressure as you tap the pin into the wood. The pliers guide the pin, and prevent it from bending by supporting it. Remove the pliers as the head approaches the jaws, and tap the pin the rest of the way in, taking care that the taps are at the correct angle so the pin won't bend over. If you do bend a pin, pull it out with the pliers and use another pin. The pin head can be submerged into wood to flush level. It is sticks out a bit, the head can be sanded off easily during the first sanding pass on the hull. You can see form the photo below that one of the pins was pushed too deep, about half way through the plank, but as long as it holds the plank and does not go all the way through it's okay.

It helps to add a bit of CA glue to the bulkhead before you pin the plank to that spot. The pin's purpose is to secure the plank to the correct location and hold them there when using traditional PVA glue (yellow carpenters glue is the strongest), which takes time to set. CA glue is almost immediate. Don't forget to apply some glue to the edges between the planks without getting your fingers all sticky. This adds great strength to the hull. Fill gaps between planks with PVA glue also.

48 Lowest Cannon Port.jpg
 
Last edited:
@DARIVS ARCHITECTVS Many, many thanks for sharing your own experience and recommendations with us. This is makes SOS of a kind forum, where to share the knowledge among others is an important part.

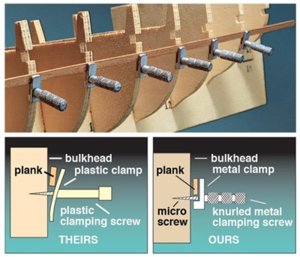
Another way to plank, I should say not very common, is to use clamps of various kinds. Some of us making our own, while others buying them. Here are the clamps I used in the past. They incorporate micro screw and knurling head. Take a look at the picture below. (picture courtesy of Micro-Mark). They are a bit high price for 10 pcs.

60926_R-4.jpg

 
I use lill pins- they are short and smaller than the brad driver is made for, but once the pin is started the brad driver pushes them in cleanly. Stick the pin in where it is supposed to go, make sure it is straight and then drive it in. A smaller diameter tool would make it a little easier, but I have the brad driver already.
 
Hi folks

This post will reveal the lack of experience that I have with wooden ship models, but I am getting desperate.

I have completed two models (HMS Pickle and Agamemnon both from Cadecraft) with reasonable results but I am completely at a loss as to how to fix temporary battens to the ribs. I have tried pushing pins in not good as I cannot push them in hard enough. I have tried using a hammer (v small) to knock the pins in, but it is then difficult to get accurate alignment. I have tried screw in plank fixings. but that leaves a lot of holes.

I am sure that I am missing something...any assistance or suggestions would be much appreciated.

Am about to launch into the Syren and want to be sure that I have a reasonable chance.

Regards Chris Beale
Hallo Chris, alias @Chris1953 ,
I hope you are well and you are working on the Badger
we wish you all the BEST and a HAPPY BIRTHDAY
Birthday-Cake
Would be great if you could show us your work on the actual build
 
Back
Top